Hello world, welcome to haxez where we will be covering Hack This Site Extended Basic Mission 2. This challenge is fairly simple provided you have an understanding of application structures. It requires us to slightly modify the provided script in order to access the index.php page at the root of the web application. In order to do that we need to perform a directory traversal up two directories to grab the index.html page.
The Extended Basic 2 Function
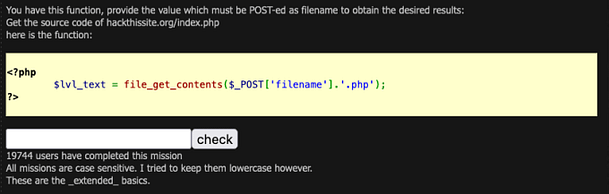
As you can see from the screenshot below, we have some fairly basic PHP code that is attempting to get the contents of the filename specified by the value ‘filename‘. Furthermore, it specifies the type of extension for the filename which in this case is ‘.php‘. Underneath the code, we have a submission box where we need to submit the solution to the challenge.
The Function
The Solution
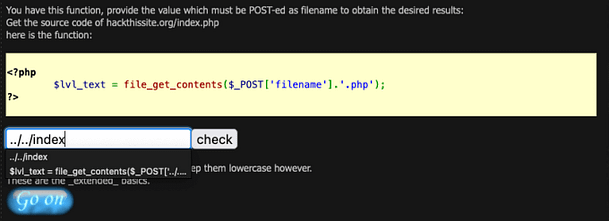
Given these points, all we need to do to solve this mission is to tell the script to navigate up two directories. We are currently in the ‘extbasic‘ directory looking at the file named 2 ‘/missions/extbasic/2‘. So by traversing up two directories we should be in the root directory. Once there, we need to specify the ‘index.php‘, however the file extension ‘.php‘ has already been appended for us so we only need to specify the word index. The correct solution should be ‘../../index‘. Paste that into the check form and you should complete the mission and be able to proceed on to the next one.
The Solution
Extended Basic Mission 2 — Conclusion
This is a simple but fun challenge that tests your knowledge of web application directory structures and code reading ability. While I wouldn’t have a clue how to write this off the top of my head, I easily worked out what the code is attempting to do. Once you understand what the code is doing, and you understand the rules of the mission then it’s fairly simple. This type of attack is known as a directory traversal attack and can be prevented by validating user input and by having strict permissions policies on directories. Anyway, I hope this helped you solve the mission.
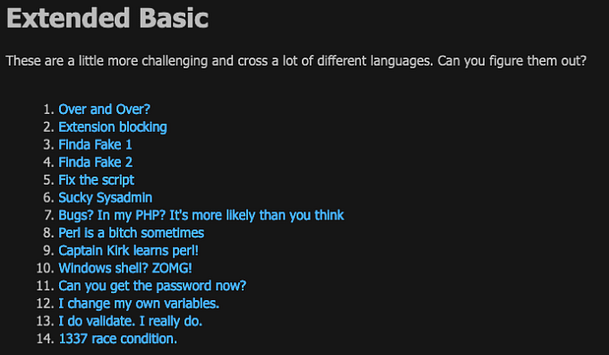
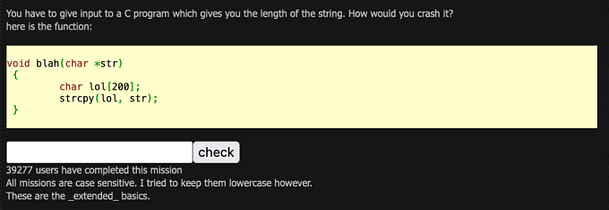
Hello and welcome to haxez where today we’re looking at Hack This Site Extended Basic Mission 1. The mission is titled “Over and Over?” and requires you to perform a buffer overflow to complete it. Upon navigating to the mission we are greeted with a message that explains that we have a C program that calculates the length of the user input. It goes on to explain that we need to crash the program. It also provides us with the source code of the application.
Extended Basic Missions
Extended Basic 1 – Source Code
I’m not going to pretend I know the ins and outs of the C programming language. It was a bit before my time so I’ve never learned it. However, If we look at the source code we can see that it is declaring a standalone function using the void statement. Furthermore, we can deduce that there is a character limit of 200 hundred characters as stated with the ‘char lol [200]‘ line. Taking this into consideration, we can safely assume that inputting more than 200 characters would likely cause an error.
The Source Code
Extended Basic 1- Buffer Overflow
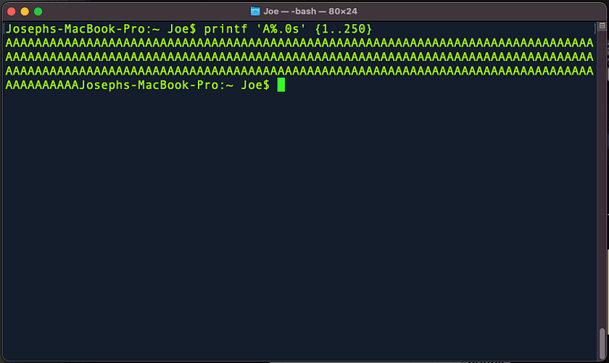
A buffer overflow occurs when you send more data than is expected to an application. Essentially, each part of a program has an allocated amount of system memory. If you were to send more data to the application than the application has allocated memory for, unexpected results happen. This will likely cause the application to crash but in some cases, it could allow for code execution. However, the purpose of this mission is to crash the application. We know the application is expecting 200 characters. So if we generate 250 characters with our terminal using ‘printf 'A%.0s' {1..250}‘ and submit it to the application, we should crash it.
Terminal — Creating Payload
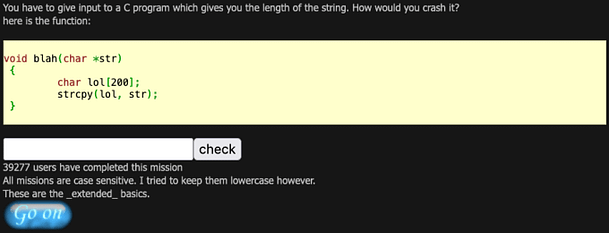
Mission Complete
Now if we copy and paste that string into the application submission box and click submit, we should see it process and complete the mission. We can tell the mission is complete because it should generate a blue Go On button underneath the input form.
Hell world, welcome to haxez. We have done it, we have made it to the Javascript 7 mission or the last Javascript mission on Hack This Site. After all those other missions I feel like I’m a scripting savant. Ok maybe not, but progress is progress. Furthermore, once we have completed this mission, we can move on to other more exciting missions. This mission is a lot like one of the previous missions that we did. However, instead of the password being encoded or obfuscated, this time the whole script is obfuscated.
JS Obfuscation FTW
Javascript 7 Introduction
Navigating to the mission we can see a password input form. There isn’t much more information than that other than the title and a thank you message to the creator. If we submit test data to the password input form then we will get an incorrect error message. In order to see what’s going on, we need to view the page source of the application.
Password Submission Form
The Javascript
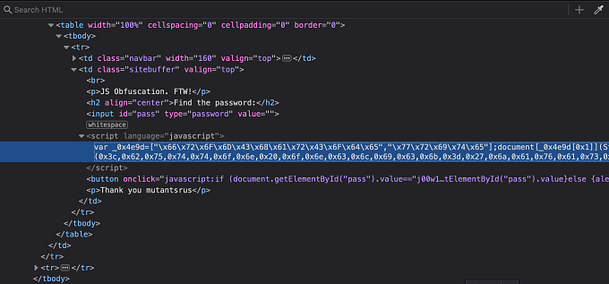
As you can see from the image below, the script appears to be garbled data. It’s all X’s followed by two-digit numbers. We could attempt to decode it online but there is a far easier solution. All we need to do is to right-click the Check Password button and inspect the functionality behind that.
Obfuscated Javascript
The Button Javascript
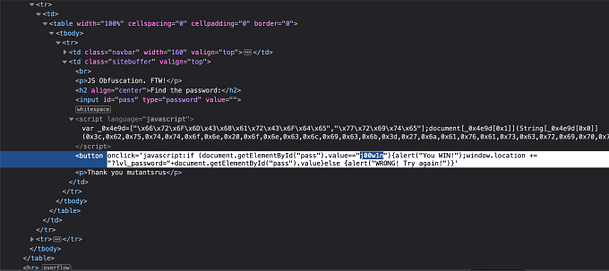
As you can see from the screenshot below, inspecting the button shows us the Javascript that is powering it. The Javascript is checking the value of user-submitted value ‘pass‘ to see whether it matches the value ‘j00w1n‘. If the values match then we get an alert saying “You WIN!”. If it doesn’t match then we get a message saying “WRONG! Try Again”.
The Button — Javascript
The Javascript 7 Solution
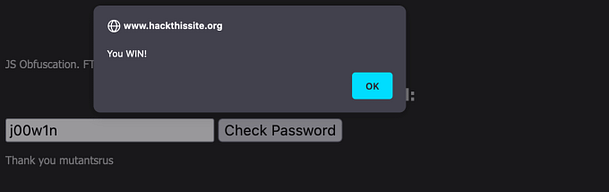
Therefore, in order to complete this mission and to complete the Javascript series. All you need to do is submit the value ‘j00w1n‘ to the password form. As you can see from the image below, we get the alert box that tells us that we have successfully completed the mission.
The Solution
Alernative Method
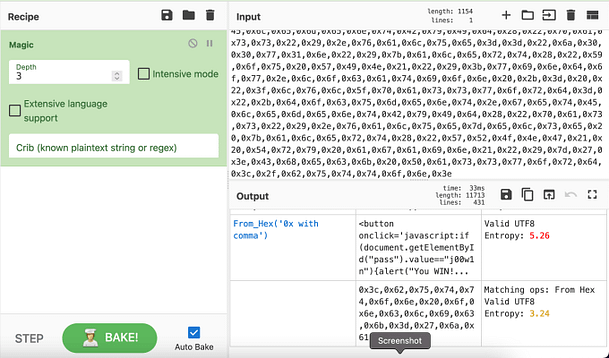
I’m sure the developers didn’t intend for this mission to be this easy. I fully believe that they wanted us to deobfuscate the code. So for that reason, the screenshot below shows me deobfuscating the code using the GCHQ tool CyberChef. As you can see from the screenshot, the output shows the button value with the password.
Hello world, welcome to haxez where today we’re going to solve Javascript Mission 6 on Hack This Site. This challenge isn’t too difficult provided you pay attention to the details. The mission takes the script from a previous mission and attempts to distract you with it. However, hidden on another page of the application is the correct script that is being used to authenticate.
go go away .js
The Javascript 6 Mission
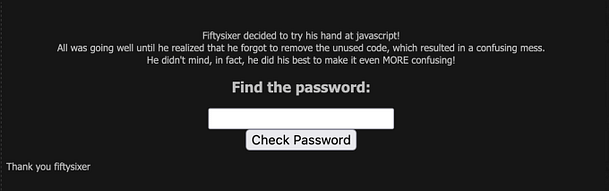
Navigating to the mission we see the expected password submission form. However, instead of Faith, this time we have a message saying that Fiftysixer has decided to try creating some Javascript. It explains that he forgot to remove the previous code. This has made the new code more confusing but apparently, Fiftysixer likes it that way. We can submit test data to the form but we get an incorrect error message.
The Password Form
The Javascript
If we view the Javascript we can see that it looks a lot like the script we had for a previous mission. This script tried to trick us by comparing a variable with a string rather than assigning the string to the variable. The solution to that mission was ‘moo'. However, if we submit ‘moo‘ to the password form, we still get an incorrect error message. Notably, there is a link to what appears to be another Javascript file called checkpass.js. Furthermore, the name suggests that it may have something to do with the password checking functionality.
The Javascript
The Real Javascript
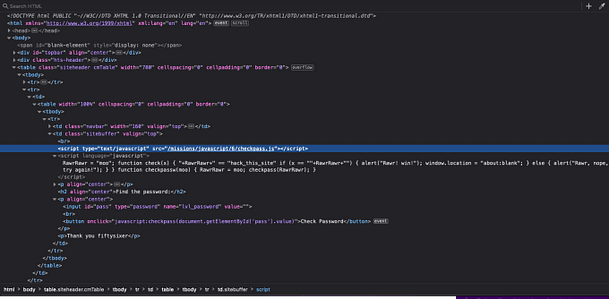
If we navigate to the script in the URL we can see that it does appear to be the correct script for checking the password. As you can see from the image below, the javascript is declaring three variables and assigning them values.
dairycow="moo";
moo = "pwns";
rawr = "moo";
I’m not too familiar with Javascript syntax but I wonder whether the lack of spaces in the declaration of ‘dairycow‘ is significant in any way. After the variable declaration, we have a function to check the password. It states that if the value submitted by the user is the same as the value of ‘rawr‘ and ‘moo‘ then we win. If not then we lose. It is important to note that there are also speech marks between ‘rawr‘ and ‘moo‘ so we need to ensure that we have a space in our submission.
The Real Javascript
The Javascript 6 Solution
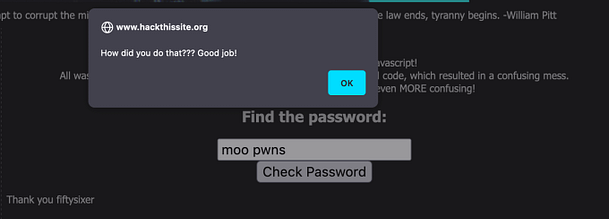
So that’s all we need to do to solve the mission. Submit ‘moo pwns‘ as the password and you should complete the mission. Congratulations.
Hello World, welcome to haxez where today we will be looking at the Javascript Mission 5 on Hack This Site. This mission was a lot of fun and even gave me an excuse to use the GCHQ CyberChef tool to deobfuscate some encoded text. The mission is fairly simple provided you know what to do with the data that you find.
Escape
The Javascript 5 Mission
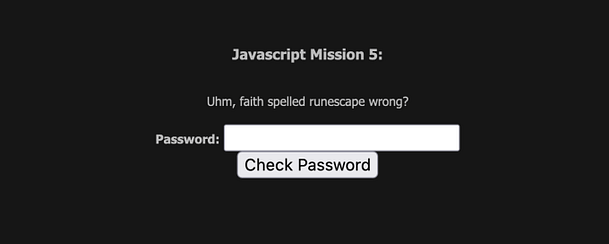
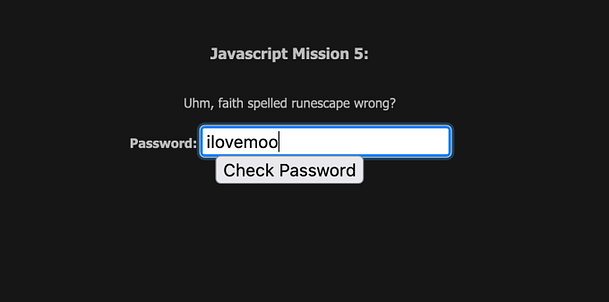
Upon navigating to the mission we are greeted with a password input form and some text asking if Faith spelled Runescape wrong. This comes into play a bit later as it is referencing a Javascript function that is used to encode or decode text. We could input some text into the password form and submit it but without the correct text, we will get an error message to notify us that the password is wrong.
The Mission
The Javascript 5
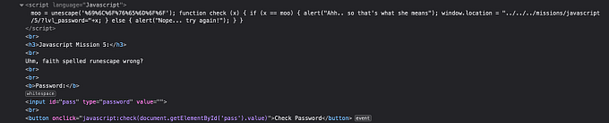
However, If we inspect the password form or view the page source we can see the Javascript. Furthermore, the first part of the script is declaring a variable named ‘moo‘ and says that it is equal to unescape. The ‘unescape()‘ function computes a new string in which hexadecimal escape sequences are replaced with the character that it represents. In addition to the declaration of the ‘moo‘ variable and the ‘unescape’ function we have the following encoded string ‘%69%6C%6F%76%65%6D%6F%6F‘.
The Javascript
Javascript Deobfuscation
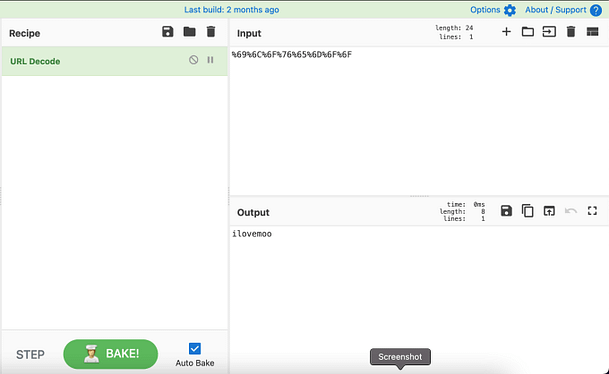
In order to decode the string, we can use our favorite Government developed decoding tool, CyberChef. Surprisingly, CyberChef works really well considering it came from the public sector (please don’t arrest me). As can be seen from the image below, the interface is simple. You choose a recipe, then paste in your encoded text, and then it works its magic and decodes it for you. It even has a magic recipe that will automatically detect what you’re inputting. It really is a great application.
CyberChef
The Solution
As shown above, the decoded text turns out to be ‘ilovemoo‘. If you submit that to the password form then you should complete the mission.
ilovemoo
Congratulations you have now completed Javascript mission 5.
Hello world, welcome to haxez where today we will be solving Hack This Site Javascript Mission 4. This mission is a little deceptive due to the way that the Javascript is written. To put it another way, this mission intentionally tries to trick you into thinking the value of a variable is something else. However, our keen attention to detail is enough to complete the mission.
Javascript 4
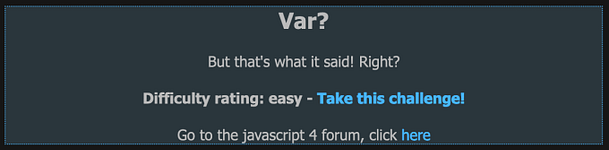
The Mission
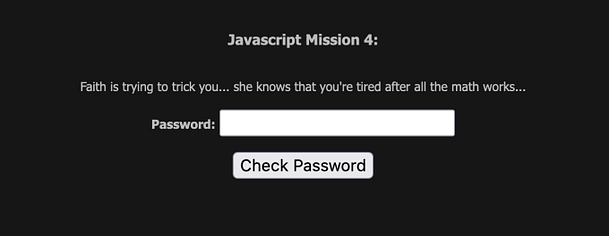
The mission is called Var which we can deduce means we’re going to be working with variables again. As can be seen from the image below, the message reads “Faith is trying to trick you… she knows that you’re tired after all the math works”. To sum up, Faith is going to going to attempt some shinanigans to prevent us from completing this mission. We can test the form with random data to see what happens but as expected, we just get an alert informing us that it is incorrect.
The Mission
The Javascript 4
If we inspect the page we can see the script that is powering the functionality. This is where the first deception comes in. If you view the page source instead of inspecting the element, you may not notice that the first variable is being set. The image below shows that the first variable is being set on the far right. It’s probably a bit to small to see though.
Hidden Moo
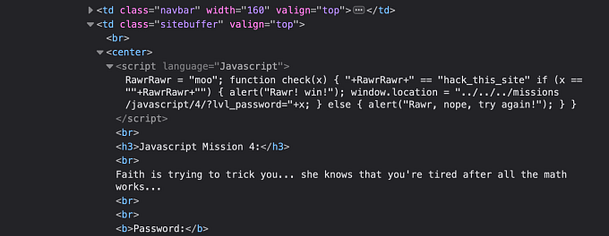
However, if we inspect the script you will see that at the very start of the script, we can see that the value ‘moo‘ is being assigned to the variable ‘RawrRawr‘. Next, we can see that a function called ‘x‘ is being created where the value of ‘hack_this_site‘ is being added to the variable ‘+RawrRawr+‘. Then again, perhaps it isn’t. If we look at how the ‘moo‘ is being assigned to ‘RawrRawr‘ we only see one equal sign. In javascript, a double equals sign acts as an operator to compare two values so all that’s happening here is that ‘hack_this_site‘ is being compared to ‘RawrRawr‘.
The Javascript
The Solution
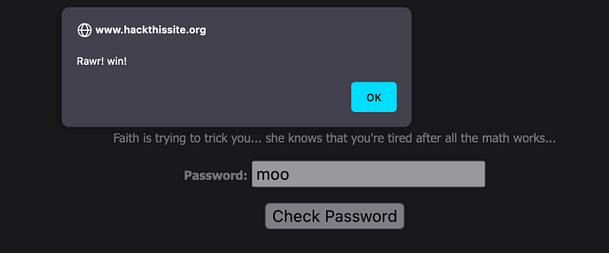
The value of ‘RawrRawr‘ is still moo, let’s see what the script does next. The script has an if statement that compares ‘x‘ to an empty value between two speech marks plus the value of ‘RawrRawr‘. So in essence, the script is checking the value of ‘x‘ against nothing plus ‘moo‘ as ‘moo‘ was set earlier. Therefore, the password to complete the mission should be moo. Input that in to the box and click submit to score.
Hello world, welcome to HaXeZ where today we’re going to be solving the Javascript 3 mission on Hack This Site. Judge me how you will but I have to admit that I learned a lot from this challenge. My time at school was less than ideal so I didn’t go very often. Unfortunately, this meant I missed out on a lot of important subjects including mathematics. I hadn’t even heard of BODMAS until today and I’m 35. I have no idea how I’ve made it this far in computing without knowing it. This challenge is fairly simple provided you know how variables work and know maths.
Math Time
The Javascript 3
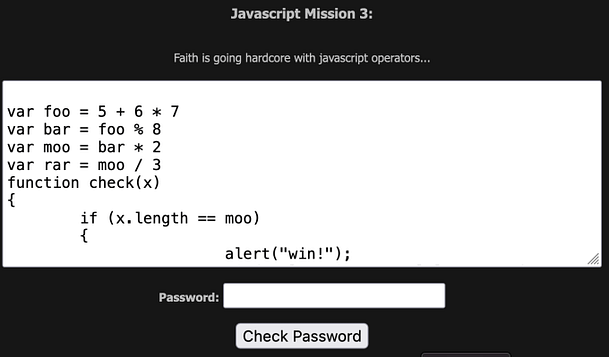
Looking at the code below we can see that we need to submit a password that is the same length as the value of the variable ‘moo‘. We know this because of the if statement that requires ‘x.length == moo‘ for us to get the alert that we have won the mission. In order to get the value of ‘moo‘, we need to perform some calculations to work out the value.
The Javascript
The Mathamatics
Ok, let’s break down the maths.
The value of ‘foo‘ is 47 Because of the BODMAS calculation 6 * 7 + 5.
The value of ‘bar‘ is 7 Because it’s the Modulus remainder of 47 divided by 8
Therefore, the value of ‘moo‘ is 14 because the value of ‘bar‘ is 7 and the value of ‘moo‘ is ‘bar‘ * 2.
We can discard the value of ‘rar‘ because ‘rar‘ is not used anywhere during the calculation. Therefore, we are left with the value 14. We know that the password submission form requires our input to be the same length as ‘moo‘. In essence, we should be able to submit any 14 characters to complete the mission.
The Mathematics
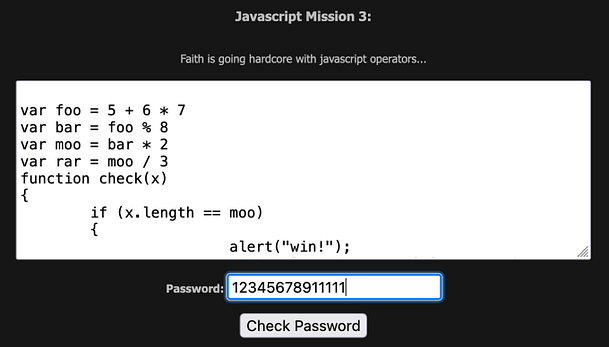
Congratulations
After submitting 14 characters to the password submission form, you should complete the challenge. That’s all there is to it. However, if you don’t know about BODMAS, which I didn’t, and if you didn’t know that a percentage sign in programming means Modulo or remainder then it could be difficult.
Hello World, welcome to haxez where today we’re looking at Hack This Site Javascript Mission 2. For this mission, we only need to change a setting within our browser or install a plugin. As a result, we disable Javascript which allows us to complete the mission. As can be seen from the image below, the mission is called Disabled Javascript and supposedly has a script that redirects to log out hackers.
Disable Javascript
Javascript 2 Scripting Enabled
As a result, navigating to the mission will prompt an error message saying we need to try again because we didn’t disable Javascript. To complete this mission, we need to disable the script doesn’t run and we don’t get “logged out”.
Try Again
Disabling Javascript
In order to disable the script, we can install a browser plugin or we can head to our browser settings. I’m using Firefox so the setting we need is in 'about:config'. Head to ‘about:config‘ in your browser and search for Javascript. You should see an enabled option with the value set to true. Click the little arrow icons and change the value to false. There are plenty of guides out there for other browsers or you can search the browsers store for a plugin that disables it.
Disabling Javascript
Scripting Disabled
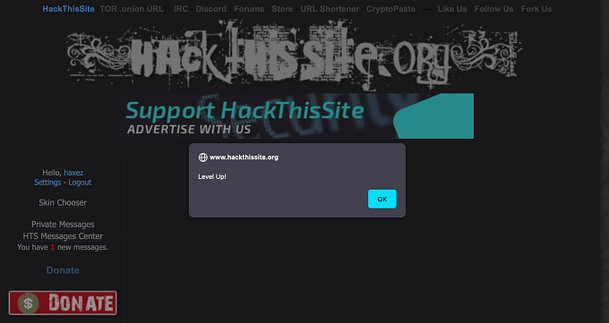
Now that it’s disabled, we can head back to the mission and click the ‘here’ hyperlink to take the mission. This time you shouldn’t see an error. You should see another link that says “Click here to win”. Click that link and you should then see the image below congratulating you on completing the challenge.
Scripting Disabled
Conclusions
There isn’t much to say about this one honestly. It’s a good mission to teach the user how to disable and enable client-side scripting in your browser. Client-side scripting is responsible for a number of attacks like Cross-Site Scripting (XSS) and when combined with other vulnerabilities can cause a lot of problems. Anyway, I’ve passed this post out as much as possible but there isn’t much more I can say so… thanks for reading.
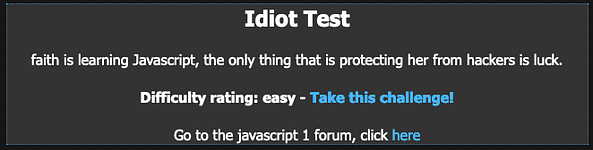
Hello world, welcome to haxez, where we will be working out Javascript Mission Level 1 on Hack This Site. We’ve just completed the realistic missions and I thought it was time to take a break and do something a little less intense. So without further ado, let’s get started. Upon navigating to the mission, we get a title called the Idiot Test (very appropriate for me I assure you). Based on the information we have, it sounds like Faith with a small f (bug report submitted) is learning Javascript. Let’s go and take a look at it.
Idiot Test
Testing The Javascript 1
When we follow the link to the mission, we’re greeted with a title of Javascript Mission 1 and a password submission form. Furthermore, if we input data into the form (incorrect data), we get a javascript alert window pop up telling us we fail. Ordinarily, Javascript is a client-side language (runs un the user’s browser), we can’t intercept this request and brute force it. That also means we can view the script and see what it’s doing.
You fail
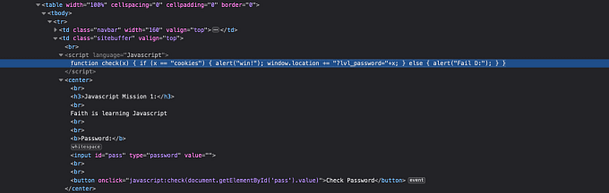
Analyzing The Javascript
As shown below, In order to find out what the script is doing, we need to view the page source and locate the code. Overall, the quickest way to do this is to right-click inside the password form and click inspect. As can be seen, that should take you directly to the code powering the form. As illustrated in the image below, the Javascript code is checking if the variable ‘x‘ is equal to cookies. If the value is equal to cookies then an alert box will pop up saying “win”. If the value is not equal to cookies then we get an alert box pop up saying “fail”.
Page Source
Bribing With Cookies
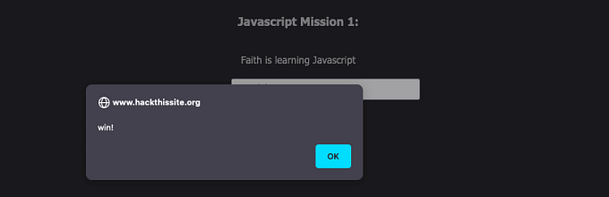
In order to pass this mission, all we need to do is submit the value cookies into the password submission form. Yes, it really is that simple and could be completed without even understanding the code. So, input the word cookies in to the password submission form and click submit.
Cookies
As promised, upon doing so you will receive a pop-up box claiming that you win.
Hello world, welcome to haxez where today we’re looking at the last realistic 16 web application mission from Hack This Site. This mission was difficult for all the wrong reasons. It wasn’t because it was designed in a challenging way. No, it was because it uses Adobe Flash which has been dead for a while now. The challenge itself was a lot of fun despite the technical problems encountered along the way. I don’t know why I’m complaining honestly, I learned an additional nugget of information along the way.
Realistic 16
Realistic 16 Introduction
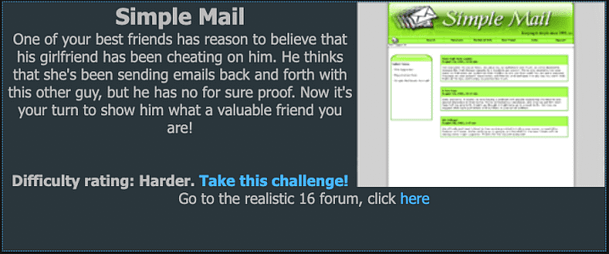
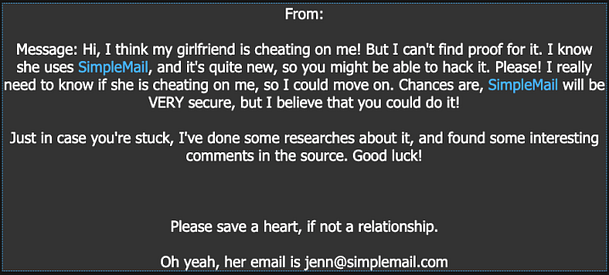
We receive a message from someone who neglected to leave their name. The message explains that they suspect that their girlfriend is cheating on them. Furthermore, they have noticed that their girlfriend is using simplemail.com a lot. They suggest that it could be the way his girlfriend is messaging her secret lover. We’ve been asked to hack in to simplemail and read his girlfriends emails. Not trying to be a warrior of virtue or anything but under normal circumstances this would be a pass from me.
Message From Concerned Boyfriend
Exploring The Realistic 16 Web Application
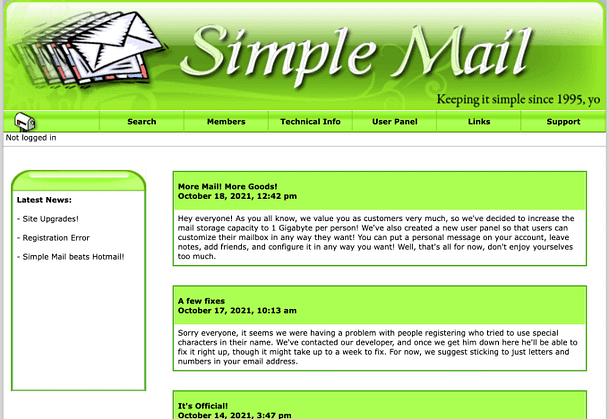
Upon navigating to the application we’re greeted with a lovely lime green decore that is reminiscent of the old KazaA downloading application. During the Degeneration X days of the internet, Limewire and KazaA were the go to downloading applications. Alas, The application has a number of options that allow you to register, login, search and perform other activities. I genuinely like the look and feel of this application.
Simple Mail Web Application
Scouring The Source
First things first, lets view what’s under the hood of this beautifully decorated vintage application. It’s mostly just what you would expect. However, there are a few comments that jump out at me. As you can see from the screenshot below, there is a comment that mentions an admin login. Lets head over to the URL and see what’s occurring.
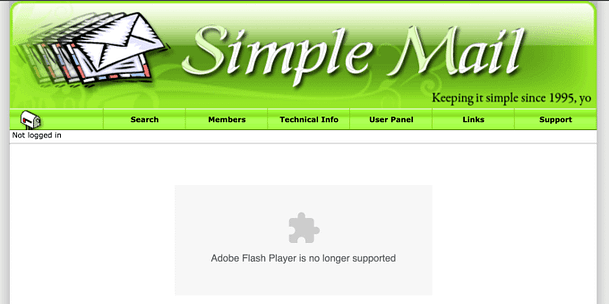
Well that’s not something you see everyday. The login page uses Adobe Flash which hasn’t been supported by browsers since *googles it* December 31’st 2020. Ok, it hasn’t been dead that long but it’s surprising how Adobe Flash already feels like a relic of the ancient internet.
Simple Mail Flash Requirement
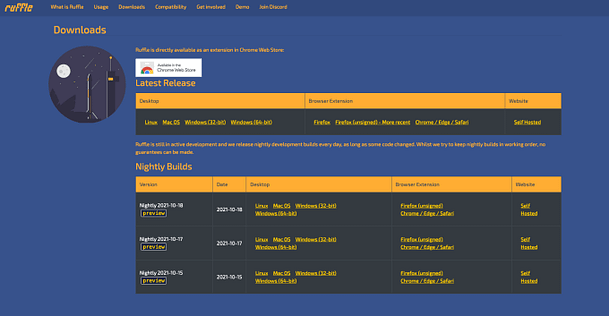
As we know, most browsers don’t support Adobe Flash anymore. I tried to install an older version of Firefox first to get it working but didn’t have much luck. After a bit of googling, I stumbled upon the miracle that is Ruffle. I did try a number of other plugins first but none of them seemed to do the trick. Ruffle however, was amazing and did it’s job perfectly.
Ruffle
Web Browser Meet Ruffle
As Ruffle isn’t on any of the default plugin stores for the popular browsers yet, you need to download it and add it yourself manually. In order to do this in the Firefox web-browser you need to head to about:debugging in the URL. Then click This Firefox, and then select Load Temproary Add-ons and navigate to the file you downloaded. With that file loaded, we should now be able to access the URL.
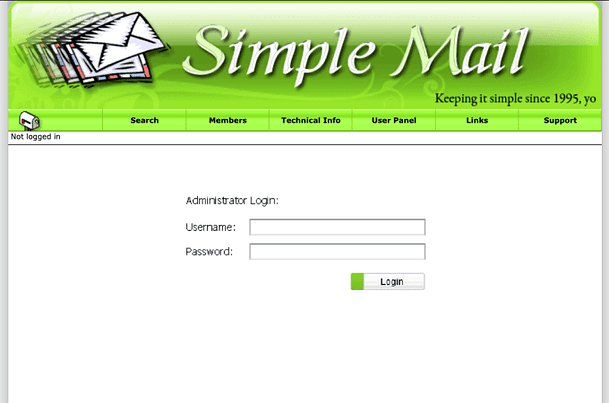
Web Application With Flash
Realistic 16 Intercepting Web Requests
Before you continue, make sure you have your favorite web application penetration testing tool (Burp Suite) open and configured to intercept traffic. Then populate the Username and Password forms with test data and click submit. Inspec the request as it comes in to Burp and you will notice it is sending a GET request to a config.txt file. This suggest to me that the login form is checking something inside the config.txt before attempting to authenticate us.
Burp Suite Intercepted Auth Request
Registering For Web Mail
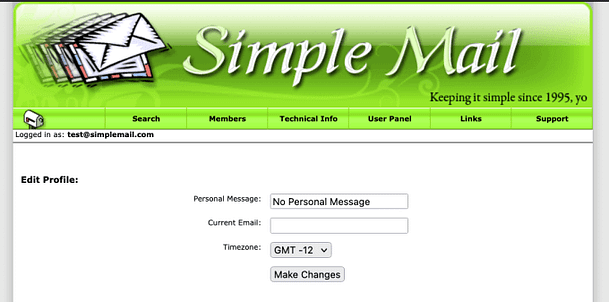
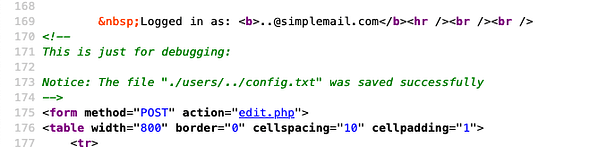
Now we know a little bit about how the admin login works, lets register our own account and see if there is anything interesting there. I registered the user of test with the password of test because who cares about username and password complexity requirements anyway. Upon logging in, I had a look around and noticed that we had the ability to edit our profile. If we view the page source of this application we notice that it links to an edit.php page. If we click the link for edit.php to view the source of that page we notice that our profile configuration is stored in the following location /users/username/config.txt
Edit ProfileConfig.txt
Registering A Diretory Traversal
We know that our profile is stored in config.txt and that the admin authentication script was checking a config.txt file in the root directory (a directory, or two? above us). Perhaps we can register a user with a directory traversal for the username so that when we edit our profile, we end up editing the admin config.txt. Well, that’s exactly what we need to do. Logout and head to the register page and register a user with the username ‘..‘. You will get an error message saying it was unable to create the email address, but you will get a conflicting messaging saying the registration was a success.
Registering Directory Traversal
Admin Authenticiation
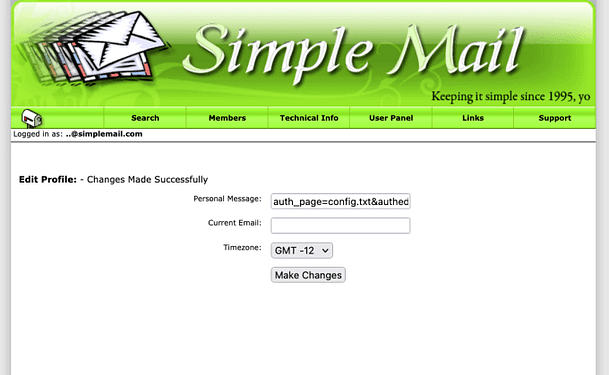
With our newly created user, we need to head back to the edit profile page. This time we’re going to use the edit profile to edit the config.txt file in the root directory. We need to input the following value in to the ‘auth_page=config.txt&authed=true&‘ which is going to allow us to authenticate.
Editing Profile
Admin Access
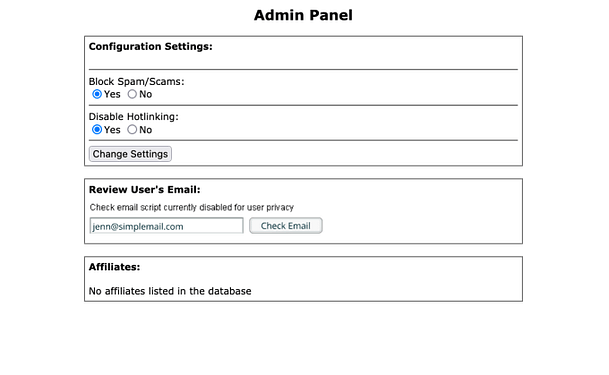
Ok, now that we have done that. Logout and head back to the admin URL and login with the other account we created. I used username test and password test. We shouldn’t revive an error message this time. Instead we should be redirected to the admin panel. The admin panel has a number of options including one that lets us read users emails. However upon submitting our clients girlfriends email address, we get an error message saying that the feature has been disabled for user privacy.
Admin Panel
F**king Flash!
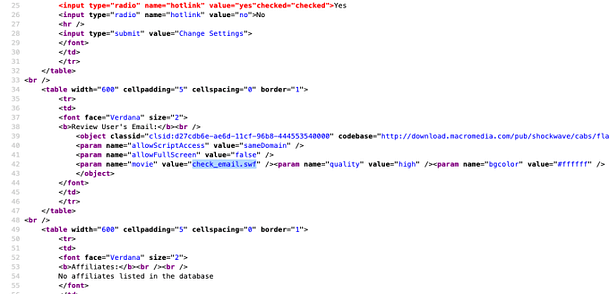
If we view the page source again we can see that this “Check Email” functionality is being provided by another Flash .swf file.
Web Application Page Source
This is the part where we need to switch to our Linux Virtual Machine. We need to run a wget on the file and then disassemble it to see what’s going on. Fire up your linux terminal and run the following wget command. However, if you run in to errors advising you that the HackThisSite SSL certificate has expired (like I did), then you will need to tell wget to skip SSL checks. I will let you google that one.
Now we need to disassemble the Flash file, to do this I used the tool swfmill to convert it to an XML file. Once the Flash file is an XML file, we can look through it to find out why it isn’t letting us check users emails. Or better yet, we can find how it would check the users emails and we can use that instead. The command to convert the SWF to XML is as follows:
swfmill swf2xml check_email.swf test.xml
You can then grep the XML for PHP and and you should find the following reference in the file.