Hello friend, welcome to haxez where today we’re looking at the Hack This Site insane difficulty realistic web mission 15. This mission has a lot of breadcrumbs that we need to follow in order to complete it. It’s much more complex than any other mission and I convinced the person who created just wanted to make people suffer.
First, it requires attacking an encrypted zip file with a known plain text attack. Second, you need to modify your requests to log in to the internal message system as an admin. Third, you need to exploit a PHP authentication script to gain access to a PHP shell. Fourth, you need to perform a buffer overflow on another authentication script to gain access to the patents page.
Realistic 15 Introduction
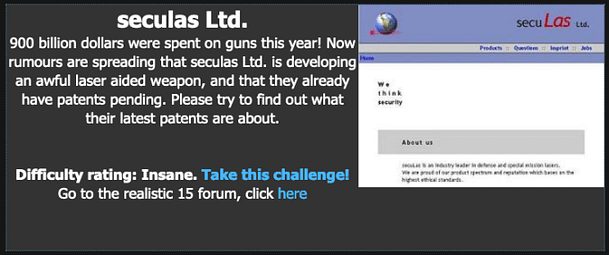
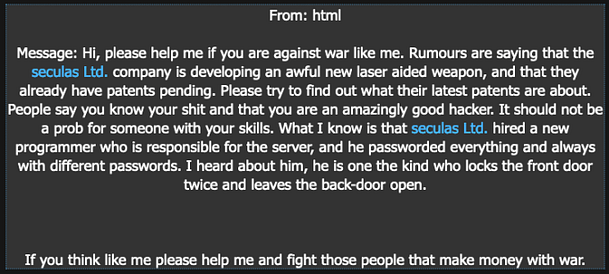
So, we’ve received a message from HTML that Seculas Ltd has developed a new laser-guided weapon. HTML has sought our elite hacking services to hack in and steal the patent for the new weapon. HTML also explains that their new developer in charge of the website is the type of person to leave the backdoor open.
Exploring The Realistic 15 Web Application
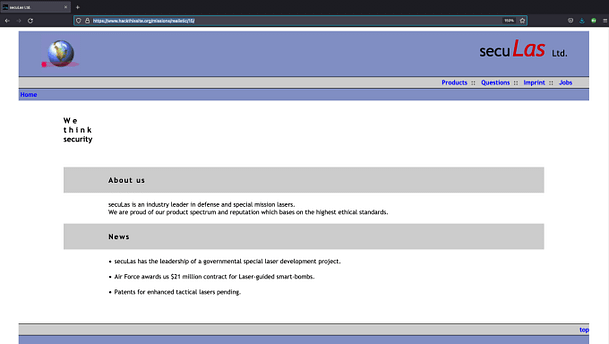
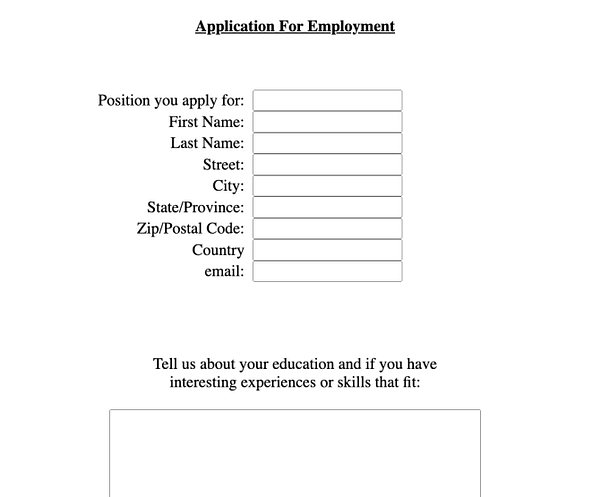
Upon navigating to the web application, we are greeted with a sleek website that advertises its tools of warmongering. There are a number of pages include products, questions, imprint, and jobs. The questions and jobs pages have forms that we can fill out and submit back to the server.
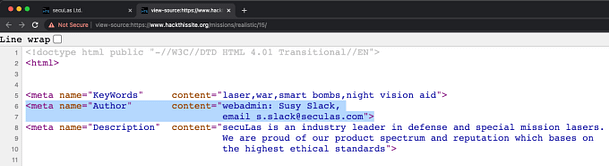
If we view the page source of the index page we immediately see what appears to be a username of 'webadmin‘ with a real name of Susy Slack. We should make note of this as it may come in handy later.
Figuring Out Forms
As mentioned previously, there is a questions page and a jobs page. Both of which have forms that can be filled out and sent back to the server. After filling out and sending off the “questions” form, nothing spectacular happens. However, after filling out the job application form, we notice a difference in the coding.
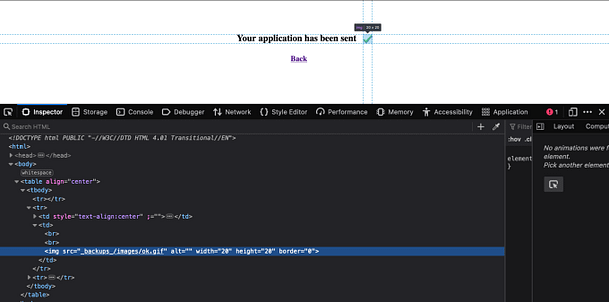
The .gif file that is being loaded to indicate that the form has been sent, is loading from a different location to the one on the “Questions” form. This gif appears to be loading from a directory called _backups_. The image below shows the page source of the application once the Jobs form has been completed and sent.
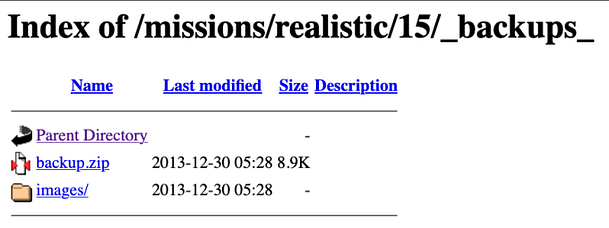
If we navigate to the backup directory we get a directory listing with zip file named backup. This is a perfect example of why having directory listing enabled is a bad idea. It provides the threat actor with a wealth of knowledge about the structure of the application. Furthermore, backups should not be saved on the same server being backed up. Nor should they be saved in a directory that’s public. In the event of a drive failure, that backup is completely useless. Also, having the backup archive public means any old Joe could download and view its contents.
Realistic 15 Web Application Backup
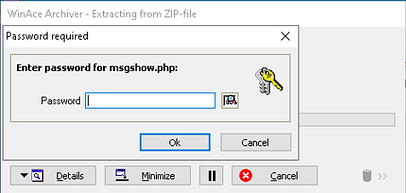
If we download and try to open the backup file, we are prompted to input a password. No!, a password-protected zip archive, my only weakness! Honestly, this did actually give me some issues initially. At first, I attempted to use zip2john to capture the password hash and crack it. It appeared to grab the hash but cracking it proved difficult.
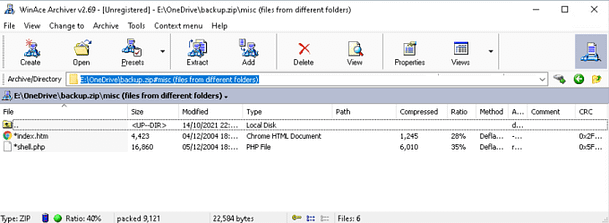
The good thing (or bad depending on who you are) about password-protected zip archives, is that we can see the contents. Inside this particular zip, is a file called index.htm. If this is the index.htm of the main site we’re attacking then we have some known plain text. If we have encrypted files but know the contents of one of the files then we can perform a known-plaintext attack. It’s a bit like how Alan Turing and the Bletchley team deciphered the Enigma machine and beat the Nazis during World War 2. If you know a portion of the text of an encoded document. You can use that text to decode the rest of the encoded text.
Cracking The Backup
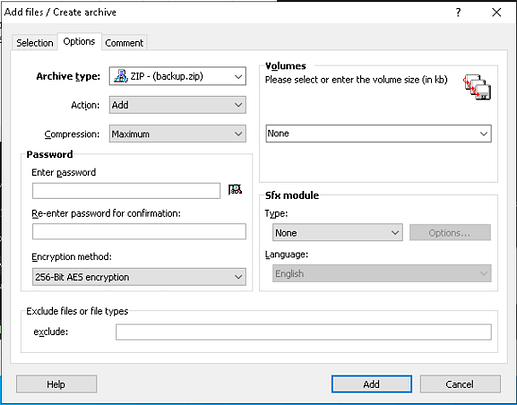
In order to crack the backup.zip, all we need to do is grab a copy of the index.htm page. Once we have that page, we can compress it using the same method used to compress the encrypted backup.zip. Then we can compare the two zip archives using ‘pkcrack‘ and decrypt the encrypted version. First, grab a copy of the index.htm page by navigating the home page and right-clicking, and choosing save as (make sure you save HTML only). Second, create a new zip archive using WinAce with the following parameters:
Archive type: Zip
Compression: Maximum
Encryption Method: 256-Bit AES Encryption
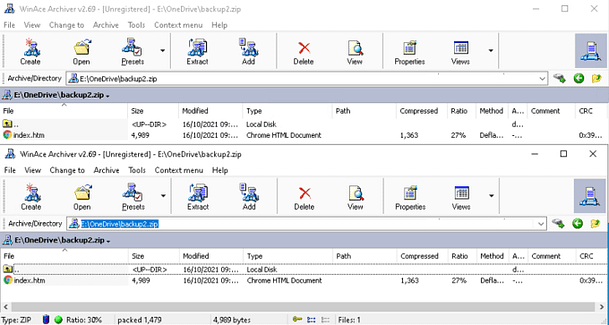
Third, compare the two archives and make sure that the compressed size of both the index.html files is the same. If the compression and encryption methods used are different from the ones on the encrypted archive, then it won’t work.
Fourth, master Linux, install pk-crack, and crack the zip archive. Ok, going through it step by step is a bit beyond the scope of this walkthrough. However, if you’ve made it to this mission then you should be able to git clone a repository. Follow the instructions on git to build it then run ‘pkcrack‘ to compare the two files. You should receive an unencrypted output zip file that contains the contents of the encrypted zip file.
sudo ./pkcrack -C /media/sf_OneDrive/backup.zip -c "misc (files from different folders)/index.htm" -P /media/sf_OneDrive/index.zip -p index.htm -d decrypted_file -a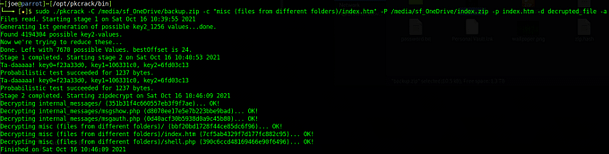
Web Application Message System
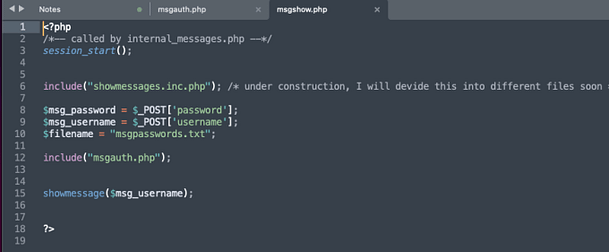
With the output, we can now look through the files. If we open the PHP files in the internal_messages directory we can see that the ‘msgshow.php‘ file references an ‘internal_messages.php‘ file.
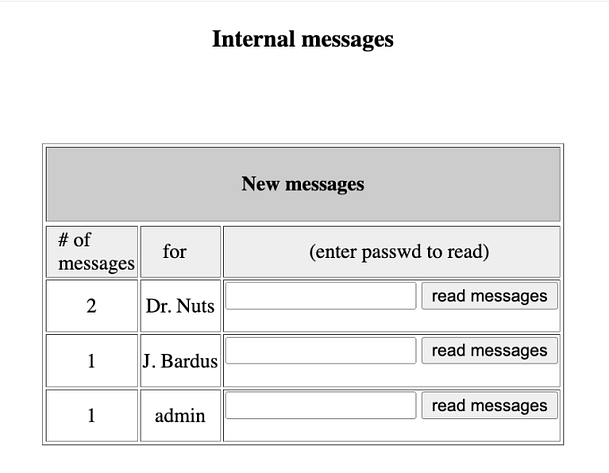
If we navigate to the ‘internal_messages.php‘ page, we can see that there is in fact an internal messages system that requires a password to access it.
This is where things get a bit confusing. If we view the page source of the index page again we can see the code below. The code appears to contain a username of webadmin and a password of ‘Susy Slack,‘. However, this “exploit” requires us to use the user ‘admin' with the same password. Perhaps the developer was intentionally demonstrating password reuse.
<meta name="KeyWords"     content="laser,war,smart bombs,night vision aid">
<meta name="Author"       content="webadmin: Susy Slack,
                                   email s.slack@seculas.com">
Anyway, if we look at the msgauth.php file we can see that it appears to be an authentication script. It is storing the user-submitted credentials into variables. The username is being stored in a variable named ‘$msg_username‘ and the password is being stored in ‘$msg_password‘. Further down the code, we can see that it is performing the following if statement to check the username and password. The format appears to be the same as the username and password we found in the index page.
if (ereg($msg_username . ": " . $msg_password . "\r*\n*$", $strLine, $regs))Exploiting The Message System
Things get even more confusing. We can’t just submit the password to the form seen in the picture above. We have to intercept a request and modify it to post to a different PHP page with different parameters. Surely, if we are viewing the backup files of the site then we should just be able to submit the password to the internal messages system. It should be using the same PHP files with the same parameters. I have no idea how the first person to solve this mission did so.
If we capture a request to msgshow.php we can modify the following parameters to gain access to the messages. First, we need to change the POST request so that it posts to ‘msgauth.php‘ rather than ‘msgshow.php‘. Second, we need to change the password parameter to ‘msg_password‘ and the username parameter to 'msg_username‘. Third, we need to populate those parameters with ‘admin‘ for the username and ‘Susy%20Slack,' for the password. Finally, we need to add another parameter of filename and set it to ‘../../index.php‘.
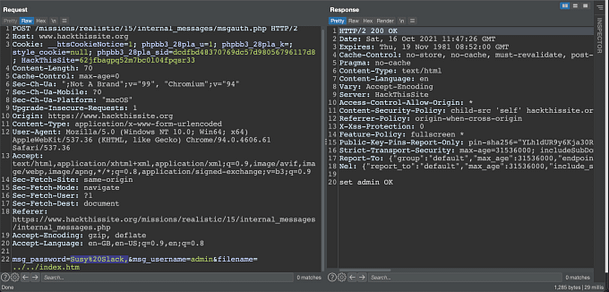
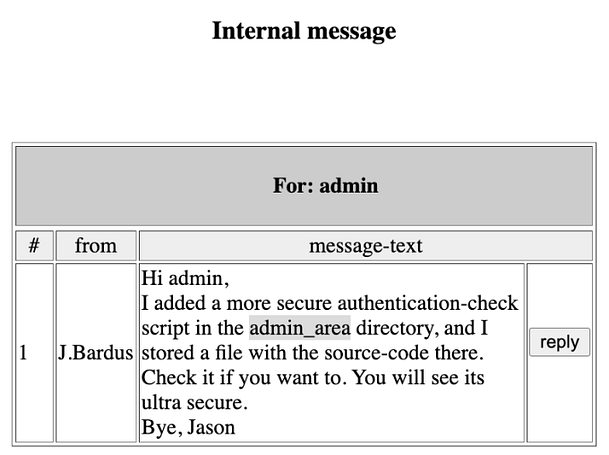
Now if you send the request, you should see the message ‘set admin OK‘. I have no idea why this works or more importantly, why submitting the correct password to the ‘internal messages’ form doesn’t. Furthermore, why is the user listed as ‘webadmin‘ on the index page, but admin on the internal messages page. I admit that I’m not great at coding and perhaps it has been designed this way in order to make it challenging. However, to me, this doesn’t make much sense. Anyway, we can see the message that we’re intended to see in the image below.
Exploiting PHP Authentication
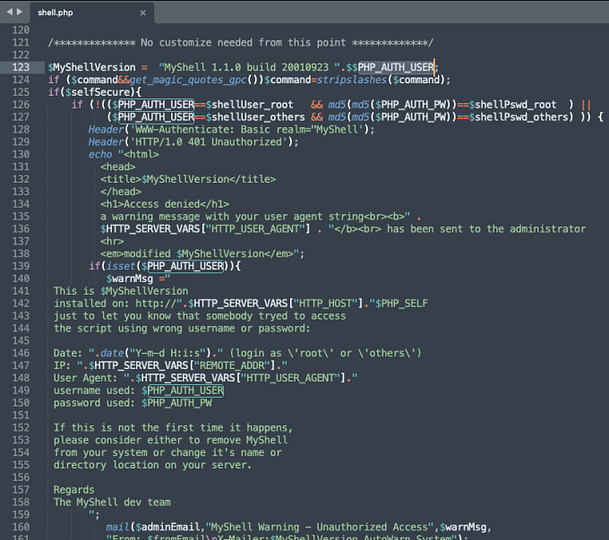
After all that work, we only receive a new directory to go visit. We could have found this directory using directory brute force tools like DIRB and Go-Buster. I’m not sure what I was expecting. Heading to the ‘admin_area‘ directory produces a forbidden message. With nowhere else to go, we need to head back to the backup file that we downloaded and decrypted. There is one file in there that we haven’t looked at, shell.php. If we head to ‘admin_area/shell.php‘ we get a login prompt. The previous credentials don’t work so let’s look at the code. The first thing to notice is that it tells us what the username is. The value of root is being passed to the ‘$shellUser_root‘ variable. Unfortunately, it looks like the password has been stripped out of the backup file but it is being passed to the ‘$shellPswd_root‘ variable.

Additionally, if we look further down the code, we can see how authentication is being performed. I have no idea why this is vulnerable. PHP isn’t my strongest area but it’s something I intend on learning more in the future. What I do understand though is that there is an if statement that checks the value of ‘shellUser_root‘ and the md5 value of ‘shellPswd_root‘ and if they are correct it loads the page. The vulnerability is probably to do with the way that the script is passing the user-submitted values to the variables.
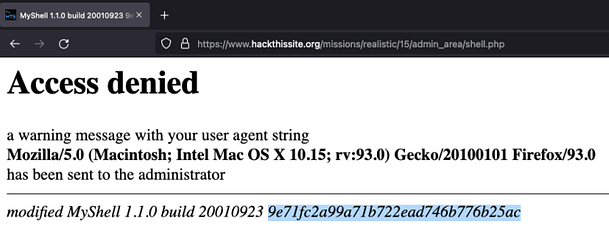
Anyway, if we load the shell.php page and submit ‘shellPswd_root‘ to the login form, we can force the application to return the hash on the proceeding error page. The steps to do this are to input the variable, click submit, then when the login form pops up again, click cancel.

After clicking cancel, you should get an error message saying Access denied. However, at the bottom of the message, there is some data that shouldn’t be there. It is the password hash that was removed from the backup file but remains in the actual shell.php file.
Cracking The Hash
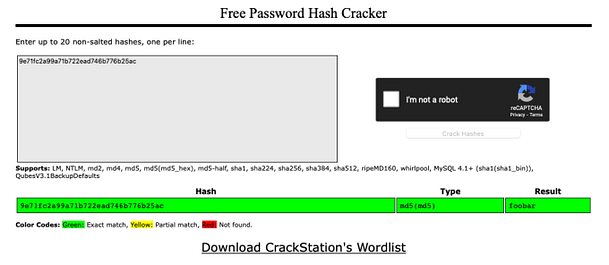
The first thing you should know is that the password has been hashed to an MD5 and then that hash has been hashed again. You could attempt to crack this with John The Ripper or Hashcat. However, the quickest way to do it is by submitting it to Crackstation. Crackstation makes short work of the hash and as you can see from the image below, the password is foobar.
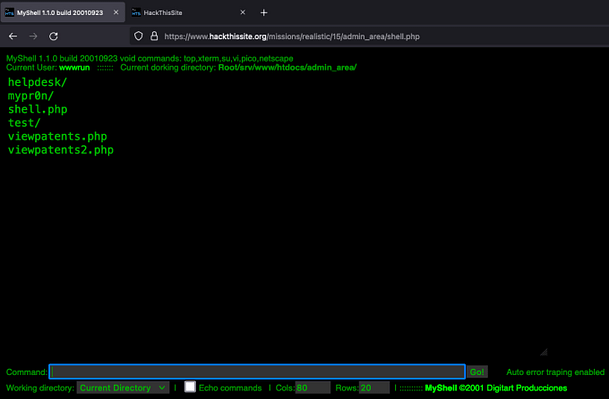
With the hash cracked, we can log in to shell.php. We are greeted with a terminal that allows us to list out the contents of the directory. The output of the ls command shows us two PHP pages associated with patents. Accessing these pages requires credentials and none of the credentials we have obtained so far work. There is also a directory called test.
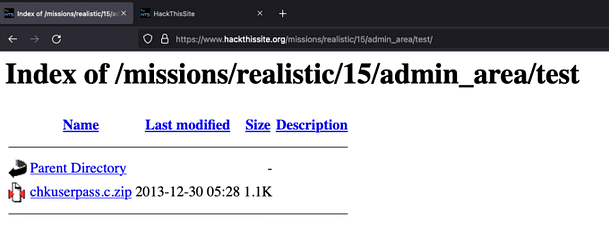
If we navigate to the test directory in our browser we can see that directory listing is enabled and there is a zip file we can download.
Buffer Overflow
If we download the zip file and open it with a text editor we can see that it is another authentication script. This script appears to be the authentication script for the viewpatents.php page. Furthermore, if we look closely at the script we can see that it is concatenating characters to 200. This means that there is a character limit on the input boxes.
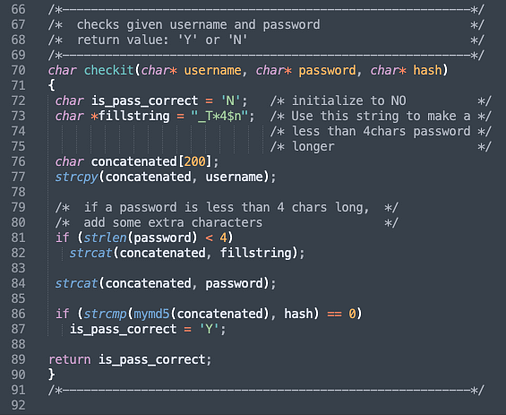
This means we can perform a buffer overflow. By submitting more than 200 characters to the user input box we can escape the allocated memory amount and trick the application into letting us log in.

Once logged in there is another login form. Just kidding! that’s it. We’re done. Thank god.

Conclusions
I have none. I hated it.