Debug was the third hardware hacking challenge of the Hack The Box Cyber Apocalypse Capture The Flag Competition. Hello world, welcome to Haxez, this challenge was a lot of fun and wasn’t too difficult provided you had the right extensions installed. The description for debug was as follows.
Your team has recovered a satellite dish that was used for transmitting the location of the relic, but it seems to be malfunctioning. There seems to be some interference affecting its connection to the satellite system, but there are no indications of what it could be. Perhaps the debugging interface could provide some insight, but they are unable to decode the serial signal captured during the device’s booting sequence. Can you help to decode the signal and find the source of the interference?
Debug With Logic 2
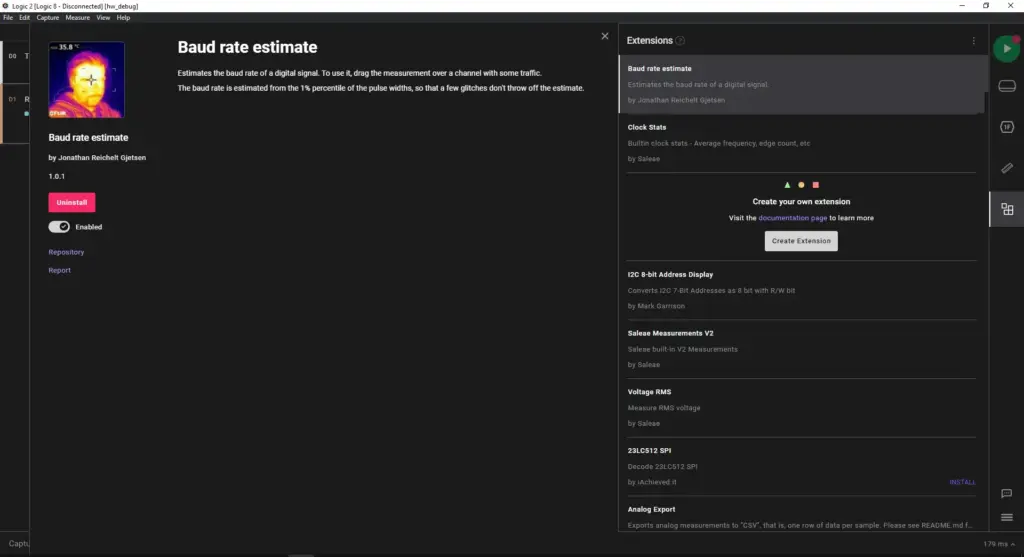
As with the first challenge, we needed to open the files with Logic 2. However, the answer wasn’t right in front of us like last time. I had previously used Logic 2 before during the Try Hack Me Advent Of Cyber. However, that challenge told us what analyzer we needed to use and the exact settings needed. I thought it would be best to start with Async Serial but I had no idea what the baud rate would be. There are ways to calculate the baud rate manually but thankfully there is also an extension.
Configuring The Analyzer
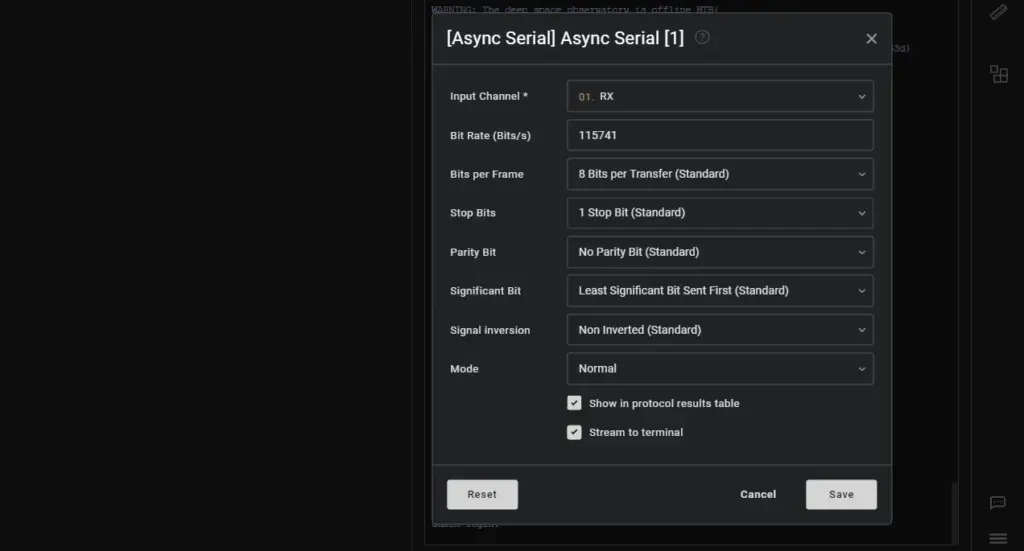
Once the extension was installed, I shift clicked from one high point of the signal to the other. This then provided an estimation of the baud rate. I added a new Aysnc Serial analyzer for the RX channel and gave it the correct baud rate.
Debug The Signal
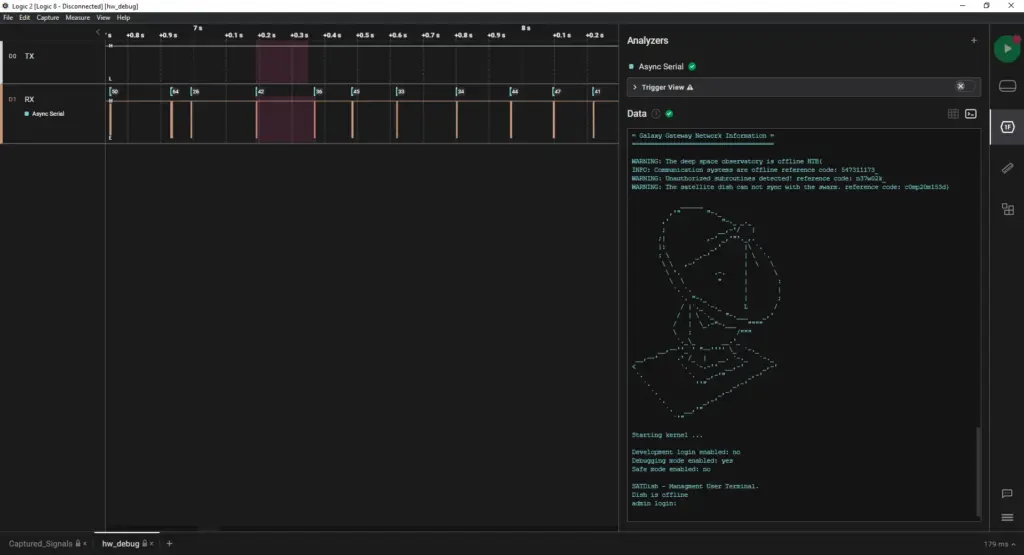
Finally, the data window started producing text. I must admit that I thought this was cool. It reminded me of the film Aliens for some reason. Something to do with the ASCII art and the satellite dish I think. Anyway, a lot of text was spat out and I have to salute whoever made this because they didn’t need to put this level of detail into it. Hidden in this transmission was the flag and all you had to do was assemble it.
HTB{547311173_n37w02k_c0mp20m153d}
Debug Review
This was a really fun challenge but I have to be honest, I found it easier than the first challenge. With this challenge, I felt that I knew what I had to do immediately. The first challenge completely threw me off for a long time. I really appreciate the level of detail that went into the transmission. It made me smile. Anyway, that’s all for the hardware challenges. I couldn’t solve secret code and from the write-ups, I’ve read, it didn’t look easy.
Critical Flight was the second hardware hacking challenge of the Hack The Box Cyber Apocalypse Capture The Flag competition. Hello world, welcome to Haxez, in this post I’m going to be discussing my experience solving the Critical Flight hardware hacking challenge. All challenges have a description and you can find Critical Flight’s below.
Your team has assigned you to a mission to investigate the production files of Printed Circuit Boards for irregularities. This is in response to the deployment of nonfunctional DIY drones that keep falling out of the sky. The team had used a slightly modified version of an open-source flight controller in order to save time, but it appears that someone had sabotaged the design before production. Can you help identify any suspicious alterations made to the boards?
Opening Critical Flight Files
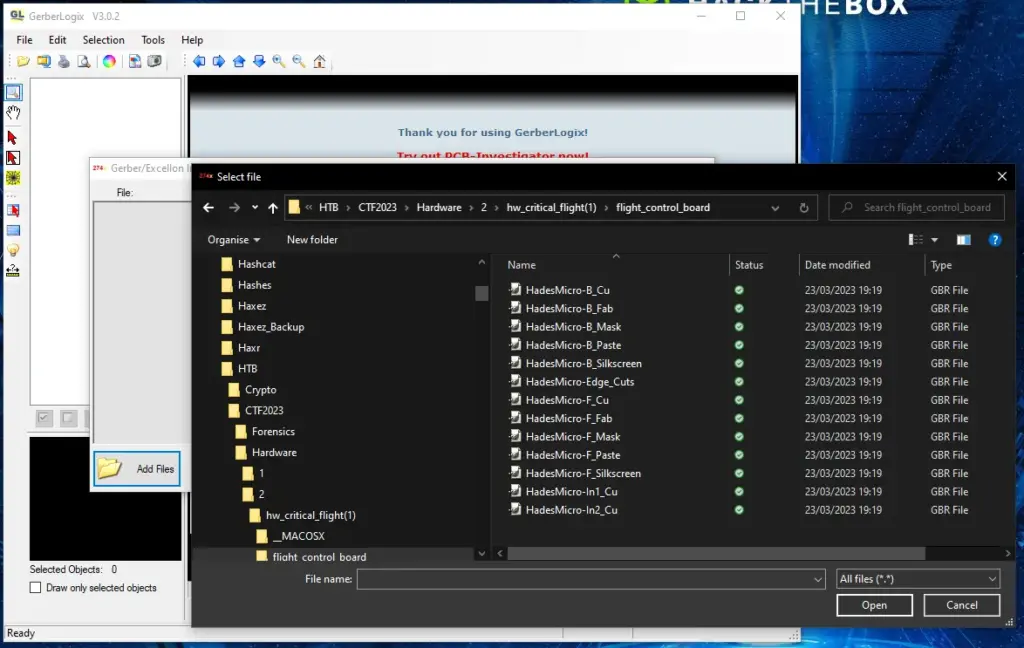
I have no previous experience with GBR files. Honestly, it took me far too long to find something that would open them. In the end, I found an application called GerberLogix. The application allowed me to open all the files at once and was very simple to use. It does seem dated but it got the job done for the task at hand.
Critical Flight GerberLogix
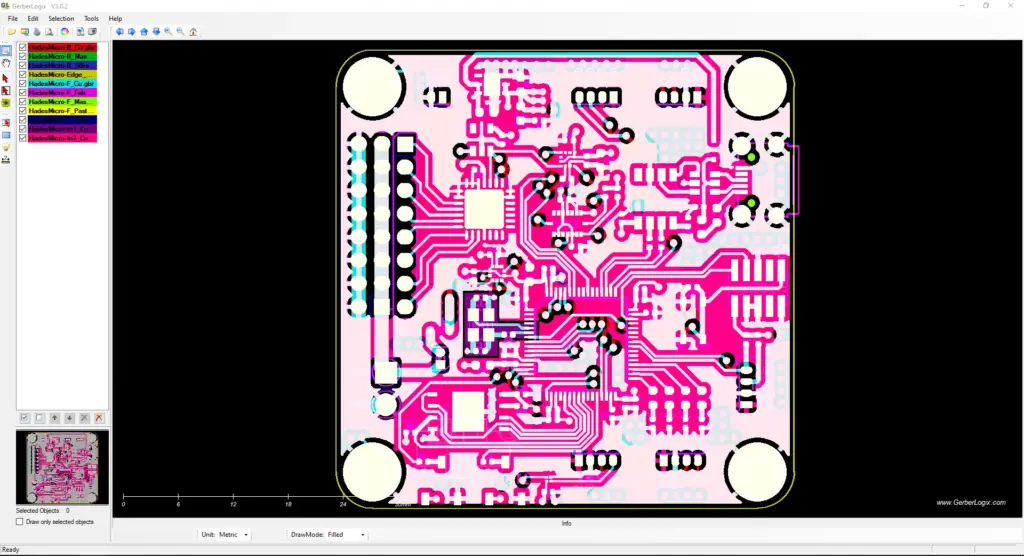
As you can see from the image below, when opening the files they are combined. It’s like layers in photoshop or gimp and each layer was coloured differently. There wasn’t much else for me to do so I started selecting and unselecting different layers.
Revealing The Flag
After playing with the layers for a bit I eventually found a flag. However, no matter how I structured it, the flag wasn’t accepted. I initially thought that someone had made a mistake and forgot to add the end squiggly bracket but I should have known better. These folks don’t make mistakes.
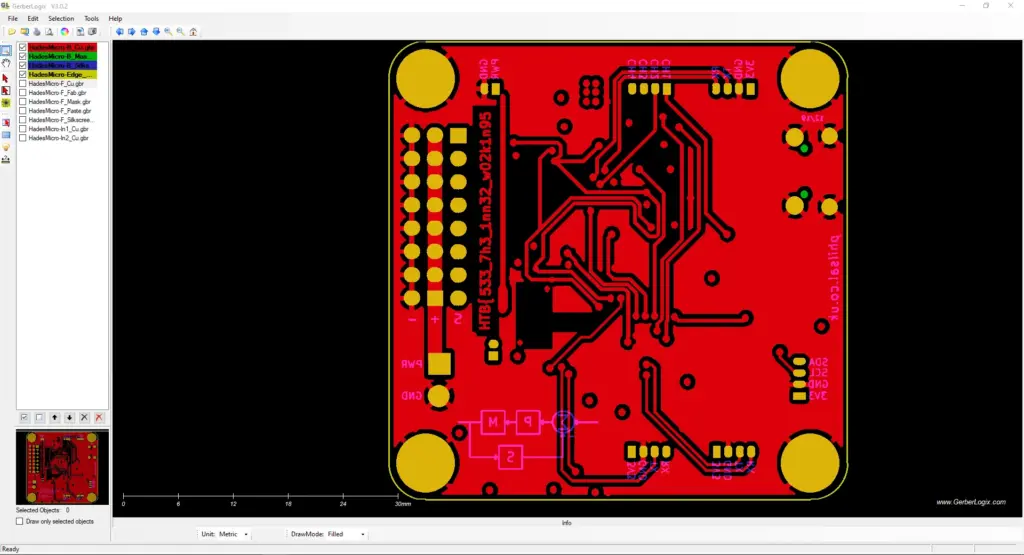
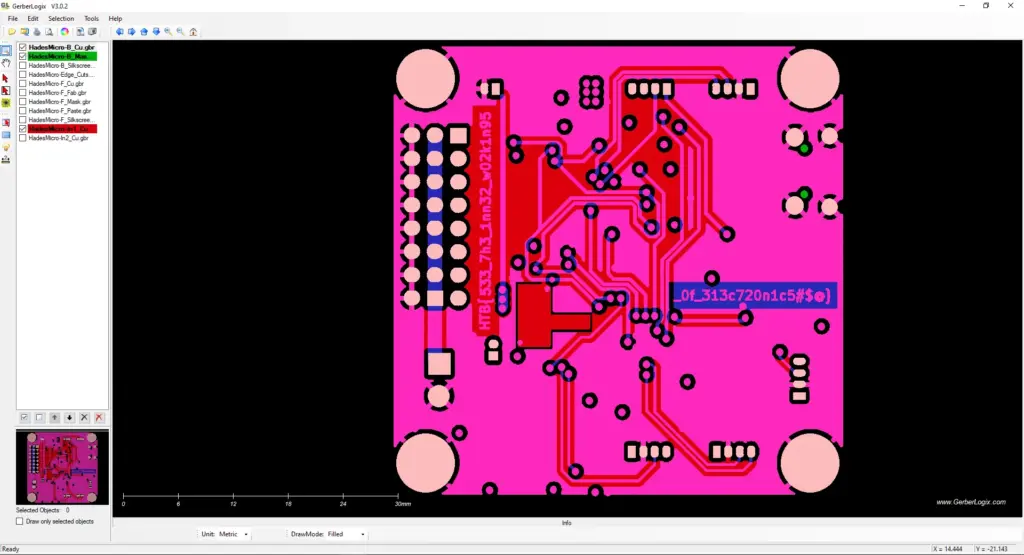
Pulling Back The Layers
After tinkering with the layers a bit more, I finally noticed the second part of the flag. Of course, they didn’t forget to close the flag. These are hackers we’re talking about, syntax is incredibly important. As you can see below, there were two parts to the flag and we needed to combine them to solve the challenge.
HTB{533_7h3_1nn32_w02k1n95_0f_313c720n1c5#$@}
Critical Flight Review
This challenge was great in my opinion, it didn’t require too much tinkering. Once I found an application to open the files it was simple. I did try opening the files with GIMP as I read somwhere that they were brush files. That didn’t work out too well. Anyway, not much more to say about it. Fun challenge.
Timed Transmission was the first hardware challenge of the Hack The Box Cyber Apocalypse 2023 CTF event. Hello world, welcome to Haxez. In this post, I’m going to describe my experience solving the Time Transmission hardware challenge. All the challenges in this CTF have a great description following the theme of the competition. The introduction to the challenge was as follows.
“As part of your initialization sequence, your team loaded various tools into your system, but you still need to learn how to use them effectively. They have tasked you with the challenge of finding the appropriate tool to open a file containing strange serial signals. Can you rise to the challenge and find the right tool?”
Timed Transmission Files
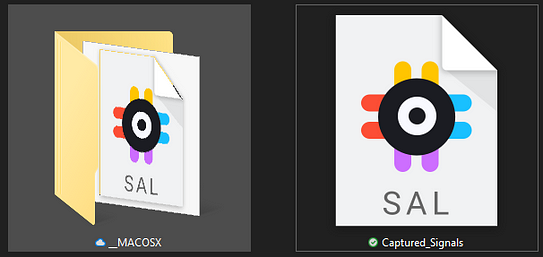
After reading the description, we can download the challenge files which are achieved in a zip file. Extracting the zip files revealed a file named ‘Captured_Signals.sal’. There was also a ‘_MACOSX’ file which I presume contained the Mac OS equivalent files.
Our first challenge was to identify how to open these files. Performing a google search for ‘.sol’ files solved that question pretty quickly. Unfortunately, that was only the beginning of the challenge. Admittedly, I spent far longer on this challenge than I should have. Furthermore, the answer was under my nose the whole time, I just couldn’t see it.
Saleae Logic 2
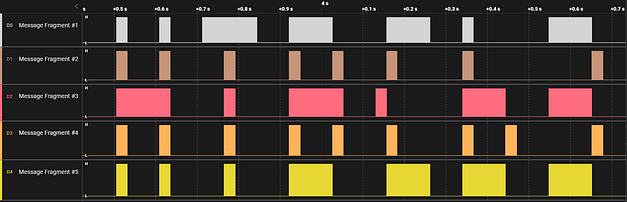
The provided files could be opened with a program called Logic 2 from Saleae. Logic 2 allows the user to capture and analyse signals. Upon opening the file, the answer is right in front of you. The different message fragments make up the flag. Unfortunately, and embarrassingly, I didn’t see it. I spent hours trying to analyse the different channels with various different analyzers.
So provided you didn’t immediately zoom and mess with the signal, this should have been easy to solve. Unfortunately, I did mess with the signal and even went as far as extracting the individual channels from the file and looking through those. I wasted a lot of time.
HTB{b391N_tH3_HArdWAr3_QU3St}
Timed Transmission Review
I didn’t enjoy this challenge for the wrong reasons. It should have been a fun introduction to hardware hacking but I went and overcomplicated it. However, the challenge itself is fun and I like how the creators were able to make the signals spell out the flag.
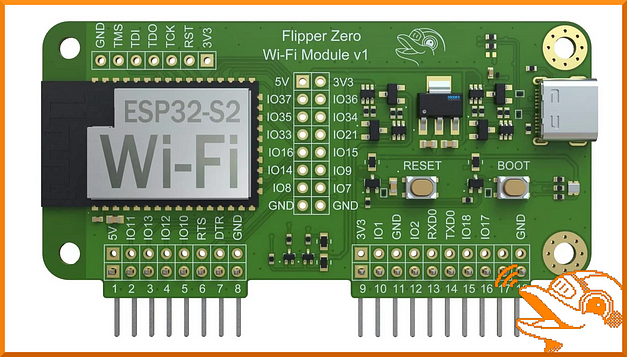
Hello world and welcome to Haxez, today I’m going to be talking about using your Flipper Zero with Marauder to attack Wi-Fi networks. By default, the Flipper Zero doesn’t have Wi-Fi capabilities. However, with the addition of the Wi-Fi developer board, you can add this functionality. The Wi-Fi developer board is rocking an ESP32-S2 module. With this module, you can perform Wi-Fi penetration testing such as probing attacks, de-authentication attacks, SSID rickrolling, and more.
The Wi-Fi developer board
Installing Marauder to the Flipper Zero Wi-Fi Development Board
The Wi-Fi developer board can be purchased from the Flipper Zero website for $29.00. Obviously, As I’m in the UK I purchased mine from Joom for £36.60 excluding VAT and shipping (Ouch). As mentioned previously, the board adds Wi-Fi functionality to the Flipper Zero but you need to do a bit of work beforehand.
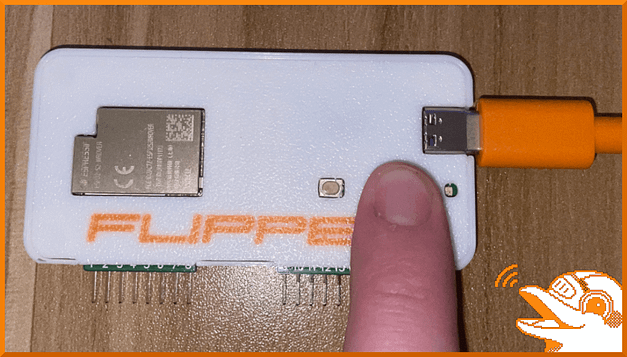
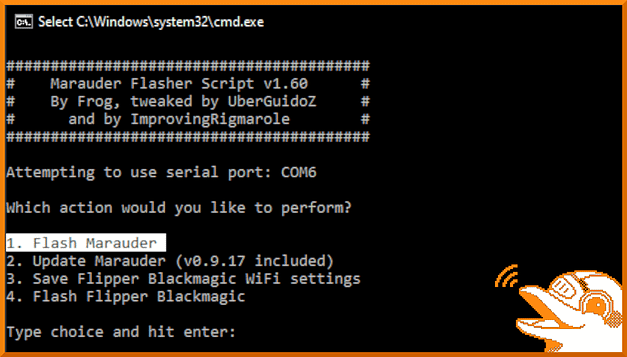
First, you need to download the Marauder firmware and flash it to the developer board. I would recommend using the UberGuidoZ Flipper repository to make the process easier. Unzip the zip archive and locate the flash.bat file. Then, while holding down the boot button, connect the Wi-Fi development board to your computer via USB and hold the boot button down for 3 seconds.
Installing Marauder to the Wi-Fi Development Board
Your computer should recognize the device. Now, double-click the batch file. You may get a Windows security alert, if that is the case click show more and then run anyway. This should spawn a command prompt window similar to the one below. Furthermore, it should have a number of options including the ability to flash the Marauder firmware. Select option 1 and wait patiently for it to install.
Marauder install
Adding Marauder Wi-Fi Functionality To The Flipper Zero
Unfortunately, Flipper Zero doesn’t have the functionality to use the Marauder Firmware out of the box. However, you can install some custom firmware that contains the Marauder tools in order to use it. Although, That is going to be outside the scope of this post but feel free to click the image below to read my article on installing the RogueMaster firmware. Once you’ve read that, come back here and finish the article.
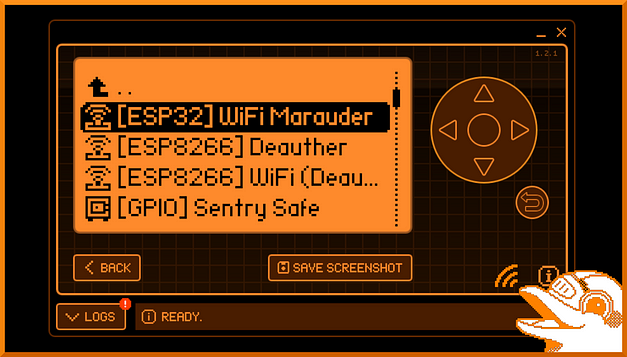
Marauder Flipper Zero Menu
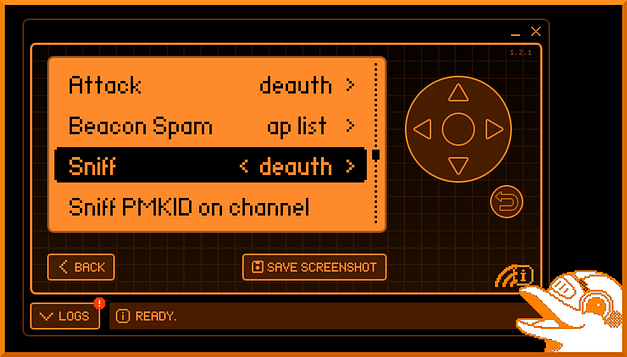
Now that you have Maurader and RogueMaster installed, you should have access to the Marauder menu on your Flipper Zero. In order to access it, head to Applications > GPIO > [ESP32 WiFi Marauder]. After selecting Marauder you should have a number of options including View Log from, Scap AP, SSID, List, Select, Clear List, Attack, Beacon Spam, Sniff, Sniff PMKID on channel, Channel, Settings, Update, Reboot, and Help. Some of these options have sub-options that can be accessed by pressing left or right on your Flipper.
Marauder Menu
Scanning Access Points
One of the first options in Marauder is Scan AP. This option lets you scan for access points within your nearby area. Furthermore, the results of these scans can be used with other attacks such as de-authentication and probe attacks. The image below shows that I have started a scan for local access points. The results will be displayed below and saved to the AP list.
Scanning Access Points
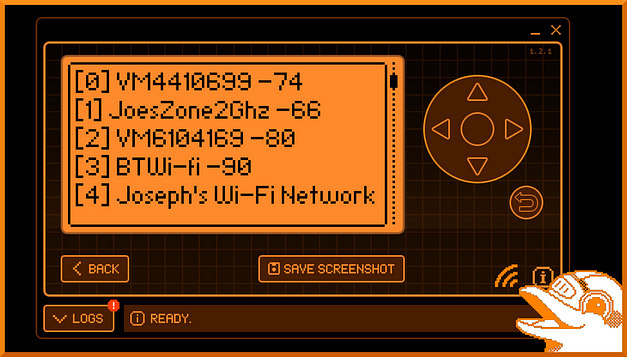
Listing Access Points
The next option in the list is to list the access points that you have just scanned. This is a convenient feature as it assigns a number to each of the access points. This number can be used later to select the access point you want to attack. The image below shows the results of running the list command after running the Scan AP command. As you can see, it shows 5 access points (0 to 5). However, the list can be scrolled on indefinitely depending on the number of access points.
Listing Access Points
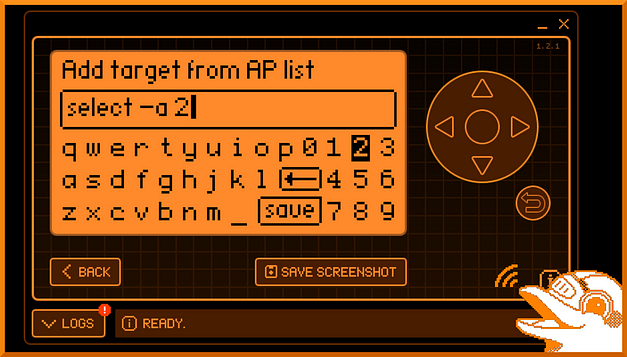
Selecting An Access Point
The select option allows you to select an access point based on the list. At least, that’s what I hope it is doing. Regardless, the option presents a keyboard that allows you to type in the access point you want to select. Once selected, you can then launch attacks against the selected access point.
Selecting An Access Point
Rick Roll Attack
The first attack that I’m going to talk about is the Rick Roll attack. That’s right, you can rickroll people but not in the conventional sense of sending them the Youtube URL. This attack is mostly harmless but is a cool party trick. By selecting the Rick Roll attack method, you send data out from the Flipper Wi-Fi board and create a bunch of dummy access points named in accordance with the lyrics from the song. As you can see from the image below, I have launched the attack and there are a number of new access points available.
Rick Roll Attack
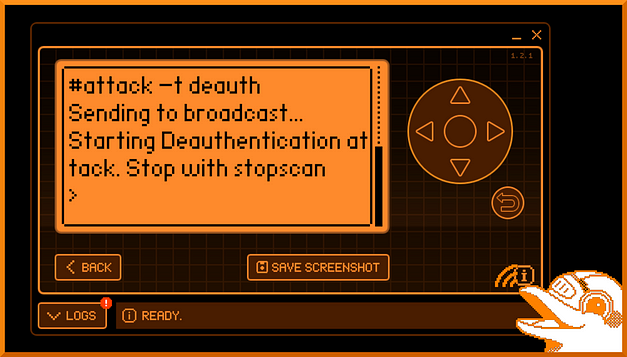
Flipper Zero Marauder Wi-Fi De-Authentication Attack
The next attack I want to talk about is the Wi-Fi de-authentication attack. This attack can be useful when trying to capture handshakes. Wireless handshakes will contain the hashed password for the access point. Capturing the hash would allow you to crack it and then access the access point. The de-authentication attack works by sending de-authentication frames to the wireless access point. This packet is usually spoofed from the client and forces them to disconnect.
Wi-Fi De-Authentication Attack
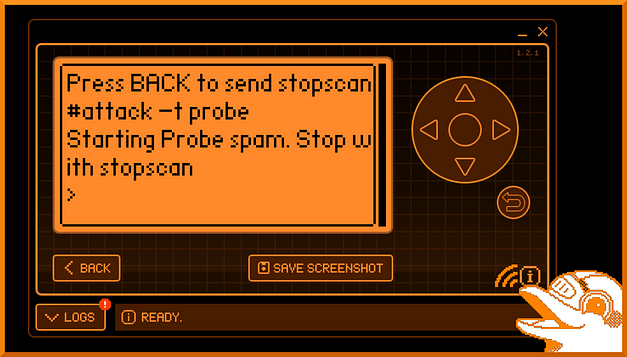
Probe Attack
Probes are sent out by devices when not connected to a wireless access point. They send probes for access points that they have previously connected to in order to see if the access point responds. A probe attack is essentially spamming probe requests to the select access point. I believe the desired output of this attack is to confuse the access point and potentially consume resources leading to a denial of service conditions. Don’t quote me on that though as I’m not 100% sure and am just going off of the articles I’ve read so far. I will update this if I get any more insight into the purpose of this attack.
Probe Attack
Sniffing
The Wi-Fi developer board with Marauder also has a number of sniffing options including sniffing de-authentication packets, pwnagatchi packets, beacon packets, esp packets, and pmkid packets. I haven’t played with the sniffing options too much but it doesn’t seem like you can run both attack payloads and sniffing payloads at the same time. I will look into these options further at a later date.
Sniffing
Flipper Zero Marauder Conclusions
There is a lot more to the Marauder firmware than I’ve covered in this post. it has the ability to sniff packets and other things that I haven’t explored yet. However, I wanted to make a post about it as there aren’t many posts about it. Hopefully, this should get you up and running with the Marauder firmware and more people will make content about it. Anyway, the firmware and Wi-Fi development board are excellent additions to the Flipper Zero if you’re looking to increase its functionality. I can’t wait to see what other things people make.
Hello world, welcome to haxez. The rubber ducky, first conceptualized and popularised by Darren Kitchen from hak5 is a USB keyboard emulator. It gives the wielder of this device unlimited power, at least on computer systems. The emulator injects keystrokes into the victim’s machine with unprecedented speed and precision. The right combination of keystrokes will do great but unspeakable things.
The USB rubber ducky https://shop.hak5.org/products/usb-rubber-ducky-deluxe currently sells for $49.99 which is a reasonable price and I would highly recommend purchasing one to support Hak5. However, if for some reason you are unable to get hold of one then pick yourself up a CJMCU virtual keyboard. You will also need a micro SD card, a micro SD card reader, a rubber duck and a coffee.
Installing the Arduino Integrated Development Environment
Once you have your coffee and your CJMCU you will need to download and install the Arduino integrated development environment. This can be download from the Microsoft Store if you are using Windows or you can get it from their website if you are using linux. https://www.arduino.cc/en/guide/linux
Next you will need to get Duckduino from Seytonic’s github repository.
The next thing to do is insert your CJMCU into a USB port and launch the Arduino IDE. Before going any further, you may need to check that the right board and COM port is selected. Both of these can be configured from the tools menu. Since the CJMCU board is a clone of the Leonardo board that’s the board I selected from the boards menu.
Next you will need to copy the contents of the Duckduino-microSD.ino file into the Arduino sketch. Then use the upload button to push the new sketch to the CJMCU board. This is the functionality that allows the CJMCU to impersonate a keyboard. This is what allows it to act like the USB Rubber Ducky we all know and love. After a bit of time the upload will complete, and the device is almost ready to go. The only thing missing is a payload.
Loading the Payload
There is a huge repository of ducky payloads on the git hub repository https://github.com/hak5darren/USB-Rubber-Ducky/wiki/Payloads. Find the payload you want, I suggest starting with something easy like the Open Webpage, Any Platform payload. Copy the contents of the script to a text file and make the modifications to tailor it to your liking (may I suggest https://www.youtube.com/watch?v=oHg5SJYRHA0). Save it as script.txt or whatever you have set the String DEFAULT_FILE_NAME = “script.txt”; value to in the ino file uploaded to the CJMCU. Finally, copy the script.txt file over to your microsd using your microsd card reader. Your knock off USB Rubber Ducky is now ready to prank unsuspecting victims.
While the USB Rubber Ducky is primarily associated with hacking and penetration testing, it is a powerful automation tool that can be used for a wide range of tedious tasks. For instance, imagine if you needed to install software or make configuration changes on multiple air gapped machines. You could write a script that automates this process for you.