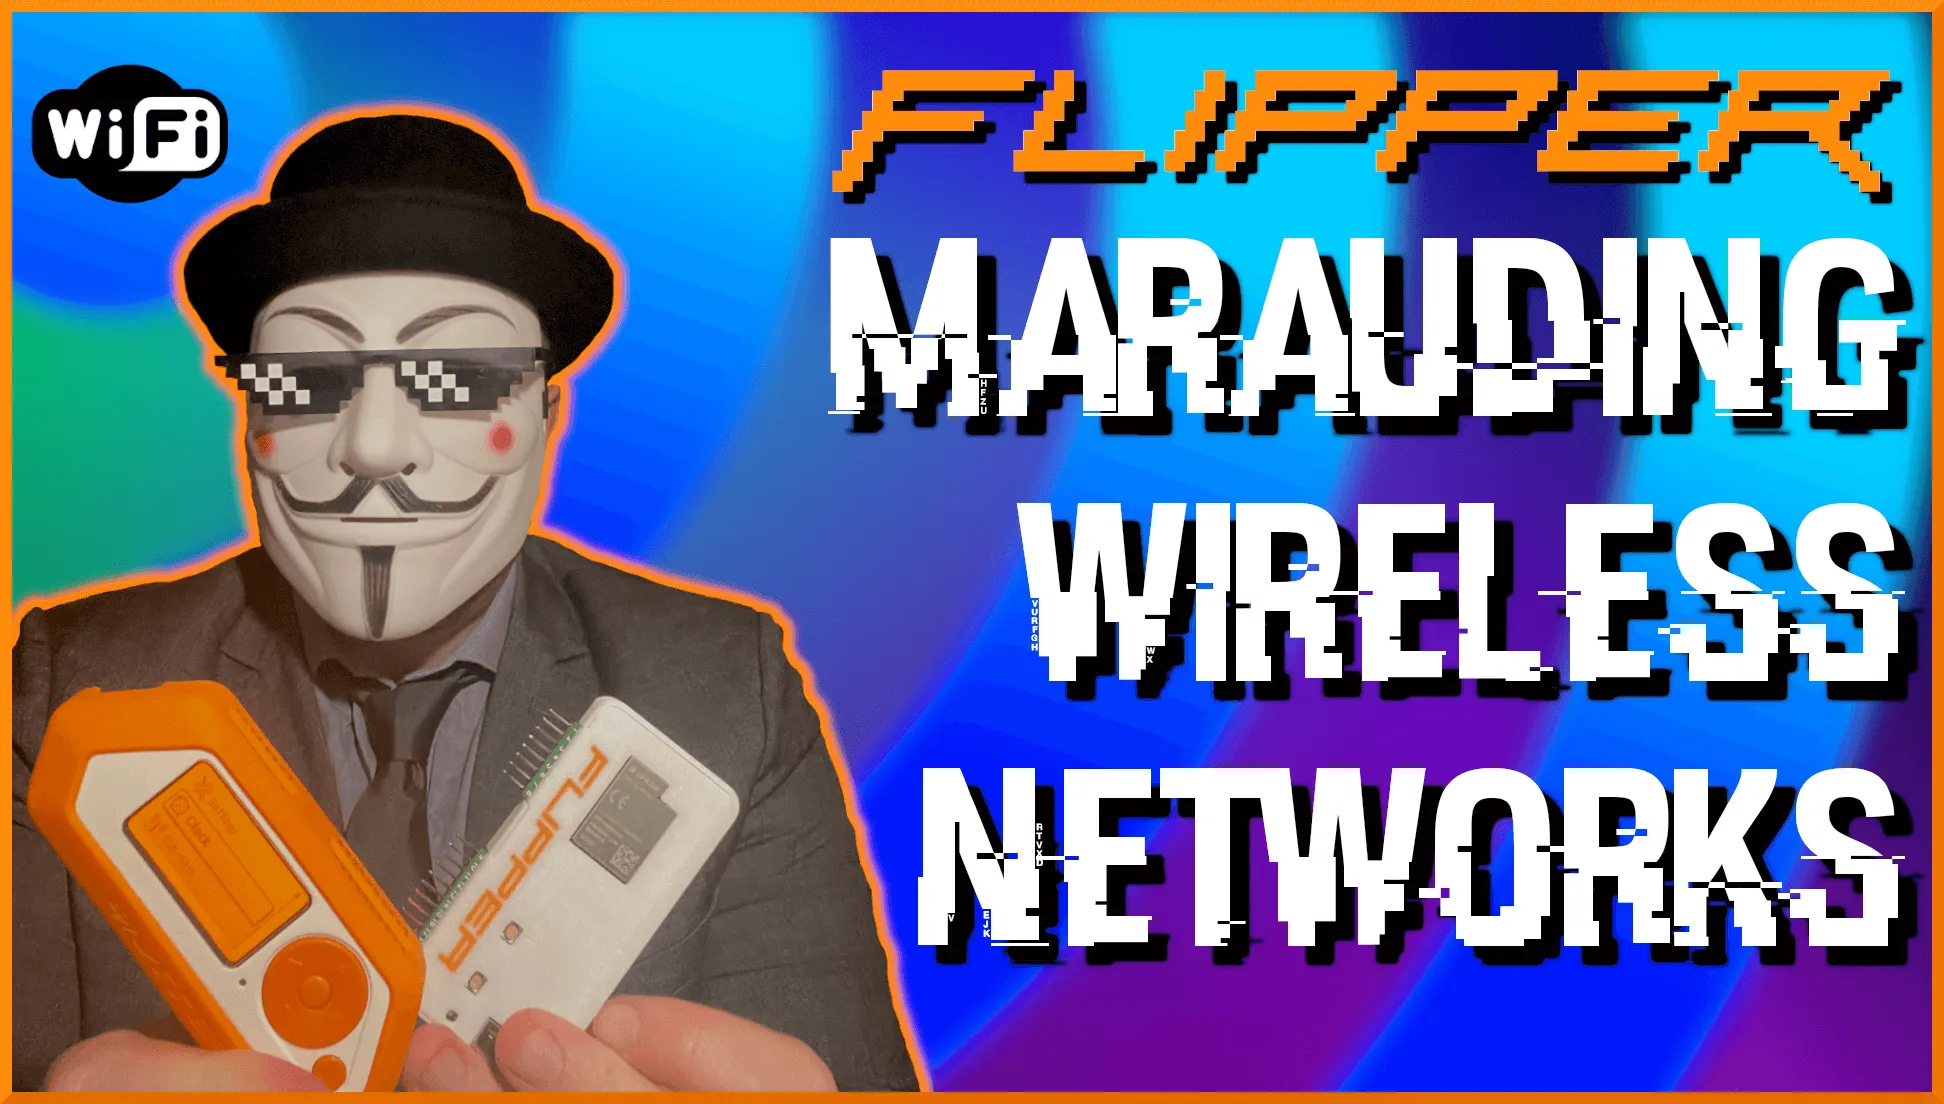
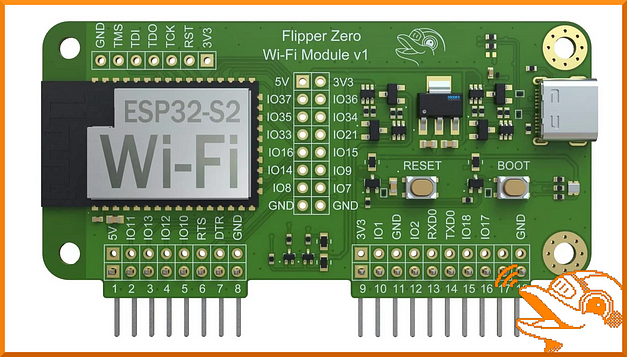
Hello world and welcome to Haxez, today I’m going to be talking about using your Flipper Zero with Marauder to attack Wi-Fi networks. By default, the Flipper Zero doesn’t have Wi-Fi capabilities. However, with the addition of the Wi-Fi developer board, you can add this functionality. The Wi-Fi developer board is rocking an ESP32-S2 module. With this module, you can perform Wi-Fi penetration testing such as probing attacks, de-authentication attacks, SSID rickrolling, and more.
Installing Marauder to the Flipper Zero Wi-Fi Development Board
The Wi-Fi developer board can be purchased from the Flipper Zero website for $29.00. Obviously, As I’m in the UK I purchased mine from Joom for £36.60 excluding VAT and shipping (Ouch). As mentioned previously, the board adds Wi-Fi functionality to the Flipper Zero but you need to do a bit of work beforehand.
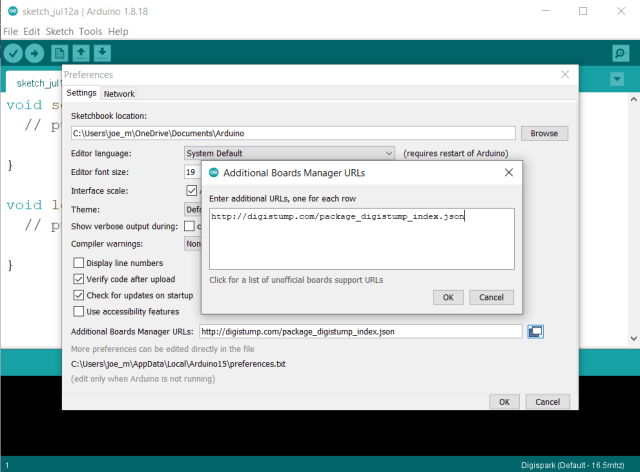
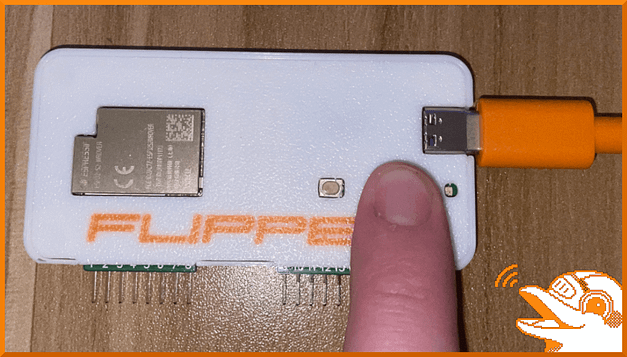
First, you need to download the Marauder firmware and flash it to the developer board. I would recommend using the UberGuidoZ Flipper repository to make the process easier. Unzip the zip archive and locate the flash.bat file. Then, while holding down the boot button, connect the Wi-Fi development board to your computer via USB and hold the boot button down for 3 seconds.
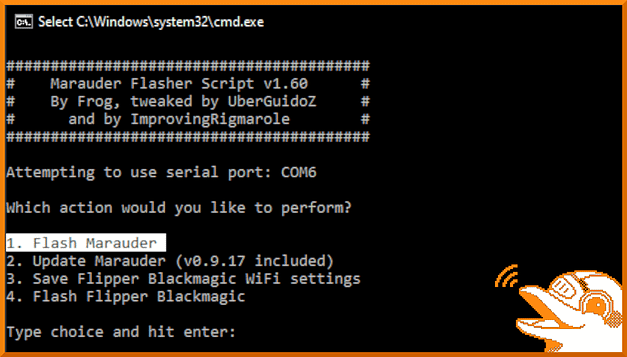
Your computer should recognize the device. Now, double-click the batch file. You may get a Windows security alert, if that is the case click show more and then run anyway. This should spawn a command prompt window similar to the one below. Furthermore, it should have a number of options including the ability to flash the Marauder firmware. Select option 1 and wait patiently for it to install.
Adding Marauder Wi-Fi Functionality To The Flipper Zero
Unfortunately, Flipper Zero doesn’t have the functionality to use the Marauder Firmware out of the box. However, you can install some custom firmware that contains the Marauder tools in order to use it. Although, That is going to be outside the scope of this post but feel free to click the image below to read my article on installing the RogueMaster firmware. Once you’ve read that, come back here and finish the article.
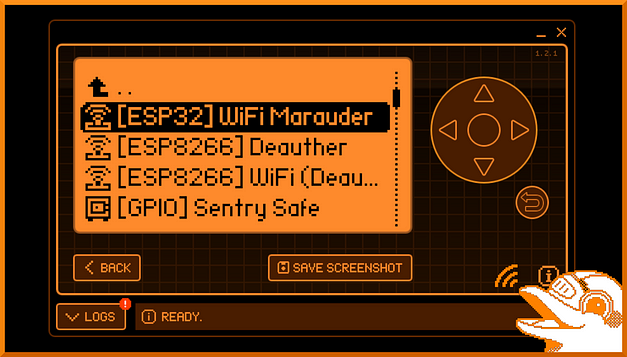
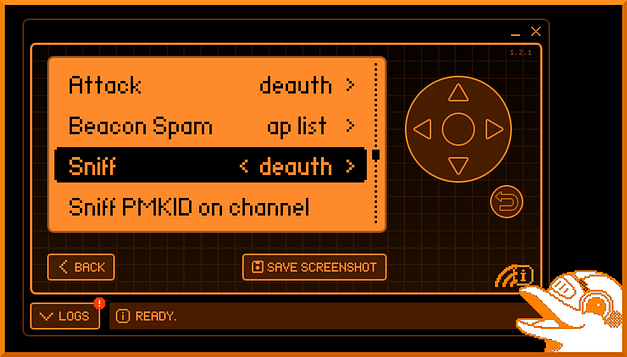
Marauder Flipper Zero Menu
Now that you have Maurader and RogueMaster installed, you should have access to the Marauder menu on your Flipper Zero. In order to access it, head to Applications > GPIO > [ESP32 WiFi Marauder]. After selecting Marauder you should have a number of options including View Log from, Scap AP, SSID, List, Select, Clear List, Attack, Beacon Spam, Sniff, Sniff PMKID on channel, Channel, Settings, Update, Reboot, and Help. Some of these options have sub-options that can be accessed by pressing left or right on your Flipper.
Scanning Access Points
One of the first options in Marauder is Scan AP. This option lets you scan for access points within your nearby area. Furthermore, the results of these scans can be used with other attacks such as de-authentication and probe attacks. The image below shows that I have started a scan for local access points. The results will be displayed below and saved to the AP list.

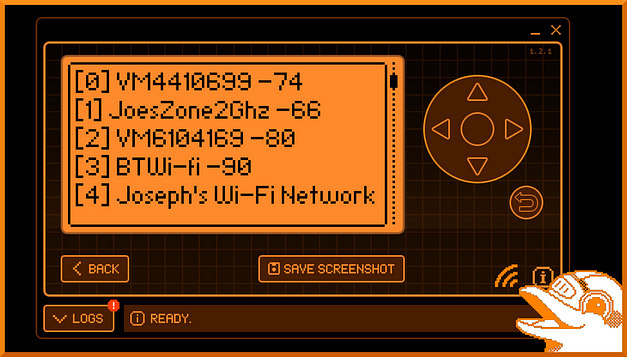
Listing Access Points
The next option in the list is to list the access points that you have just scanned. This is a convenient feature as it assigns a number to each of the access points. This number can be used later to select the access point you want to attack. The image below shows the results of running the list command after running the Scan AP command. As you can see, it shows 5 access points (0 to 5). However, the list can be scrolled on indefinitely depending on the number of access points.
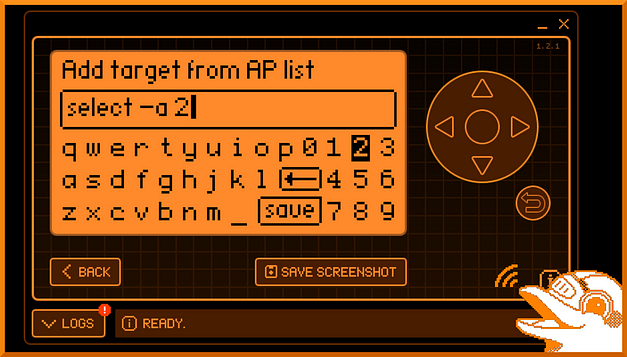
Selecting An Access Point
The select option allows you to select an access point based on the list. At least, that’s what I hope it is doing. Regardless, the option presents a keyboard that allows you to type in the access point you want to select. Once selected, you can then launch attacks against the selected access point.
Rick Roll Attack
The first attack that I’m going to talk about is the Rick Roll attack. That’s right, you can rickroll people but not in the conventional sense of sending them the Youtube URL. This attack is mostly harmless but is a cool party trick. By selecting the Rick Roll attack method, you send data out from the Flipper Wi-Fi board and create a bunch of dummy access points named in accordance with the lyrics from the song. As you can see from the image below, I have launched the attack and there are a number of new access points available.

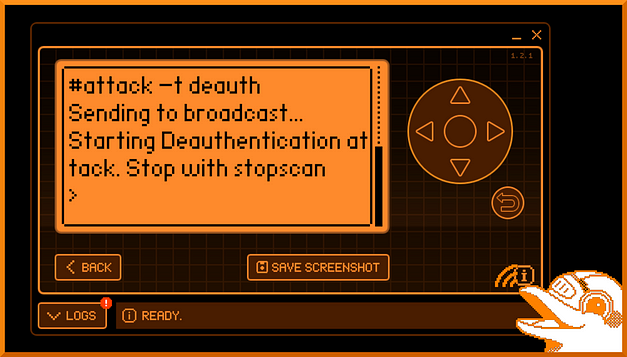
Flipper Zero Marauder Wi-Fi De-Authentication Attack
The next attack I want to talk about is the Wi-Fi de-authentication attack. This attack can be useful when trying to capture handshakes. Wireless handshakes will contain the hashed password for the access point. Capturing the hash would allow you to crack it and then access the access point. The de-authentication attack works by sending de-authentication frames to the wireless access point. This packet is usually spoofed from the client and forces them to disconnect.
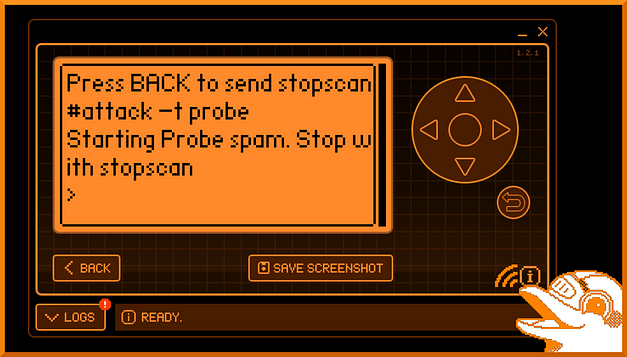
Probe Attack
Probes are sent out by devices when not connected to a wireless access point. They send probes for access points that they have previously connected to in order to see if the access point responds. A probe attack is essentially spamming probe requests to the select access point. I believe the desired output of this attack is to confuse the access point and potentially consume resources leading to a denial of service conditions. Don’t quote me on that though as I’m not 100% sure and am just going off of the articles I’ve read so far. I will update this if I get any more insight into the purpose of this attack.
Sniffing
The Wi-Fi developer board with Marauder also has a number of sniffing options including sniffing de-authentication packets, pwnagatchi packets, beacon packets, esp packets, and pmkid packets. I haven’t played with the sniffing options too much but it doesn’t seem like you can run both attack payloads and sniffing payloads at the same time. I will look into these options further at a later date.
Flipper Zero Marauder Conclusions
There is a lot more to the Marauder firmware than I’ve covered in this post. it has the ability to sniff packets and other things that I haven’t explored yet. However, I wanted to make a post about it as there aren’t many posts about it. Hopefully, this should get you up and running with the Marauder firmware and more people will make content about it. Anyway, the firmware and Wi-Fi development board are excellent additions to the Flipper Zero if you’re looking to increase its functionality. I can’t wait to see what other things people make.