Hello World and welcome to haxez, the game’s afoot and in this post, I’m going to be talking about my favorite password-cracking tool, John The Ripper. John the Ripper is a multi-platform password cracking tool that can crack various password hashes. It was developed by OpenWall and was initially released in 1996. I believe John The Ripper got its name from another hacking tool called Jack The Cracker, or Cracker Jack. Anyway, you’re not here to read a reworded Wikipedia article.
Installing John The Ripper
John The Ripper should come preinstalled on most penetration testing Linux distributions. However, your package manager may have it if your distribution didn’t come with it preinstalled. For Debian-based distributions you can run:
sudo apt-get install john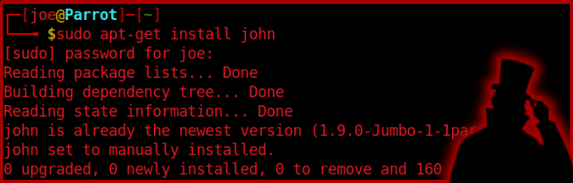
If your package manager’s repositories don’t have John then you can install it from GitHub by using Git Clone. Then once it’s installed you can view the documentation by either running john -h or by looking at the man pages.
John The Ripper Features
As mentioned, John can crack a variety of different password hashes. You can see exactly which hashes he can crack by running the list formats command. This command is also helpful when trying to manually specify a hash type. If you’re in an exam and have forgotten how to ask John to crack a raw MD5 hash, then this command could help.
sudo john --list=formats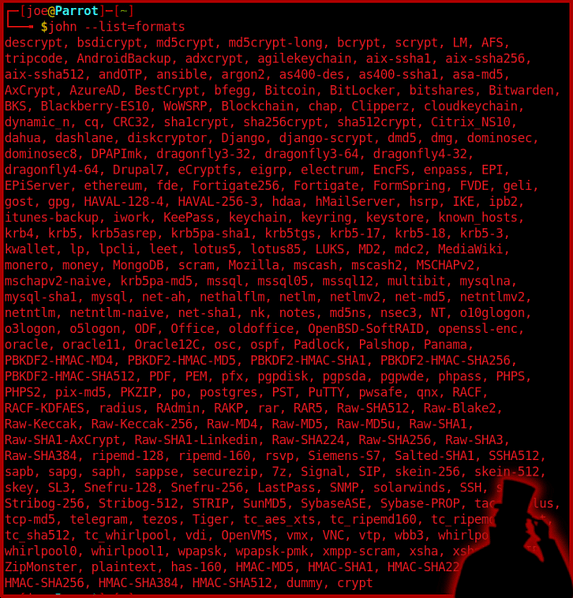
The functionality doesn’t end with mere password cracking though. John has a variety of tools to aid you in the heinous slaughtering of innocent password hashes. These additional tools can normally be found in your /usr/bin or /opt/john/src/ directories. Furthermore, these tools can be used for things like extracting hashes from password-protected ZIP or RAR archives.

John The Ripper Cracking Modes
John has a number of different password hash cracking modes. These various modes can be used to crack password hashes in different ways. If one method of cracking a password hash didn’t work, then you could try a different mode.
Wordlist Mode
By far the most common mode I’ve used is the wordlist mode. This mode requires the user to specify a wordlist. This wordlist could be bespoke and created by tools like Crunch. Or it could be one of the many wordlists available on the internet. John will then go through the list line by line attempting to match the hash to the word. This mode also offers a mangle option where it will apply rules to the word. In short, the word password could be automatically mangled to something like P@55W0RD.
Single Crack Mode
As stated on the Openwall (John Developers) website, the single crack mode is the cracking mode you should start with. It will use login names, full names, and user home directory names as candidate passwords. It will then apply a large set of mangling rules. Successfully cracked passwords will also be tried against any other hashes that have been loaded. In theory, this mode should be able to crack a list of password hashes faster than if you were to supply the hashes separately.
Incremental Mode
This mode will try all possible character combinations. This is a powerful mode but would likely take longer than using a wordlist. If it tries all possible character combinations then it would eventually guess the correct password. If you know the length of the password then you can specify it to make cracking quicker. However, if you don’t know the length of the password and the password is a fairly long and complex one, then you could be waiting a while… like forever.
External Mode
From what I’ve read and what I understand, I believe this mode requires you to create your own cracking mode. The program code is a subset of C and would be compiled by John at startup. This could be useful if the hashing algorithm used to create the hash is bespoke. You could then write your own cracking module and load it into john to crack those custom-created hashes.
Identifying Hashes
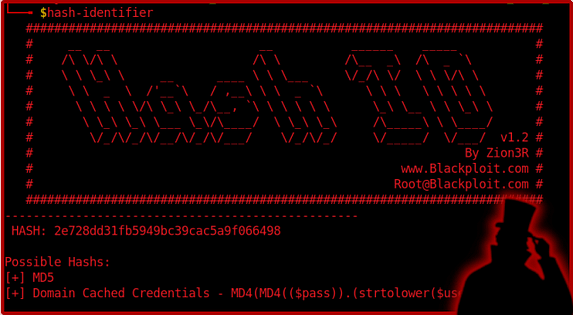
John The Ripper will automatically attempt to identify the hashes that you give him. However, this can be prone to error. Fortunately, there are plenty of tools out there that you can use to identify password hash types. One such tool is hash-identifier which will come preinstalled or should be installable via your package manager or via cloning it from GitHub. To run the tool you simply type the name and then it will ask you to submit your hash. It will then spit out a list of hash types in the order of likelihood. Then you can use that information to manually tell John what type of hash you want to crack.
Getting Wordlists
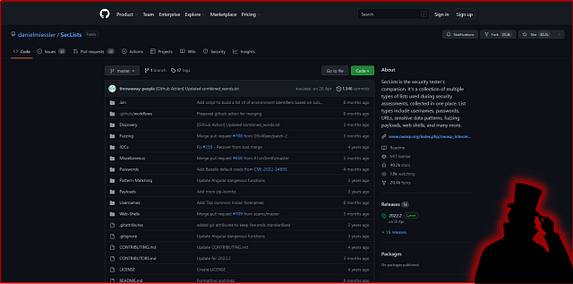
A question I get asked a lot is where I get my word list from. Well, there are many locations. Most penetration distributions come with a wordlist preinstalled. However, you can download them from the internet. One particular wordlist that I would like to shine a light on is seclists. Seclists is available from GitHub and has almost every type of wordlist you could ever want. For the purposes of this demonstration, I will be using the rockyou.txt wordlist from the rockyou.com data breach.
Cracking MD5 Hashes With John The Ripper
As mentioned earlier, John can crack a variety of password hashes. The example below shows how you can crack an MD5 hash. An MD5 Hash or MD5 message-digest algorithm is cryptographically broken but still commonly used. Its a hashing function that produces a 128-bit hash value. MD5 was originally designed by Ronal Rivest in 1991 as a method of replacing MD4 hashes. I used the following syntax to crack the MD5 hash.
sudo john --format=raw-md5 --wordlist=rockyou.txt hash1.txt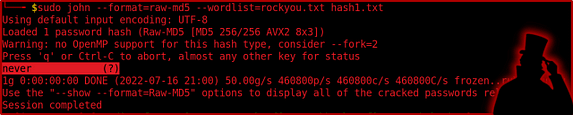
Cracking SHA1 Hashes With John The Ripper
The next hash that somehow managed to sneak its way into my directory is a SHA1 hash. SHA1 is a cryptographically broken encryption cipher that was originally designed by the National Security Agency. It was initially released in 1993 and produces a 160-bit hash. The following syntax shows how you can crack a SHA1 hash.
sudo john --format=raw-sha1 --wordlist=rockyou.txt hash2.txt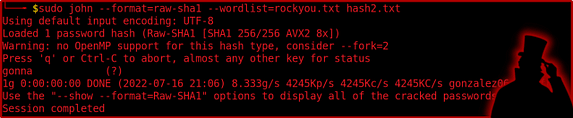
Cracking SHA256 Hashes With John The Ripper
Where did this hash come from? never mind, I’m sure our friend John can dispatch it fairly quickly. SHA256 is another cryptographically broken hashing algorithm that was developed by the National Security Agency (it’s almost as if they were designing them to fail).
sudo john --format=raw-sha256 --wordlist=rockyou.txt hash4.txt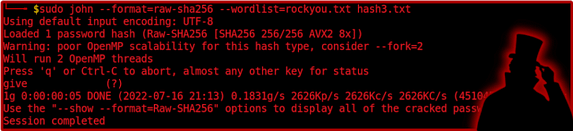
Cracking Whirlpool Hashes With John The Ripper
What’s that? no secret is safe? Well if you use a crappy password and someone is able to obtain your password hash then you aren’t far from the truth. have you considered doing a password audit of your employee’s passwords to ensure they are secure? Maybe now is a good time. The syntax below shows how you can crack Whirlpool hashes. Whirlpool is a broken cryptographic algorithm designed by Vincent Rijmen and was first published in 2000.
sudo john --format=whirlpool --wordlist=rockyou.txt hash4.txt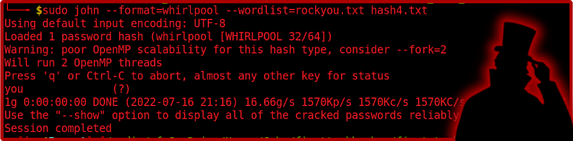
Cracking MD4 Hashes With John The Ripper
MD4 hashes are outdated but you would be surprised to see how many organizations still use broken and outdated cryptographic algorithms. MD4 is a cryptographically broken encryption cipher originally developed by Ronal Rivest and first published in 1990. The syntax below shows you how to crack passwords encrypted with MD4 hashing algorithms.
sudo john --format=raw-md4 --wordlist=rockyou.txt hash5.txt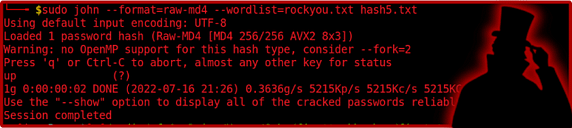
John.pot
Did I just rickroll you via password hashes? well yeah, I did and I refused to apologize. This post took me a day to write up and unfortunately you have to deal with the consequences. So, what happens to all the password hashes that get cracked by john? Well, they get stored in a file called john.pot. You can use locate on your system to find this but it is usually located in /root/.john/john.pot. If you’re trying to crack a hash but are getting an error message then it is likely you have already cracked it. Deleted the john.pot file or remove the line with the cracked has in order to re-crack the file.
sudo cat /root/.john/john.pot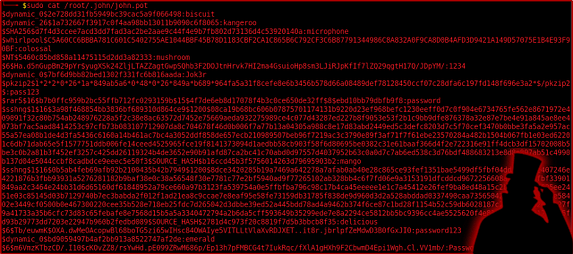
Conclusions
John The Ripper is a fantastic tool that is near and dear to my heart. Yes, there are alternatives such as Hashcat but this is a mainstay of cybersecurity. It does what it needs to do and provides a simple way of doing it. It is one of my favorite tools for hacking and I will continue using it until it is no longer feasible to do so. I realize I have only scraped the surface on the functionality of John The Ripper but this post isn’t meant for advanced usage, it is merely a guide on how to get started with John The Ripper. So get slaying and let me know how you get on.