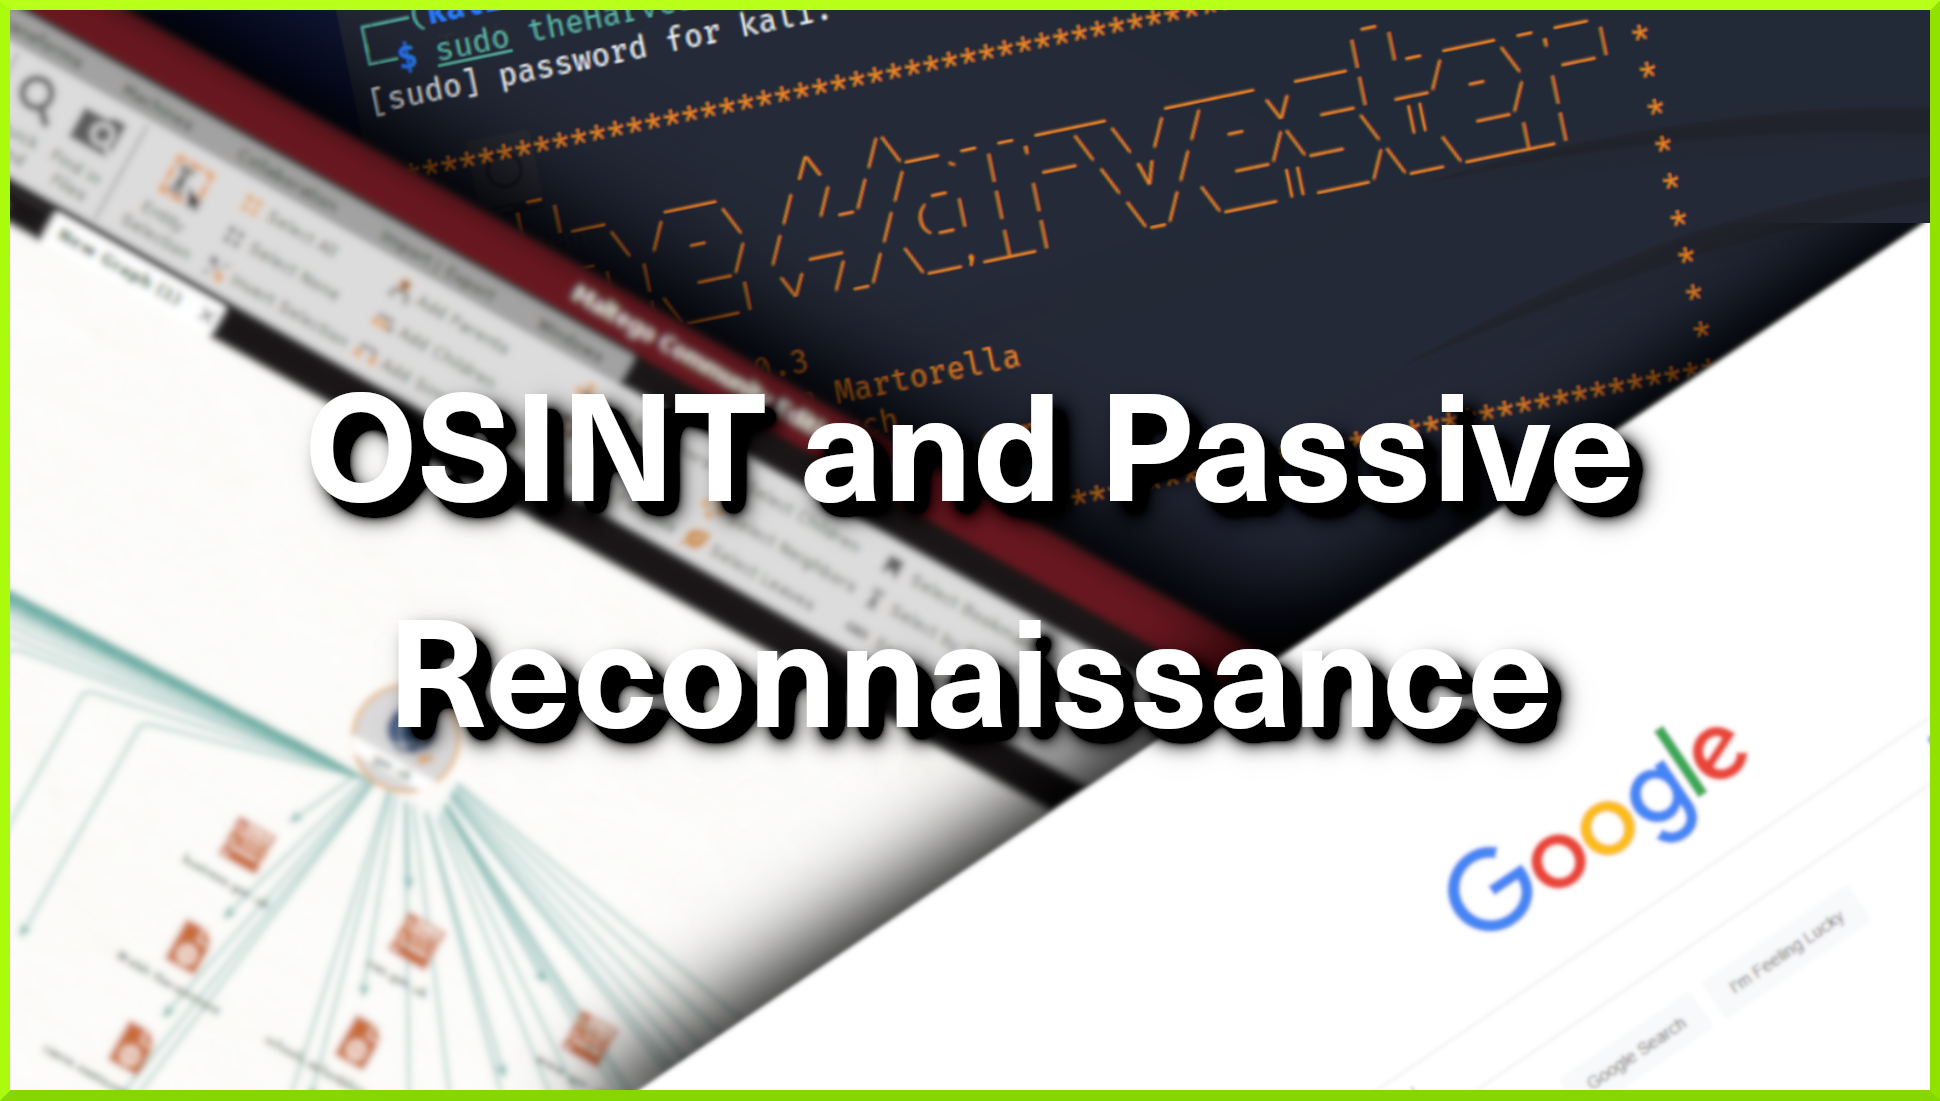
Hello world, welcome to haxez where I want to talk about OSINT or Open-source intelligence and passive reconnaissance. Passive Reconnaissance is one of the most important phases for successful hacking. Passive Reconnaissance uses Open Source Intelligence (OSINT) techniques to gather information about the target. To explain, we attempt to gather information about the target without interacting with it. For this reason, this article is going to cover a number of Passive Reconnaissance tools but there are plenty more out there.
Google Passive Reconnaissance
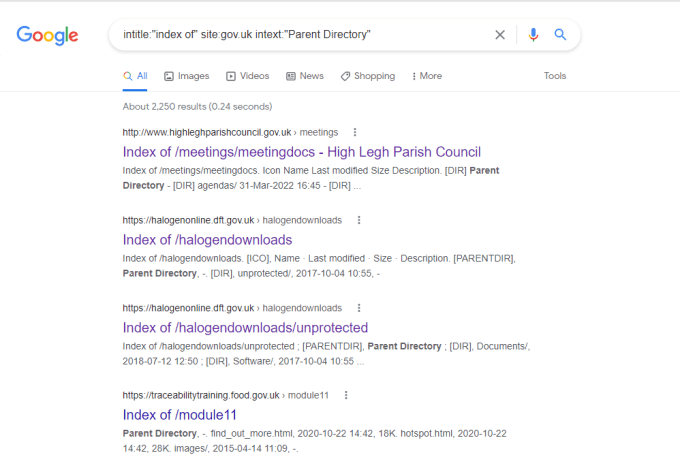
Google is an extremely powerful search engine. They didn’t become the number one search engine by luck. Usually, most people use google by popping in word and looking through the results. However, with a few modifications to your search terms, Google can be a powerful Passive Reconnaissance tool. In essence, using specific search operators can retrieve a wealth of information from google. Additionally, the Exploit Database has a whole section dedicated to “Google Dorks” which can return potentially sensitive information about a target. Below are just a few examples.
Maltego Passive Reconnaissance
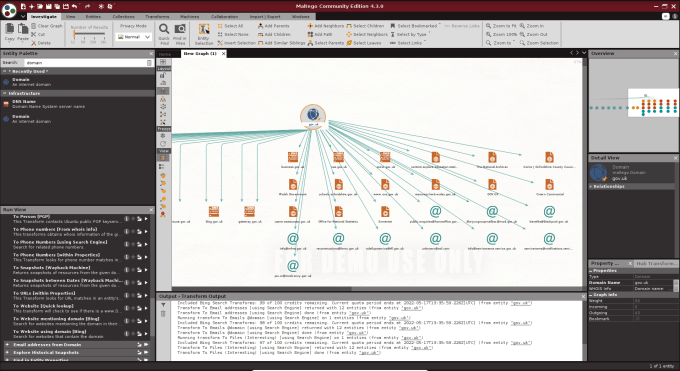
Maltego is an open-source intelligence gathering application that allows you to gather information about a target domain. In short, it has a number of transforms that will automatically perform passive reconnaissance techniques. Furthermore, these transforms include various DNS record look-ups from various sources. Email addresses and telephone numbers and various other bits of information. Overall, the interface provides an intuitive and friendly method of viewing the information retrieved. Within a few clicks, you can have a wealth of information that could allow you to find weaknesses in your target. Simply right an entity and chose from the list of transforms.
Have I Been Pwned?
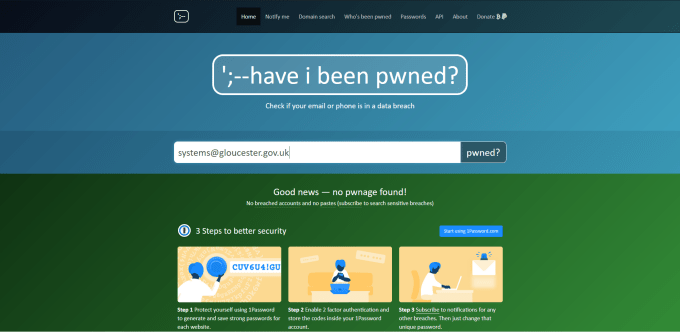
Have I been Pwned? is a web application that allows you to check whether the credentials of a mailbox have been compromised. Notably, It utilizes known database leaks and checks whether your email address was part of those leaks. These leaks are from various sources including public leaks such as the Linked In database leak. Have I Been Pwned? was created for you to check your own email address but there is nothing stopping you from checking other peoples too.
MXToolbox OSINT
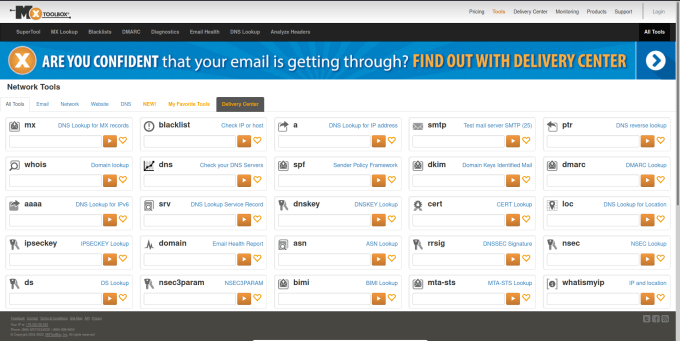
MXToolBox is a web application that has a great number of tools. I initially discovered this tool while working in Technical Support for a hosting provider. It can be used to gather information about a domain’s DNS records. Furthermore, it has tools like ping so if you want to see whether an IP is blocking you, you can check on here rather than switching VPN locations. To cover all the tools would require an entire article but this is a great tool to perform passive reconnaissance against a target.
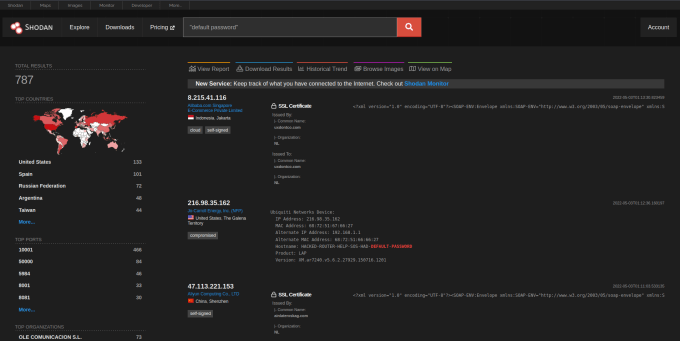
Shodan OSINT
Shodan is a search engine for internet-connected devices. It can be used to find specific devices with specific operating systems with specific ports open. It has also indexed the various banners that those ports display when connecting to them. Furthermore, it also checks to see whether those devices are using weak credentials. You can filter devices by country, city, organization, and domain, the list of flags is endless. If you wanted to find all FTP servers owned by a certain organization that supports anonymous login then you can.
HaXeZ_Shodan_Cheat_SheetDownload
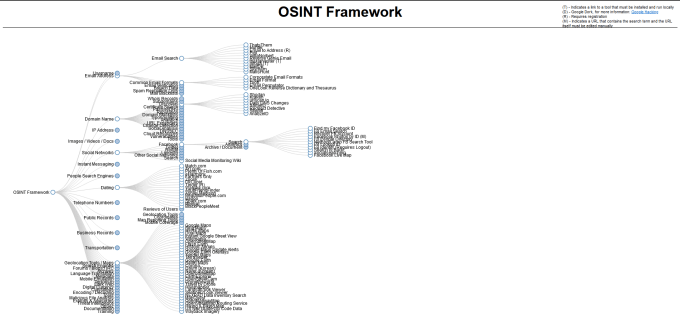
OSINT Framework
The OSINT Framework is a web application that catalogs everything you could want to know about Open Source Intelligence Gathering. It has a horizontal hierarchical structure and clicking one category will provide other categories and eventually a link to a resource. The resource will usually provide instructions or a tool for you to perform that specific type of OSINT. This web application has a lot to explore, more than can be covered in a single article.
Whois
The Whois is a tool that can gather information about the registration of a domain. In some cases, it may tell you who registered it and include their contact details but this will depend on the domain privacy settings. This information could include the domain owners’ telephone number as well as their addresses. Furthermore, the owner information, domain registration date, and expiry date can also be provided by the tool.
whois google.com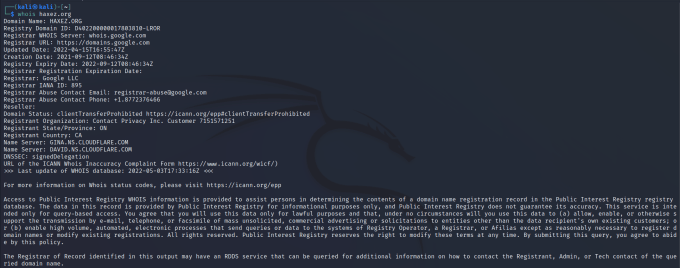
NSlookup
You can use the nslookup tool to retrieve information about a domain. The information can include the domains name servers, the IP address, the mail servers, and various other records. It can tell you how the domain is configured, provide certain records, and may identify potential targets.

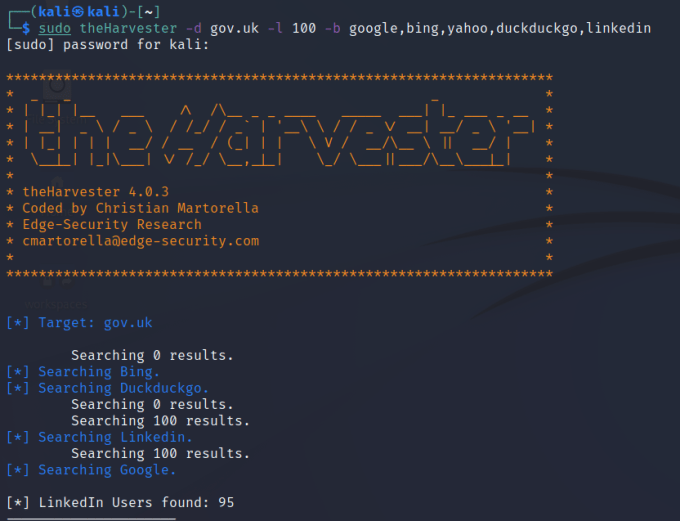
theHarvester
A tool that combines all of these techniques into one great command-line tool is the Harvester. The Harvester is a wrapper for other tools and can perform passive and active reconnaissance. It can use search engines to find subdomains and URLs. Additionally, It can use social media websites to find employee names and email addresses. To find the full list of tools utilized by theHarvester, head over to the developer’s GitHub page.
https://github.com/laramies/theHarvester
OSINT Conclusion
Passive reconnaissance can provide a wealth of information about a target that you are testing. While some of the information may be beyond the scope of the engagement, it can give you a good insight into their organization. The tools I’ve talked about above barely scrape the surface of the iceberg that is OSINT tools. Perhaps one day someone will create an and all in one, web-based OSINT scanner and it will become what Nessus is to vulnerability scans. I’m fond of Maltego and theHarvester and think they do a fantastic job but would love more functionality and a simpler interface. Input your domain, tick the boxes of what information you want to discover and then wait for the report.